


The 4 Best Ways to Digitize Photos (and How to Store Them)
Have old photos you want to digitize? Here are some recomended ways to turn them into digital files and how to store them once they've been converted.
Learn | By Ashley Darrow | Last Updated: February 5, 2026
Shotkit may earn a commission on affiliate links. Learn more.
Most of us use digital cameras to capture our trips, memorable moments, and even everyday life.
However, you might enjoy experimenting with film photography or have printed photos in the family archives. For me, it's both those things.
I studied photography before the digital camera boom. So, all my first projects were done in film, and sometimes I still enjoy making them this way.
I also have boxes with physical photographs from my childhood, my parents, and even my grandparents' wedding. To safeguard all these precious memories, it's important to make digital copies of them.
This is not just to protect your archive from physical damage; it will also allow you to use current technologies, such as AI tools to retouch and organize them.
You'll also be able to share them with others, print them on t-shirts and other merchandise to make personal gifts, and so much more.
If this sounds exciting but daunting, don't worry! In this article, I'll walk you through the most efficient ways to digitize your photos.
Why You Should Digitize Your Old Photos

Credit: Getty Images
There are so many benefits to learning how to scan photos. While I worked through digitizing hundreds of old photos, I came across a few compelling reasons that kept me motivated.
Let's start by talking about the short-term rewards of this project. Having your images as a digital file, you can easily share them with friends and family.
You can do this by posting them on social media, sending them via email, creating a shared folder on a cloud storage service, or building a beautiful online gallery.
I'm sure this will give you instant satisfaction as you start receiving messages of appreciation, people sharing memories sparked by the photo, and even requests to share more images.
Another excellent use for your newly digitized photos is to create personalized presents. There are plenty of printing services that can print your images on blankets, mugs, and other unconventional items.
You can also make high-quality prints with a nice frame, which will make a lovely present. Alternatively, you can gift a digital frame that displays photos on rotation.
Regarding the long-term benefits, consider restoration and conservation.
If your old photographs are anything like mine, they're a little worse for wear. Converting them into digital photos lets you use Photoshop and other editing programs to touch up old photographs.
Restoring old photos used to be a hard task that required very specialized skills. Don't get me wrong – in many cases, these are still needed. However, AI photo restorers can do wonders at removing scratches and even colorizing your old family photos.
You can also do things like correct red-eye and even get rid of creases or other physical damage using editing software. You can also convert negatives to digital photos.
Film preservation is one of the most important issues for photographers today. Photographers are losing touch with the origins of our art form, and that's honestly a shame. Digitizing your old photographs is one way to get back in touch with where our craft got started.
Digitizing isn't everything when it comes to preserving old photographs and keeping film alive, but it is a great place to rekindle your love of film photography.
If I've got you motivated to start digitizing your old family photos, the first step is to organize your physical photos. Doing this also helps you store your photos in the best way.
- Read more: What is the best film scanner?
Before You Digitize, Organize!

Credit: Miray Bostanci
I used to recommend that people organize their photos before starting the digitizing process.
I still think it's a good idea if you're dealing with an extensive collection: it will help you prioritize, since you'll hardly be able to do it all in one go.
However, we now have excellent AI-powered tools to help you organize your photos with smart search and face recognition. So, you can also skip this step and do it once you have everything digital.
You can check out this guide to the best photo management software for some more options.
- Read more: How to organize digital photos
How to Digitise Photos
Having worked with archives and museums, I was familiar with the professional options for digitizing photos. However, I was really surprised by the number of different options I had for doing this at home and on a budget.
Let me tell you about my findings, so you don't have to go through the trial-and-error phase.
1. Use a Scanner to Digitize Photos at Home

Credit: Skylar Kang
A flatbed scanner is by far the best way to scan photos at home. Many of us already have one of these at home, often as a scanner-printer combo.
However, you won't always offer the best quality. You want to use the best photo scanner you can when digitizing these old images. Of course, it depends on your budget.
I also had some film negatives I needed to scan. Fortunately, there are flatbed scanners that also have this feature.
Whichever scanner you end up using, you'll want to adjust the settings. The resolution is one of the most essential parts. You can learn more about PPI and DPI resolution to make more informed choices.
However, I recommend using the highest resolution you have available. This way, you can make a large print or get a better result when retouching your photos.
Remember that it's always better to make a file smaller if you need to share it on social media or by email than to enlarge it to make a large-format print.
(See also our guide to ways to share photos online.)
You should also take some time to check out the color and grayscale scanning settings. You should scan your black-and-white images using a grayscale setting because the color scanner might pick up unwanted colors like yellowing or a stain on the photograph.
Sepia-tone photographs should always be scanned in color to capture the vintage tones.
Batch scanning is a great way to quickly process tons of old photos. You just needed to crop out each picture later in editing and save it as its own separate file.
Now you're ready to edit your photos if needed, share them with others, print them as wall art, and keep them safe for generations to come.
2. Use a Digital Camera to Digitize Your Photos
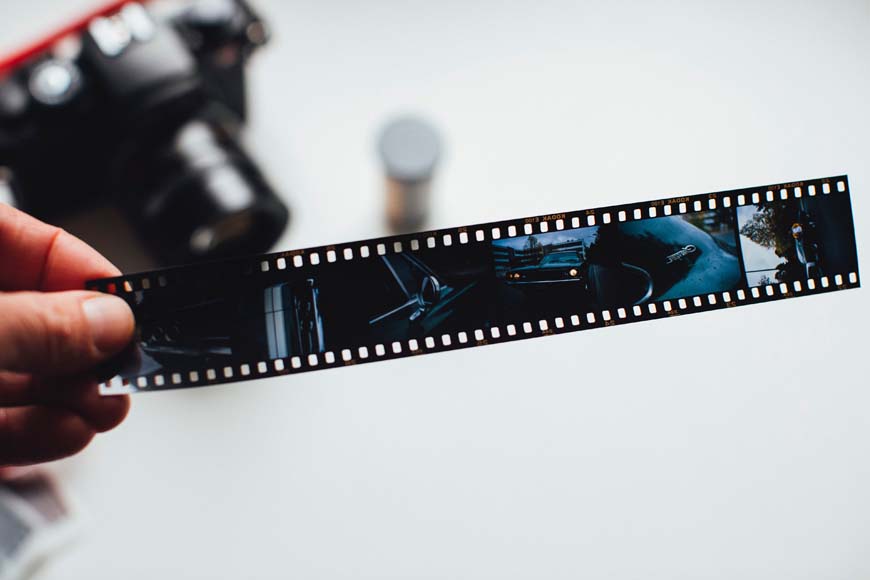
Image Credit: Markus Spiske
Here's another way to convert photos to digital at home.
This method was quite common when working professionally in cultural institutions, but it requires a professional setup. At home, it's harder to control the lighting, so you may end up with reflections and glare.
However, it's definitely doable. Keep in mind that a good camera and lens will give you the sharpest possible outcome, but a digital camera can still make a great alternative to a flatbed scanner.
You can even get away with using your smartphone—but I've got more on that later.
The key to this is setting up your tripod, understanding the basics of color calibration, and getting good lighting.
If you have a big collection of photographs, you might want to invest in a photographic copy stand. Alternatively, you can use your tripod with an inverted center column or a boom arm.
The inverted center column will allow you to place the camera directly above your photographs. The boom arm will allow you to position the camera off-center on the tripod, but also above your photos.
The goal here is to have the lens of your camera completely perpendicular to the photos you'll be scanning.
Regarding lighting, you'll want even, soft light across your picture. Photographic copy stands often include side arms to hold lights or flashes, but you can substitute these with tripods, as shown in this YouTube video.
If you don't have photographic lights, make sure you shoot where the light is soft and, most importantly, avoid mixing light sources. If you have one color cast, it's easy to fix – but two or more will complicate your editing.
Speaking of which, if you have a color checker, use it; otherwise, use a grey card. This will allow you to easily adjust the white balance.
Always shoot in RAW to have more flexibility when you're editing your images. You can also adjust your white balance settings or play around with color profiles if your camera has options for that.
Last but not least, let's talk about the photograph itself. The flatbed printer naturally presses them down, but what should you do when you are trying to take pictures of old, curled photographs?
You can go to your local hardware store and pick up a flat acrylic sheet. This will be essentially transparent to your camera, and it will press flat any pesky curling old photos.
You can also pop the glass out of an old picture frame for the same effect.
Then all you have to do is export all of your photos from your camera's SD card and edit them in your favorite software.
- Read more: Best photo scanning software for negatives
3. Use an App to Digitize Photos With Your Phone
Another way to digitize your photographs is to simply use your smartphone.
It won't give you as high-quality results as the previous methods, but the camera on your smartphone is surprisingly capable, and there are plenty of apps to help you along the way.
Of course, this is also the most budget-friendly option. Many of the tips I just talked about for using your professional camera to scan some old pics work just as well with your smartphone.
Follow all of those tips and just switch your professional camera out with your smartphone, and you're good to go.
The one limitation you need to understand about scanning pictures with a smartphone is that your phone’s camera has limited resolution. However, with the wonders that AI upscalers do these days, you might not have a problem.
I'd say your best bet is to save the smartphone scans for pictures that you're digitizing to share on social media.
Then again, there are some great apps built into your smartphone and apps that you can download that make the scanning process so much easier.
Even free apps like the limited version of Lightroom or Photoshop are great for doing some quick color correction and cropping on your smartphone scans, not just to digitize old photos.
Here's a list of apps for Android, iPhone, and both that can help you in scanning physical photographs into the digital world.
- Your built-in camera app is a great place to start
- Photoshop Express
- Notes on iPhone
- Google PhotoScan on Android & iOS
- Microsoft Office Lens
- Photo Scanner
4. Use a Professional Photo-Digitizing Service
If you don't know how to digitize film photos on your own, or you don't have the time to do it, this is the route to take.
Professional photo-digitizing services take out all of the guesswork. However, there are a few things that you should know before you decide to slap a shipping label on that box of old photographs.
Actually, shipping is a good place to start this conversation.
You're going to need to pay for shipping, not only to send your old photos to the digitizing service but also for them to ship them back to you. I strongly recommend ensuring these shipments and paying for tracking.
Make sure the service you choose actually sends back the printed photos and negatives – not all of them do!
It is also important that you safely pack all your old photos. The pile of shoe boxes that used to hold all your old photographs might not cut it when it's time to ship them across the country.
Consider how long it will take you to get your files. When you're creating digital photo scans on your own, you can prioritize the ones that really matter.
A professional photo digitizing service will handle your entire order at once, so you'll have to wait for those key photographs to be digitized.
There might also be a backlog of customers that they have to work with. Always double-check the processing times of a photo digitizing service before you hand over any money.
Photo digitizing services are run by trained professionals. You stand a good chance of getting much better results when you work with these pros.
They also have the best scanning equipment out there. Many of them even use high-end drum scanners that are just not affordable for home operations.
They've even got photo retouching professionals on staff, ready to help you out. You might have to pay more to have your photos retouched, but these people can do wonders at removing water damage, stains, and yellowing.
(Check out our guide to the best online photo scanning services.)
The cost for having professionals digitize and retouch your old photos is surprisingly affordable. Your costs are going to go up depending on the quality of scans you're looking for and whether you plan to ask for any retouching.
Not sure where to start when it comes to a professional photo digitizing service? I've put together a list of a few of the best, along with one service that specializes in digitizing 8 mm and 16 mm film.
- ScanMyPhotos
- ScanCafe
- Digital Memories
- ScanDigital
- EverPresent
- DigMyPics
- Local Document and Office Supply Stores
- Film Photography Project for 8 mm and 16 mm movie scans
These services offer the best way to digitize photos if you want top-quality results or don't own a film scanner.
This is by far the best way to convert photos to digital if you want professional-quality scans that are relatively fuss-free.
What Resolution and File Format Should I Use?

Image Credit: Jessica Lewis Creative
Part of learning how to scan old photos is understanding what resolution and file format to use.
There are more resolutions and file format options than ever before. Shotkit has in-depth guides for all of this, but I'll summarize it for you.
To share your images online, the industry standard is 72 dpi.
To print them, you'll want at least 150 dpi, but 300 dpi is the industry standard. However, if you want to print your images at a bigger size than the original you're holding, you'll need a higher resolution.
Of course, the higher the resolution, the larger the file size. So, consider how many of them and the type of storage you're going to use – whether it's a cloud service or a local hard drive.
Regarding file formats: your three main file formats will be JPG, PNG, and TIFF.
JPGs, also called JPEGs, are your basic image file. They're perfectly suited for sharing online as they're fully compatible, and you can choose the level of compression.
JPEGs have a smaller file size thanks to their image compression. This makes them a lossy format, meaning they lose some detail and aren't as good for printing.
PNG is the gold standard for digital image files. It's got plenty of information for sharing a high-resolution digital image. PNG files are slightly larger than JPEGs since they hold more information.
If you really want the best file type for scanning, the answer is TIFF. The TIFF file format is a favourite among photographers, graphic artists, and printers.
TIFF files can get pretty big, so you might have to pay for more storage, but if quality is what you want, then TIFF is what you need.
My Photos Are Digitized – Now What?

Image Credit: Callum Hilton
So, you worked out how to scan pictures to digital – well done! What do you do now?
The absolute first thing you need to do is consider your storage options. I'm going to talk about storing the pictures themselves as well as backing up your files.
I want a curated selection of my scanned physical photographs uploaded to the cloud. I use iCloud, which syncs photos across my devices, but there are plenty of other services that offer similar functionality.
When you digitize pictures for preservation, backup is essential.
When it comes to the full archive of digital images, I keep those stored on multiple devices. This means if a device ever totally fails, I won't lose all of the photographs I worked so hard to digitize.
I keep my digital photos stored on my main computer as well as my laptop and a dedicated external hard drive. I also keep the CDs that the digitizing companies sent back to me just to give myself an extra layer of protection.
With all of these digital files, you've got plenty of photos to share. You can even use some of the cloud options I just mentioned to share the entire archive of digitized photos with the friends and family that show up in the frame.
You can also show off your photos with a digital frame. You can load hundreds, if not thousands, of pictures under one of these digital frames and let your entire archive of retro pictures scroll by for all of your guests to see.
I know you just worked hard to scan all these pictures, but you can also try printing some out. Your scans are probably high-quality enough to make larger prints than the originals, which gives you some interesting options for displaying physical photographs.
I'm going to round out this article by discussing ways you can keep those physical photos safely stored for years to come.
3 Ways to Store Your Photos Once They're Digitized

Image Credit: SHVETS production
Now that you have your photos digitized, you don't just throw the originals away. You should also think about conservation so that future generations of your family can flip through the photographs themselves.
I'm going to walk you through three common ways to store your photos and the pros and cons of each.
Archival Photo Albums and Boxes
Archival photo albums and photo storage boxes are, hands down, the best way to go. These won't contain any chemicals that will ruin your photos in the long term, and they're not that expensive, all things considered.
Pros
- Best quality photo storage option
- Purpose-built for storing photos
- A variety of sizes, colors, and other options
- Easy to label
Cons
- Can cost more than using supplies you already have
Plastic Zip Top Bags
Plastic zip-top bags are among your most cost-effective options. They're definitely going to keep the moisture and pests out, but there are some cons you should consider.
Pros
- You’ve already got a few to use
- Very affordable
- Will work for short-term protection
Cons
- They contain an inner layer of Butylated HydroxyToluene, which will damage photos after a while
- Not as good as archival-quality plastic storage options
Regular Cardboard Boxes
If you want a real lo-fi option, you could leave the pictures in the cardboard boxes they're already stored in.
This option is going to be the riskiest, so I'll give you a few tips for making it safer for your photos.
Pros
- Most affordable option
- Works in a pinch while you order archival storage equipment
Cons
- Photos are still susceptible to elements and humidity
- Must be stored off the ground
- Shouldn’t be kept in attics, basements, garages, or anywhere that isn’t climate-controlled
FAQ
What is the best way to digitize old photos?
The best way to digitize your old photos is to scan them with a dedicated photo scanner.
Using a photo scanner gets the job done fastest and gives you the highest-quality digital copies of your old family photos. You can also digitize photos with the camera on your smartphone, but you won't get the same quality as a photo scanner.
How much does it cost to digitize a photo?
The cost to digitize an old photo ranges from a few cents to a few dollars per image. You can get more detailed results by digitizing old pictures in bulk.
You can pay a company to digitize around 500 photos for between $20 and a few hundred dollars, depending on image quality and photo size.
If you do it at home with a scanner you already own or your smartphone, then you can do it for free.
How to make copies of old photos
To make copies of old photos, first gently clean the originals to remove dust. Use a scanner to digitize them at a high resolution (at least 300 DPI for prints, 600 DPI for detailed work).
Save digital files in a lossless format, such as TIFF for editing or archiving, or JPEG for sharing. If a scanner isn't available, take a photo of the original with a digital camera or smartphone in good lighting, avoiding glare.
For best results, consider using photo editing software to correct any imperfections, then print the restored images or store digital copies securely.
How do I digitize a huge amount of photos?
The easiest way to digitize a large number of old photos is to pay a digitization service to handle the job for you.
You can also buy a top-loading feed photo scanner to quickly drop in and scan all of your family photos.
You can also break the task up and scan a batch of photos a day to handle hundreds of photos over a longer period of time.
How do I digitize photos with an iPhone?
Your iPhone has a few built-in utilities that will allow you to digitize photos with ease. The simplest way is to use your iPhone camera to snap a quick pic of the old picture you want to digitize.
You can also use the Notes app to scan documents, which takes more time but gives you a higher-quality scan of your photo.
Are there services that can digitize your photos for you?
There are countless online services that can digitize your photos for you. These services work by having you mail in your old photographs so that the company can digitize them.
Photo digitization services often deliver the best results because they have access to more expensive, more powerful photo scanners.
How to digitize large photos?
There are two easy ways to digitize large photos. The fastest way is to contact a scanning service that has access to a larger commercial scanner that can handle large images.
You can also scan individual sections of your large photograph and then use photo editing software, like Photoshop, to stitch the images together like you would a panorama.
How do you digitize photos to use for embroidery projects?
The first step in digitizing an old photograph for an embroidery project is to scan it with a flatbed scanner or your smartphone.
You can then use an app like Adobe Illustrator or other apps to convert that scan into a PES file, which works with most embroidery machines.
There are also apps like Cross Stitch Creator that can convert digital images into embroidery instructions.
What is the best app to restore old photos?
Photomyne is a good app to use on your phone, but I prefer to work on a desktop computer and use Adobe Photoshop or Luminar Neo. They both have excellent automated AI restoring features and generative tools for fine-tuning.

Check out these 8 essential tools to help you succeed as a professional photographer.
Includes limited-time discounts.

Ashley is a photographer, writer, and film critic. When Ashley’s not writing essays on photography, cinema, and theory, he’s out taking pictures with retro film cameras.
9 Comments
Leave a Comment

👋 WELCOME TO SHOTKIT!
🔥 Popular NOW:

Very helpful, thanks, a relative died a few months back & we found lots of old photos. Trouble is now finding anyone who knows the names of the people in the photos.
Q were these typos? distorted… Once I had all of my photos distorted by year, … (should that be sorted?)
ensuring …strongly recommend ensuring these shipments. (I think that should be insuring)
sorry, not meant as a criticism but as suggestions. (Maybe I’m wrong. My proofreading habits die hard!) Indeed the article is very well written and easy to understand
Hello and thank you for this comprehensive article. I do have one question which is, once digitized how do I identify the person in the photo, relationship in family and year of photo, assuming I know this. Where on the digitized photo do I place identifying information? Thank you for your consideration.
Try these strategies, good question;
Metadata: You can embed metadata directly into the digital photo file. Most photo editing software allows you to add details such as the names of individuals, the relationship, and the year the photo was taken. This information can be stored in the photo’s EXIF data. However, keep in mind that not all devices or platforms may display this metadata.
File Naming: Adopt a consistent and informative file-naming convention. Include details such as the names of people in the photo, the relationship, and the year. For example, “John_Mary_Wedding_1990.jpg.”
Captioning: Add captions or text overlays directly onto the photo itself using photo editing software. This allows you to annotate the image with relevant information. Be cautious not to obscure essential parts of the image.
Organize in Folders: Create organized folders on your computer or cloud storage, categorizing photos by events, individuals, or years. Include a text file with additional information if needed.
Digital Albums or Scrapbooks: Use software or apps that allow you to create digital photo albums or scrapbooks. These often provide options for adding captions and additional details to accompany each photo.
Database or Spreadsheet: If you have a large collection, consider creating a database or spreadsheet to catalog details about each photo. This can include columns for names, relationships, and the year.
Karen, I have digitized thousands of 35mm slides dating from the early 1940’s for two families. Now i’m working on old b&w prints that are up to 100 years old. it seems most file types have a feature called ‘tags’ which are locations in which you can enter data such as names, comments, etc as a part of the files itself. I have a ‘screen saver’ application which will then display the tag info with the picture. There are photo editors available for most digital formats to enter the tag data. I use Photoshop Elements to make the scans and then can make retouching, color adjustments, etc.
For scanning prints, I load the scan bed of the scanner with as many prints as it will hold, and scan the lot. Then I can use Photoshop Elements to crop the individual pictures to single files.
As an intermediate step in the process, I use couple ways to maintain the info. I purchased a 35mm slide scanner that will scan a batch of 50 slides overnight. The software allows for several means of retaining the information. I also use a text file in the directory in which I list the picture id number and can add data such as people, locations, events, etc.
I use a directory structure as follows:
C:\Data\DigitalPics\
C:\Data\DigitalPics\1965_06_10_Graduation\
C:\Data\DigitalPics\1965_06_12_Wedding\
My scanning software provides the ability to create a base file name and will add a unique sequence number to that. Further, within the individual directory I can create a text file that contains the matching comments, names, locations, etc. Also, I can rename files to add some info to the filename, such as 1965_06_10_Wedding_BrotherDave.tif.
If you use the naming convention carefully, it automatically provides time sequencing by default.
I scan to the .TIFF format for the highest resolution for purposes of retouching, etc. Then I can convert to a lower resolution. We use a laptop computer to read the digital files via ethernet from our home network NAS storage device and display the pictures on our 57-inch tv for family viewing.
Thank yoiu for the atricle.
1. What company do you recommend to digitize a couple thousand photes?
2. Once digitized, how do you digitally store them so they can be retreaved by date, event, person or perhaps type of photo (portrait, dog, cat, ocean, etc?
3. I plan to store a cloud storage service, my computer, and a hard drive. Do you agree with this?
Thank you, Julie
Digitizing and organizing a large collection of photos involves careful planning and consideration. Here are recommendations for your specific questions:
1. Digitizing Photos:
Memories Renewed: This company is known for high-quality digitization of photos, slides, negatives, and more.
ScanCafe: They offer photo scanning services at varying resolutions and have a reputation for quality.
Costco Photo Center: If you’re looking for a more budget-friendly option, Costco provides photo scanning services as well.
2. Organizing Digitized Photos:
Date and Event Organization: Use a consistent naming convention, like “YYYY-MM-DD_Event_Description”, to organize photos by date and event.
Categorize by Type: Create folders or tags for different types of photos (portrait, dog, cat, ocean, etc.).
Metadata: Utilize metadata (e.g., EXIF data) to store additional information like date, location, and camera settings.
Software: Consider using photo management software like Adobe Lightroom, Google Photos, or Apple Photos for easy categorization, tagging, and searching based on metadata.
3. Storage and Backup Strategy:
Cloud Storage: Storing photos in a reliable cloud service (e.g., Google Drive, Dropbox, Amazon Photos) provides accessibility from anywhere and serves as a backup.
Local Storage (Computer and Hard Drive): Storing photos on your computer allows quick access, and using an external hard drive provides a physical backup in case of computer failure.
Backup Your Backup: Regularly back up your digital photo collection across all storage locations to ensure redundancy and prevent data loss.
Julie, we had several thousands of slides from two families, so I bought a Pacific Image Powerslide X scanner. It was expensive, but worth it. Now that I’m done I can pass it along to other family members for their slides or sell it online.
I don’t do cloud storage. I have what is called a NAS device in our home office that contains four disk drives that provide around 40TB of storage. I keep duplicate copies on multiple drives for safety. I also have a docking station that holds four removeable 3.5″ drives and a USB docking strip that allows six more removable drives.
See my comments above relating to storage and file naming
what an informative and timely blog post! It really helped me navigate through preserving my cherished memories. Thanks for it! Although there are other online platforms like foreverstudios and others that I researched and perform the same task in no time.
You’re welcome! I’m glad to hear that the information provided was helpful to you in preserving your cherished memories and
indeed, there are several online platforms and services that offer various ways to preserve and cherish memories, such as Forever Studios and others. Each platform may have its unique features, pricing models, and additional services to cater to different preferences and needs.