


Understanding the Exposure Triangle
Mastering The Exposure Triangle is essential to take great photos. This simple and fun guide explains aperture, ISO & shutter speed in plain English.
Learn | Photography Guides | By Greg Cromie
Shotkit may earn a commission on affiliate links. Learn more.
This guide to understanding the exposure triangle is fun and straightforward – ideal for beginners to understand the basics of shutter speed, ISO and aperture.
I've had years of experience with the exposure triangle as a photographer and educator, putting it to practice every day I pick up my camera.
In this guide, I'll break down the exposure triangle in a way that makes sense, no matter your level or pre-existing knowledge of camera settings and exposure.
(It's the kind of guide you should send to a friend learning photography!)
So, let's get started on all there is to know on the exposure triangle in photography – I promise to keep it simple ;-)
What is The Exposure Triangle?
The exposure triangle is photography-talk to describe how shutter speed, aperture and ISO work together to expose an image correctly.
Shutter speed, ISO and aperture don't work independently of each other – you combine all three to get an image correctly exposed to the best amount of light.
Using the exposure triangle doesn't come with a set of fussy rules – “shutter speed MUST be this, and ISO MUST be that”, etc. You get to mix up each of the exposure triangle parts to get different looks in your photos.
The exposure triangle is shown as a triangle – obviously! The three sides show aperture, shutter speed and ISO – the basic and most common camera settings.
Just remember that if you change one side of the triangle, the other two sides are affected.
If this happens, you simply change the other two side of the triangle to compensate and get the right exposure.
Correct exposure means getting aperture, shutter speed and ISO ‘right' when you press the button and take the photo.
A well-exposed picture will balance light and dark areas without being overexposed or underexposed.

For example, if shooting sports on a dull overcast day, you'll need a fast shutter speed to freeze the scene's action.
However, a fast shutter speed restricts the light needed to expose the image correctly. In this case, to get the best exposure, you'd use a wide aperture to let more light into the lens.
(You'd probably also need to bump-up ISO to change how the camera sensor deals with the lower light in the scene.)
Put simply, you balance aperture, shutter speed and ISO with the exposure triangle to achieve the ‘correct' exposure… or at least, a look that you're happy with.
When we talk about exposure in photography, we mean how the sensor (in digital cameras) receives enough light to make an image.
The camera image sensor is a light-sensitive gizmo that sees and records the lightwaves before saving them to a memory card. When you press the button, a shutter or panel covers the sensor and moves away quickly to expose it to light.
Another example is taking photos of a waterfall on a sunny day. In this case, you want a slower shutter speed so that the flowing water looks like white ribbons, instead of being static and ‘frozen'.
However, a slow shutter speed exposes the sensor to light for much longer, which would make an overexposed image. In order to negate this effect, you need to ‘compensate' by using a narrow aperture (i.e. lens ‘opening') to reduce how much light gets through the lens.
Also, it helps a lot in general if you keep your ISO as low as possible.
See what we did there? We used a camera setting to change one side of the exposure triangle… and then we used two other settings to ‘balance' the exposure triangle work to get the ‘best' exposure, or at least, one we're happy with.
- Related: What is a Stop in Photography?
How Light is Measured in Stops
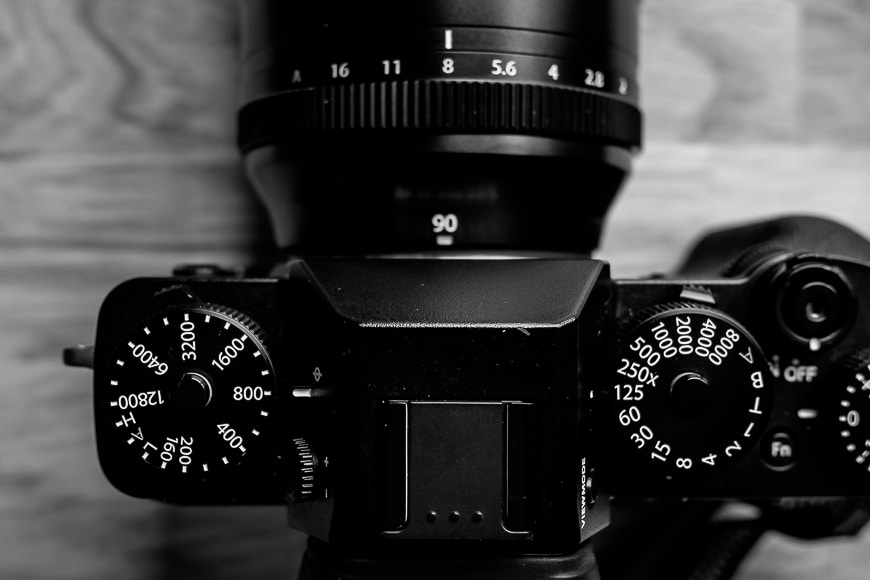
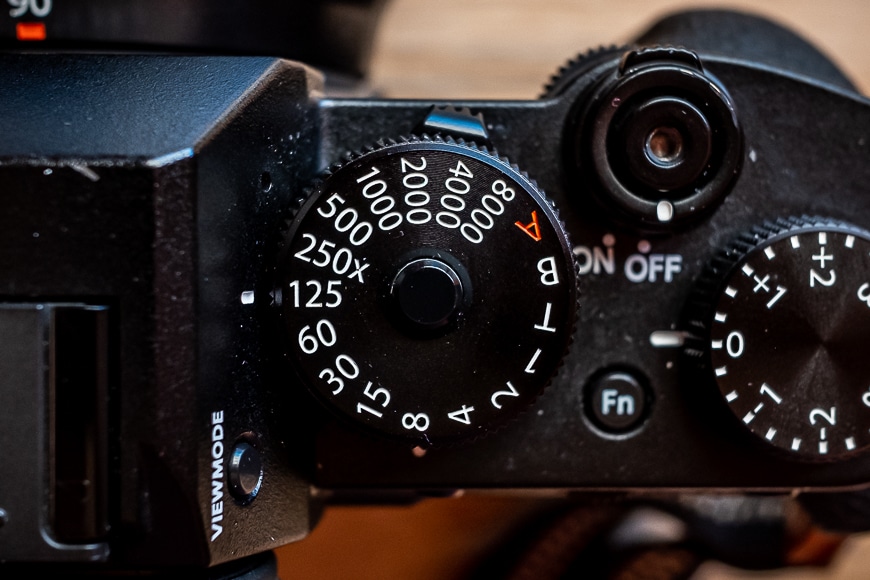
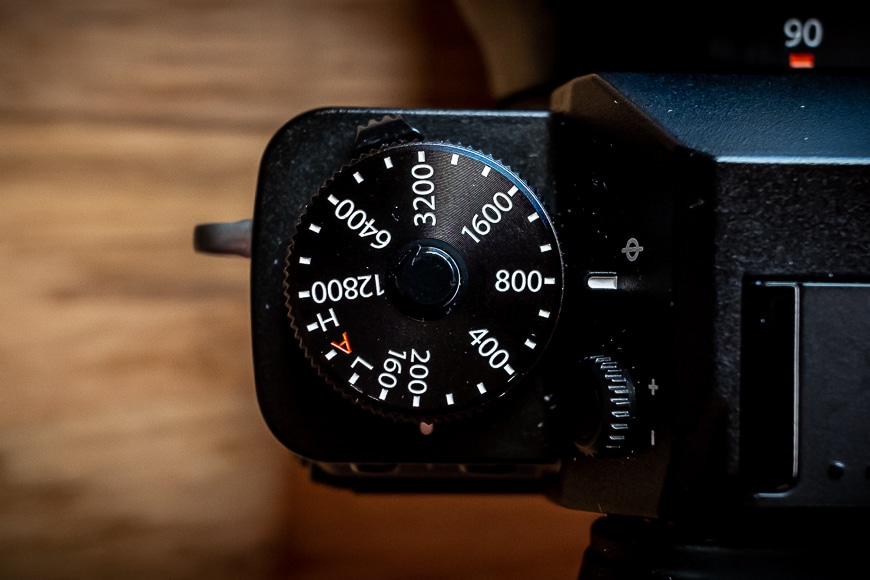
Camera dials showing ISO (left), Shutter Speed (right), and Aperture (on the lens dial).
Sorry to say, there's a bit of math in how cameras measure light and work out exposure value.
There are a bunch of formulas that photography nerds use to explain the magic of photography. We'll take a more straightforward approach to understand aperture, shutter speed and ISO, as well as exposure…
In photography talk, a ‘stop' means the measurement or value of light – sometimes called an ‘f-stop' or ‘stop of light'.
(You can download this f-stop chart for a better explanation.)
A stop is doubling or halving the value of light required to achieve correct exposure.
Shutter speed, aperture and ISO all do their bit to the stops of light as they change the value of light picked up by the sensor.
Changing the stops through doubling and halving light values for the best exposure is done in the following ways:
- By Adjusting Shutter Speed
Shutter speed sets out how long the image sensor is exposed to light to capture an image.
Changing shutter speed from a faster speed, such as 1/1000, to a slower speed of 1/500 increases the exposure since there's more time for light to reach the sensor.
Halving the speed doubles the amount of light – that's one stop of light.
In another example, changing the shutter speed from 1/2 to 1/16 is doubling the speed three times. It increases the light three times, equating to three stops (1/2 to 1/4 to 1/8 to 1/16).
- By Adjusting Aperture
Aperture is the size of the gap inside the lens that light passes through – it widens and narrows depending on the aperture setting. An f-number represents each f-stop on the aperture dial.
An aperture moves in stops – for example, changing the aperture from f/2 to f/2.8 is one f-stop. The aperture has doubled in size, and the amount of light passing through the lens has doubled.
Changing the f-stop or aperture from f/8 down to f/2.8 delivers less light by four stops (f/8 to f/5.6 to f/2.8 to f/2).
- By Adjusting ISO
If you double the ISO value, you increase the exposure by one stop of light.
For example, moving ISO from 800 to a high ISO of 1600 will increase the exposure by one stop of light. Double the value, double the light.
Putting it all together…
Using all three elements of the exposure triangle, you control the number of stops required to achieve the best exposure.
Remember: every time you take a photo, there's ‘give and take' to produce the best exposure – adding stops to one side of the exposure triangle requires you to takes stops away from one or both of the other sides.
In most cases, if you drop ISO one stop by halving the value, you need to increase either aperture or shutter speed by one stop to ‘compensate'.
Similarly, if you increase the aperture by four stops of light, you should use either ISO, shutter speed or a combination of both to drop down four stops .
It all depends on what you're shooting and the look you want in your final photo – you use the exposure triangle to get the ‘best' exposure.
Delving Deeper: 3 Components of the Exposure Triangle
Let's take a closer look at the 3 key parts of the exposure triangle – our old friends, shutter speed, aperture and ISO.
All of these camera settings operate together and are changed with dials or menu settings.
Shutter Speed
Film and ‘retro' digital cameras show shutter speed on physical dials.
Remember we talked about the camera sensor and how a shutter moves to expose it to light?
The shutter is controlled by a mechanism – usually mechanical – to flip the shutter back and forth at fast speeds. We are talking super fast – like so fast you can hardly see it move.
The camera shutter speed controls how fast that shutter moves and how long the shutter is open. The speed ranges from leaving the shutter open for seconds and minutes to speeds over 1/4000 of a second.
But shutter speed also has an impact on exposure on how much light comes in.
A slow shutter speed such as 1/60 of a second keeps the shutter open long enough to let the right amount of light in on an overcast day.
But on a bright and sunny day, 1/60 of a second is too long and makes an overexposed image that's too bright to see the detail. 1/250 of a second (or more) is better for sunny days.

Slow shutter speeds can help illustrate the motion of moving water.
Slow shutter speeds also affect the sharpness of the image. If taking photos at 1/60 of something that's moving fast, it will show motion blur – sometimes you want this look, but otherwise, it looks like you screwed up!
At slow shutter speeds, (if you're not using a tripod), any camera movement shows up in the image and make it appear like you gave the camera a good shake.
Here's an easy way to remember how to use shutter speed: Halving the exposure value doubles the amount of light – 1/250 to 1/125 halves the value but adds a stop of light.
Just remember that a faster shutter speed, such as 1/1000 of a second, captures fast action and makes everything look frozen in time.
However, it may be too fast for light to hit the image sensor – you probably need to have a wider aperture to let in more light.
Aperture

Usually, you adjust the aperture using the camera's settings, but some lenses allow you to do it via a ring on their barrel.
Camera lenses are usually a barrel shape with glass at each end.
Inside the barrel are groups of additional glass lenses that move when it's zoomed or focused. These lenses are what sends the light down the lens barrel to the camera sensor.
Inside the lens is an aperture to control how much light passes through it – you change this with the aperture ring on the outside. The aperture ring is marked in ‘f-stops' to know how wide an aperture you set.
The aperture blades inside the lens rotate to make the circular gap narrower or wider, so less or more light gets through respectively.
The smaller the f stop number on the aperture ring, the wider the aperture will open to let in more light.
A wide aperture makes a shallow depth of field. At the other end, the higher the number on the aperture ring, the narrower the aperture is to reduce the amount of light.
Just remember: A wide aperture has a smaller number and a narrow aperture has a larger number.
The aperture of a camera lens works just like the human eye. When we walk into a dark room, our pupils open wider to accept more light into the eyes. On a bright sunny day, our pupils contract to tiny black dots to restrict the amount into our eyes.
In digital photography, the aperture is another way to control exposure; however, aperture also controls the depth of field in an image.

A shallow depth of field is produced by choosing to shoot with a large aperture.
One of the critical elements of aperture is what it does to the depth of field.
Our eyes see a depth of field when we look at things. If we focus on something close to us, the background becomes softer as our focus is not making the background details clear.
A camera lens works in much the same way and controls the depth of field with aperture.
If you turn the aperture ring to a smaller number (f/2); the aperture inside the lens open right up and increase the light coming in. But this also makes only a small area in share focus.
If you imagine someone standing close to the camera, they'll be in sharp focus, but the background behind them will be soft and blurry. We call it a shallow depth of field.
If you turn the aperture ring to a larger number (f/8), the aperture becomes smaller and reduces the light. It also makes almost all of the image in sharp focus.
The person, the foreground and the background are all in focus. It's known as a broad (or ‘deep') depth of field.
ISO
ISO is the camera's ability to control the sensitivity of the image sensor as the light hits it. It forms one of the critical elements in the exposure triangle.
The camera controls the ISO by letting you enter an ISO value or apply an automatic setting to achieve exposure. Most modern cameras have clever Auto ISO mode settings that do a great job.
Camera ISO can go from around 100 up to 12800 and higher. On a bright sunny day where there's lots of sunlight to get the best exposure, you'd use a low value of 100. In this way, the sensor doesn't need to work so hard.

When taking a photo at night or indoors with not many lights, use a high ISO of 6400 or more. The sensor works harder to get the best exposure by compensating for the lack of light.
Photographers often get ISO wrong – they see it as a way to increase exposure by cranking up the ISO as high as it goes. However, depending on the lighting conditions, a high ISO makes an image with a lot of digital noise.
Digital noise ruins the image quality as the sensor and processor incorrectly record the exposure for the pixels in an image, with photos looking grainy and unattractive.
Simple Way to Understand the Exposure Triangle: The Dripping Tap

Another way to show you the exposure triangle is with a dripping tap (faucet) analogy.
Imagine that water falling from a tap needs to fill up a bowl sitting in the sink – but you cannot underfill or overfill the bowl – this is the same as the light we need to capture a correctly exposed photo.
The aperture in this example is the amount of water that drips out of the tap – from a long slow single drip (narrow aperture) to a steady flow (wide aperture).
The shutter speed is the amount of time that you leave the bowl sitting under the tap – a short time (fast shutter speed) or a long time (slow shutter speed).
Finally, the bowl's size represents ISO – a large wide bowl (high ISO) to a small narrow bowl (low ISO).
To fill up the bowl without overfilling (overexposed) or underfilling (underexposed), we change the flow of water (aperture), how long the bowl sits in the sink (shutter speed) and the size of the bowl (ISO).
We fill up the bowl with different combos – the same as using the exposure triangle in photography.
For example, if you fill up a small bowl with a medium-flowing tap, you'll have to leave the bowl under the faucet for a couple of seconds. On the other hand, if you're filling up a large bowl with a slow dripping tap, it would take minutes.
If we use this thinking to get the best exposure with a photo, you'd use a low ISO of around 100, an average aperture of around f/5.6 and a fast shutter speed of 1/500.
Be sure to check out this exposure triangle cheat sheet from our friends at Picture Correct to learn more.
Final Words
If you're new to photography, it would be easy to flip the camera to Auto and hope for the best… but that defeats the purpose of spending all that cash on a funky camera!
Plus, your photos will be flat and the result of the tiny computer inside your camera.
It's time to rise against the machines and take back control of the exposure triangle in digital photography!
Understanding the exposure triangle puts you in charge of the camera to get awesome images that are correctly exposed. Plus you can play around with depth of field (aperture), motion (shutter speed) and overall sharpness and clarity (ISO).
What do you think about the exposure triangle? Do you have any tips for using shutter speed, aperture or ISO? Let us know in the comments!

Check out these 8 essential tools to help you succeed as a professional photographer.
Includes limited-time discounts.

I’m a Melbourne-based street photographer and blogger. I love to travel to Japan to photograph and document its dynamic people and culture.
3 Comments
Leave a Comment
👋 WELCOME TO SHOTKIT!
🔥 Popular NOW:

Is this correct?
An aperture moves in stops – for example, changing the aperture from f/2 to f/2.8 is one f-stop. The aperture has doubled in size, and the amount of light passing through the lens has doubled.
Changing the f-stop or aperture from f/8 down to f/2.8 delivers less light by four stops (f/8 to f/5.6 to f/2.8 to f/2).
Hi. Thank You for Your bright article. Best Regards, Hanski from Finland, Lapland
Thanks for checking out my latest article. If you have any comments, questions or just want to be involved in the conversation, leave them below. Cheers. G