


How to Extend a Background in Photoshop (3 Techniques)
Learn how to extend an image's background to give your subject more room to breathe using 3 different Photoshop editing techniques.
Photoshop | Software | By Judyth Satyn
Shotkit may earn a commission on affiliate links. Learn more.
Do you have a beautiful selfie perfect in every way, bar one thing, the portrait orientation is slightly off?
If there isn't enough background available background to reposition your image you can try extending the image's background using Photoshop.

Download the latest version of Adobe Photoshop to follow along with this simple tutorial.
Start a free 7-day trial today
Extending the background of an image is useful when editing photos, whether you are a professional wedding photographer or a happy home snapper.
You can extend a background in Photoshop using different editing techniques, this tutorial will teach you 3 ways.
Give it a shot, try them all to see which one works best for you.
How Can I Extend Backgrounds in Photoshop?
Step 1 – Open Image and Increase Canvas Size
Open your image in Photoshop.
Increase the canvas size using the Crop Tool to include extra space for the background.
Select the Crop Tool from the Toolbar to the left of your canvas workspace, or use the crop tool keyboard shortcut by Pressing C.
Using the mouse, Hold and Drag the Crop Tool Pointer across your workspace to increase the size.
You can drag the Crop Tool to the left or right, horizontally or vertically of the workspace.
A Crop Tool dialog box will appear indicating the size in pixels of the new canvas.
Hit Enter when you have achieved your desired canvas size.
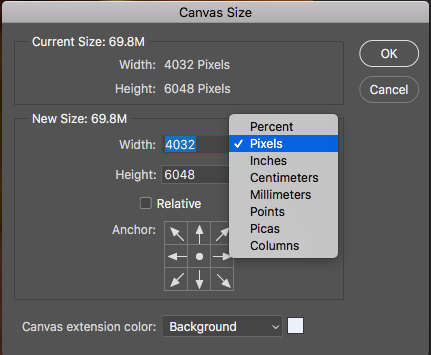
Note: You can also set the canvas size under Image > Canvas Size and set your new canvas size in the pop-up box.
If you need help finding the right measurements, use Photoshop's lines and grids.
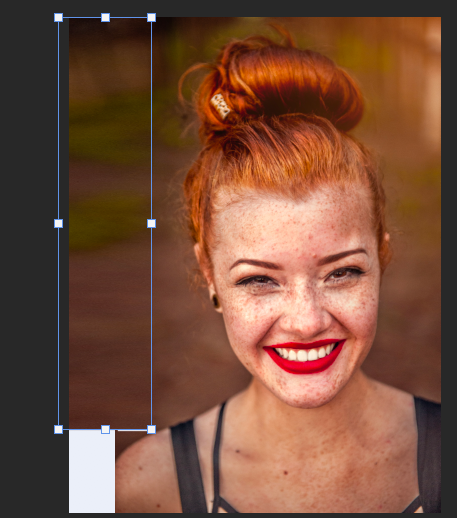
Step 2 – Select the Background Area
Using a selection tool, such as the Lasso Tool, Magic Wand Tool, or the Marquee Tool, select the area you wish to add background too.
If it is a square or rectangle shape you wish to extend the background into, use the Rectangular Marquee Tool.
Navigate to the Toolbar and Select the Rectangular Marquee Tool or for the keyboard shortcut Press M.
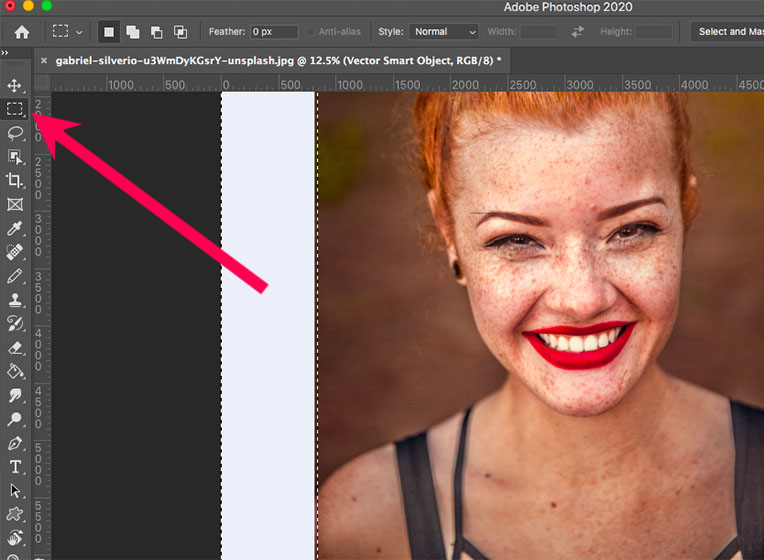
When the Marquee Tool is selected, Drag your cursor over the background area.
When the desired size is achieved, Release your cursor, the area will be surrounded by marching ants.
The area you want to create a background for will now be surrounded by marching ants.
Option 1 – Extend using Fill
Now it is time to fill the area with background.
Navigate to the menu bar and select Edit > Fill.
When you click on Fill a Dialog Box will appear, ensure that Content-Aware is selected beside Contents:.
Tick Color Adaption under Options, and in the Blending Box select Mode: Normal and Opacity: 100%.
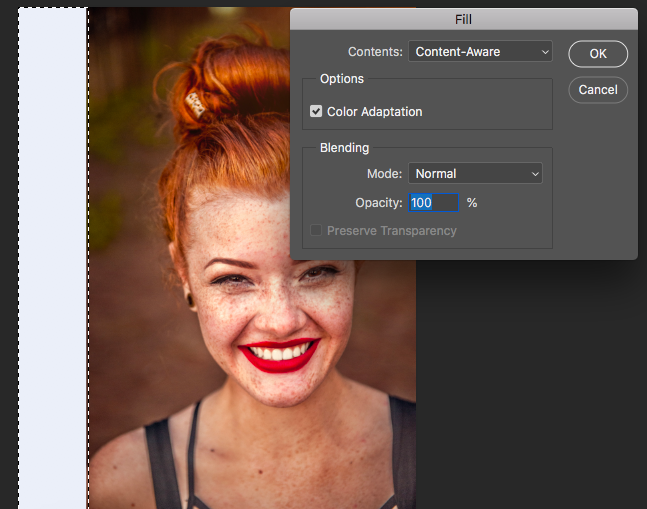
Now click OK.
The Content-Aware Fill action will fill the blank space with the background.
Occasionally the Photoshop Content Aware Tool will also include unwanted background areas, in this case it has included parts of the girl's face and hair.
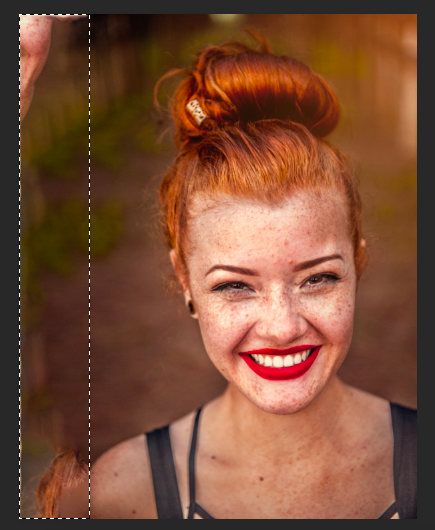
This happens because Photoshop will use the closest background to the area you want to be filled.
If unwanted areas have been included in your image try one of the following options.
Step 2 – Extend using the Content-Aware Scale Tool
This time using a selection tool, select an area of the background with which you want to replace the space background.
It is best to select an area that will match, it can take some time to develop an eye for the best background area to use, or some trial and error.
Navigate to Edit and in the drop-down menu select Content-Aware Scale.

Once selected the Content-Aware Scale Tool will select the background area and surround it with a blue line.
You can now move the area in a similar way to if you were using the free transform tool.
Using your cursor, Drag the selected background into the area you wish to have an extended background.
In the Content-Aware Scale Options Bar above your workspace, you can enter the size you wish to increase the selected background portion to.
Note: The Content-Aware Scale Tool is best to use if you wish to extend the background area outward from your image, using a background that will look natural when stretched.
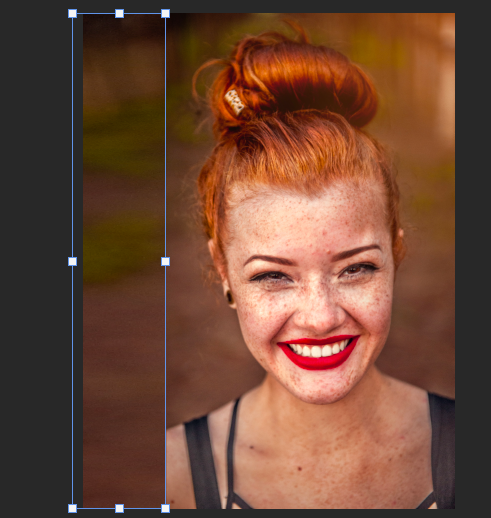
As you can see in the image used if you want to cover all the background's negative space the shoulder of the girl will also be covered.
Click Enter to finish.
As you can see Photoshop helps extend a section of the background layer, but it doesn't always give the results you want.
Check out the next and best option.
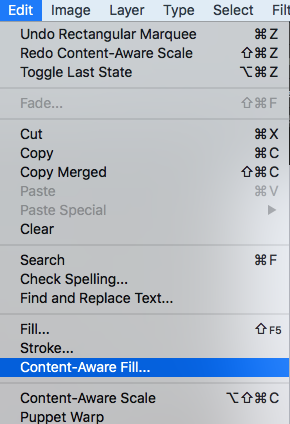
Option 3 – Extend Using Content-Aware Fill
Sorry to save the best for last, but the Content Aware Tool gives you by far the most control when editing backgrounds.
When the background area is selected, navigate to the menu bar and select Edit > Content-Aware Fill.
When you click on Content Aware Fill two canvases will appear with the Content-Aware Settings on the right side.
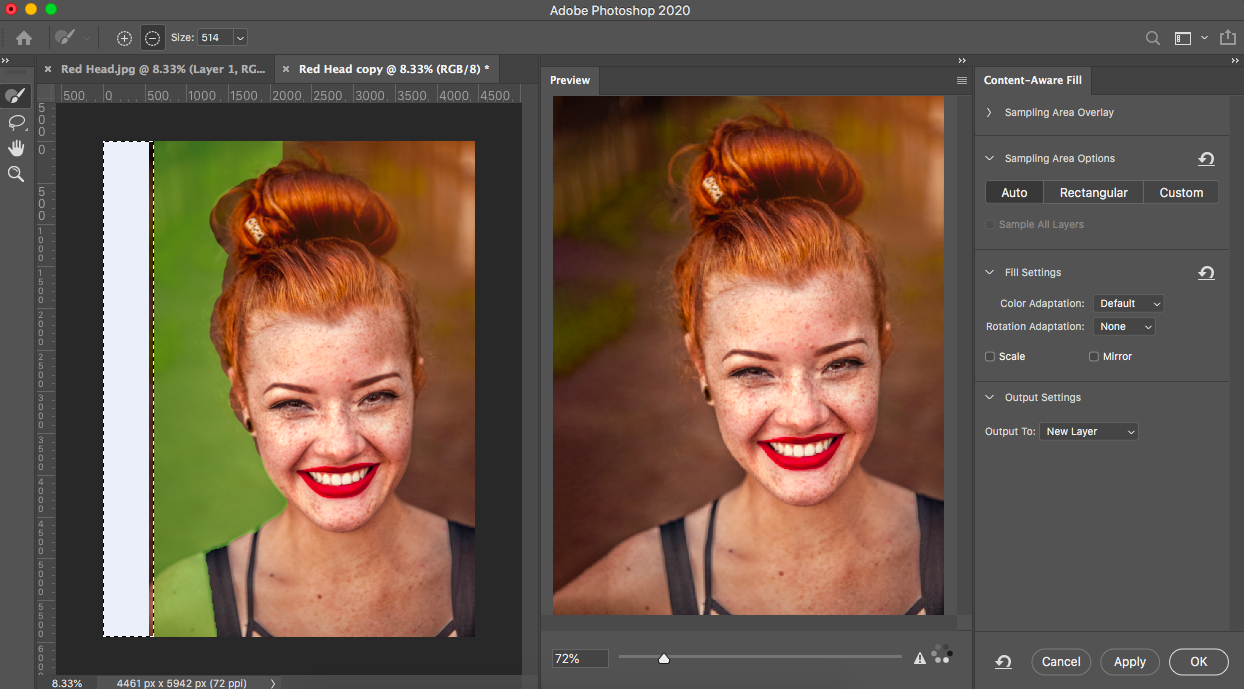
The Canvas on the left side will have an overlay of transparent green and the second screen will show you the final image, with the extended background.
You can add or subtract to the green overlay, to change the image in the sampling canvas to get the result you prefer.
Click on the Subtract or Add Icon in the top left-hand corner of the canvas window, and enter a size for your brush.
The areas you add will be added to the sampling area, and the areas you subtract will be removed from the sampling area.
Click Apply in the Content-Aware Fill Panel to see what the extended background of the final image will look like.
When you are happy with the extended background Click OK.
You will now have an image with a background so natural no one will know it's not part of the original photo.
You can now Save your file.
How to Extend an Image in Photoshop
To extend an entire image rather than just the background you can use the above photo editing options.
Using Automatic Fill, Content-Aware Scale or Content-Aware Fill in a similar way to mentioned above you can extend your entire image.
1. Open your image in Photoshop
2. Extend the canvas area to accommodate the extra area, Image > Canvas Size.
3. Select the area of the image you wish to extend with a Selection Tool.
4. When the area is surrounded by marching ants, select Edit > Content Aware Scale.
5. You can now extend the chosen area into the negative space, by Dragging the Border with your cursor.
6. Click Enter, and you will now have an extended image.
Hungry for more Photoshop tips? Try – How to Create a Transparent Gradient in Photoshop
How do I use Generative Expand? Update Adobe MAX 2024

As of 2024, Photoshop has an AI too powered by Adobe Firefly specifically designed to extend a photo of a background.
To use it, enable the Crop tool. Then, select Generative Expand from the Fill options in the top menu bar.
Now, pull the handles on the edges and corners to determine in which direction and by how much you want to extend your photo.
Lastly, click the check mark if you want the AI to generate the content based on the information it has. This is pretty similar to the Content-Aware Fill.
The biggest revolution about this tool is that you can use text prompts to tell Photoshop what elements you want in the new section of the canvas.

Judyth is an experienced studio photographer and glass artist. When she isn’t Photoshopping comedians into the bellies of sharks, you can find her cooking delicious treats for her guests.

👋 WELCOME TO SHOTKIT!
🔥 Popular NOW:
