


Guide to Forest Photography
Want to learn the 25 best tips for taking amazing forest photos? Read on! This guide covers all you need to know about forest photography.
Learn | Photography Guides | By Greg Cromie
Shotkit may earn a commission on affiliate links. Learn more.
In this guide to forest photography, we'll describe all you need to know to capture stunning images of nature at its best.
Like landscape photography, capturing pictures of a forest takes you out of your fast-paced world and forces you to slow down. You get to see the natural beauty not just in the towering giants, but also in the tiny details that exist.
You'll also discover there's a lot more to taking a beautiful forest picture than you first thought.
The good thing is that a forest doesn't need extra props or gimmicks to make a photo of it pop. Forests have all you need in abundance ready for you to capture them in compelling ways.
You can go into forests armed with the correct gear, knowledge, and a few ideas on gaining a gorgeous shot. What's more, forest photography is an incredibly relaxing pursuit.
Your forest photographs will soon put you in the company of the most famous nature photographers around.
25 Tips for Amazing Pictures of Forests
While taking a long drive to the forest as a nature photographer may be your intention, capturing amazing pictures while you're there is far more likely when you know a few tips.
From planning to gear to settings, let's take a look at some things you can do to kickstart your forest photography.
1. Take The Necessary Time

While striking a cool forest photo pose is great, be mindful not to rush into things. Take a bit of time to be in the moment and be aware of your surroundings.
When heading into an unknown destination, take the necessary time to scout the area. This rule applies to people shooting any types of photography.
Get a feel for the location by walking through it and paying attention to the light at that time of day. Take note of where it falls at other times for future use.
Look for interesting compositional elements by crouching down, looking upwards, or climbing a rise to see what there is to photograph. Such elements can make a picture of a forest unique and interesting.
2. Explore Your Surroundings
There's nothing worse than finding an ideal location packed with photographers or tourists.
Do your research and find the best forest photography spots that are accessible from the main road, walking tracks and observation areas.
Take the time to step off the path and locate parts of the forest that are less travelled. Just be mindful of your safety and never explore beyond your limits. Returning safely with stunning photos is the ultimate goal.
3. Make the Most Of Golden Hour

Golden hour is the time of day where the sky changes to a golden hue. It's a perfect time for any style of photography. Sunset forest pictures make for dramatic and visually appealing images.
There are two goldens hours being the hour before sunset and the hour after sunrise.
In forests, the low angle of sunlight casts a golden glow against the tree-trunks and the forest floor. It also results in long shadows creating a stark contrast.
Although you can fake golden hour lighting, it's best to make the most of this magical time of day to elevate the drama and narrative in your forest photography.
4. Shoot Throughout The Day
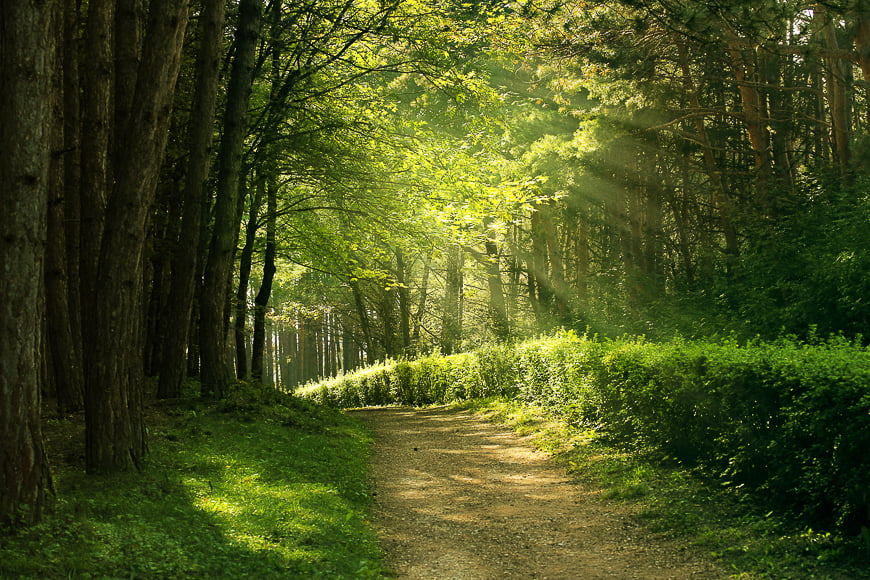
Shoot the filtering light at daytime for a beautiful effect.
While golden hour results in stunning forest photos, there are other times when you should make the most of the lighting.
Getting out for a photography shoot in the middle of the day often results in images with harsh bright areas. However, in a forest, the canopy blocks the sun and creates dappled light across the scene.
If you're in dense woods, you get moody shots with harsher rays of light blocked.
5. Don't Shy Away From Bad Weather

Forestry photography can be quite unpredictable. The weather can change quite dramatically in a short time.
We tend to believe that the best time to do any sort of outdoor or nature photography is during good weather. But there's a lot to be said for photographing a forest scene in less than perfect weather conditions.
Forests and woods are dark and moody places at the best of times; the mood increases with rain, snow, mist and fog.
Mist and fog drifting between the trees dramatically changes your depth experience. Your visibility shortens and darker tree trunks become mere suggestions rather than concrete subjects.
This can make for a completely different yet equally compelling style of forest photography.
Learn more in our complete article on fog photography tips.
6. Shoot With A Long Lens
Longer lenses allow you to compress the foreground with the background.
The typical school of thought is to shoot landscape photography with a wide-angle lens. For forest photography, you should consider packing a telephoto lens.
A telephoto lens makes a lot of sense for forest images – you get much tighter compression and frame a more specific scene.
Telephoto lenses cause less distortion meaning that tree trunks will be straight rather than bowing at the edges of the photo.
A long lens is excellent for managing depth of field with foreground elements in focus and background elements softening.
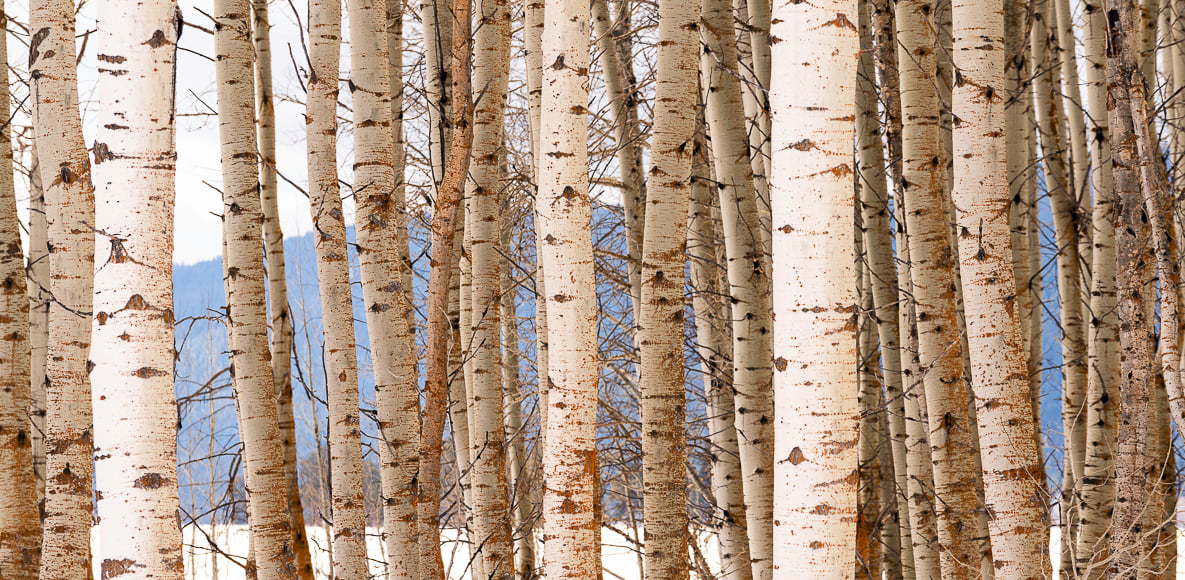
7. Shoot With A Wide Lens

Anything wider than 35mm can be considered ‘wide angle'‘.
As mentioned, a wide-angle lens is ideal for capturing more scenery in forest images.
Wide-angle lenses allow compositions to demonstrate the breadth of the forest. They're especially helpful when you have neat rows of tall pines marching off into the distance.
By standing at the best angle, you highlight the vastness of the forest and the volume of trees standing tall and silent.
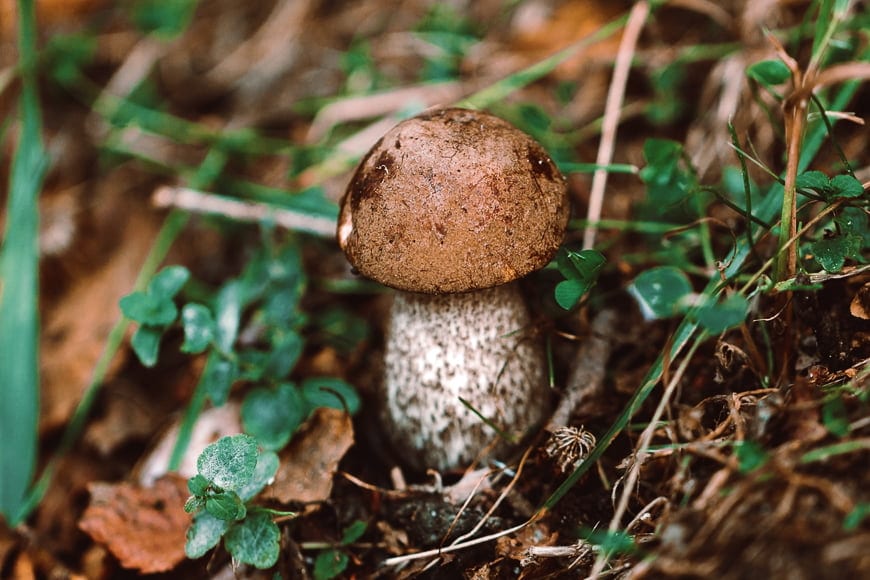
In forest photography, wide-angle lenses are also great for getting close to a smaller foreground subject.
Imagine a spotted toadstool standing in a bed of pine needles. The wide-angle lens captures this with the forest floor disappearing into the background.
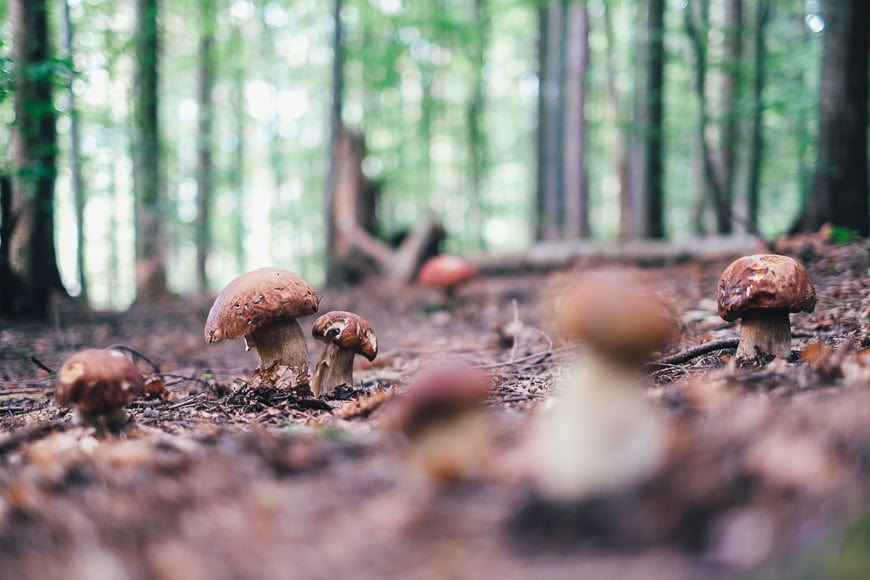
8. Shoot With A Macro Lens

Forests compel us to look up into the tangle of growth. But there's also a lot going on at a ground level that you cannot afford to miss.
With a macro lens, you'll capture truly unique images of plant, animal and insect life. Forests are a microcosm of life – much of which is happening right under our feet.
Packing a macro lens when you head out for some forest photography will remind you to slow down and look for what's going on between your boots.
9. Remember to Pack A Tripod
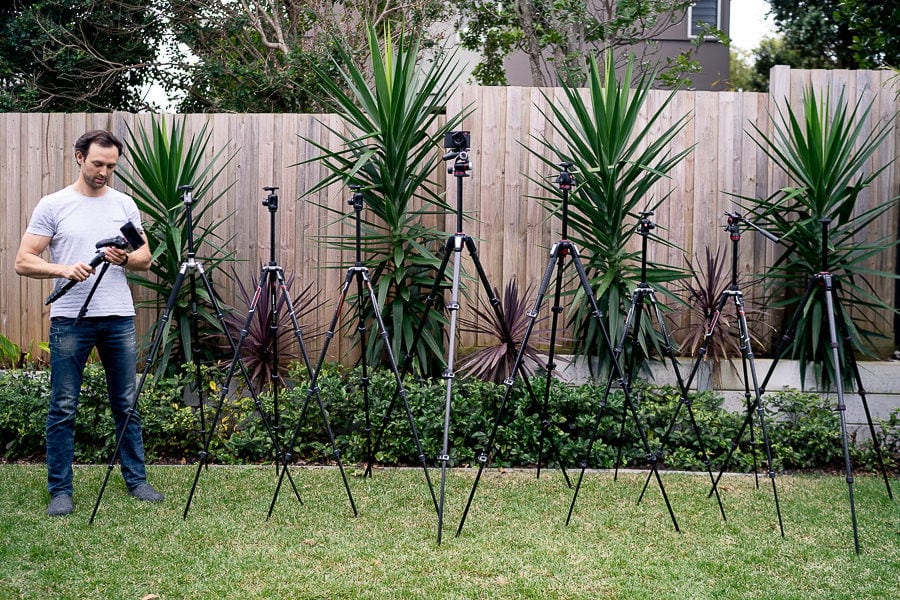
Mark testing tripods for a recent review.
This is a handy tool to have in forest landscape photography.
If you want to frame compositions and ensure that you have them straight and steady, attach your camera to a tripod. You'll also need a tripod if you're going to get serious with slower exposure times – it will eliminate camera shake.
If you intend to pack a macro lens, you'll need a tripod to frame your shot. As macro lenses have a thin focal plane, you may need to use focus stacking to capture more of your subject in focus.
If bringing a tripod along on your next forest photography adventure, strap it to a comfortable camera backpack, such as these.
10. Apply a Polarising Filter
Polarising filter can reduce glare on reflections.
Filters are a handy tool for photographers that intend to shoot long exposures without overexposing their image. Filters cut down the amount of light entering the lens and hitting the sensor.
A polarising filter darkens skies and manages reflections and glare from bodies of water – it controls the linearly polarised sunlight.
A polarizing filter adds balance to the light in your photo as well as adding contrast to skies and clouds.
11. Control Your Shutter Speed

Selecting the right shutter speed is critical to the success of your forest photography process.
We use fast speeds to capture and freeze something that's moving within the composition. With most forest photography, there's not a lot of action going on – the trees tend to stand pretty still.
However, if there's a strong breeze and you don't want the photo to have motion, use fast shutter speeds.
If you want to capture a greater level of detail and the effects of the existing light, slowing the shutter speed is best.
Plus, forest settings tend to be quite dark, and slow speeds allow more time for the rays to hit the sensor.
12. Select The Best Aperture
Shoot ‘wide open' to selective blur your foreground or background.
The lens aperture controls how wide or narrow the lens diaphragm opens.
A wide aperture creates a shallow depth of field with close subjects in focus with the rest blurred. A narrow aperture delivers images where everything is in focus.
In forest photography, use a wide aperture to capture your foreground subjects in crisp focus. The background elements will gradually blur and become less distinct. This effect adds a lot of mood to your composition and draws the viewer in.
13. Create Compositions

Animals like this black bear in alaska add volumes to your composition.
You'll quickly notice that when you walk into a forest, a lot is going on visually.
Don't be overwhelmed by the volume of elements before you – shapes, contrasts, lines, colour, and framing are all there. You just have to take the time to find them and position your camera for the best forest photos.
This is another reason why your initial scouting exercise is so important – it prevents you from not seeing the forest for the trees. See what I did there?
Look up, look down, get down low, stand on a hill – look for the best composition for your shot.
14. Framing Your Photography Scene
One of the best elements in forest photography is to use natural subjects to frame your shot.
Forest scenes with trees and bushes lining a pathway make for a perfect frame to your photo. One idea is to position the camera so the trunks form vertical edges to your frame.
Go a step further and use low hanging vegetation to apply a horizontal frame to the top section of your photo.
The scene draws the viewer into the dark shadows of the centre where the forest setting is pronounced.
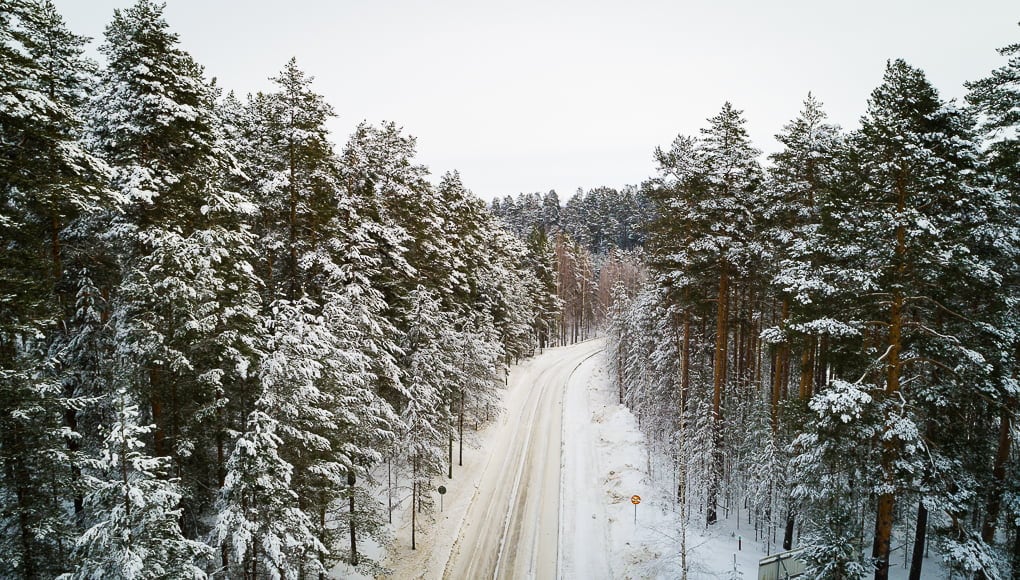
15. Use Leading Lines
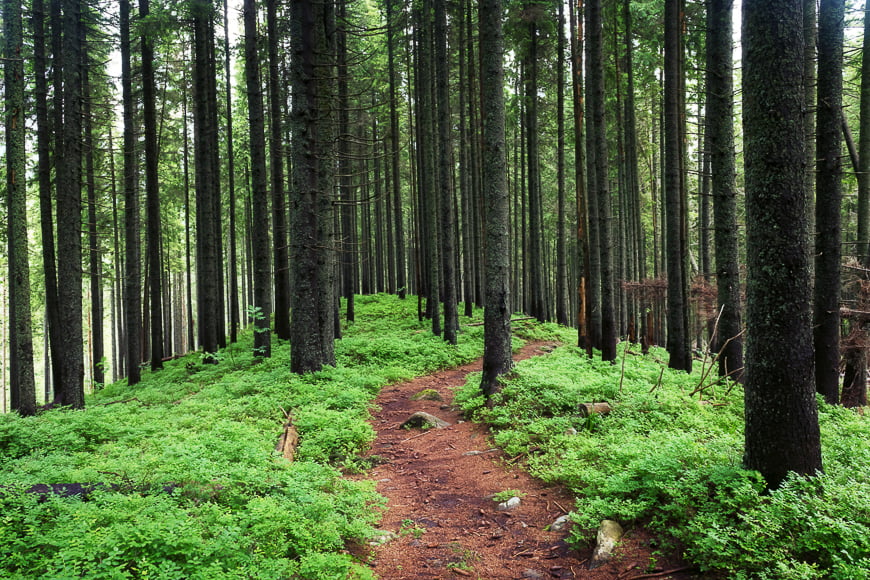
Including leading lines in your forest photos helps to guide your viewer on a journey through your image.
If there are walking paths, position yourself to uses the natural leading lines created. If you pair this with the concept of framing explained above, you have a winning combo.
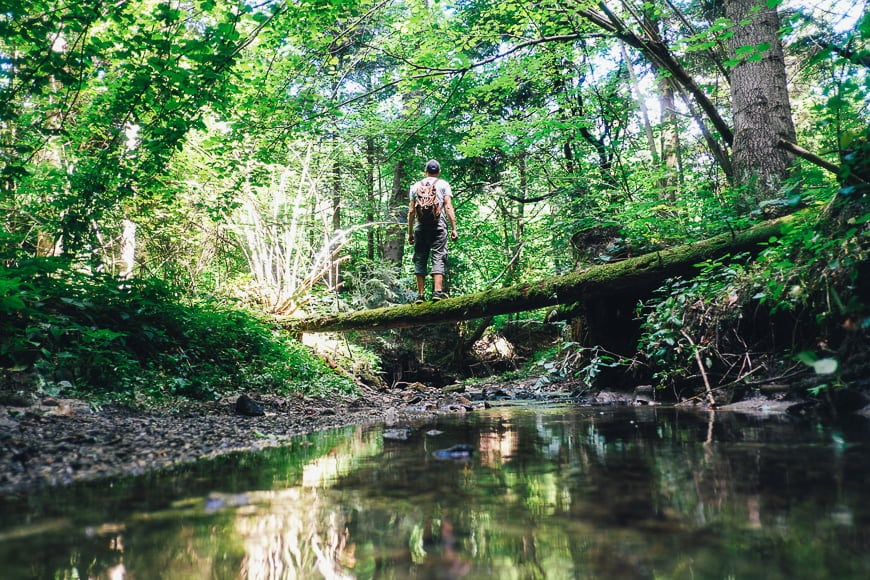
Other elements form leading lines in your shots such as a giant fallen tree lying across a stream. This strong linear element pulls the viewer in and leaves them guessing where it leads to.
Another form of leading lines in forest photography is created by the sharp rays of light, causing shadows among the trees.
16. Find Unique Elements

Capturing the raw beauty of the forest creates mesmerising imagery. Consider taking it up a notch by finding a unique feature or element to include in your forest photography.
Some photographers love using forest settings as a backdrop for model shoots. A forest photo that features a pixie-like model running through the trees in a flowing white gown is compelling.
While that's one option, another is to look for natural elements to create an artistic scene. Consider a red toadstool standing on the ground with a single beam of light falling upon it.
Alternatively, include woodland creatures that wander into your frame. Or perhaps frame a small meadow of wild-flowers standing at the edge of the forest.
17. Use The Natural Contrast
Another element of forest photography, or any photography, is to find the existing contrast.
Contrast tells us a lot about a scene and comes in many forms – texture, colour, tone, light and shadow. Look for the contrast that already exists in the area you're photographing.
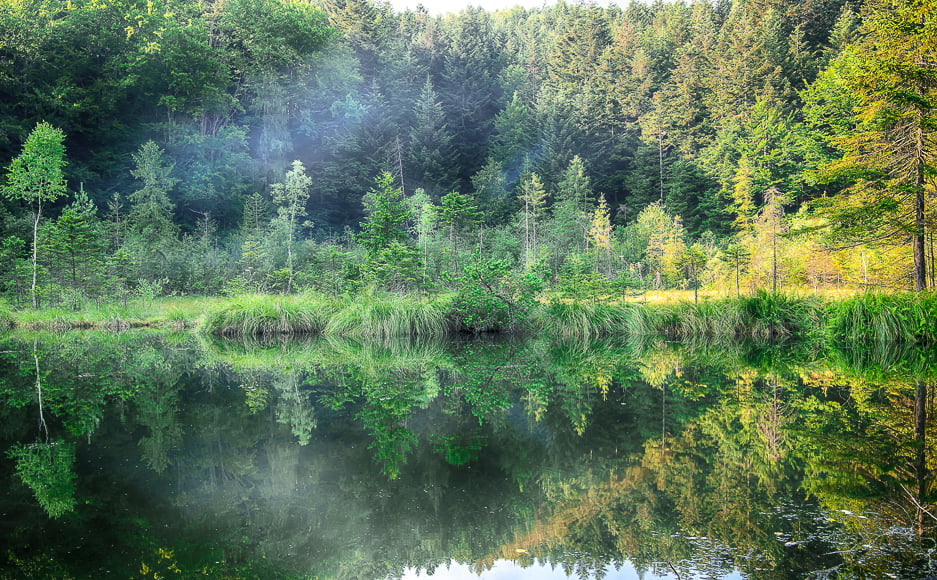
Find the pine needles scattered on the ground surrounding a perfectly still puddle of water. Or perhaps capture the way the woods meet the water with a top-down drone shot.
Also, look for the contrast that exists between the varying colours and tones of the foliage.
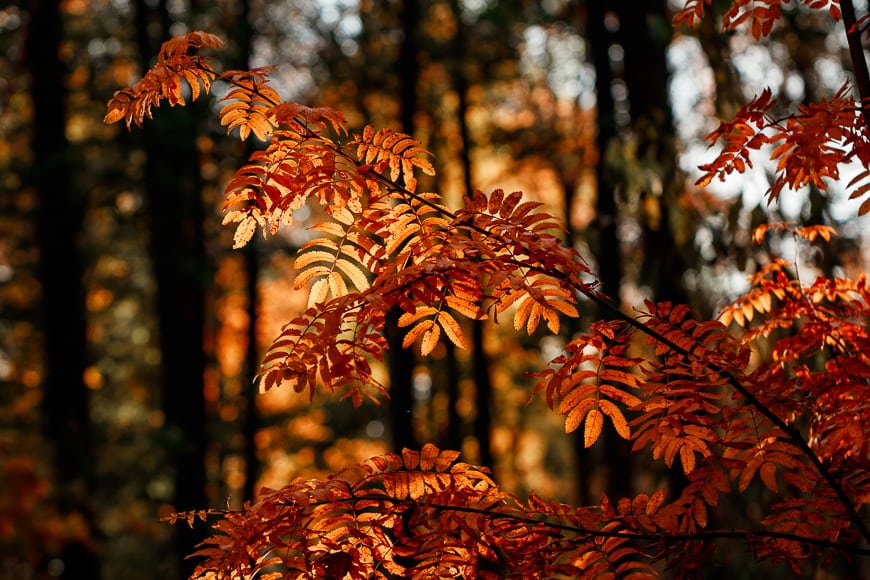
18. Shoot In Every Season
The temptation exists to only photograph a forest area in the ‘good' seasons of spring and autumn. But you should also consider shooting the same location in all the seasons.
I recommend visiting the same forest in summer, autumn, winter and spring to create a series demonstrating the natural changes. Imagine a scene with strong summer sunlight or falling snow during the Christmas season, or the dance of falling leaves during autumn.
Forests with dense foliage undergo dramatic transformation throughout the year. Spring sees bright green saplings push from the soil and native flowers bloom. In comparison, winter casts a white blanket over the scene and creates a striking contrast.
Regardless of shooting a spring bud or an autumn leaf, using the seasons adds a narrative to your forest photography images.
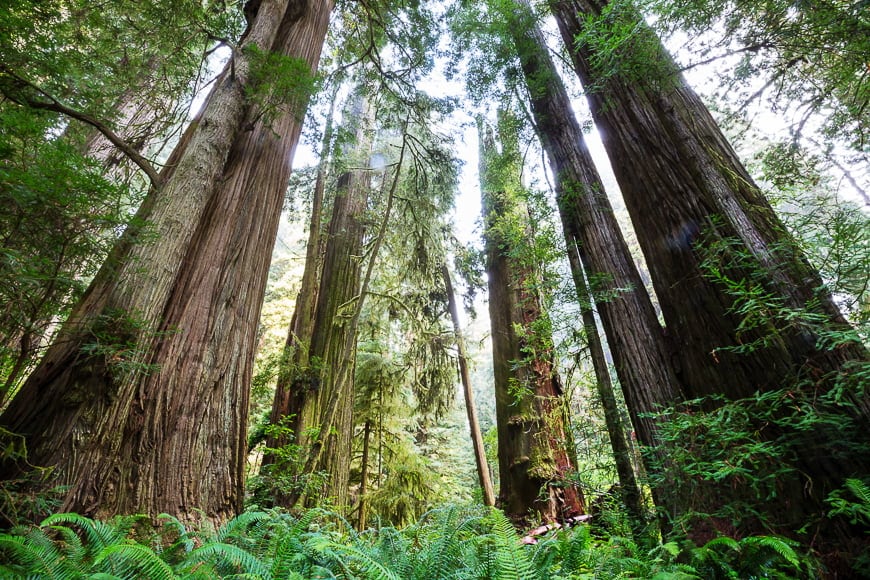
19. Shoot From The Ground Up

Lay on the ground and shoot upwards for an original composition.
Holding your camera at eye level and shooting straight ahead will catch you some nice photos. But getting down low and shooting up at an angle is guaranteed to deliver stunning forest images.
Forests are all about tall upright trunks that stretch up forever, making us stop in awe at their size. Make the most of that with a photo shot from the ground up.
Another great style of shot is to stand in the middle of a stand of trees and photograph straight up. The trees will create long leading lines up to the leaves of the canopy and sky.
You might even capture the phenomenon of “crown shyness”, where the trees keep their branches at a distance from one another, making it look like there are cracks in the canopy. This also makes for stunning imagery.
20. Shoot From The Top Down
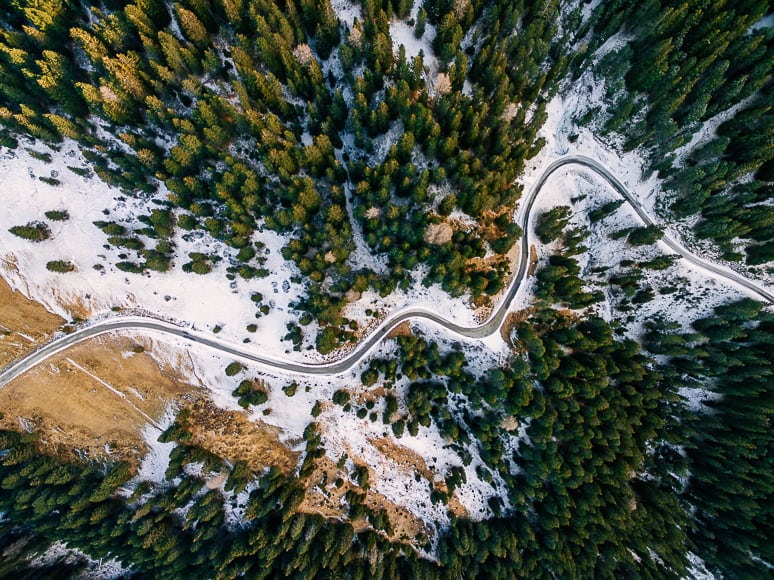
Check your local laws before flying your drone.
If you have a drone, consider taking it along on your next adventure in the woods.
Forest photos shot from above the canopy leaves create their own form of a story – especially if you're capturing a large area from a high altitude.
If there's a nearby body of water, use the opportunity to split your photo with half of it filled with the textured green canopy and the other with the still deep blue waters.
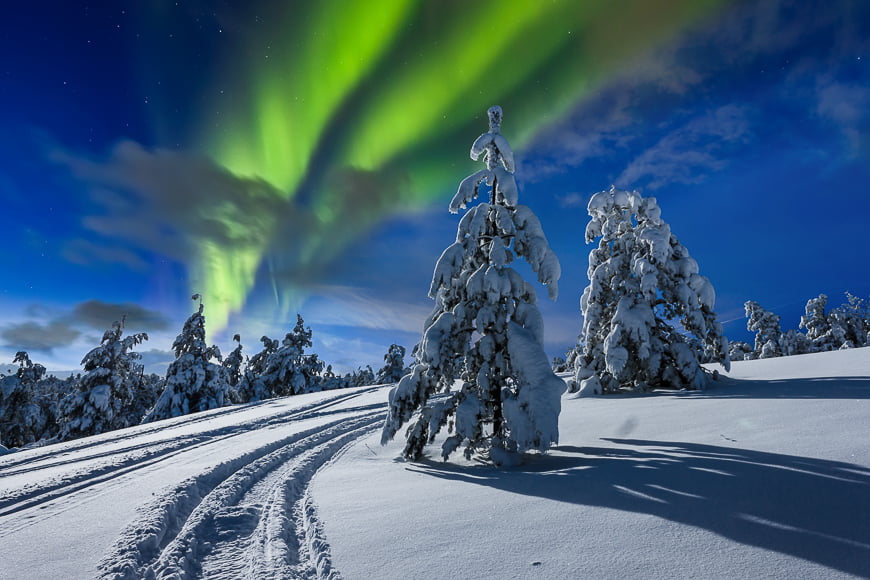
21. Shoot Forrest Photography At Night

So far we've spoken about shooting forest photography during the day. But it's also worth considering heading out at night for a completely different outcome with your forest photos.
With your safety paramount, head out during blue hour to make the most of the cool blue glow. Blue hour takes place roughly during the hour and a half after the sun has entirely dropped below the horizon. The time of year will determine how long blue hour lasts.
Another option is to shoot when the moon is casting a white glow across the scene. Instead of shafts of sunlight falling through the gaps in the foliage, ghostly moonlight will fall and soften the scene.
22. Try Astrophotography In The Forrest
If you want to take a shot at astrophotography, get set up in the clearing of a forest.
In the right spot, the trees form a natural frame with leading lines looming upwards.
Imagine a ring of treetops at the edges of your frame with a clear sky in the centre displaying the galactic core of the Milky Way. That's one way to take your forest photography to the next level.
23. Shoot In Black & White

A neat look with forest photography is to shoot in black and white – or at the very least edit your forest photo to be black and white later.
With black and white, you train your eye to identify the bright and dark areas of your forest photography. The varying shades of green become tonal values making you look for stronger contrast.
Work with the highlights and shadows caused by the fall of light and the forest breaking up that light.
You should also read our guide on when to use black and white photos.
24. Keep The Peace
As with any photography undertaken in nature, please be respectful of the natural balance that exists.
Ensure that you tread carefully so as not to disturb critters both large and small. Consider the eco-system that exists between those underfoot and those up above – if you destroy one, the other suffers.
Be mindful of others using the location and if photographing with friends, communicate quietly.
Above all else, leave the area the way that you found it when you arrived.
25. Dress For The Conditions
It may seem like a no-brainer, but I always recommend that you're aware of the conditions you're working in and dress accordingly.
If you intend to head off the forest path, make sure that your footwear is suited to the terrain. If you're facing cold weather, layer-up just like the guy at the camping store recommended – thermal layers, gloves and a beanie are a great start.
If it's likely to be hot, be aware of the impacts of heat exhaustion and dress for the part. When in direct sunlight, a suitable hat and shades is a must.
Be comfortable and safe so you can make the most of the time in the woods.
Better Forest Photos | Final Words
Being out in the forest with your camera is a dream come true. The woods have so much to offer visual creatives, making forest photography a must for any nature-loving photographer.
With the right preparation, gear and some ideas on composition, you can capture stunning forest photos to wow all those who gaze upon them.

Check out these 8 essential tools to help you succeed as a professional photographer.
Includes limited-time discounts.

I’m a Melbourne-based street photographer and blogger. I love to travel to Japan to photograph and document its dynamic people and culture.
1 Comment
Leave a Comment
👋 WELCOME TO SHOTKIT!
🔥 Popular NOW:

Why would most of my photos taken in Cradle Mountain be out of focus. I have a Nikon D60 and took most of the photos on a manual setting using a 40/ second setting and allowing the camera to set its own AF.
They are great photos but the auto focus option didn’t seem to work or maybe I didn’t know what the focus was picking up?? Any ideas to assist me please. Peter