


Blue Hour Photography: ESSENTIAL Settings, Ideas & Tips
What is blue hour and how can you use it to create stunning images? Check out this guide to blue hour photography to find out all the secrets!
Learn | Photography Guides | By Greg Cromie
Shotkit may earn a commission on affiliate links. Learn more.
In our guide to blue hour photography, we're going to share with you some secrets to creating unique and inspiring images.
You can pick up a camera any time of the day and head out to grab some shots. But, there are some special times of the day where the lighting changes your compositions completely.
Making these times of day work for you takes a little planning and dedication – but the rewards far outweigh the inconvenience.
So let's dive in to the concept of blue hour photos and what you can do to make sure you get the most out of this special time when the sun is low in the sky.
What is the Blue Hour in Photography?
Photographers the world over are very attuned creatures as we all rely on a little bit of magic to capture fantastic images. Our magic source is a secret that I've sworn never to divulge, but I'll tell you if you promise to keep it to yourselves… ;)
There are many magical hours or times throughout any given day, where ideal lighting allows us to create exceptional photos. These are, without a doubt, the best times of the day to get out and do what we do best.
For example, there's a “golden hour” around sunrise and then another during sunset (see: guide to sunrise photography). During both these times, the light becomes warm, golden and diffused. In turn, landscapes and even portraits gain a level of punch and depth.
But for many, the most magical time of all is the “blue hour”. Much like the golden hour, blue hour occurs twice per day.
The first blue hour happens right before the sun rises. During this twilight period, the sky takes on a dark blue colour and gradually gets lighter as the sun crests the horizon.
The second occurs just after the sunset golden hour, when the golden glow has disappeared and is replaced by a cool, crisp and blue hue. This blue hour is quickly followed by darkness as the sun dips further below the horizon line and directs its light and warmth elsewhere.
Note that neither of these periods is really an hour: how long blue hour lasts depends on factors like season, weather conditions and where you are in the world. Oftentimes, it's very short-lived (so you have to be quick with that shutter release button!).
Why Take Photos During Blue Hour?
Taking photos such as landscapes and portraits during golden hour makes a lot of sense. But the question remains why photographers would hang around to work during the blue hour.
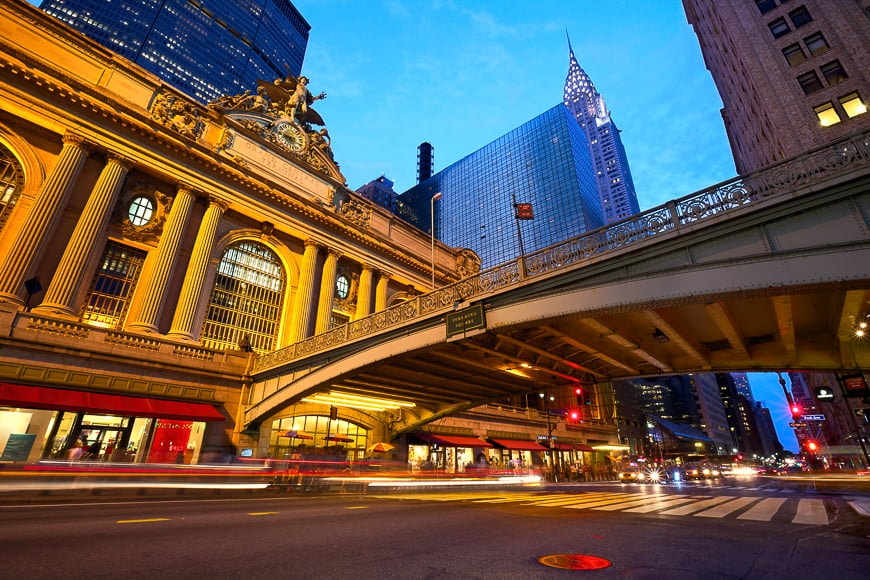
For photographers, blue hour is a perfect time to take landscape, city and even street shots. In built-up areas, lights start to come on in the houses, cars, streets and buildings – but there's still enough light in the sky to bring out the details in objects.
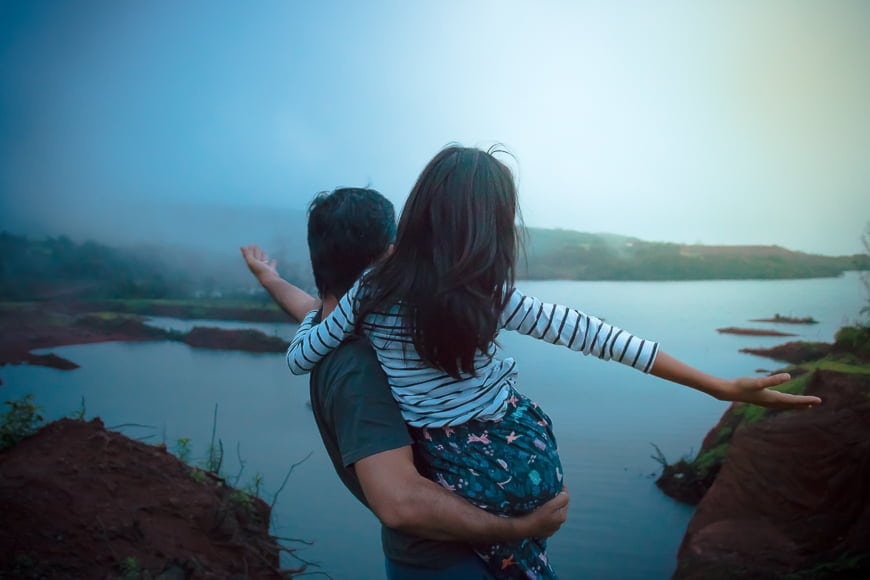
Where sunrise and sunset are popular times of the day for photographers and tourists alike, blue hour tends to be a little quieter. The blueness of the light best represents the calmness of the day, and depending on the location and time of year, can be a very tranquil backdrop.
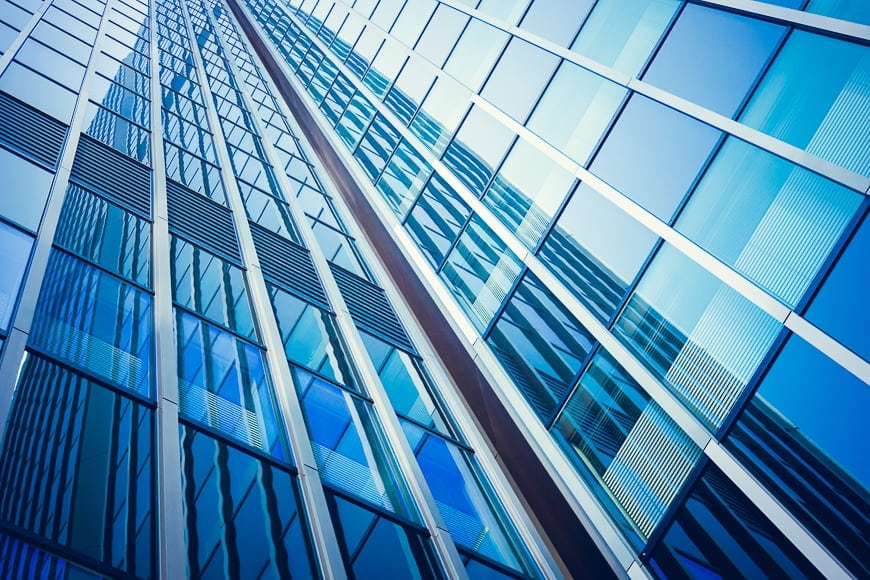
Landscapes take on a moody and soft appearance, while city streets show the contrast of the blue sky with the yellow illumination from street lamps.
Check out all the best photography magazines next time you're in your local newsagent, and you'll start to see a pattern of the time of day that the majority of landscape images were shot.
What Kind of Photographs Benefit From the Blue Hour?

The kinds of photographs that benefit the most from blue hour are relatively broad. Any shoot that takes place outdoors can be enhanced or achieve a moody look at blue hour.
Genres such as landscape and cityscape photography benefit from blue hour. But there are plenty of other photography styles that can make the most of this lighting.
Street photography is an ideal genre at blue hour. Blue hour tends to create more contrast as shadows deepen but don't lose all detail.
As street lights come on and cast their glow, this can illuminate pockets of the composition. And, if the artificial light is of a warmer colour, then the contrast with the cooler blue sky is gorgeous.
A wedding photographer that organises a sunset or golden hour shoot should consider hanging around for blue hour.
This diffused and cooler light produces a moody setting while still retaining image detail and sharpness in your subjects.
Work in a location where there are strings of lights for some dreamy bokeh, and you have a winning combination. Also, vivid whites become more cooling and less glaring at this time of the day.
Finally, if you're into long exposure photography for landscapes or even astrophotography, you can make the most of blue hour without the need for excessive shutter speeds.
Give it a try next time you want to shoot a long exposure or time lapse of the night sky: You might find that the Milky Way emerging from the dark blue sky at dusk has a beautiful effect.
7 Tips for Amazing Blue Hour Photography
1. Plan Your Blue Hour Photography Shoot
One of the positives about afternoon blue hour photography is that you mostly have all day to plan it. But the flip side is that blue hour is fleeting and you only have s small opportunity to get your shot.
Having the time to plan for your blue hour shoot means that you can scout your location to find spots to take photos near you.
If you're working in a landscape setting, you can travel to and then explore the location. This way, you can work out the best set-up spot and angle to capture your images.
Another bonus with blue hour photography is that if you arrive with enough time, you can capture the golden hour of the sunset too. Then, you're ready to go as the light in the sky changes hue.
As you only have a short amount of time to capitalise on blue hour, being set up and ready is essential.
If you're shooting a cityscape or a street scene, you want to time your shoot with the cooling sky and the switching on of city lights. It's going to be tight, but with a little preparation and luck, you can nail the scene in your composition.
There are sites and apps available that'll allow you to know when the golden hour and blue hour will occur in any given destination.
2. Choose Your Settings
In general, photography during blue hour benefits from a far less complicated workflow. So knowing and choosing your camera settings doesn't need any special knowledge or expertise. (See: how do I find my camera settings?)
First of all, let's remove the complexities that shooting at other times of the day present – full bright and pitch black.
There's no need for additional lighting or excessive ISO as the scene has a soft and pleasing amount of illumination. Also, you don't have to worry about motion blur due to using long shutter speeds.
During the brightness of the middle of the day, you often need to stop your aperture right down to its narrowest just to prevent overexposure and highlight blow-out. Not so at blue hour. Nor do you need to work with ND filters to reduce the harshness of the light.
During the blue hour, you can work with pretty much whatever aperture you want – within reason.
It's all going to vary depending on the strength of the light and if you're shooting right at the start of blue hour or at the end of it.

When it comes to shutter speed settings during blue hour, it all depends on the scene you're photographing. If it's a landscape where there's no movement, then a slower shutter speed will ensure that optimal light and detail are captured.
However, if you're shooting a street scene, you're going to want to increase the shutter speed to around 1/250 to capture everything in sharp detail. Fortunately, during blue hour, you have a good amount of wiggle room with shutter speed.
Your aperture also depends on what you're shooting. If portraits are your thing, then you want a wide aperture such as f/1.4 or f/2 to ensure subject focus, sharpness, separation and background blur. During this time, you can comfortably use wide apertures without the fear of highlight blow-outs.
Equally, you can make sure that all of your composition is in focus through a narrow aperture such as f/5.6 or f/8.
Your ISO settings don't have to be extreme just because the sun has set. In fact, during Blue Hour, a better approach is to start with an ISO between 800 and 1600. This approach will ensure that the sensitivity of available light is optimised without causing unwanted noise in your images.
Remember that photography in any light is a balance between these settings and the best way to master them is through practice.
3. Lock Up the Mirror to Reduce Blur
For those shooting with a DSLR, there's always the risk of your shutter mechanism causing camera vibration. While on its own it's not an issue, but at slower shutter speeds it can result in your image being less sharp or even blurry.
When you press the shutter release button to take a shot, you'll hear a mechanical clunk – it's a satisfyingly good sound. But, when this occurs, the mirror inside the camera quickly shifts direction and back again. It's that same mechanical action that vibrates the camera.
While this does not impact mirrorless cameras (as there's no mirror to shift) camera shake is still an issue that can ruin a perfect composition and image.
Fortunately, there's an easy way to fix this problem. Every DSLR camera includes a function to lock the mirror up so that when you hit the shutter button, the mirror only shifts once.
This significantly reduces any noticeable camera vibration and impact to your photos.
4. Practice Makes Perfect
Blue hour can be over before you know it, and so your time to experiment and practice is minimal.
But you shouldn't be discouraged as a lot can be achieved in under an hour. Part of your preparation should also include scouting more than one location or scene within proximity to one another.
(See our tips for successful location scouting.)
This way, you could be set up for one composition, spend 15 minutes shooting it, and then quickly relocate to your next.
Another tip is to not be satisfied until you have used up the very last of the cool soft light.
Get the composition you wanted with the ideal settings and then spend a few minutes adjusting your camera settings to evaluate the differences they make.
Who knows, perhaps slowing down the shutter speed or opening up your aperture will achieve a unique look.
5. Let Your Composition Tell A Story
Blue Hour presents you with a golden opportunity to set a tone or mood in your composition.
Storytelling in photography is a core element of the process. A thousand photographers could capture the same landscape but to make yours stand out, you make decisions that create a unique narrative.
With blue hour, you already have a perfect and natural light source to set the stage for a moody image. Blue tones tend to represent coolness, sadness and clam – capitalise on these in your composition.
Part of your planning and scouting for this time of day should also consider if you want to introduce a model into your image. A single ballet dancer standing in the warm glow of a street light during blue hour tells a very compelling story – especially when you compare this to the same composition in the full light of day.
Above all else, be creative and always strive for a unique look.
6. Take A Monochromatic Approach
Many people incorrectly assume that monochromatic images are the same as black and whites – this is not the case.
By definition, monochromatic is only using a single colour. It's the tonal values of that colour that create darkness, light and contrast.
Using the unique light of blue hour to create natural monochromatic images delivers a fantastic outcome. While a little touch of post processing and editing can enhance this, the ability to capture monochromatic images naturally is compelling.
It's the contrasting tones that define the contents of the image and not the contrasting colours.
Alternatively, you can take a mostly monochromatic approach except for other artificial light sources such as the orange glow from street lights. In this case, the contrasting warm highlights punctuate the blue scene.
7. Edit Your Images With A Gentle Touch
As much as we'd all love to believe that our photography is so refined that we spend no time in post processing, the reality is a little different.
Most of us need to spend a little time editing our images. This may be to crop or straighten a frame, improve the highlights, shadows and contrast, or improve colour representation.
We can tread lightly, or we can be heavy-handed – we've all seen heavy-handed editing where colours are too intense to be real.
With blue hour photo editing, I always recommend the less is more approach. Make small incremental changes that are easier to undo than big, sweeping strokes.
Most importantly, you don't want to adjust the temperature of the image – otherwise, you're going to destroy that gorgeous and natural blue hue.
The same goes for the overall exposure of the image as you can quickly lose the mood and context by pushing that slider too far one way or the other.
Essential Gear for Blue Hour Photography
You've dressed for the occasion, and now it's time to pack your gear. But what's the best combination of equipment for blue hour photography?
Obviously you need a camera, but you also need it to have a couple of essential features. The most important is the ability to manually control your ISO and shutter speed.
Attempting photography in these conditions with an AUTO only camera results in you losing all control of the outcome. As we've discovered, being able to control ISO and shutter speed results in appealing and well-balanced images.
As for the lens, this is going to first depend on the style of photography you'll be doing.
If it's landscape, then you want to pack a wide-angle lens that can capture a wider field of view – something around 20mm is ideal. If you're going to be shooting street photography, then you want something a little more compressed such as 35mm.
Finally, for portraiture work, higher compression results in better images and so an 85mm lens is ideal.
Either way, you want to be able to control aperture and select a lens with as wide an aperture as possible. You may not need to open it up, but having the option to do so is best.
Finally, you will likely need a tripod, especially if you're going to be doing some long exposure work.
Camera shake will ruin a perfectly good composition, and there's no way to save it. By mounting your camera on a tripod, you can make sure that the camera remains perfectly still.
Blue Hour Photography FAQs
How long does blue hour last?
Despite the name, blue hour usually doesn't last a full 60 minutes. Often, it lasts for around 20-30 minutes, though the exact length of time depends on factors like weather conditions, time of year, and location.
What is morning blue hour?
Blue hour occurs twice per day. The morning blue hour happens just before sunrise. It's a twilight period where the sky turns dark blue and gradually lightens as the sun appears over the horizon.
How do you capture a blue hour photo?
You shouldn't need any additional light sources to shoot during blue hour – just set your shutter speed and ISO according to the scene and how much light is available. You can also set your aperture as wide or narrow as needed, depending on your subject. If you're shooting at the darker end of twilight, you may need a tripod to afford slightly longer exposures.
Final Thoughts
There you have it: You now know the secrets to blue hour photography and how harnessing this time of day can elevate your photography game.
Just remember, this is our little secret as we don't want too many people showing up to your next twilight shoot…!

Check out these 8 essential tools to help you succeed as a professional photographer.
Includes limited-time discounts.

I’m a Melbourne-based street photographer and blogger. I love to travel to Japan to photograph and document its dynamic people and culture.
1 Comment
Leave a Comment
👋 WELCOME TO SHOTKIT!
🔥 Popular NOW:

Thanks for checking out my article. If you have any comment or questions then leave them here and I will get right back to you. Cheers. G