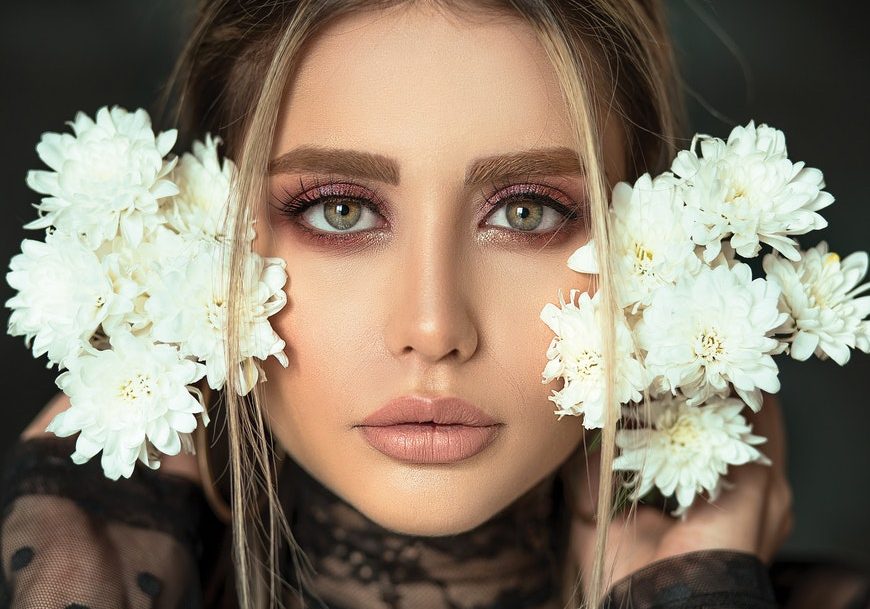
How to Use Front Lighting for Better Photos
Discover 5 front lighting tips & examples to create amazing portrait photos using artificial and natural light. Elevate your photography just using light!
Front lighting is one of the most basic photography lighting setups. If you want to create better photos, learning to use the direction of light to your advantage is key.
In this article, I’ll discuss the pros and cons of using a front light and show you some situations where you can use it creatively with both artificial and natural light.
I’ll also give you a brief introduction to other lighting angles, such as backlight and side lighting.
What is Front Lighting?
Front lighting is when the direction of light is coming from the camera, in front of the subject – that’s it. Sounds simple, right? It is. That’s why it’s one of the most common lighting techniques.
To avoid having predictable results, professional photographers tend to add complexity by modifying the light. This is because ‘front light’ refers only to the direction of light.
You can choose between using natural lighting (the sun) or artificial lighting (flashes, etc). Also, you can use direct light if you want to create deep shadows or use a light modifier if you want diffused light for fewer shadows.
You can change the height of the front light source to change the direction of the light and the shadows.
Just be careful not to go all the way above the subject because it stops being front light and becomes top lighting – and top lighting is no longer frontal – it’s a type of side lighting.
Other Common Lighting Angles
Side lighting is exactly what it sounds like – it’s when the photographer puts the flash or whatever light source on one side of the camera.
If the photographer doesn’t want a deep shadow, a side light can be complemented with a reflector or a secondary light on the other side.
- Back lighting
Backlight is when the light source is behind the subject. When you use this light scheme, you’ll be photographing the shadow side.
This creates a silhouette or a dramatic mood with harsh shadows on your subject. This setup is exactly the opposite of front lighting.
If you want to learn more about using backlighting, you can check out our guide here.
Pros & Cons of Front Lighting in Photography
Pros
- Suitable for natural and artificial light – whether you’re using sunlight or flash, the front light has the same pros and cons on your photos.
- Easy to setup – Front light it’s easy because you lit the subject with one flash or light source. If it’s a soft light, it evenly spreads across the entire scene.
- Suitable for all subjects – You can use front lighting for portraits, landscape photography, still life, and other shooting.
Cons
- It creates predictable images – All portfolios benefit from a variety of lighting schemes, so photos can look ‘samey’ if all you use is the same style.
- It flattens the scene – Lighting helps create the impression of three dimensions in a two-dimensional photo. Since a front light casts the shadows on the back of the subject, it eliminates the contrast that gives depth.
- Can be dazzling for the subject – depending on the brightness of your light source, a front light can be too bright for your model, causing them to squint.
How to Use Front Lighting: 5 Tips
1. Use front lighting for real estate & landscape photography

Credit:Clayton Bunn
Front lighting is perfect for real estate images because it evenly illuminates the entire house. You’ll also avoid the contrast problems that usually force photographers to use HDR.
When you shoot in the early morning or late afternoon, you’ll have soft light – the best time depends on which way the property is facing.
Also, you can use front light for landscape images. Most people shoot towards the sun during the golden hour because they want to create a silhouette or simply catch the sun rising or setting.
Next time, turn around to leave the sun behind the camera and in front of the subject – you’ll see how great results you can get with an evenly lit subject.
2. Cast a shadow

Credit: Faizi Ali
Images taken with a front light usually have a flat look. However, you can create dramatic images when you use hard light coming from the front and a person or an object casting a long shadow on your subject.
One of the most common examples is a photo where you can see the shadow of the photographer because the sunlight is coming from behind the camera. You’ve probably done one of these ‘self-portraits’ at some point.
You can apply the same concept and cast long shadows of any object onto your subject with very creative results – like the example above.
How Much Do You REALLY Know About Photography?! 🤔
Test your photography knowledge with this quick quiz!
See how much you really know about photography...

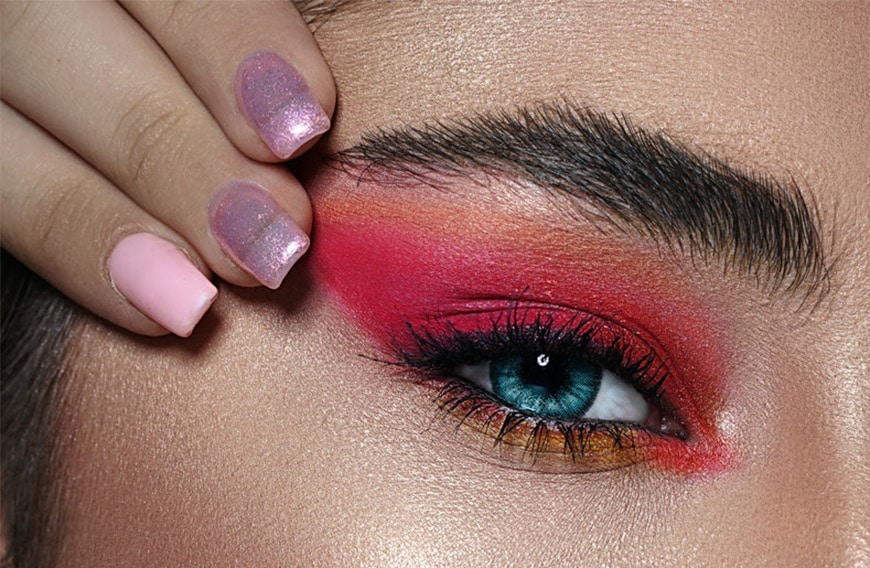
3. Create a catchlight
Credit: Amir Seilsepour
In most professional portraits, you’ve probably noticed that there’s a light reflection in the subject’s eyes – that’s called a catchlight.
When you’re learning photography lighting, you start to pay attention to the light, to where it casts a shadow and if it’s causing a reflection – this is what makes a photo look three-dimensional, after all.
In the case of portrait photography, you learn to control the catchlight because this reflection makes the subject’s eye look more ‘alive’.
A front light creates a nice catchlight. If you’re using artificial light, you can change the reflection’s position by changing the light source’s height.
Also, you can change its shape by using different modifiers. A softbox creates a rectangular catchlight while a ring light creates – well, a ring.
If you prefer to use natural lighting, you can shape the catchlight using window light.
4. Butterfly light

Credit: Ali Pazani
There’s a very traditional type of light in portrait photography called butterfly lighting. It’s called like that because it creates a small shadow under the nose shaped like a butterfly.
Butterfly lighting is an extremely flattering portrait lighting technique because it highlights the cheekbones and makes the person’s face look slimmer.
It was used to photograph Hollywood stars – which is why it’s also called Paramount light, and it’s used by most photographers shooting beauty or glamour portraits.
In its essence, it’s a front light positioned relatively high – this way, the light falls on the subject’s face creating small shadows under the nose, cheekbones and chin.
To soften the shadows, you can reflect light from the bottom using a reflector panel or use a fill flash.
5. Use front light as a fill light

Credit: Kindel Media
When there’s more than one light source, you can have one key light and two or three fill lights – the front light can be one of those.
For example, if you’re doing a portrait in the midday sun, you can use an on-camera flash to soften the unflattering shadows.
Another example, this time with a back light as your key source, is when you want to create a silhouette with some details.
If you don’t want to have a deep dark silhouette, your key source would still be the sky, but you can use a front light to reveal some details of the subject.
Front Lighting FAQs
What are the qualities of front lighting?
Front lighting illuminates the entire subject. It flattens the scene because the shadows fall on the back of the subject – it also flattens surfaces diminishing textures.
Why is front lighting important?
It’s important because it lights the entire subject straight on. It can be very flattering for portraits because skin imperfections are less noticeable.
What mood does front lighting create?
It creates a soft mood because whatever shadows it creates fall on the back of the subject. If you want dramatic photos, the front light might not be the best choice.
What are the 4 qualities of lighting design?
The four qualities of light that can be controlled are intensity, direction, color, and movement.
Final Words
I hope this article helps you the next time you’re deciding on how to light a photo. Lighting photography in different ways can bring a variety of ‘looks’ to your work, elevating it from all the other photos you see on Instagram these days.
Take note the next time you find some dramatic images to see how they were lit – chances are, the photographer used some form of front light sources to create them.
If you have any questions or suggestions, please share them in the comments.

Check out these 8 essential tools to help you succeed as a professional photographer.
Includes limited-time discounts.


