


How to Create Dramatic Lighting in Portraits
Dramatic lighting can really elevate your portrait photography - the best part is that you don't need any special equipment! This guide reveals the secrets.
Shotkit may earn a commission on affiliate links. Learn more.
When you're scrolling through Instagram, you'll probably notice that the portraits that grab your attention are often the ones with dramatic lighting.
As a portrait photographer, you can use light to create the right atmosphere. When you use dramatic lighting, you're communicating a mood and intentionality – it's not for beauty or glamour shots.
So, if this is the style of photography that you want to focus on, and you're asking “How do you get dramatic lighting?”, this is the article for you.
Here you'll find different photography lighting tips that will help you regardless of your equipment.
It's a useful guide for beginners with no special lighting gear as well as more advanced photographers who wish to master this technique with different lighting equipment.
As always, you'll also find plenty of examples to visually demonstrate the different techniques and keep you inspired.
Let's dive in!

Revolutionary lighting simulation software that streamlines studio photography and film making.
Use code SHOTKIT10 to save 10%.
What is Dramatic Lighting?
Dramatic lighting is a style that comes from an art technique called chiaroscuro – which literally translates from Italian as light-dark. It originated in the Renaissance period, and it has influenced many artists to this day. You can see Chiaroscuro lighting here.
This lighting technique is widely used in portrait photography. You can see some famous examples in the works of Annie Leibovitz and Robert Mapplethorpe.
The idea is to create atmosphere and intensify volume through bold contrast between the highlights and the shadows. This can be done considering different characteristics of light.
- Brightness – this refers to the intensity of the light. If you have an area of the picture where there's a very bright light and another one with very dim light, you're creating dramatic lighting – for example, in low key images.
- Contrast – when the light source is hitting the subject from the same angle, this creates what is called a hard light in photography because it creates deep and well-defined shadows.
When you use any of these concepts – or combine them together – you can create a wide variety of looks for dramatic portraits.
Let's see some ways in which you can do this.
7 Ways to Create Dramatic Lighting
If you're still asking yourself, “How do you get dramatic lighting?”, here are 7 fun ways to try and recreate studio-like dramatic lighting in the comfort of your own home.
1. Use natural hard light
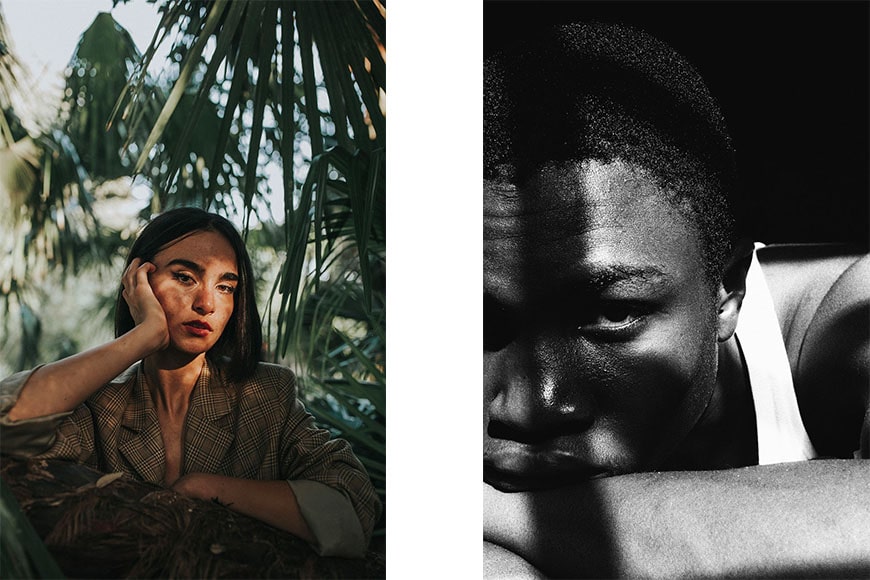
Credit: Juri Gianfrancesco (left) / Muhammadtaha Ibrahim Ma'aji (right)
As I was saying before, a high contrast light source is one that illuminates your subject from the same angle – which is what happens with direct sunlight.
I'm sure you've heard that you should never do portraits at noon on a sunny day because it creates strong shadows, right?
Well, that's exactly what you need when you want to create dramatic lighting! You just have to be creative to achieve a good dramatic portrait instead of an unflattering one.
For example, if you place your model under a tree, some hard light will pass through the leaves, creating an interesting pattern on your subject.
Otherwise, you can use natural hard light indoors by using window light. This also gives you the opportunity to get creative with the shadows.
During a sunny day, the light is direct and hard which creates dark and well-defined shadows – check out our guide to summer photography for examples.
2. Create artificial hard light
Since a small light source creates hard light, almost any artificial light can work well for your dramatic portraits. There are plenty of examples – some are professional lighting equipment, and others are things from your home.
Here are some ideas to get you inspired.
- Use desk lamps or a light bulb.
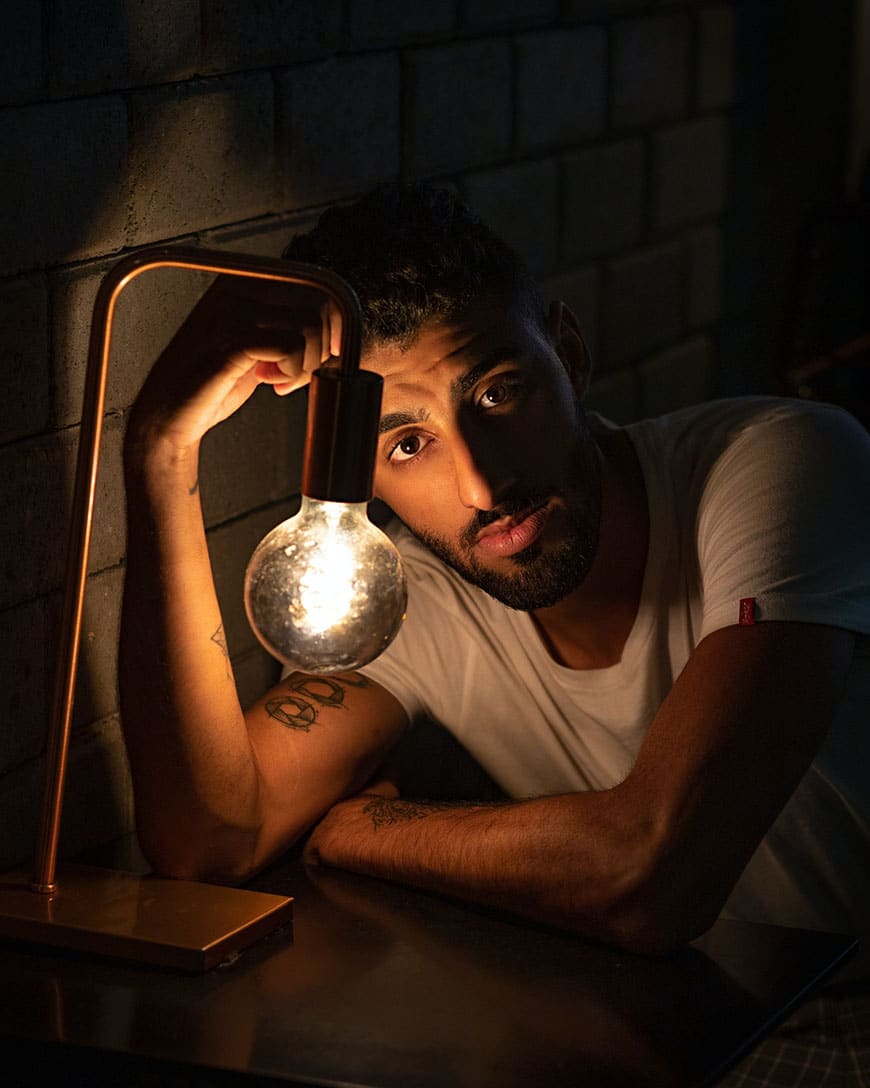
Credit: Yuri Manei
- Use a computer, a TV, a phone or any other device that emits light.

Credit: Daniel Radford
- Use fairy lights.

Credit: Myicahel Tamburini
- Use photographic strobes or flashes for a professional studio portrait.
Credit: Richard Jaimes
Using hard light can be particularly effective when you want to create edginess in genres such as fitness photography, where the harsh highlights and shadows can help define the model's muscles.
- Use street lights
Just because it's artificial light, it doesn't mean that you have to create it or control it.
You can also use the available light in a particular scene – for example, street lights.

Credit: Dima Valkov
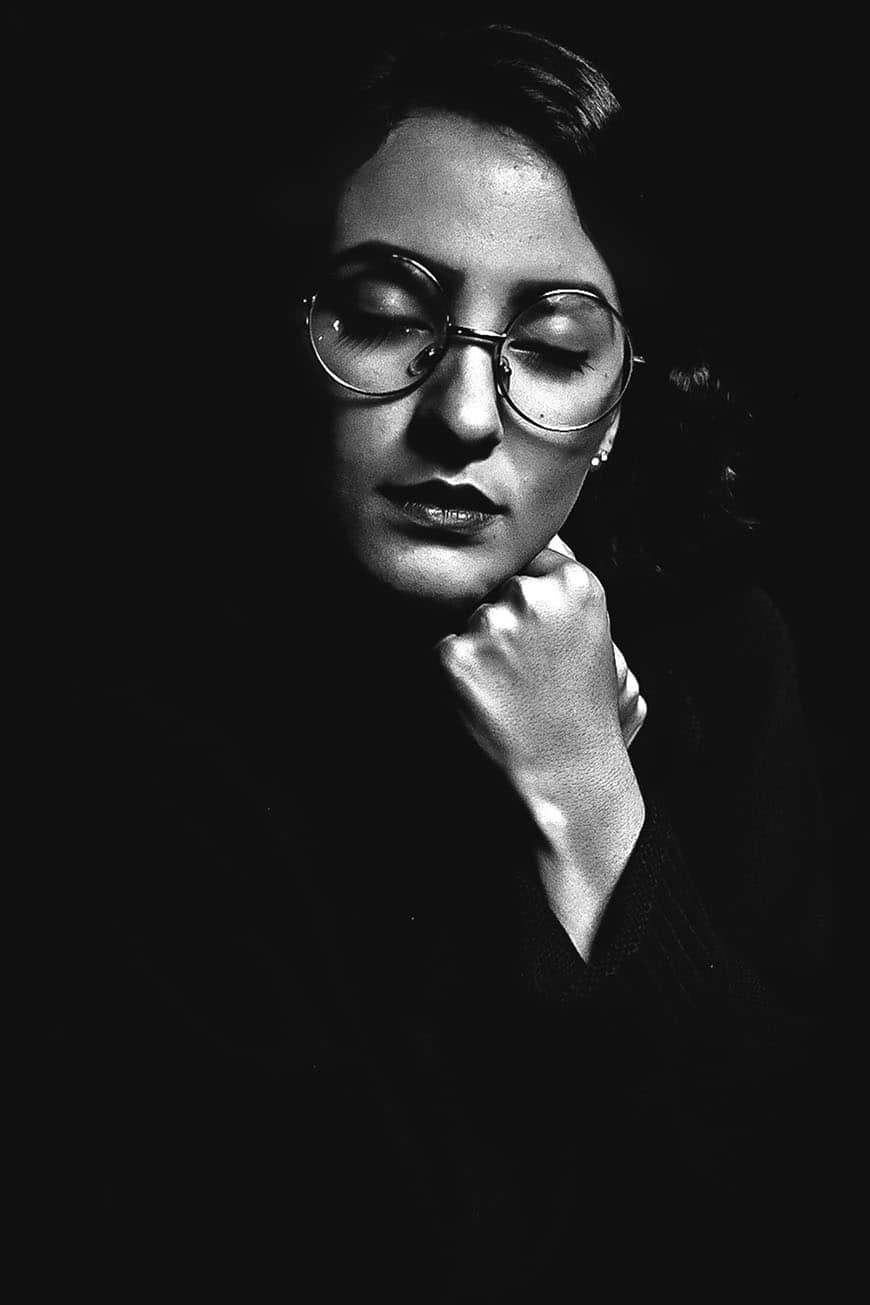
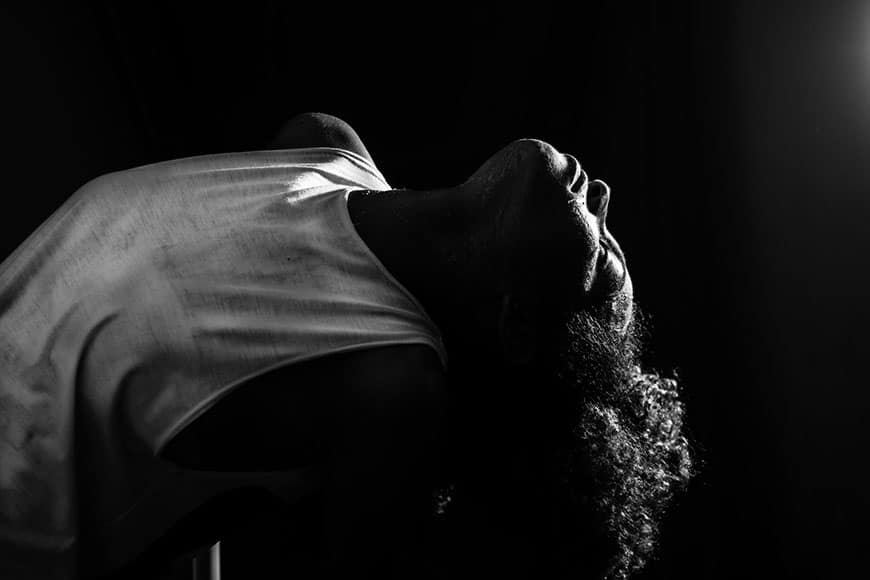
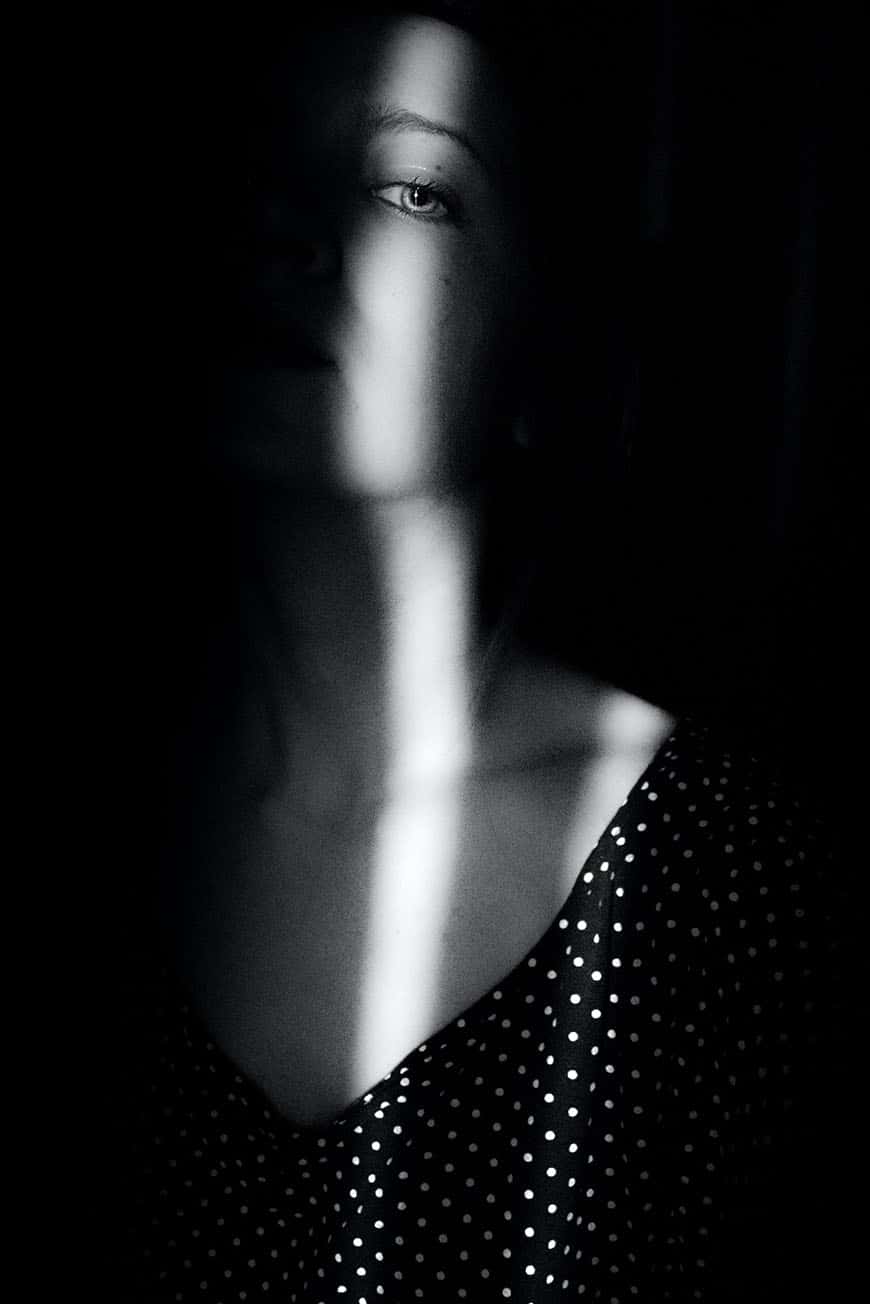
3. Move the light direction
The way you position the light has a great impact on creating highlights and shadows. There are various different lighting patterns that create dramatic light. Here are some of the most common.
When you place the light behind the subject, you're creating a rim light that creates a very strong highlight.
If you leave that as the only light source, you'll create a silhouette effect like the one you see in the example below.
However, if you want to have some details on the subject, you can position a reflector or a second light with less flash power at the front.
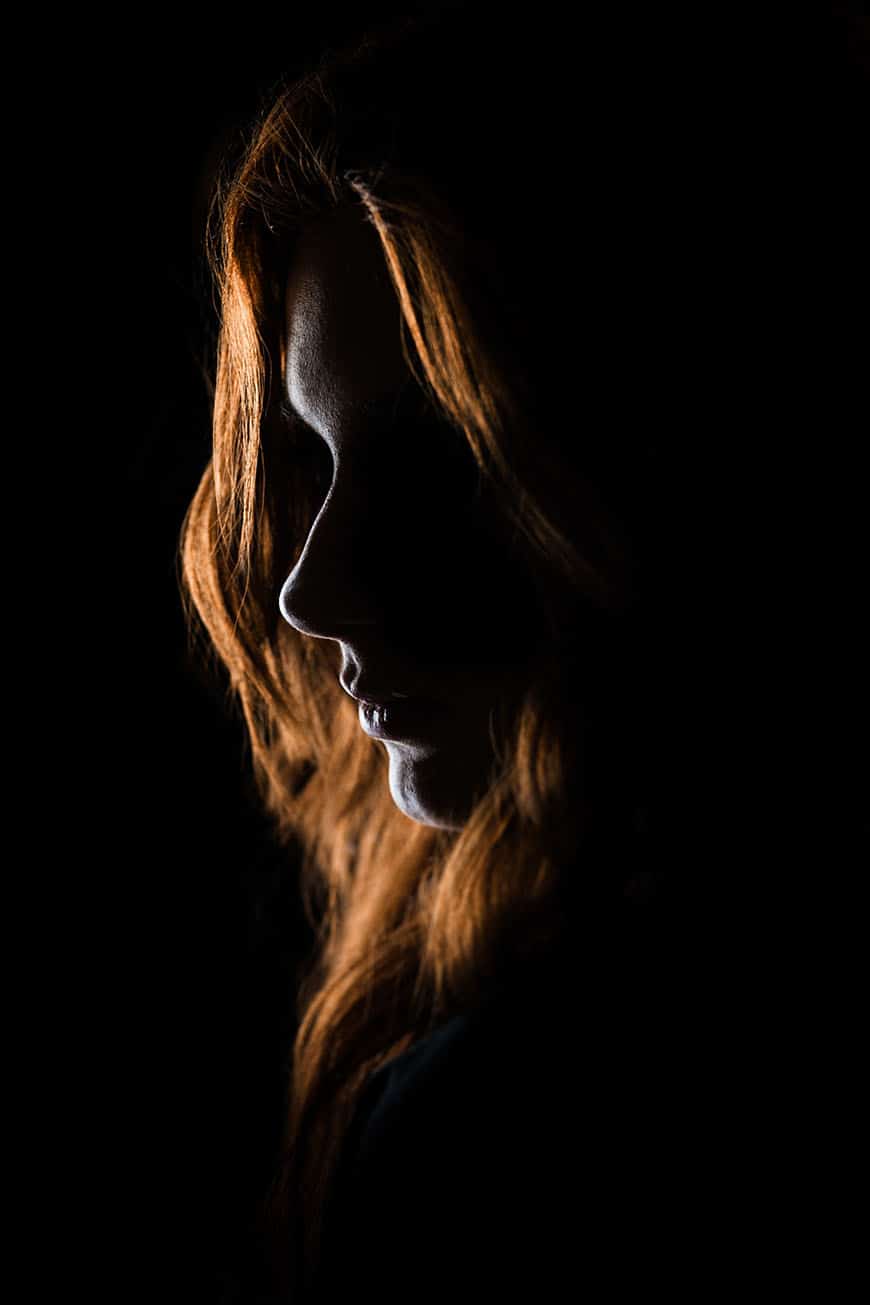
Credit: Christian Holzinger
- Side-lighting
You can use only one light to illuminate your model on one side but not the other.
To intensify the effect, you can add some negative fill on the opposite side (you can learn how to do this with a lighting modifier in tip number 4).
Credit: Fillipe Gomes
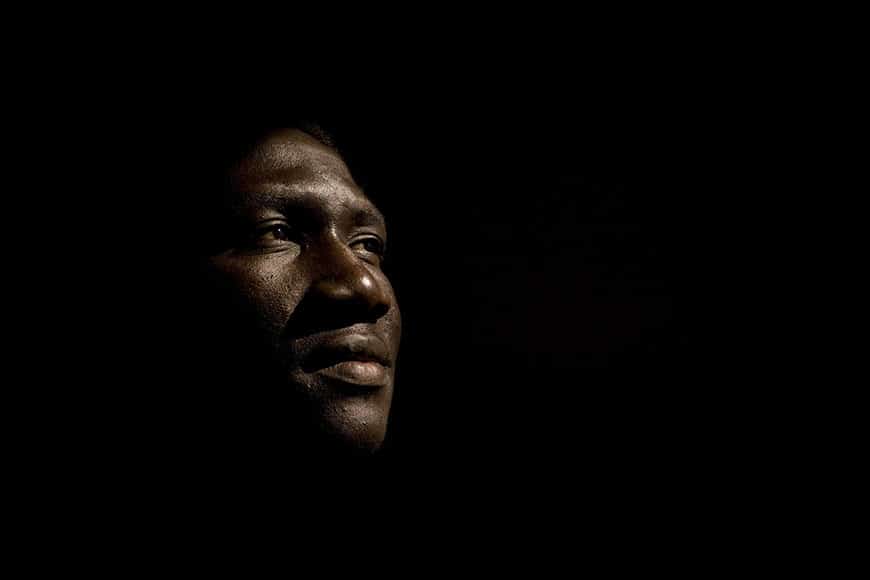
- 45-degrees
One of the most popular lighting techniques for portraits is positioning the light at a 45-degree angle from the subject.
This means that it should be a little bit to the side and above the head.
Credit: Sam Burriss
If the background is too close, you might see the shadow of your subject. To prevent this, you can separate the subject from the background or use a black background.
Depending on whether you use a modifier or not (see below), lighting from the front can yield dramatic results – the light from a hard light source such as a bare flash or the sun after midday will create strong highlights and shadows.
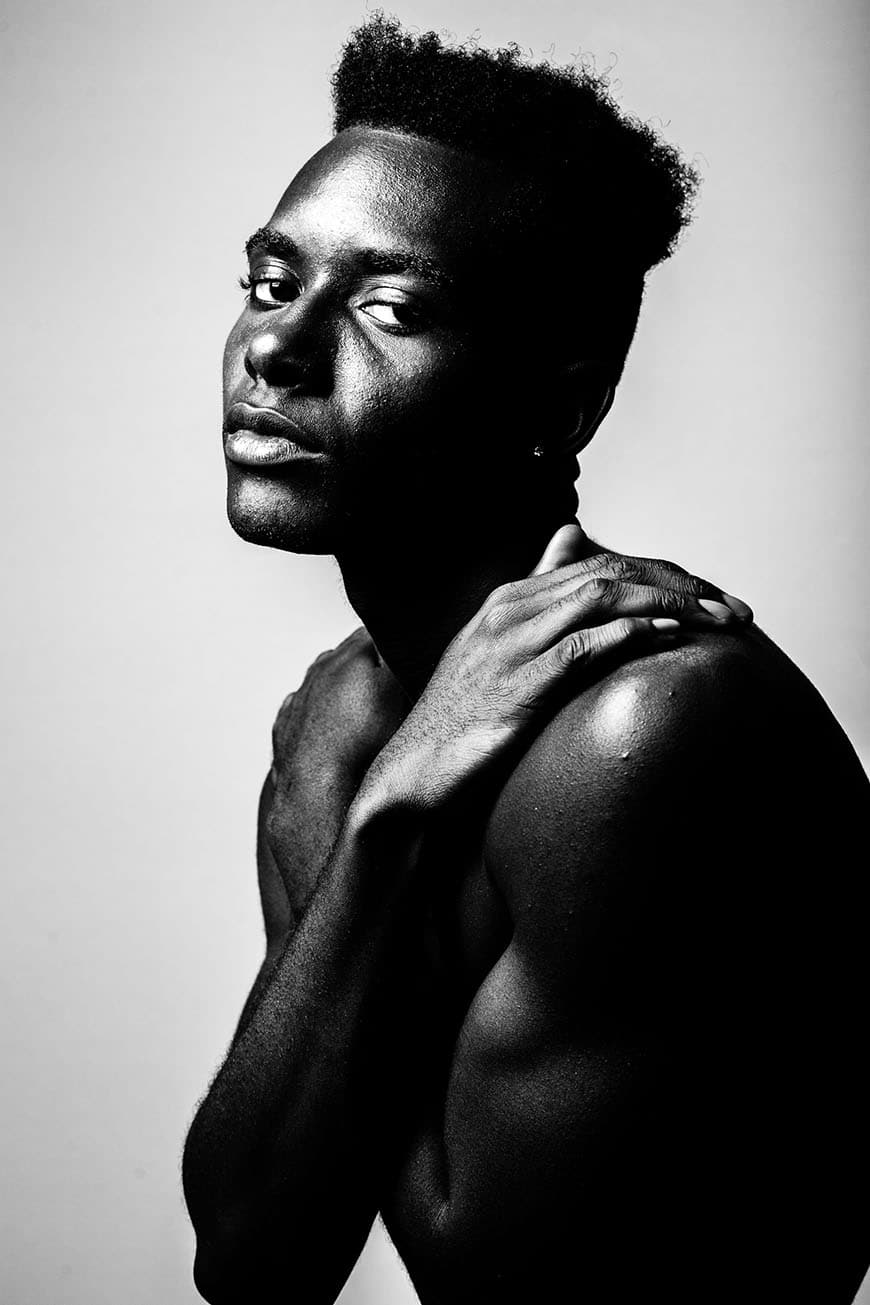
4. Choose the right light modifiers
Credit: Bianca Salgado
Just because most flashes and strobes create a hard light without using any modifier, it doesn't mean that you can't use them to shape and direct the light – you just need to know which modifiers to use.
- Honeycombs
This accessory fits in front of the flash or strobe to direct the light. As the name says, it's a honeycomb-shaped grid that restricts the beam of light. They come in different degrees – the smaller it is in degrees, the narrower the light will be.
- Snoot
This is a cylinder or a truncated cone that you can attach to any light source to focus the beam. In other words, it gives a smaller circle of light. It gives more defined edges than the honeycomb.
- Barn doors
When you put barn doors on your light, you can prevent the light from going in a certain direction. Each flap works as a flag that blocks the light. They are used to prevent spill.
- Flags
Flags work like the barn doors, except that they are totally independent. They are big sheets of opaque material that block the light.
They can also be used for negative fill. This means that you can put them on the opposite side of a lamp to absorb the light and prevent any of it from bouncing back onto the subject.
- Umbrella
It can be difficult to control the light from an umbrella, since it usually works to spread and diffuse the light evenly over a subject. However, used in conjunction with flags, an umbrella can still help create dramatic lighting.
Photographers can use an umbrella as a shoot-through or as a reflective devices – most of them allow you to do both by simply removing the cover.
- Softbox
As with the umbrella, light tends to ‘spill' more from a softbox, making it harder to control – this is where flags come in. You can learn more in our guide on why photographers use softboxes.
5. Expose for the highlights
Credit: Nicola Fioravanti
Since dramatic light is very contrasted, it will be difficult for your camera to get it right in auto mode.
This is because, by default, your camera will read the light of the whole scene and arrive at an average. As a result, you'll have underexposed highlights and overexposed shadows – killing the contrast you were creating.
To get the correct exposure in dramatic lighting, you must take control of your camera settings. Otherwise, you'll end up with a dull photo instead of a dramatic portrait.
I'll explain how you can get the correct exposure with manual and semi-automatic – this way, you can choose according to your skill level.
- The first thing you have to do is set your camera to spot metering mode. This tells it where to gather the information to measure the available light.
- In most cameras, the spot metering mode measures the area in the center. So, once you've set it, place the bright areas of your photo in the center of the frame (you'll worry about framing later).
- Then, press the shutter halfway down to see the metering.
- Start by setting it to ISO 100 – this will prevent any noise. Then, choose the right aperture according to the desired depth of field.
- Finally, adjust the shutter speed until you have the light meter in the center. Make sure it's not slow enough to cause any camera shake.
Once you have the right camera settings, you can reframe the scene and shoot your photo. When you do this, you'll have the highlights well exposed, and the rest will have deep shadows.
If you don't feel comfortable using your camera in full manual, you can use any semi-automatic modes and correct it with exposure compensation.
For example, if you set the camera to P mode, it will decide which aperture and shutter speed are best. Shoot the first image to see how it looks.
If you think it's not getting the right mood because the shadows aren't dark enough, apply -1 or -2 steps in exposure compensation.
Does exposure compensation affect Raw files? No, absolutely not, since exposure is set by the parameters you already selected (while shooting) for aperture, shutter speed and ISO.
6. Edit your portraits for dramatic lighting
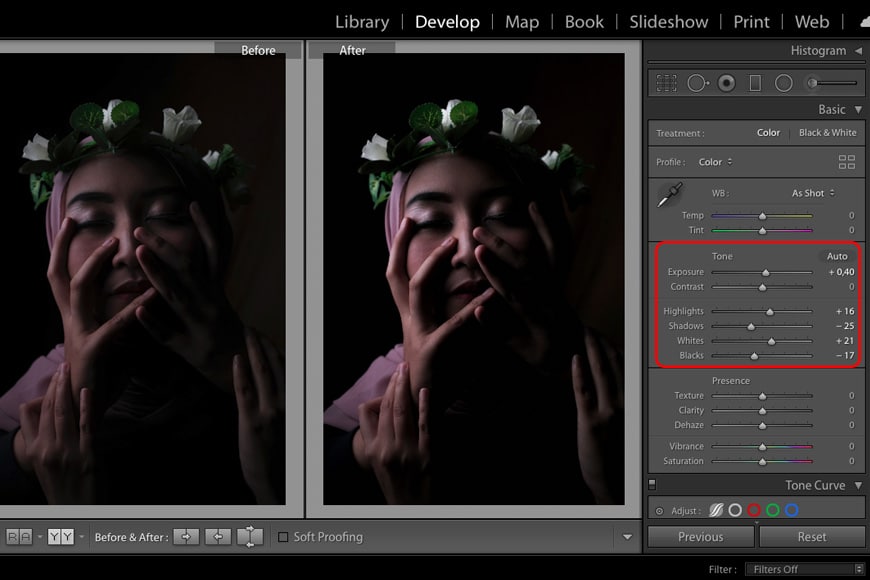
Credit: Alazik Maulana
Post-processing is an important part of dramatic lighting – it's like developing the film. You can do this in any photo editing software of your choice (I used Lightroom for demonstration purposes).
The idea is to get a contrasty image, so that's what you want to get from your post-processing. The easy way to do this is to use the Contrast slider and crank it up – that, however, won't give you much control.
Instead, try using individual sliders. Drag the highlights and the whites to the right to brighten the light areas of the picture.
Then, drag the shadows and the blacks to the left to darken them. The exact amount depends on each photo and on your personal style.
Another way to do it is by using the Tone Curve. This gives you the most control, but it's more difficult to use. If you are confident using this tool, though, go right ahead.
7. Create dramatic lighting in Photoshop
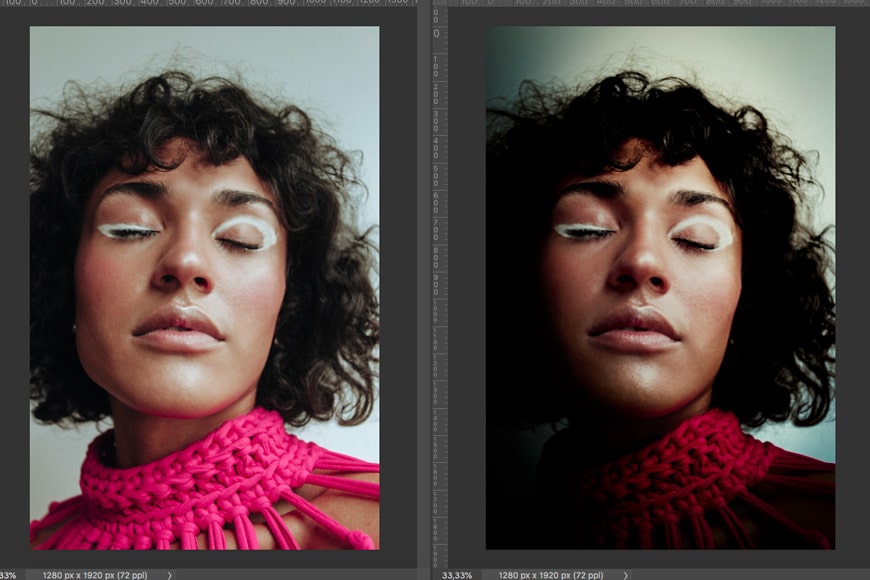
Credit: Tainá Bernard
If you shoot in RAW format – which I strongly recommend – you can start by doing some editing like decreasing exposure and increase the contrast by pushing the highlights and whites and darkening the shadows. You can use the Camera Raw filter if your image is in JPEG.
You can also add some vignette if you want to start darkening the borders – some photos will benefit from this, others won't, so just try it out and decide.
Accept the adjustments and open your image in Photoshop. Here, add a new layer and change the blending mode to Soft Light. In here, you can paint black anything that you want to darken and paint white anything that you want to lighten.
You can also do a gradient to simulate a directional light.
This is the main process – however, you can add as many retouches as you want to this base. For example, you can do some dodge and burn to increase the contrast in the face.
You can do this by adding a Curves Adjustment Layer to lighten the image. Then mask the layer and paint only the parts where you want to dodge.
After that, add a second Curves Adjustment Layer and darken the image to burn specific areas. You can also use the Blend If tool to apply the adjustments only in a certain tone range – see our guide to blending layers in Photoshop.
Finally, you can do some color toning if you want by adding a Color Lookup Adjustment Layer or doing some split toning.
Is dodge and burn necessary for all photos? Definitely not, but it can still help to add impact to your portrait images if used sparingly.
Final Words
I hope you liked these lighting techniques to add drama to your portraits. Creating dramatic light can really help to bring something special to an otherwise ordinary shot of your subject's face, so be sure to give it a go.
Let us know in the comments section if they were useful or if you have any questions – we'd love to hear from you!

Check out these 8 essential tools to help you succeed as a professional photographer.
Includes limited-time discounts.

Ana Mireles is a Mexican researcher that specializes in photography and communications for the arts and culture sector.
2 Comments
Leave a Comment
👋 WELCOME TO SHOTKIT!
🔥 Popular NOW:

Very informative article,like it.Thanx.
I’m glad you found it useful Suresh. Thanks for your comment.