


Backlighting in Photography: Best Techniques, Examples & Setups
Find out all about backlighting in photography in this must-read guide! Learn the tips and tricks involved to capture that perfect shot.
Shotkit may earn a commission on affiliate links. Learn more.
Backlighting is a common term in photography with an obvious enough general meaning – lighting coming from behind the main subject.
In practice, however, backlight in photography covers a number of different photographic techniques and can be used to describe a wide range of possible outcomes. This guide will define the term and explain how and why it is used.
Revolutionary lighting simulation software that streamlines studio photography and film making.
Use code SHOTKIT10 to save 10%.
We will provide examples, information, techniques and ideas that you can adopt for your own creative needs.
Along the way, we mention some photography equipment such as flash, diffusers and gels; but nothing complicated or expensive – and it's completely optional if you utilise these accessories or not.
Check out more advice on photography lighting here, or jump right into this guide.
What is Backlighting in Photography?
Usually, a photographer would choose to light a subject from the front (see examples) so we can, quite literally, see what's going on. Backlighting reverses this procedure by having the main light behind the subject.
For backlighting, there's no rule as to how you source the light. You can use natural light such as the sun or the moon, or it can be ambient – windows, doorways or lamps.
It can also be photographic – lights or flashes you have set up to produce and control the effect.
The subject you choose to backlight can be just about anything. For example, figures in a landscape with the sun going down behind them, a dancer in silhouette or a standard portrait with a subject or a group of people.
What Is Backlighting Used For?
Backlighting can bring impact and drama, creating a very graphic image, or it can be used to subtly accentuate the qualities of the subject.
Backlighting is very versatile. By lighting a subject from behind you can create separation from the background. You can also use it to create striking silhouettes that entwine the subject within a vivid sky.
Backlighting can even affect the tones and contrast in an image. Using natural light, you can create a backlit image with a dreamy pastel color behind your subject.
The examples provided below are mainly about portraiture and images of people but you can also use backlighting for other subjects such as still life and product photography.
Once you master backlighting, you'll find yourself utilising it time and again.
12 Tips for Great Backlighting
If you're keen to use backlighting, be it as a rim light behind the subject, or simply as a creative light source to elevate your photography, here are some helpful tips.
Before we begin – one important note about health and safety for yourself and your models/clients and protecting your eyesight.
Firstly, make sure you don't point the camera directly into the sun as you look through the viewfinder.
Secondly, make sure you or those you are working with don't look directly into spotlights or bright beams of light produced by flashes or any other source.
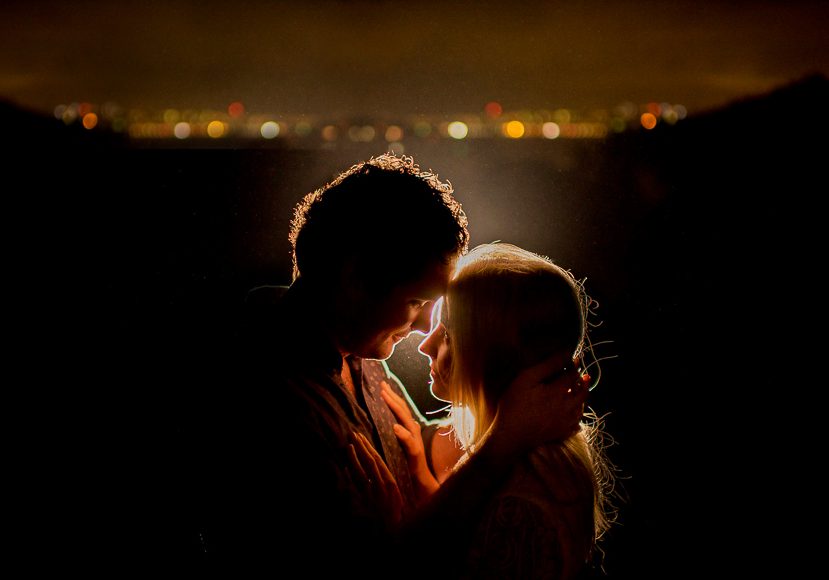
1. Choose the right positioning for your light source
Credit: Patrick Mateer
The positioning of your light source makes all the difference. If you’re shooting a couple, you can place the light directly behind them – you can experiment with the distance between the light and the couple.
Also, you can adjust the height if you’re using a flash or other artificial light source – in these instances experiment with the light being to one side or directly behind them.
You can even adjust the set-up so you can see the light source within the frame. There's no rule here – experiment!
2. Try different angles and positions
Credit: Patrick Mateer
Moving the camera position will, of course, change the way the image looks and alter the effect the background light gives. So, move your feet!
See how a subtle adjustment can instantly change the profiles of the couple and with it the atmosphere of an image.
3. Create a stunning starburst effect using a high aperture
Credit: Patrick Mateer
Your choice of aperture when using backlight in photography dramatically alters the image and its feel. By stopping down, you will not only create a harsher light with higher contrast, but you can turn your source of light into a ‘starburst’ if you can see it within the frame.
This starburst effect can be achieved with either a natural light like sun rays or by using a flash.
Simply set your aperture to f/16 and position yourself so you can see the light source clearly in your image. Warning! Don’t look directly through the lens/viewfinder into the sun with the naked eye!
You’ll find that the higher the F-number, the more pronounced the starburst effect will be. Also, you can use a lens hood to reduce lens flare.
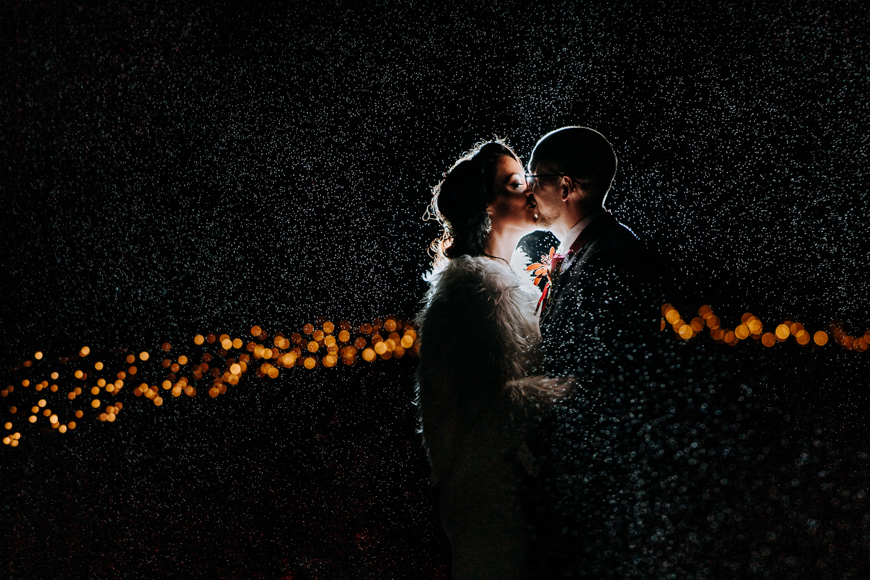
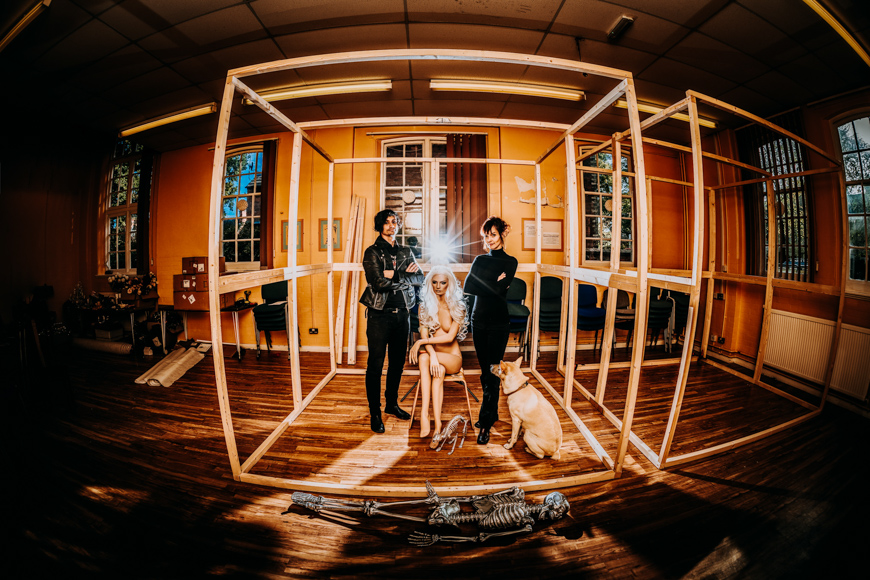
4. Use flash to rim light a portrait
In portraiture, if you place your light source directly behind your subject, then you can create a highly effective rim light effect. The technique creates a slither of light all around the contour of the subject – it's a stunning effect, which is quite simple to achieve.
All you need is one flash placed behind the subject. Set the camera with a low ISO (such as 100) and use a high shutter speed (anything above 250, but do experiment) and high aperture (try f/8 or above).
These settings will ‘kill’ the ambient light and leave only the subject and ‘rim light’. Rim lighting is very versatile. It also works well with objects with fine edges such as glass bottles or fibres and fabrics.
5. Coloured gels can add a different dimension
‘Gels’ are pieces of translucent plastic tinted in a range of colours that can be used with photographic/video lights or flashes – check out our MagMod gels review for some good ones.
By changing the colour of your light, you can add a very different dimension to your backlit image.
You can alter the mood – add a warm glow or ice-cold blues. So, try things out! A red gel will often create a dramatic and brooding image.
Pairings of colors such as blues and greens, yellows and oranges will give heightened but harmonious results while pairs of ‘complementary colours’ – red and cyan or blue and yellow – can create arresting, even unsettling, images.
Add a diffuser in front of a gel and it will produce a softer, less strident tone.
6. Fill flash can balance out the lighting
Credit: Patrick Mateer
Backlighting isn’t always something to celebrate! Sometimes backlighting can be problematic.
A classic example is a large window or doorway with your subject directly in front of it. It's easy enough to create a striking silhouette – however, this isn’t always what you want to achieve.
By using a flash as a ‘fill light' – either on or off-camera – you can lessen the effect of the backlit window or door by overpowering it with artificial light.
This means your image will then include more detail on the subject. To create a more natural look using a flash, angle the flash up and bounce it off a ceiling, if you can.
If you’re outside – there will probably be nothing to bounce the flash off. So in this case, use a diffuser on your flash to avoid harsh light on your subject’s face.
7. Pick the right time of day for your images
Credit: Patrick Mateer
If you’re experimenting with natural light for your backlit image, consider the time of day you are taking your photographs. Better still, try them all!
At midday, sunlight is particularly harsh. As the sun goes down, the quality of light changes – it softens and becomes more golden.
It really is recommended to try shooting at these different times and consider the effect this has on your backlight photography.
Whenever you choose to shoot, be prepared to work quickly. It's not uncommon to set up a striking pose against a nicely lit window and as you begin to shoot a passing cloud intervenes and the moment is lost.
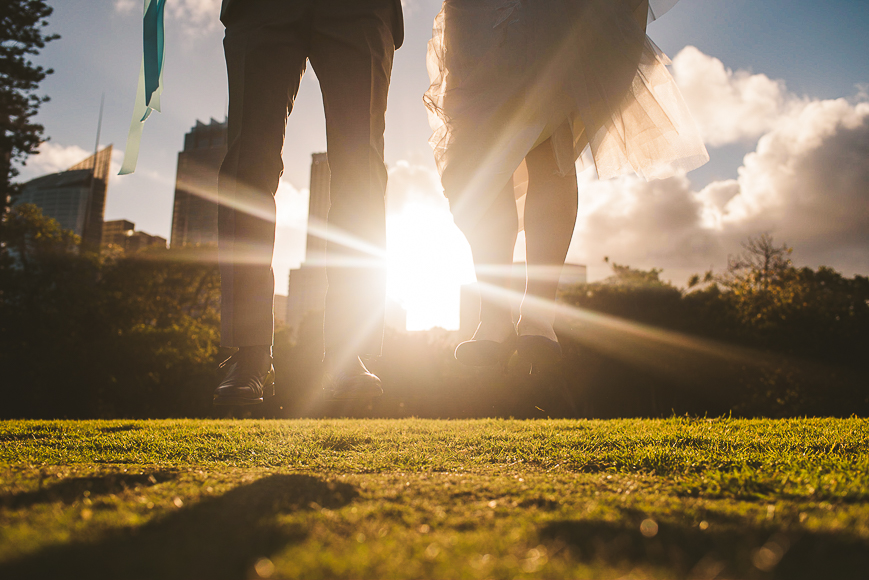
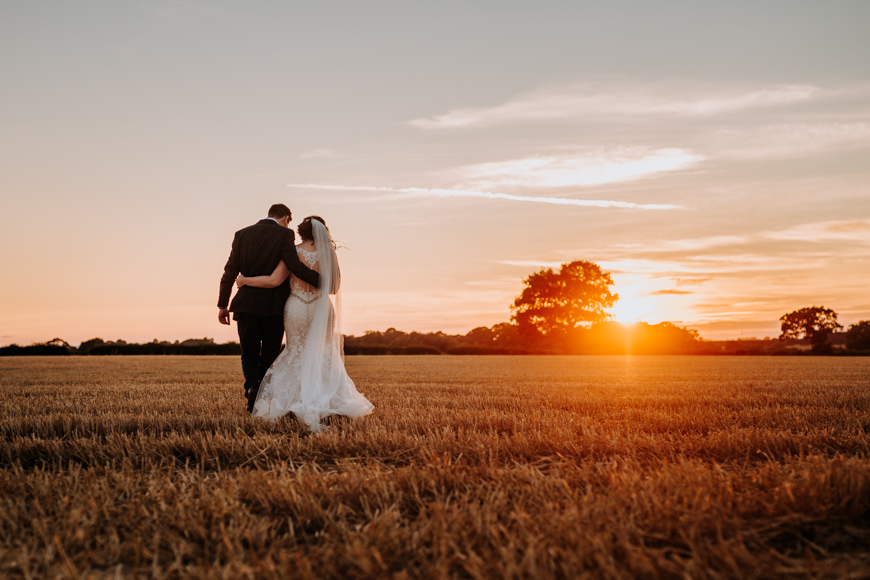
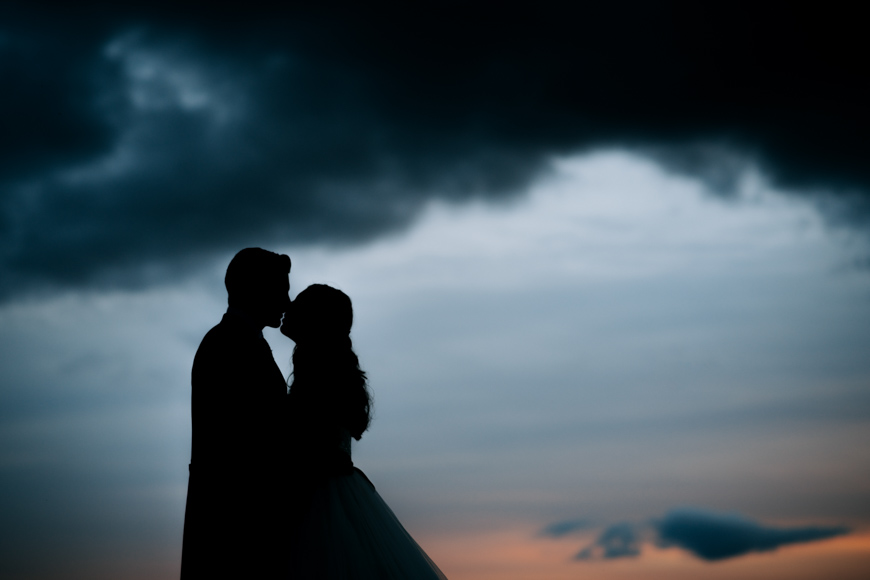
8. Use the sun to create a stunning backlit sunset portrait
Credit: Patrick Mateer
The ‘golden hour’ – that hour or so before the sun really starts to set – is much talked about within photography circles. If you know any wedding photographers, you will be aware they are always chasing that elusive sunset.
Photographers love sunsets for the ‘quality of light’ they give. The range of colours – reds, oranges, yellows and tints of green as the sky fades to blue, purple and then black – can give stunning results.
However, the sun and clouds move quickly, therefore there’s no time to lose – there’s no rewind.
So, the next time you're photographing a person or a couple at sunset, position them so that the sun is behind them. The results can be quite beautiful as this image shows.
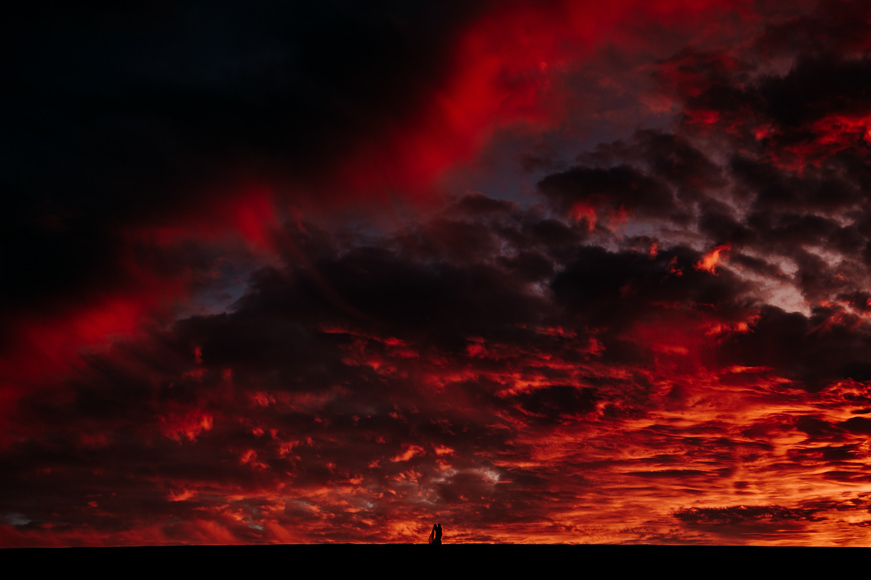
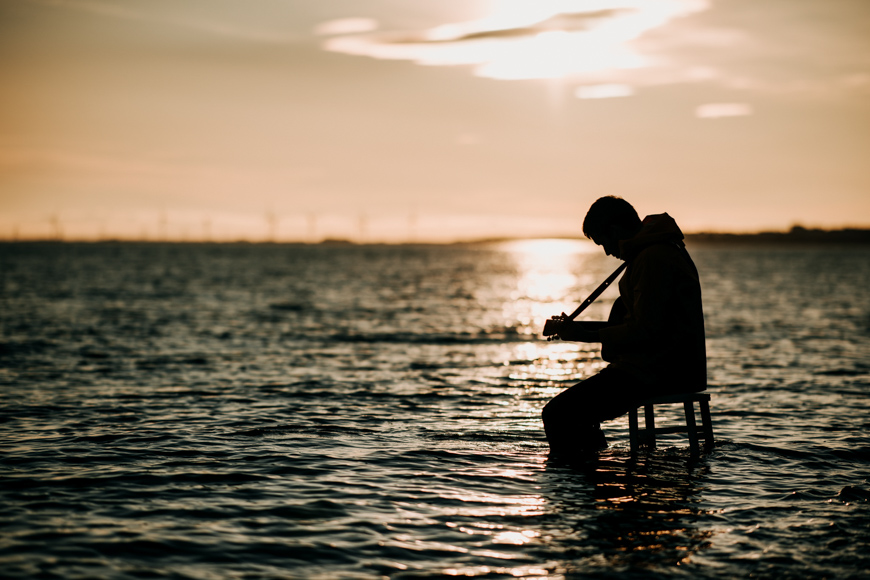
9. Use backlighting to create stunning silhouettes
Credit: Patrick Mateer
You can use artificial or natural backlighting to create silhouettes. Stop down the aperture. Check the ‘dynamic range’. You can choose to have a high contrast silhouette or one that still retains a little detail.
Backlighting can be challenging as we’ve already discussed. But a silhouette can sometimes make the absolute best of a backlit situation and create an incredibly beautiful image.
By forming silhouettes, backlighting can quite literally take perspective out of the picture and create a more graphic image that explores the play between positive and negative space.
The positive shape being the figures and the negative space is the shape of the background you see. Moving the light, the camera or the figure(s) just a little can alter the negative shapes a great deal.
10. Shoot shallow aperture to isolate your subject from the background…
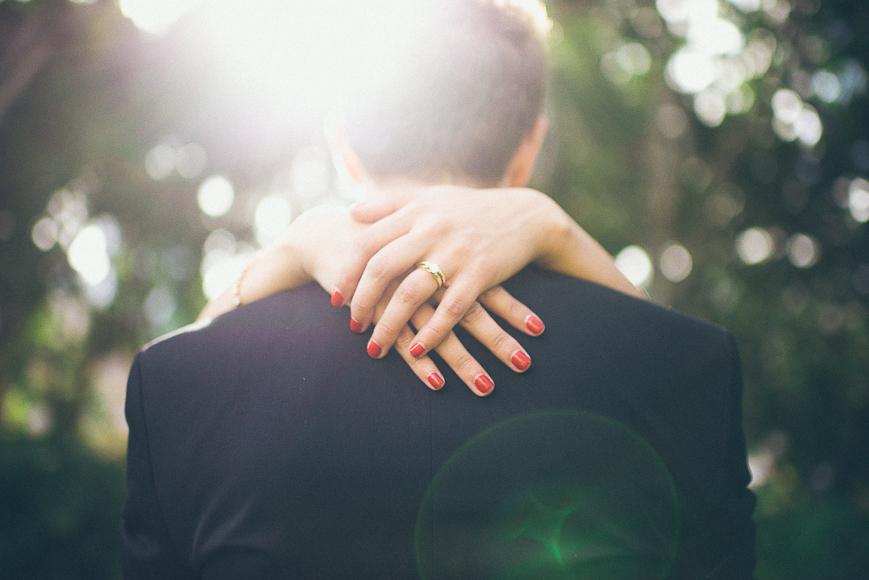
Coupling backlighting with a shallow aperture – such as f/1.4 to 1.8 – can bring really beautiful results. The background will soften or blur, and the viewer’s eye will be drawn to the subject.
When choosing your location, make sure you look for some trees or something similar for the sun to filter through behind your subject, while you have open space behind you, so your subject has some natural light on their face as well as the backlighting.
Putting all this together can create a really ‘dreamy’ looking image with pastel colours, quite different from the stark silhouettes usually associated with backlighting.
You'll also get less sun flare if you shoot shallow.
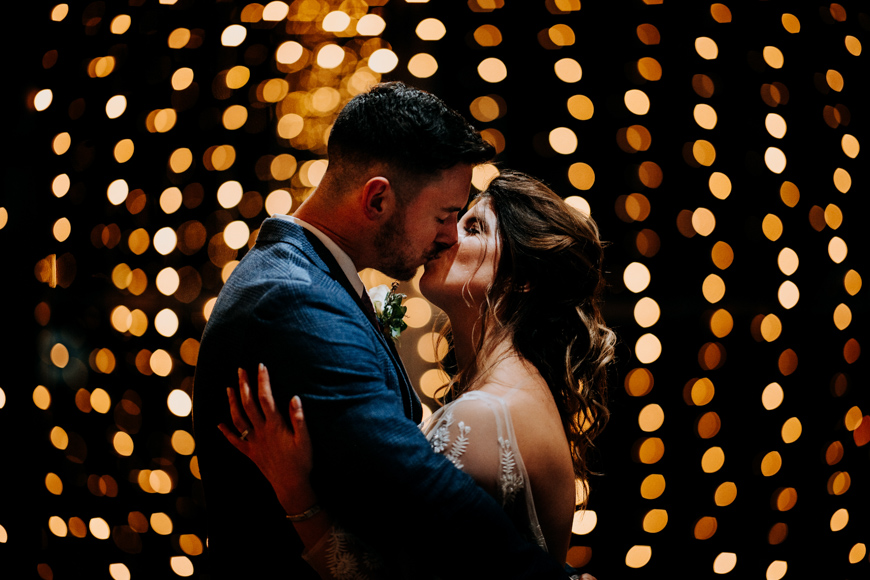
11. …or stop down to draw the eye to the whole scene
Of course, you don’t need to shoot a shallow aperture. If you want to tell a different story and show the details of hair or clothing plus the background and surroundings, stop down.
The effect will be less dreamy – but no less effective. You will just be creating a very different kind of backlit image, like the one above.
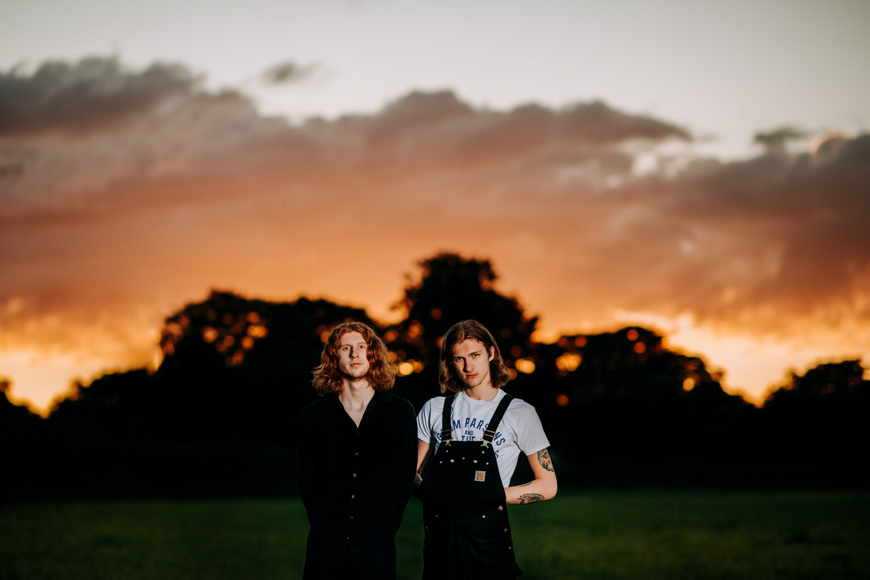
12. Use backlighting when there is no shade available
This is a simple tip that many people never consider. On a sunny day in the park, you’ll see so many people taking snapshots of squinting friends and family with harsh unattractive light on their faces.
So, if you find yourself in the open with bright sun and you're taking images of people with no flash or artificial light, utilising backlighting is the way to go.
By shooting backlit, you instantly remove harsh shadows on people’s faces – not to mention you won't have squinting subjects.
You'll end up with slightly underexposed subjects, but don’t worry, you'll be able to lift the shadows in post-processing.
How Do You Expose a Backlit Subject?
Credit: Patrick Mateer
There are several ways to expose a subject with backlight photography. First of all, it’s important to consider there is no ‘correct’ exposure. It’s subjective!
Some people may see a backlit scene as an opportunity for a silhouette – others may want to ensure the subject is still clearly visible.
So it’s vital that we understand the different methods that can be used and the effects that can be created. For example, you can create your backlit image fully ‘in camera’ (using manual mode, spot meter – perhaps with the addition of a reflector).
Or, you can expose for the background and correct the image in post-production. We explore these in detail below.
Method 1: Use Spot Metering
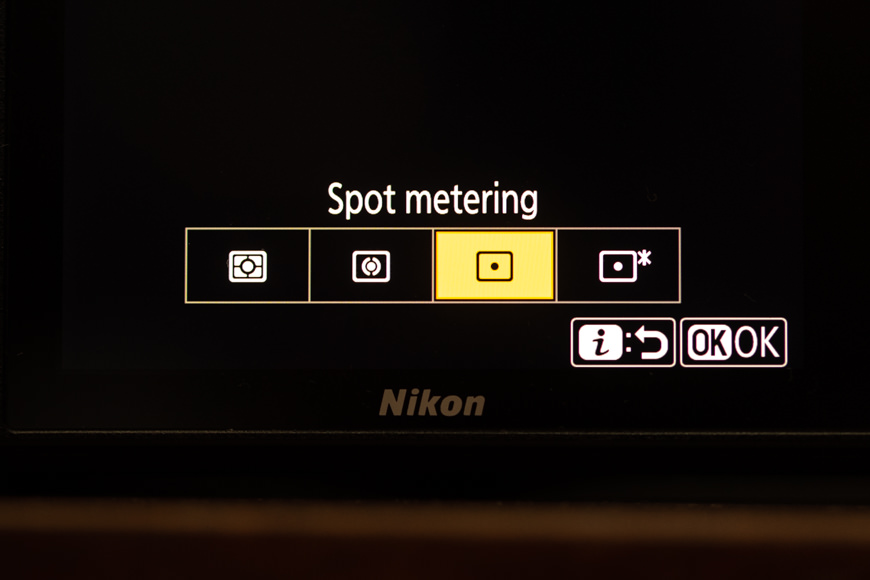
Normally, you'll be using matrix/evaluative metering on your camera, which takes an average meter reading and suggests a best fit exposure value for the scene as a whole.
However, if you set your camera’s metering to spot metering, you will be taking a reading for only your subject (or wherever you place your focus point).
Spot metering is crucial when using backlighting if you want to create an image ‘in camera’ with good exposure for the subject.
Select spot metering (as in the image above), point your focus at the subject and your camera will take a meter reading for that subject.
If you’re in manual mode, adjust your ISO, shutter and aperture until your meter is not showing over or underexposed for your subject.
This method may, of course, lead to a blown-out background due to the backlighting – however, it will ensure you can see your subject clearly in terms of exposure. Sometimes, this is what matters most.
Method 2: Expose for the background and adjust in the edit
If you’re shooting a person or couple, the alternative to spot metering for the subject is to underexpose your subject and expose for the background. For example, if you’re shooting a couple with a backlit sky, expose for the sky.
The couple may then look too dark in the image – but don’t worry! You don’t necessarily have to go with a silhouette.
You can use Lightroom or Photoshop to lift the shadows on them to bring a more even look to your image in terms of lighting. This way you can make the most of that beautiful backlighting while still retaining detail in the couple.
It is strongly recommended that you shoot in RAW file format for this method to be successful. Jpeg won’t give you as much latitude to recover the shadows or highlights.
Method 3: Exposure bracketing can be used in fast-moving situations
Bracketing was a method used all the time back in the days of film. Digital cameras mean you can quickly see your results so there is less need to take multiple different exposures.
But bracketing still has its uses now. If you’re shooting a fast-moving backlit situation, you may not have time to carefully choose the correct exposure. And small adjustments make such a big difference.
So use bracketing to take different exposures of the same moment. Then in the edit, you can select the exposure that matches what you wanted to create.
Backlighting in Photography FAQs
What is backlighting in photography?
Backlighting is lighting that comes from behind the main subject. This light may be natural or artificial, accidental or intended.
What is backlighting used for?
Backlighting can be used for creative or dramatic effect. For example, natural light can create a dreamy backlit image, while a harder backlight can create a striking silhouette.
How do you expose for backlit subjects?
While ‘correct' exposure depends on your desired outcome, one key tip is to use spot metering. This will ensure your exposure reading is for the subject only and not the background. Another option is to expose for the background and bring out the subject's details in post-production using software like Lightroom or Photoshop.
Final Words
There are so many ways to create a backlit image. So, pick up your camera and flashes or head outside at sunset and start creating to perfect your backlighting techniques!
Whether you go for a specific technique like ‘rim lighting', or a photographic trope like ‘figures in the sunset', or simply add your new awareness of ‘backlighting' as another tool in your bag of ‘photo-tricks’, you will have much to experiment with and a whole new world of imagery to enjoy.
If you have any questions or would like to share your own backlighting tips, please don’t hesitate to leave a comment below.

Check out these 8 essential tools to help you succeed as a professional photographer.
Includes limited-time discounts.
Patrick Mateer is an award-winning photographer who lives in Yorkshire, England with his wife (wedding photographer Hollie Mateer) and two children.
1 Comment
Leave a Comment
👋 WELCOME TO SHOTKIT!
🔥 Popular NOW:

Great to see this published, thanks Shotkit – if anyone has any questions at all, please leave them as a comment and I’ll get back to you ASAP.