


How To Photograph Portraits at Night (With or Without Flash)
Whether you use flash or ambient light, night portrait photography is an essential skill to learn. Here's what you need to know for great pictures after dark.
Learn | By Jeff Collier
Shotkit may earn a commission on affiliate links. Learn more.
You’re about to learn everything you need to know about night portrait photography in this expert guide.
I’ll show you the best camera settings to use for night portraits (and the exact settings to use for night flash photography).
I also run through how to take great photos at night without a flash by making the most of natural light.
Plus, you’ll find a selection of example night portraits for your inspiration to give you some ideas for your next after-dark photoshoot.
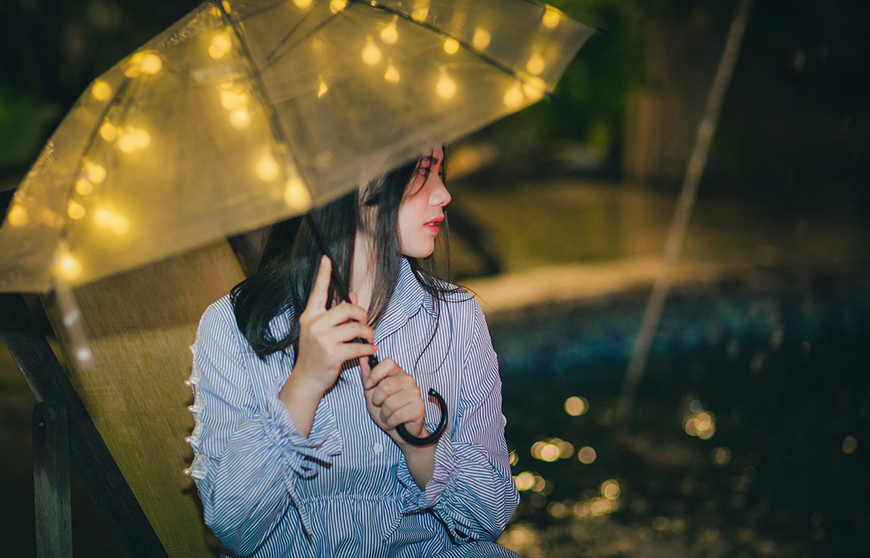
Stunning night portrait photography is easy when you know how.
(You may want to brush up on your skills first by reading our guide to flash photography.)
Now, let’s dive into the tips!
Should I Use Flash for Night Photography?
The first thing you should consider is whether you even need to use a flash – your nighttime portraits might be better without one.
There are a few reasons why using your flash might not be the best idea at night.
The light produced by your flash is going to fall off about 10 to 15 feet (3-4 meters) from your camera. This means your flash isn’t really doing anything when shooting large events or nighttime landscapes.
I’ve also seen a lot of events that ban using flash photography. This is common for concerts as bands hate being distracted by a bright flash of light.
Your flash is going to be at its most useful when accenting existing light sources. The most impactful aspects of your low-light photography are your exposure settings.
- Read more: 9 Tips for Better Night Photography
How Do You Use Flash for Night Portraits? (Settings & Techniques)
Canon EOS 5D Mark III – 85mm – f/1.8 – 1/160s – ISO 640 ↯ – Credit: Pixabay
1. Dial in the best camera settings for night portraits with flash
The settings that you choose for your night portraits are going to make or break your shots.
Beginner photographers should use automatic mode and focus on their composition rather than adjusting settings.
As you build up experience, aperture priority mode allows you to adjust the aperture while the camera handles ISO and shutter settings.
Full manual mode allows you to take total control of your camera’s night photography settings.
You should start with a shutter speed that matches your camera’s shutter synchronization speed. You can change to a slow shutter speed to get the right exposure for the image you want.
ISO is also one of the most important settings for night time photography. A high ISO can compensate for low light levels, but it will create a speckled and grainy look.
2. Dial in the best flash settings for night portraits
I talked about the settings on your camera, but there are also some settings on the flash itself that you should look at the next time you take a night portrait.
The first thing that you need to check is the flash synchronization speed. This is the fastest shutter speed that your camera can accommodate and still catch the light from the flash.
If you pick a shutter speed that’s too fast, the actual blades from the shutter will get into your shot and block all the light from reaching the censor.
You can also adjust the brightness of your flash. A high-end flash might even let you adjust the color or temperature of the light.
3. Use an off-camera flash
An off-camera flash (as opposed to an on-camera flash) is going to be one of the best purchases you make for low-light photography.
This is a flash that does not need to be on the hot shoe mount of your camera to operate. It communicates wirelessly with your camera to synchronize your shots.
You can position an off-camera flash with much more creative control. An off-camera flash lets you light your subject from behind, create a hair light, or supplement ambient lighting with much greater control.
4. Bounce your flash
Knowing how to bounce your flash is one of the most important things I’ve learned for shooting a night portrait.
You bounce your flash by aiming the light of your flash away from your subject and onto a large nearby surface like a ceiling or wall.
This allows the light to spread out and become softer. Soft light is much more flattering for a night portrait than harsh, head-on flashes.
5. What shutter speed should I use with flash?
Your camera is going to have a shutter synchronization speed that is the fastest shutter speed you can use while still being able to catch light from a flash. This is typically around 1/250 or 1/200.
You never want to go faster than your maximum shutter synchronization speed because that will block out the light from your flash and your shots will be mostly complete darkness.
You can always experiment with a slow shutter speed, but using a flash with slow shutter speeds gets us into the territory of light painting.
6. Does ISO matter with flash
ISO not only matters with flash, it matters always.
Lower ISO settings are always going to have less grain and generate cleaner images.
If you’re trying to take a portrait with high fidelity, you want to keep your ISO as low as possible. Using a flash will help you keep that ISO number down.
How Do You Take Pictures At Night Without Flash? (Settings & Techniques)
Canon EOS 5D Mark III – 35mm – f/1.4 – 1/50s – ISO 640 Credit: Pixabay
1. Dial in the best camera settings for night portraits without flash
Shooting night portrait photography is going to mean mastering the exposure triangle. This is your ISO, your shutter speed, and your aperture.
You’re going to need a higher ISO when shooting without a flash. To get the right ISO for your shot, you can meter the light using aperture priority mode or AV priority mode.
An ISO of around 1000 is a good place to start for night portrait photography.
You’re going to need a slower shutter to take night portraits, but this can cause camera shake. A tripod can help you stabilize your shots even with very slow shutter speeds.
Aperture changes your depth of field and the light your lens lets in.
Apertures with a lower number, like f/2.4, let in more light than higher apertures like f/16.
- Read more: How do you use the exposure triangle?
2. Use a tripod for long exposures
It takes a lot of confidence to walk around with a camera tripod, but it’s the single most important accessory you can get for portrait photography at night.
Without a tripod, your portraits will experience a lot of camera shake which can make your subjects look blurry.
Camera shake can pop up even at very fast shutter speeds. Always use a tripod when doing portrait photography at night without flash.
You can also take advantage of naturally occurring tripods. This could be the back of a bench, a large rock, or even a friend’s shoulder.
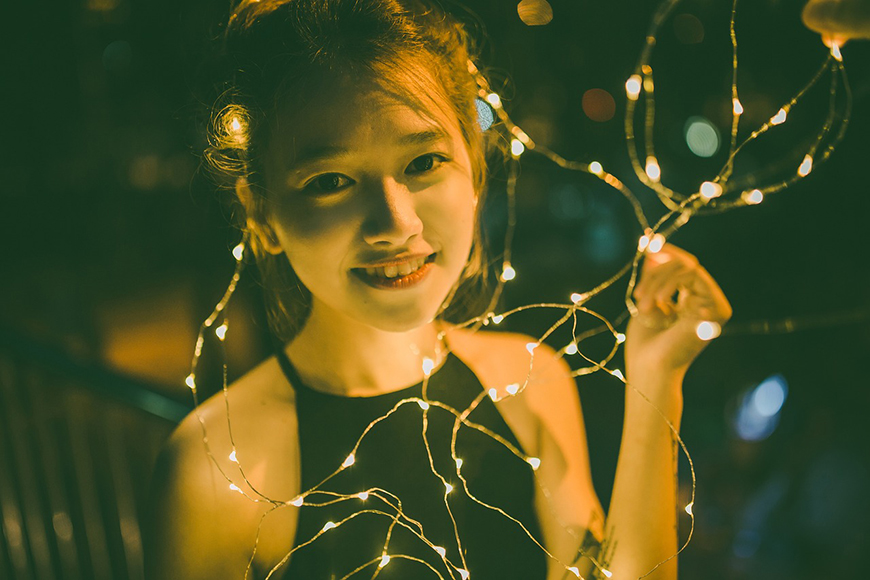
3. Take advantage of natural light
There are many ambient light sources that you can take advantage of when taking night time portraits.
City lights, street lights, or neon lights create artificial light you can use for an eye-catching final image.
4. Don’t be afraid of using a higher ISO
We’ve mentioned that you should strive to keep your ISO down to preserve image quality, but you really don’t need to be afraid of trying out a higher ISO.
Digital photography has come a long way since it started and that means that today’s DSLR and mirrorless cameras can easily handle higher ISO settings thanks to their higher megapixel count.
You can also take control of the noise and grain caused by a high ISO in post-production. Even basic photo editing software should have automated features for lowering the noise caused by high ISO.
5. What ISO is best for night shots?
A great starting ISO for night time portrait photography is going to be around ISO 1000.
If that’s causing too much noise, you can lower the ISO. You can also crank the ISO up if your shots are still coming out too dark.
There’s no one ISO setting that’s right for all nighttime photography. Play around with high and low ISO settings to find a setting that’s giving you the aesthetics you’re looking for.
6. What aperture is best for night photography?
I always start my night portraiture by shooting with a middle aperture like f/11.
A faster aperture, like f/2.8 on a prime lens, lets in more light but sacrifices depth of field. A slower aperture like f/8 and above will let in less light, but preserve a greater depth of field.
You’ll need to balance your depth of field with the amount of light you need when taking photos that will catch the viewer’s eye.
FAQs on Night Portrait Photography
What shutter speed should I use with flash?
The right shutter speed for flash photography will depend on the max settings for your flash and camera.
Shutter speeds of around 1/250 might be too fast unless your camera has high-speed sync (HSS). You should also check the shutter sync rate to get the right flash for your night time photography.
Does ISO matter with flash?
ISO always matters, even when using a flash. The higher your ISO goes, the more grain or noise your images will have. Flash photography gives you the advantage of getting to use lower ISO settings even in dimly lit conditions.
What ISO is best for night shots?
ISO 3200 is a great place to start if you’re shooting at night in very dark conditions. If your images are still too underexposed, you can always increase your ISO. If your images have too much grain, you can lower the ISO.
What aperture is best for night photography?
You can use any aperture for night photography as long as you adjust your ISO and shutter speed accordingly. Wide open apertures like f/2.8 let in the most light which makes them ideal for keeping ISO and shutter speed down at night.
What is Night Portrait Mode?
iOS has an amazing feature for nighttime portraits called night portrait mode.
This feature from Apple’s smartphones allows you to take a beautiful night portrait that keeps the subject and background lit and in focus.
Some Android phones also come with their own night portrait photography setting.
How do photographers focus at night?
I’ve got a few clever tricks that can help you focus your next night portrait.
The easiest way to focus at night is simply to set your lens to its infinity focus. This is the setting on your lens that keeps everything in frame equally focused.
You can also switch to manual focus to take full control over your night portrait photography.
If you’re setting up a specific night portrait, you can pre-focus during the day and save that same focus for when you return at night to take your shot.
How do you take a self-portrait at night?
The easiest way I know for taking a great night self-portrait is to simply use the night portrait mode on your smartphone with the front-facing camera.
You can also use all the tips above, a sturdy tripod, and a remote shutter release to take stunning night self-portraits with a DSLR or mirrorless camera.
Final Words
Capturing breathtaking night portrait photography is all about mastering the exposure triangle. Your ISO, shutter speed, and aperture are all going to help you take a great picture whether you’re using a flash or not.
Got any questions or tips that we missed? Let us know in the comments if you have any favorite night portrait photography advice.

Check out these 8 essential tools to help you succeed as a professional photographer.
Includes limited-time discounts.

Jeff Collier is an experienced film photographer who enjoys experimenting with modern digital photography equipment, software and apps. He’s also an ex-world champion triathlete and avid cyclist, clocking hundreds of km each week in the beautiful Tweed Valley of northern NSW, Australia.

👋 WELCOME TO SHOTKIT!
🔥 Popular NOW:
