


9 Night Photography Tips (Settings Techniques & Ideas)
Learn the secrets to incredible night photography in this in-depth guide, including all the settings, techniques and ideas for you to take photos after dark.
Learn | Photography Guides | By Ana Mireles
Shotkit may earn a commission on affiliate links. Learn more.
Night photography is colorful and amazing – whether you want to capture a stunning landscape with the moon and the stars or some fast-paced city nightlife. It does come with some challenges, though.
If you're wondering: how do you take good night photos? You're in the right place!
In this article, you'll find tips and techniques to capture different types of night photography – and a lot of sample images so you can get inspired.
(We've also included some handy tips if you're trying to capture some photos at night using just your smartphone.)
It doesn't matter what type of subject you want to capture, your level of expertise or what camera equipment you own… you can still learn to take amazing night shots!
So prepare your camera and flashlight, and let's head outdoors.
What Gear Do You Need for Night Photography?

Camera gear of Nicole Chan optimized for low light situations.
You can do night photography with any camera – I'll even include a section at the end of the article to explain how to do it with an iPhone.
That said, some camera equipment will definitely help you to get your images to the next level.
- Camera
A DSLR or a mirrorless camera is best for night photography, especially if the sensor is ‘full-frame'. This is because the sensor and the sensor cells are bigger, so they capture more light. Some of the most popular full frame models include:
– Sony A7S III
– Canon 5D Mark IV
You can also read more about the best full frame cameras here.
- Lens
The focal length depends on the subject. To shoot a landscape, you'll need a wide-angle lens, while capturing the moon requires a telephoto. However, for low light photography, you need to have wide apertures.
Some of the best lenses for night photography are:
– Sony 18mm f/2.8
– Rokinon 24mm f/1.4
– Canon 400mm f/2.8
- Tripod
Since you're working with slow shutter speeds, you'll need to keep your camera very steady. That's when a sturdy tripod comes in. Depending on your needs and budget, you'll have different choices of size and materials. Here are a few recommendations:
– MEFoto Backpacker travel tripod
- Remote Shutter
When you're shooting long exposures, even pressing the shutter button can cause camera shake. To avoid this, you can use a remote shutter release or a shutter release cable.
Different models will have more functions – normally, this changes according to the price tag. If you're tight on a budget, don't worry – even the most basic one will do the job.
- Extras
There are a few extra items that will serve you well when you're out photographing at night. One of them is a flashlight or a headlight. This will allow you to move without tripping on your tripod, seeing which button is which on your camera (if you don't know them by heart), etc.
Another thing that comes in handy is an extra battery. When you do long exposures, the battery life runs out faster – especially if it's cold.
Best Camera Settings for Night Photography

Credit: Parakit Keng Eos
Night photography covers a wide variety of subjects – each one of them might need different photography techniques and camera settings.
This guide is intended for night landscape photography using manual mode. Look for locations far away from the big cities to avoid light pollution.
You'll find more information in the tips and techniques section of this article for other types of night photography shots.
- ISO
The ISO controls how sensitive to light is the sensor of the camera. A low ISO value (normally ISO 100 is the lowest) is not very sensitive, but it prevents digital noise. When you start to use a high ISO, you'll capture more light, but the image will have more and more noise as the values go up.
Knowing this, you might be wondering what is the best ISO for night photography? Easy – the lowest ISO that you can use is the best one!
I know it sounds like a vague response, but it's true. For example, if you're shooting handheld, you'll have to raise the ISO to avoid camera shake. If instead, you're doing long exposure landscape photography, you can afford to keep a low ISO.
Also, different cameras perform differently with high ISO values. Crop-sensor cameras, for example, start delivering noisy images from ISO 800. In comparison, a picture made with a full-frame camera might still be acceptable at ISO 3200.
Take some test shots with your camera and determine which one is the maximum acceptable ISO value that you can use.
- Aperture
As you know, every camera settings cheat sheet is just a starting point. You can start adjusting from there to fit your specific situation.
Having said that, the best aperture to start when you want to shoot the stars is f/2.8 or the widest f/stop that your lens allows.
This is the opposite of what you would do for a regular landscape picture. However, in this case, there won't be a lot of light.
To keep the ISO low to avoid noise and the shutter speed fast enough to avoid star trails, you need more light coming in through the lens – that's why you need a wide aperture.
- Shutter Speed
In the previous point, I mentioned how the shutter speed impacts the appearance of the stars in your photos.
There is a formula to calculate the shutter speed necessary to freeze the stars and avoid star trails. This formula is known as the 500 rule in photography – you've also probably heard of the 300 rule or some other value.
Since it can be a bit confusing, let's talk about what is the 500 or 300 rule in photography. The basic formula states that you should divide 500 by the focal length that you're using.
So, if you're using a 24mm lens, you should calculate 500/24=20.8. Therefore, using a shutter speed faster than 21 seconds will freeze the stars' motion – while anything slower than 21 one seconds would create star trails.
This 500 rule applies to full-frame cameras. If you own a cropped sensor, then you should use the 300 rule. This means that you use 300 on the formula instead of 500. So, 300/24= 12.5 – because of the crop factor.
Alternatively, you can apply the crop factor to the focal length and then input that number in the 500 rule.
See also: How to photograph cityscapes at night
9 Fun Night Photography Techniques & Ideas
Photographing the night sky is beautiful for the nature-loving photographer, but there are plenty of night photography opportunities for people who like to shoot in the city too.
Here are some ideas for both nature and urban photographers.
1. Experiment with Bulb Mode

Credit: Sonny Mauricio
Bulb mode is a feature where you can control the shutter to stay open for long periods of time. Most cameras have a shutter speed limit of 30 seconds. Anything longer than that and you need to use Bulb Mode.
By using your camera's Bulb mode, you can create alluirng motion blur photography, such as capturing the light trail of a moving car. You can also use it for astrophotography to blur the moment of the stars.
You can also shoot a night scene and make it look like it was taken during the day – check out the work of Darren Almond for some amazing examples of this.
Darren exposes his photographs to the moonlight for around 15 minutes. The collection was published in a book called Full Moon.
2. Try Light Painting
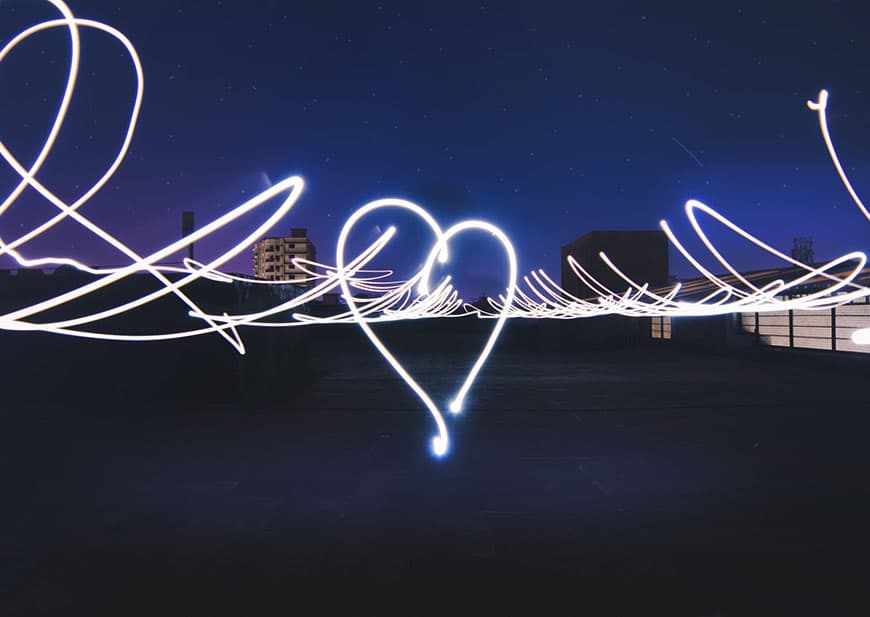
Credit: Akshar Dave
Light painting is a technique where you leave the shutter speed open for a long time, maybe even in bulb mode, while you draw with a lightstick, flashlight or any number of other light painting tools.
The rest of the camera settings will depend on how fast or slow is the shutter speed.
If your ‘drawing' is going to be created on varying levels (i.e. varying distances from the camera), you'll need to widen the depth of field. To do that, you should use an aperture of f/8 or f/11. Then, set the ISO accordingly.
3. Try fireworks photography
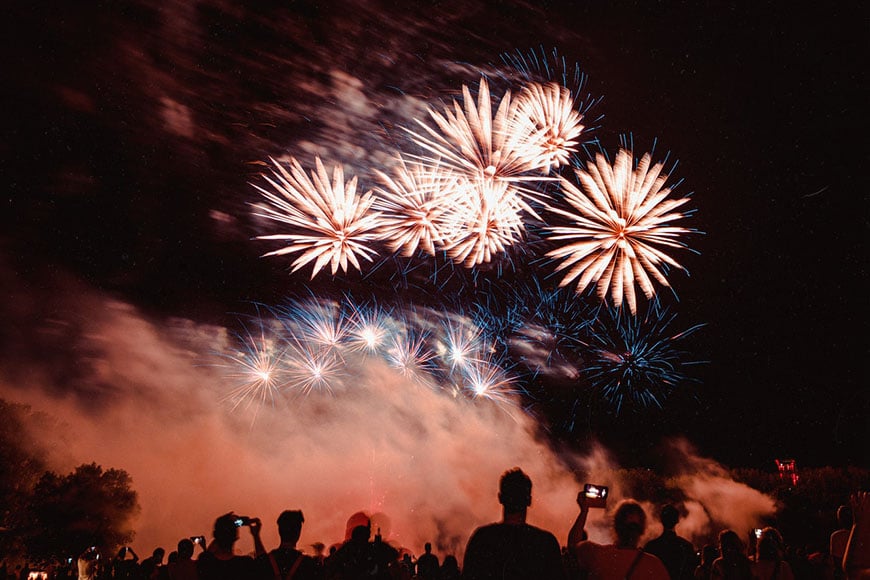
Credit: Jonas von Werne
Fireworks are one of the most eye-catching subjects you can choose when shooting at night.
It's best if you set up before the fireworks start launching in order to frame and focus. You can use the buildings on the skyline or any still point in the scene to set the focus – then, double-check that everything is fine after taking the first few shots.
You can set the ISO low – 200 or 400 should be fine. Then, the aperture should consider some depth of field. Try using f/8 – the fireworks are very bright, so this should be fine. Finally, set the shutter speed to bulb mode and fire away.
Keep in mind that every situation is different – these camera settings are just a starting point. Make a few test shots when the first fireworks explode and adjust from there.
4. Look for reflections

Credit: James Wheeler / Maciej Pienczewski
Reflections are a great subject for night photography because they offer a world of opportunities. The city lights reflected on a pond or the city's skyline reflected on a river are just a couple of suggestions.
You don't need any special gear to do this type of photography – you just need to take care of the exposure settings. Ideally, you would use the camera in manual mode. Otherwise, use aperture priority mode to control the depth of field.
For more great reflection photography ideas, read this.
5. Try capturing a thunderstorm
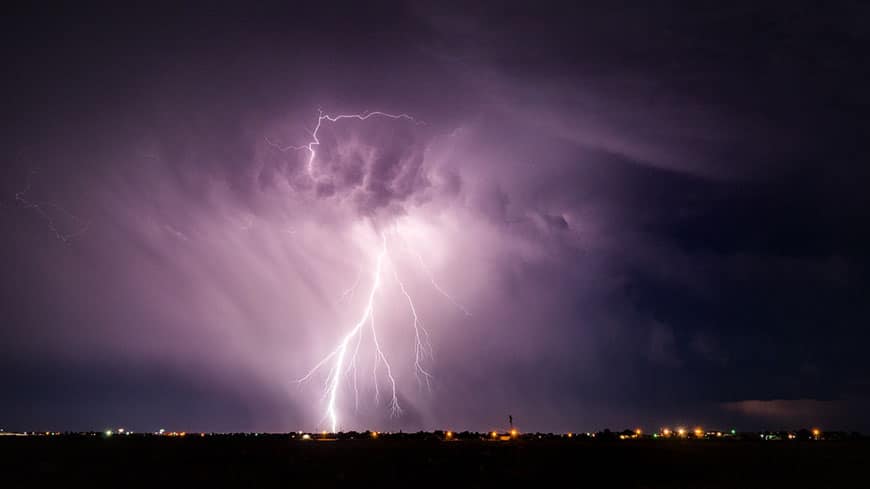
Credit: Raychel Sanner
To photograph thunderstorms, you need to set up a tripod because you'll be using slow shutter speeds.
Set your camera to ISO 100 and the aperture at f/5.6. Of course, these settings might change from one situation to the next.
As for the shutter speed, there are two approaches. You can set a slow shutter speed such as 20 seconds, or you can use Bulb mode and hold the shutter open at your discretion every time. See which technique works best for you.
It's also recommended to use an app or website to predict the approximate time and location of the thunderstorm – AccuWeather is a good one.
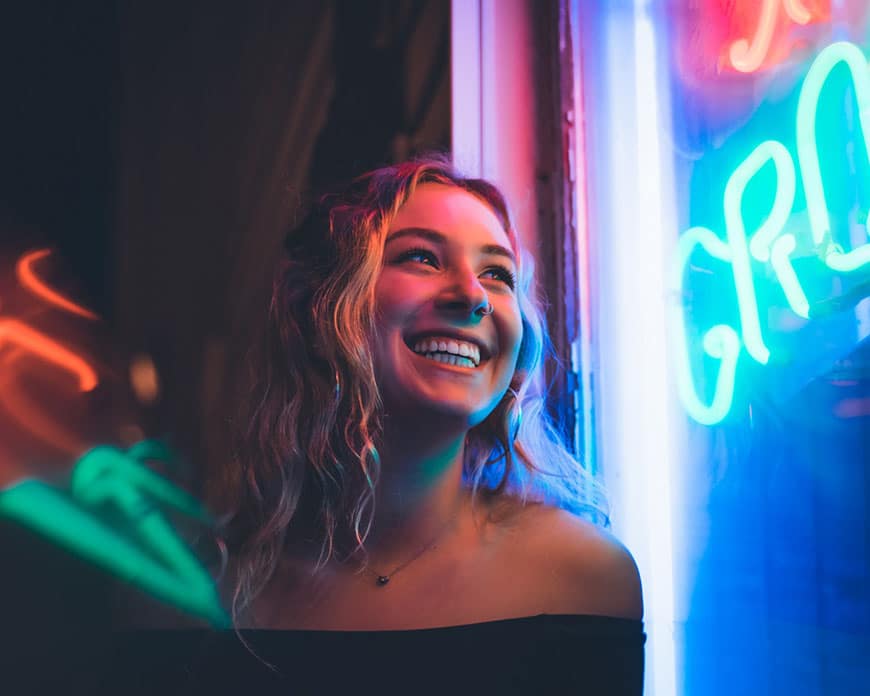
6. Try doing silhouettes
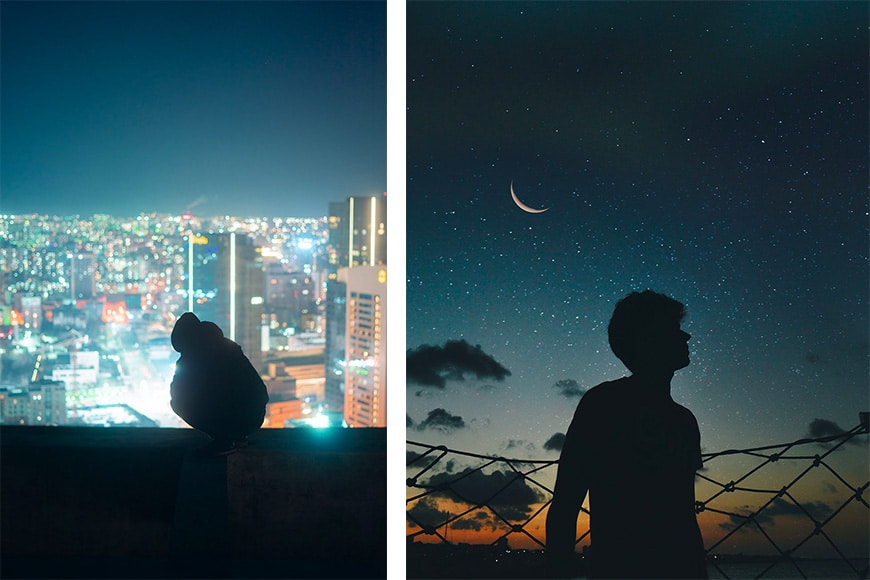
Credit: Naraa In Ub / Brenoanp
Maybe it's not the first thing that comes to mind when you think about night photography, but you can make silhouettes even when you're shooting at night.
All you need is a bright background. This can be the night sky or the city lights; it doesn't matter – calculate the proper exposure for it, then, place your subject in front and take the shot.
As a result, the subject will be underexposed, creating a black shape, and the background should be perfectly exposed.
For more tips on silhouette photography, this guide will help.
7. Try panning
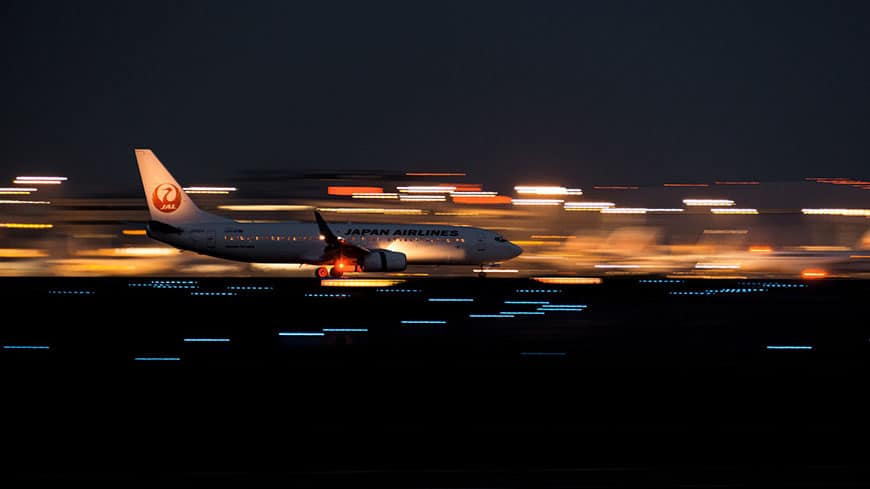
Credit: Sora Sagano
Panning is a photographic technique used to freeze moving subjects while introducing motion blur to any movement in the frame.
The idea is that you follow the subject's movement to keep it sharp while blurring the background.
The good thing about doing this at night is that there is less risk of overexposing your images. If you're not comfortable using manual mode to dial in your exposure settings, you can try setting your camera to shutter priority.
The trickiest part about panning is that you have to match the subject's speed – so you might need to do some test shots to find the right shutter speed and your own motion to get the desired effect.
Find out more about panning and motion blur photography here.
8. Photograph the moon

Credit: Katie Hetland
The night sky is full of wonderful subjects, whether it is the moon, the milky way or a meteor shower. At the beginning of the article, you can find the best camera setting to photograph the stars – including the 300 rule and 500 rule. So next, let's talk about the moon.
You'll need to use the longest focal length that you have to magnify the moon. Then, set the ISO to 100 to avoid any noise in your images and close down your aperture. Something around f/8 or f/11 – whichever it is the sweet spot of your lens.
Then, use adjust the shutter speed until you balance your other exposure settings. To do this, you should be using spot metering mode and measuring the brightness of the moon's light.
Even if the moon is quite bright, you'll probably need a tripod because you're using a telephoto lens.
The rule of thumb to avoid camera shake is that you shouldn't use a shutter speed slower than the focal length. For example, if you're shooting with a 400mm telephoto, you shouldn't shoot handheld with anything slower than 1/400.
9. Shoot in RAW
Credit: Max Andrey
RAW is a file format that holds the information of your photo before it's processed. It contains all the raw data registered by the sensor – hence the name.
The advantage of shooting in RAW is that you have much more information to work with when editing your images.
Most manufacturers have their own proprietary RAW format. For example, Canon cameras generate a CR3 file, while Nikon cameras create NEF files. Each of them has its own software to open and edit these formats. However, most professional editing programs such as Photoshop can work with them too.
There is an open-source RAW file created by Adobe called DNG. If your software doesn't support the original format, you can try converting your files to DNG. This is also the default format used in RAW smartphone photography.
How to take Good Night Photos with a Phone
Here are 7 Tips to get amazing photos with your iPhone (some of the tips also apply to Android smartphones).
1. Always photograph in RAW. Not all phones support this format, though, so you might have to download an app. I recommend Lightroom Mobile, that's because you can also do your edits there.
2. Photograph in manual or PRO mode. This will allow you to adjust the settings for your photo. If the native camera from your phone doesn't give you this option, you can download a third-party app.
3. If you have an iPhone 11 or later, shoot in Night mode. This feature captures several images and combines them into one noise-free image. The results are often quite astounding, and you'll even be able to take pictures of the moon with your iPhone – see our guide to using Night Mode on iPhone.
4. Use the AE/AF lock. Tap and hold on to the main subject to lock the focus – that will lock the exposure too. You can then adjust this exposure by swiping up to make it brighter or down to make it darker. This works on most phones – iPhone and Android.
5. Use a smartphone tripod. Just like cameras, when you use a slow shutter speed, you risk ending up with blurry images if you don't use a tripod. For example, when you use the iPhone Night mode, you can even have a five-second exposure – without an iPhone tripod like these, you'll end up with a blurry mess.
6. Get additional lighting. Sometimes when you're shooting at night, you need some extra lighting – for example, if you're photographing a night portrait. Avoid using the built-in light from your phone at all costs, since it's a very harsh and unflattering light source, particularly for people's faces. It's better if you buy an external LED light.
7. Do some post-processing. You can download photo editing apps to process your night photography like a pro. There are some great free options, such as Snapseed or even Photoshop – yes, the mobile version is free :-)
Final Words
I hope you enjoyed the article and you're feeling pumped about night photography!
Are you heading out to get some long exposure pictures this evening? Or perhaps you're going to attempt some astrophotography from your backyard? Share your tips and experiences in the comments section below, and remember to stay safe after dark.

Check out these 8 essential tools to help you succeed as a professional photographer.
Includes limited-time discounts.

Ana Mireles is a Mexican researcher that specializes in photography and communications for the arts and culture sector.
1 Comment
Leave a Comment
👋 WELCOME TO SHOTKIT!
🔥 Popular NOW:

Thanks for reading my article – let me know if you have any questions.