


Expert Guide to On-Camera Flash (How, When & Why to Use)
Everything you need to know about using your on-camera flash confidently to create powerful images in any environment with the gear you already own.
Learn | Lighting Guides | By Yatharth Gupta
Shotkit may earn a commission on affiliate links. Learn more.
This is a guide to on-camera flash based on my many years of experience obsessing over light.
Have you ever wondered why pro photographers obsess over light?
You must've heard of fashion and portrait photographers carrying heavy lighting kits to the shoot location and landscape photographers often camping all night to capture a vista in the golden light of the morning.
It's because light is fundamental to photography. In fact, your camera is nothing but a toy without light.

Excellent build quality, fast recyle times and powerful output - excellent value flash for on and off-camera use.
Even though natural light is the most accessible and cheapest source to light your photos, photographers often struggle when there's not enough light.
That's where on-camera flash comes to the rescue and helps you light your photos effectively in low-light situations.
In this guide, I'll cover everything you need to know about how, when, and why to use an on-camera flash.
You might also like to read our beginner's guide to photography lighting and flash photography to get up to speed.
For now, let's dive in.
What is the On-Camera Flash?
External flash is a small, portable lighting solution designed to be attached directly to the top of your camera.
Most external flash units are lightweight and handy compared to the bigger studio flashes.
You can quickly light a scene with an on-camera flash and improve the overall exposure and image quality.
All new DSLR and mirrorless interchangeable lens cameras come with a hot shoe designed for attaching an on-camera flash.
Here's what a hot shoe looks like:

A Hot Shoe not only keeps the flash attached physically to the camera but also has the necessary electronic connections to make it communicate with the camera.
There are a variety of on-camera flashes available in the market. Some of the models are manual flashes which require manual input, while there are many TTL models that automatically assess the flash power required.
We'll look into the differences between the two in the following sections.
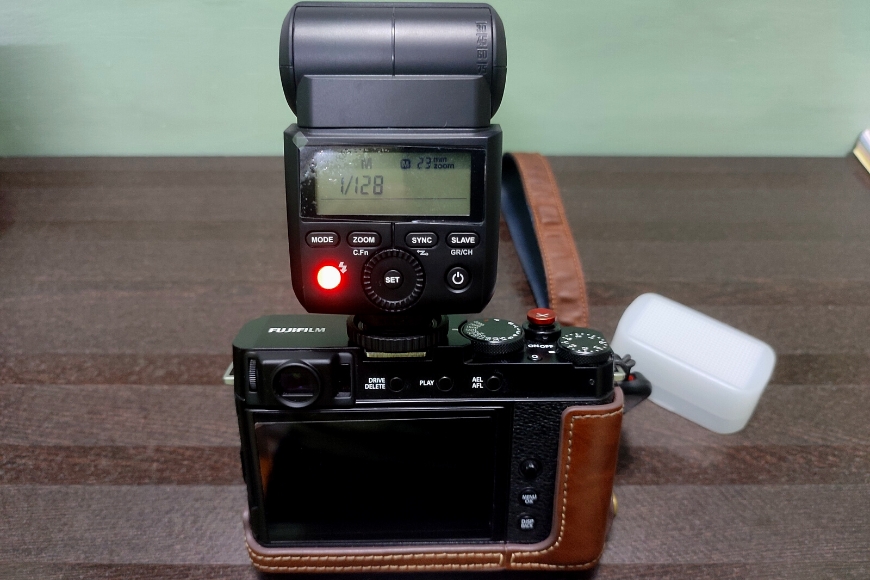
The back side of on-camera flashes typically features a settings panel that allows you to adjust the intensity of light bursts and other functions like flash mode, and zoom.
For most flashes, intensity ranges between 1, representing full power, to 1/128, which is a 128th part of the full power.
However, one thing to note is that the term “on-camera flash” doesn't imply that the flash can only be mounted on the camera. It's also possible to keep it off the camera and fire it using a wireless trigger or a sync cable.
Let's look at the differences between on-camera, built-in and off-camera flashes.
On-Camera Flash vs. Built-In Flash
On-camera flash is an external unit attached to the top of the camera on the hot shoe, whereas a built-in flash is a small internal lighting unit fixed into the camera body.
A built-in flash in a DSLR is usually located at the top middle part of the camera.
It's concealed with a lock-in mechanism that allows it to pop out with a click of a button or automatically per the camera settings. Such a flash is also called a pop-up flash.
However, in compact mirrorless and point-and-shoot cameras, a built-in flash is fitted in the front side of the camera body.

Some of the other prominent differences between the two are power and usability.
While a built-in flash is a convenient option, it lacks the power of an on-camera flash.
Typically, speedlights or on-camera flashes produce a higher power output, making them usable in larger spaces and very low light conditions.
Another area where an on-camera flash (also called a Speedlight) shines is the flexibility to change the angle of the light throw.
You can angle a speedlight to bounce the light off the ceiling or an adjacent wall by twisting the head of the flash upwards or to the side.
On the other hand, with built-in flashes, you can only light the subject right in front of the camera and at a close distance. Also, the tiny size of an in-camera flash produces harsh light and deep shadows.
An on-camera flash can also be detached and used off-camera. By placing it on a light stand, you can further explore various angles and can also add a light modifier made specifically for speedlights.
On-Camera Flash vs. Off-Camera Flash
As discussed above, on-camera flashes are designed to mount on the hot shoe of a camera.
On the other hand, Off-Camera flash refers to a technique of using a flash, whether a studio flash or a speedlight, positioned away from the camera.
Here the difference lies not in the type of unit but rather in the way of using it. A speedlight can be mounted onto a camera or used off-camera. However, larger studio flashes are designed solely for off-camera use.
The off-camera flash setup often aims to achieve different lighting techniques like Rembrandt, butterfly, or three-point lighting.
While on a light stand, a flash can be programmed to fire with the help of a sync cable or a wireless remote trigger.
Off-Camera flash setup opens plenty of creative possibilities. By positioning a flash in different locations and angles relative to the subject, you can get better control over the light.
On top of it, you can further mold the light with the many light modifiers available for both studio flashes and speedlights.
Primarily intended for off-camera use, studio flashes often deliver considerably more power output compared to speedlights or on-camera flashes.
Some higher-end studio flashes equipped with large battery packs can even generate enough power to light subjects even in strong sunlight in outdoor conditions.
Conversely, such studio lights (also called strobes) are bulky and not suitable for genres such as travel and street photography.
That’s where on-camera flashes would be useful. Owing to their smaller size and versatility, they make an excellent choice for indoor and outdoor shoots, whether you want to mount them on hot shoe or use them off-camera.
Situations where you'd use a mixture of on and off-camera flash include weddings or events with changeable lighting conditions.
See our guide to wedding flash photography techniques for more info on that.
When Should You Use the On-Camera Flash?

On-camera flash can be helpful in many situations, including low-light conditions, backlit scenes, and night portraits.
There are many creative possibilities depending on what you're trying to achieve with the flash.
Let's look at a few common uses of an on-camera flash:
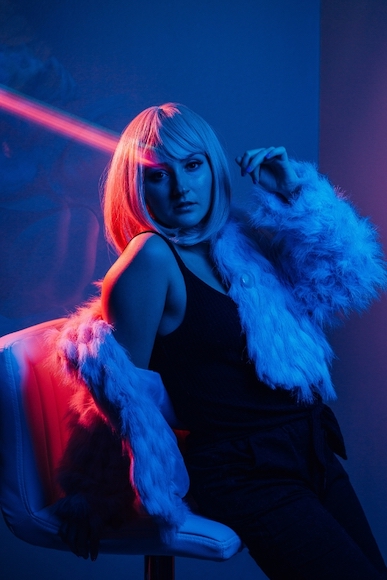
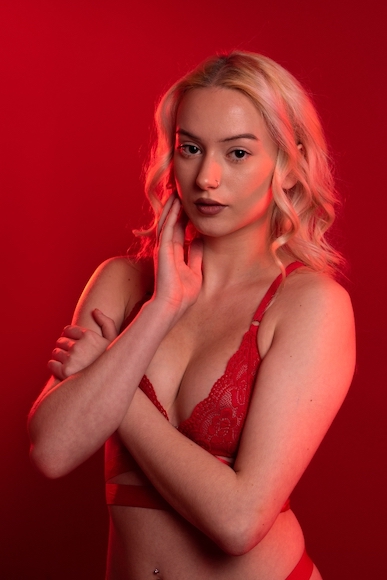
Use it as a fill flash: You can use an on-camera flash as a fill light when the subject is backlit, meaning the light source is behind the subject, leaving him in the shadows.
Fill flash is used to illuminate the shadows moderately so they don't lose definition and become too dark. Or simply to fill in the shadows.

For this purpose, you can use a flash as a fill light to add illumination and balance out the exposure.
On-camera flash is also helpful when there is a high contrast between two elements in a frame.
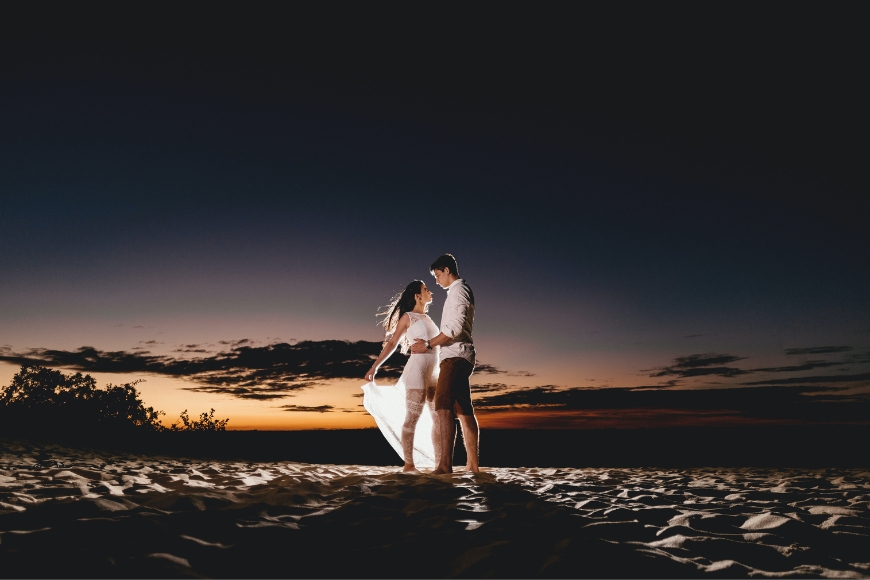
For example: Shooting a portrait on a beach with the bright midday sun would be difficult because if you properly expose the bright sky, you'll end up underexposing the subject and vice versa. In such a scenario, you can expose for the sky and quickly light up your subject with a flash.
Use as a bounce light: Light behaves differently depending on how big or small is the source of light.
Small flashes produce a harsh light that creates prominent shadows, whereas a larger light source, like a studio flash in a softbox, would produce soft light and make a smooth transition between the highlights and the shadows.
As on-camera flash is a small light source, it produces a harsh beam of light.
But many accessories are available to soften the harsh light coming from a bare flash.
However, one of the easiest ways is to bounce the light off the ceiling or white walls or use the bounce card that comes built-in with most flashes.
Bounced-off light produces softer shadows as it reflects off a large area and is helpful in indoor situations. However, light colored walls are best for bouncing the flash
Light your subject at night time: Whether you're shooting a night portrait around neon lights in the city center or looking to add a human element to your landscape photography, on-camera flash is one of the most effective ways to illuminate your subjects.
With an on-camera flash, you can achieve many creative effects by playing with the direction and angle of the light.
You might want to take the speedlight off-camera in some scenarios to enhance the effect further.
You can create a silhouette by placing the flash behind the subject at night or make a narrow beam of light to create a low-key effect using flash modifiers like snoot and honeycomb grids.
The possibilities are endless whether you're using the flash on a hot shoe or off the camera.
On-camera flashes can also be helpful for street photography in low light, where you can partially light a subject for compelling storytelling.
Freeze motion: Another good use of your on-camera flash is to freeze motion in your photos. When shooting fast-moving subjects like athletes or a racing car zooming through the track, you can use flash to freeze the motion and capture a still and sharp figure in the photo.
This works because flash bursts on most speedlights are of very short duration and can go as high as 1/20000, that is 20,000th part of a second.
For example, when you light a running athlete with a flash, he gets adequately illuminated for a fraction of a second, which results in a sharp photo, almost as if he was utterly still.

This technique is widely used by sports photographers when shooting in low-light conditions.
Combining these on-camera flash techniques with different angles and flash modifiers, you can mold light for various creative effects to add greater depth to your photos.
(See these creative lighting techniques for examples.)
However, it's easier said than done. It would be best to experiment with different shutter speeds and flash power values to master the shutter release timing and flash position.
On-Camera Flash Range
Flash range measures how far and how much a flash unit can illuminate. In other words, the spread and reach of the light coming off the speedlight or a strobe.
The flash range is measured with a metric known as the Guide Number.
A flash unit's Guide Number defines the distance at which it can effectively light a subject. It's dependent on many factors like the maximum power output, flash zoom range, aperture, and ISO.
GN is a basic equation that states: Guide Number = flash-to-subject distance x f/stop or aperture value.
As there are flash units of various sizes and power outputs, the industry uses a standardized ISO value of 100 and a flash-to-subject distance of 10 feet to calculate the Guide Numbers.
For example, a flash with GN 80 can light a subject at 10 feet for correct exposure at an aperture of f/8 and ISO 100.
The higher the GN, the more powerful the flash.
Pop-up or built-in flashes have a lower power output, resulting in a lower guide number. They are only effective in lighting subjects at a close distance, typically within a few feet.
However, this range increases significantly when using on-camera flash units and studio strobes, which have higher power outputs and guide numbers.
GN values are measured in the test conditions, which may differ among manufacturers and may not be the most accurate representation of the performance of a flash unit.
What is ‘Sync Speed’?
Sync speed is one of the most important terms when it comes to flash photography.
It is the shutter speed of your camera at which the shutter would be open to capture the full burst of light coming off a flash.
For most DSLR and Mirrorless cameras, the maximum sync speed is either 1/200 or 1/250.
To understand it further, let's see what happens when the shutter speed goes beyond the camera's normal sync speed.


As you can see in the above photo, the wall is partially lit when shutter speed is faster than the sync speed. That's because the shutter is closing fast, well before the light from the flash can be fully recorded.
Sync speed limits your shutter speed to a maximum of 1/200 or 1/250th of a second.
However, to solve this problem, flash and camera manufacturers offer High-Speed Sync (HSS) feature.
HSS allows you to shoot at a shutter speed higher than your camera's native sync speed. It works by making the flash fire multiple times until the shutter remains open, resulting in a properly exposed subject.
However, HSS is a power-hungry feature that depletes your flash battery faster compared to when using flash within the sync speed.
It's also important to note that not all cameras and flashes support the high-speed sync option.
What is TTL Mode?
TTL stands for through the lens; it's a feature that automatically calculates the flash power required to illuminate the subject in your photo. It achieves this by using your camera's built-in light meter reading to determine the optimal flash exposure.
When using TTL, the on-camera flash fires a preflash when you half-press the shutter button. This preflash hits the subject, which lets your camera's metering system record the flash-to-subject distance and the exposure requirements.
Upon fully depressing the shutter button, the flash fires again, and voila, you get a perfect exposure.
However, it's not that easy in most scenarios. TTL is as good as how you use it, meaning it won't help you create good exposures automatically unless you understand how it works.
Like everything with on-camera flash, mastering TTL requires practice and experimentation.
Similar to HSS, not all on-camera flash units support TTL.
It's also important to note that both your camera and flash need to have TTL functionality to use it.
How to Use the On-Camera Flash
On-camera flash photography may seem complicated to beginners, but taking time to learn it can be incredibly rewarding.
When using an on-camera flash, you need to adjust the settings on both the camera and the speedlight.
In this section, I'll explain what these settings mean and how to use them effectively for a perfect exposure.
Camera Settings
i) Shutter Speed: This is the first setting you should adjust on your camera when working with an external on-camera flash. It's also essential to choose a shutter speed that is below or on par with the flash sync speed of your camera unless you plan to use a High-Speed Sync.
ii) ISO: This setting affects how your camera perceives the intensity of the light from a flash. A higher value would result in brighter images but may add a significant amount of noise to the image.
It would be best to always use the lowest possible ISO without severely underexposing the image.
iii) Aperture: F-stop should be tackled after adjusting the ISO and shutter speed. Your f-stop value would determine the depth of field of the resulting image.
However, when shooting at or below the camera's sync speed, you may find it challenging to achieve shallow depth of field or bokeh in well-lit scenes.
In such scenarios, you can switch on the HSS function, allowing you to block more light via faster shutter speeds and lower aperture values to get a blurred background.
iv) High-Speed Sync: Whether you turn HSS on or off would determine the value for the above settings. With HSS on, you can achieve lower f-stop numbers and a faster shutter speed, but it would require more battery power.
Flash Settings

i) Mode: Depending on the flash you're using on-camera, you can select between three modes: Manual, TTL, and Multi.
Manual mode, as the name suggests, requires you to select the appropriate power output for your scene.
In TTL mode, the power output would be automatically selected based on the meter readings.
With Multi mode, your flash can fire many times on each shutter release. You can decide the number of times the flash would fire and the interval between bursts. It's helpful in scenarios where you want to light motion at different places in the frame.
ii) Power: If you choose Manual mode or Multi mode, you get full control over the power output of your on-camera flash. Most flash has a range of power between full power (1) to 128th part of it (1/128). You might need to experiment to get the right amount of flash power you'd prefer in your photo.
iii) Zoom: With zoom adjustment, you can make the beam of light narrower or broader depending on the value you choose. A higher zoom value would make your flash reach farther, but at the same time, it would also reduce the spread of light.
Flash Exposure Compensation (FEC)
If you're using your on-camera flash in TTL mode, you can get more control over the intensity of light with the Flash Exposure Compensation function.
It allows you to increase or decrease the flash exposure by a minimum of 0.3 stops to a maximum or full 5 stops.
However, FEC shouldn't be confused with the exposure compensation function on the camera. Exposure compensation controls the ambient or overall light in a photo, whereas FEC only affects the flash exposure.
Tips for Getting the Most Out of Your On-Camera Flash
Tip 1: Always aim to make your flash exposure look natural, as if no flash was used. However, this doesn't apply to creative photos.

Tip 2: Learn to balance the flash with the natural light for pleasant light in indoor photos.
Tip 3: Control the direction and spread of light by attaching flags (made of paper or plastic) to the speedlight.

Tip 4: Expand the light source for better portraits with off-camera flash and a flash diffuser like a softbox or an umbrella – see these portrait lighting tips.
Tip 5: Turn on High-Speed sync when there is too much ambient light, and you wish to achieve a blurry background.
Tip 6: Pair your flash with colored lighting gels to create various effects and moods in the photo.
Tip 7: Bounce the light off a ceiling or a wall to instantly turn your flash into a larger light source.
Creative Uses of the On-Camera Flash
On-camera flash is an incredible tool in a photographer's kit, opening various creative possibilities. In this section, we'll look at a few exciting ways to use an on-camera flash.
- Use on-camera flash to shoot illuminated action shots using Multi mode.
- With on-camera flash, you can create a separation between the background and the subject by toning down the ambient exposure significantly and pairing it with a flash.

- On-camera flash is not only useful for portrait or people photography but can also light up your macro shots. Whether you're clicking a picture of a bug or a tiny flower, you can illuminate it easily with the flash sitting on top of your camera.
- Rear curtain or second curtain sync is the function that makes your flash fire towards the end of the exposure. Explore rear curtain sync along with a slow shutter speed in the street and travel photography for creative shots
- Control the spread of light with a snoot designed for an on-camera flash. A snoot creates a narrow beam of light that can be used to selectively light a subject.
On-Camera Flash Accessories and Light Modifiers
Speedlight Snoot: This modifier creates a narrow beam of light that can be useful to illuminate your subject selectively and create a dramatic split lighting effect.

Honeycomb Grid: A grid is helpful when you want to contain the spread of light.
Dome Diffuser: This white dome-shaped diffuser is usually made of soft silicone designed to attach magnetically to the flash head. It creates a slightly soft light and a wider spread of light.
Color Gels: With colored gels, you can give vibrance to the background and the subject. You can also use color gels to offset the effect of the white balance selected in the camera. For example, cool color temperature set in camera can be corrected by using color temperature orange (or CTO) gel.

Bounce Cards: Most on-camera flashes come equipped with a built-in bounce card. However, external bounce cards are available that are bigger in size and produce a softer light compared to built-in bounce cards.
FAQ
Should I use an on-camera flash?
Yes, you should definitely keep an on-camera flash in your kit. An On-camera flash or speedlight is an excellent option for all photographic scenarios. You can mount it on top of the camera via hot shoe or use it positioned away from the camera.
When should you use the flash on a camera?
Flash on a camera is used to illuminate the subject in low light conditions or indoor lighting scenarios. It can also be used for freezing movement in sports and street photography.
What is the flash called on a camera?
A flash mounted on top of a camera is called an on-camera flash or speedlight.
What does the flash do on a camera?
It helps illuminate the subject when the ambient lighting is not bright enough.
What is the flash mount on a camera called?
A Hot Shoe is the mount to attach a flash onto the camera.
What is the difference between a strobe and an on-camera flash?
A strobe and an on-camera flash are both used to produce a burst of light for photography. However, there are some key differences between the two:
- Placement: An on-camera flash is mounted on the camera, usually on the hot shoe, whereas a strobe is a separate, standalone unit that can be placed anywhere in the scene.
- Power: Strobes are typically more powerful than on-camera flashes, allowing them to illuminate larger areas or subjects from greater distances.
- Modifiers: Strobes often have interchangeable modifiers, such as reflectors or softboxes, that allow the photographer to shape and control the light output. On-camera flashes usually have a built-in reflector that is less customizable.
- Sync: Strobes require a sync cord or wireless trigger to fire, while on-camera flashes are triggered by the camera's built-in flash or hot shoe contacts.
- Versatility: Strobes are more versatile and can be used in a wider range of shooting scenarios, such as studio setups or outdoor portraits. On-camera flashes are best suited for events or situations where mobility is important.

Check out these 8 essential tools to help you succeed as a professional photographer.
Includes limited-time discounts.

Yatharth Gupta is a seasoned portrait and travel photographer based in India. He is also a writer and a blogger and loves to explore new places.

👋 WELCOME TO SHOTKIT!
🔥 Popular NOW:
