


Guide to Photo Manipulation: Tips, Tutorials, Examples
Learn all about photo manipulation in this guide. Get inspired by tutorials, tips & examples, and discover new artists. We also discuss the negative side too!
Shotkit may earn a commission on affiliate links. Learn more.
Photo manipulation has been around as long as there's been photography. Sure, digital photo editing programs like Photoshop took the art to a whole new level, but photographers have been changing elements in their photos for well over a century.
Back in the days of film, everything was done in the darkroom. These days, thanks to modern technology, changing our images is infinitely more flexible – we can let our creativity fly.
In case you're wondering, however, there's a substantial difference between image editing and photo manipulation.
With photo editing, we're enhancing the information that's already present in the image. This includes everything from adjusting the exposure and tone to resizing and cropping.
Photo manipulation, on the other hand, involves changing what's in the image – adding or subtracting elements, substantially changing color or tone, etc.
Photo manipulation – popularly known as “Photoshopping” (a word that Adobe hates by the way!) – often gets a bad rap. Governments have used it for propaganda purposes, advertising agencies and news media have misled viewers, and individual photographers sometimes pass off their composite digital art as a single photo in contests where it's not allowed.
That being said, photo manipulation is an extraordinary skill to have. Knowing how to edit photos substantially will allow you to do everything from removing distracting elements (like power lines) to creating an amazing scene on screen that only lives in your imagination. It's also lots of fun!
In this article, we'll explore a number of tips for improving your photo manipulation skills and provide a number of excellent photo manipulation tutorials that will get you well on your way to mastering the art of photo retouching, realistic photomontage, and rocking the world of digital art.
Let's get started.
15 Tips for Effective Photo Manipulation
There are a number of things to keep in mind when manipulating photos – especially if you're combining two or more images together.
Here's a shortlist of the most important.
1. Keep to the Rules of Photography
While your digital art or photomontage can feature all the sci-fi and fantasy elements you want, to make the overall photo look “right,” you'll still need to conform to the rules of photography (see tips 2-4).
2. Match the Lighting and Color
When adding new assets into your photos, make sure they match what's already in the image in terms of color and tone.
If either of these is off, the viewers will notice it. They may not be able to put into words why the image looks wrong, but they'll notice.
3. Keep an Eye on the Shadows
One of the biggest mistakes inexperienced photo manipulators make is neglecting the shadows made by directional light. Each added element needs to match the direction the light is coming from in the base layer image.
Conversely, if you remove an object, make sure you remove its shadow too!
4. Get the Perspective Right
While photo manipulation gives us the power to make our fantasies come alive, understanding perspective and proportion is a must if you want your images to look realistic.
You can always make your pet rabbit bigger than your house, but you need to make it look as if the proportions are natural! For example, objects in the background need to look smaller than those in the front.
5. Choose Images that Work Well Together
To save yourself a lot of time when compositing, make sure to choose images that are similar in terms of color, lighting, and overall exposure. Not doing so will make a lot more work for yourself and may even take some of the fun out of it.
6. Create an Image Cache
If you plan to do a lot of photomontage/image compositing, it's best to have a collection of photos just for that purpose. Free stock photos like those on Unsplash will make a good start, but often the best photos for compositing will come from your own camera.
As a photographer, you can collect everything from skies and backgrounds to individual elements like flowers, sculptures, and cars. The sky's the limit.
6. Have a Plan
Having a plan before you start your image manipulation will save you a lot of time. Not only will it give a good idea of the photos you'll need to collect (if compositing), it'll also help you choose which photo manipulation techniques you're going to use and why.
7. Learn How to Perfect Your Edges
Whether you're compositing or simply removing unwanted elements from your photos, learning how to get clean edges in your selection is key. Sloppy edges are a key way in which photo art can really fall flat.
Here, having Adobe Photoshop can really be a game-changer. No other photo editing software comes close to the advanced selection tools Photoshop offers.
Sometimes you can get by using the AI in other programs, but they can be quite frustrating when trying to make complex cutouts. Here's a guide on where to buy Photoshop.
8. Resolution, Resolution, Resolution
No, we're not talking about New Year's here! We're talking pixels.
Pixels are the raw material of your image. The more raw material you have to work with, the easier your photo manipulation will go.
How much is enough? Ideally, you'll want to work at somewhere between 150-200% the size of the final image. Once you're done, you can always resample down.
Another rule of thumb: For print work at 300 dpi. For screen displays, you can get away with something as low as 72 dpi.
9. Learn the Tools
Most photo editing software comes with some form of Healing Brush, Clone and Stamp, and Transform tools. Programs like Photoshop will also have more advanced options like Liquify, Warp, and Content-Aware Fill.
These are all the bread and butter of photo manipulation. The more you get to know them, the faster your photo editing will become and the more easily you'll be able to bring your artistic visions to life.
10. Invest in a Graphics Tablet
Graphic tablets are good for more than just drawing or painting on a digital canvas. The pen responds to pressure and most tablets offer options for making quick adjustments like zooming in/out, changing the brush size, and adding or subtracting areas to your selections.
The Wacom Intuos is an excellent, affordable option to get you started. The Wacom Cintiq 16 is also a popular option, perfect for regular Photoshop use.
11. Take a Break, then do a Final Check
Once you've finished with all the details of your latest Photoshop idea and you're sure you're picture is ready to go, take a long break (ideally, overnight!) When you come back with fresh eyes, do one final check.
Take a look at the shadows and highlights, light direction, and any areas where you added or subtracted something.
If you're like me, you'll probably have missed something…!
12. Make Sure You Save a Copy With Your Layers Intact
If you're working in a program that has layers (recommended), make sure you save a copy of your completed image with all the layers intact – before you merge the layers.
You may very well find that you want to go back and change something later and without the layers available, you'll have a hard time with it. Adobe Photoshop is the original layer-based non-destructive editing program, although many other editing apps also offer it these days.
13. Choose the Right Image Editing Software
As mentioned before, what software you choose to use will make all the difference in the world. Ideally, your program will have adjustment layers, excellent selection tools, and a healing brush, clone stamp, and refine edge tool that work really, really well.
Don't be fooled here. Many programs have a healing brush, but if it doesn't work the way you need it to and/or leaves mushy pixels in its wake, they won't be that useful.
Also, while programs like Luminar can replace skies for you seamlessly, they won't let you make detailed selections in the way Adobe Photoshop can.
If you're only needing to remove that occasional person or object from your pictures, these programs will work great, but for advanced image manipulation, you'll want to look to Photoshop or GIMP or something with similar features.
14. Choose the Right Computer
Using adjustment multiple layers with large image files can quickly clog up your computer's disk storage space, and bring everything to a crawl if you don't have the correct hardware set up.
Photoshop's minimum system requirements aren't particularly taxing, but we recommend investing in a computer with more RAM than is recommended, a modern graphics card and at least 1 TB of storage. You'll also want a good external monitor, especially if you intend to make multiple minute edits.
Desktop computers are better value for money than laptops and traditionally offer better performance too, although most modern laptops can handle Photoshop and other editing apps with no issues.
15. Practice, Practice, Practice
Like all skills, effective photo manipulation takes practice. Whether you're just looking to enhance one image or you plan on creating a spectacular alternative reality through compositing, the more you do it, the better you'll get at it.
And let's face it, Photoshop has a high learning curve – the more you delve into it the easier some of the techniques will become.
12 Great Photo Manipulation Tutorials
If you have Adobe Photoshop and are yearning to get your feet wet in the art of photo manipulation, check out these amazing tutorials for photographers and graphic designers.
They all come with stock images and clear, concise directions for each and every step. What's more, the skills you practice here are directly transferable to any other artistic creations you might have up your sleeve.
These Photoshop tutorials are a bit involved, however, so make sure you have a chunk of time set aside to play around with.
Spiritual Heights

If you've ever wanted to reach spiritual heights in your digital artwork, this tutorial will show you how to put all the pieces together.
Through a Glass Darkly
Convert any standard model portrait into a creepy horror scene.
Fiery Fantasy Portrait

This photo manipulation tutorial helps you transform an ordinary portrait into a fiery deity.
Thoughts Running Wild

In this tutorial, learn how to transport an everyday model into an ethereal scene.
Come to Life
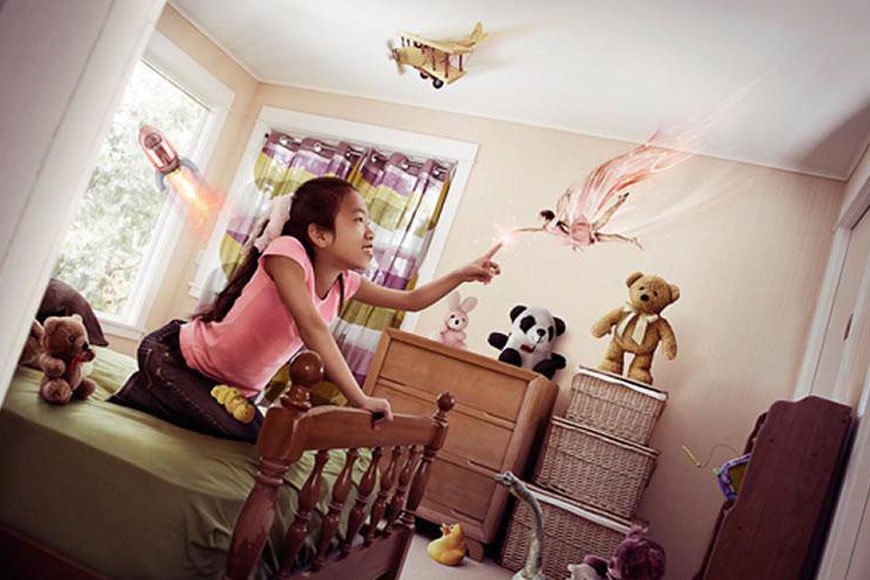
Ever wish you could make your toys come to life? This tutorial covers not only how to manipulate images, but how to create a photoshoot for the different elements as well. Get your camera ready!
Angel in the Deep Forest Night

Learn how to create the scene above from an ordinary forest image and a model reading a book.
Sylph
Transform an ordinary face into that of a slyph.
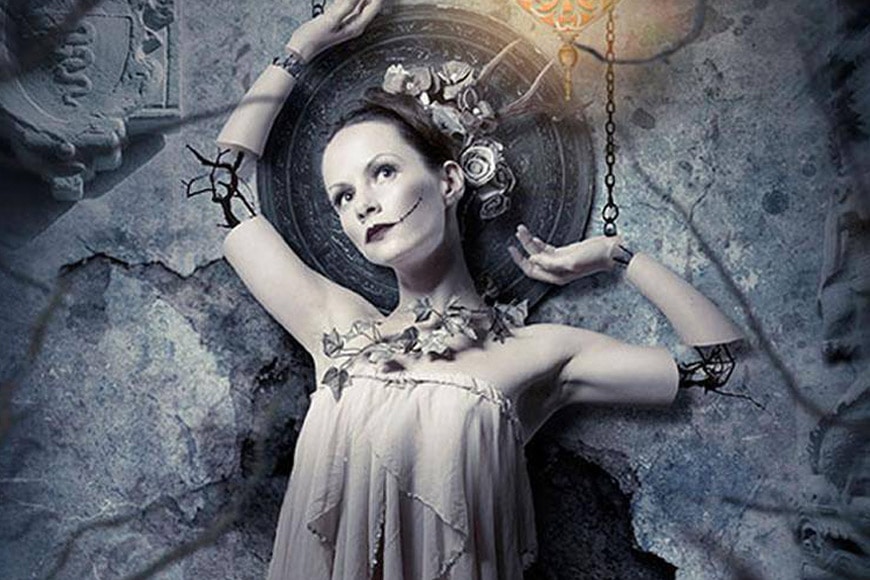
Create a Surreal Gothic Portrait
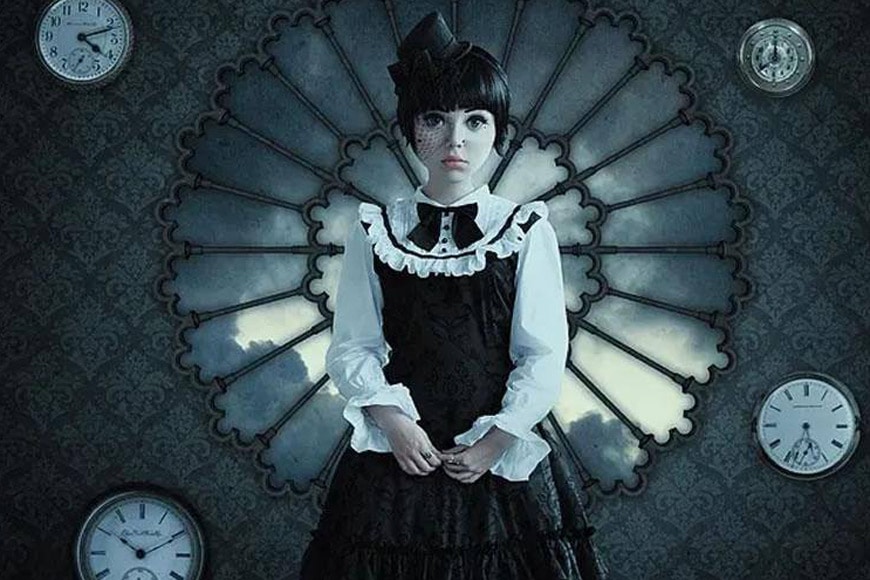
Whether you're into the gothic look or not, this tutorial is well worth a try. It shows you how to create a symmetrical background, add in the reflections, and warp a face to make it look like that of a child.
You might also find some inspiration in our guide to surreal photography.
Undressed Giraffe
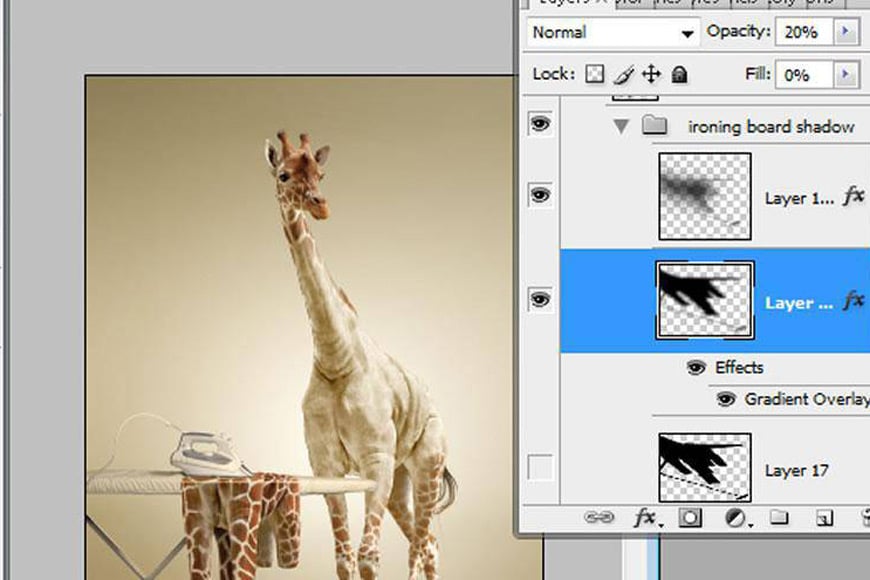
Ever wonder what a giraffe looks like without its spots? This tutorial will take you through not only removing its spots, but also turning them into an outfit to be ironed.
Shattered Glass

In this tutorial, you'll learn to transform objects, blend them, clone, and create a sense of movement – all key techniques in creating realistic sci-fi scenes.
A Long Time Ago in a Galaxy Not Too Far Away…

If you're a sci-fi lover you'll love this tutorial showing how to create a space battle out of stock photos.
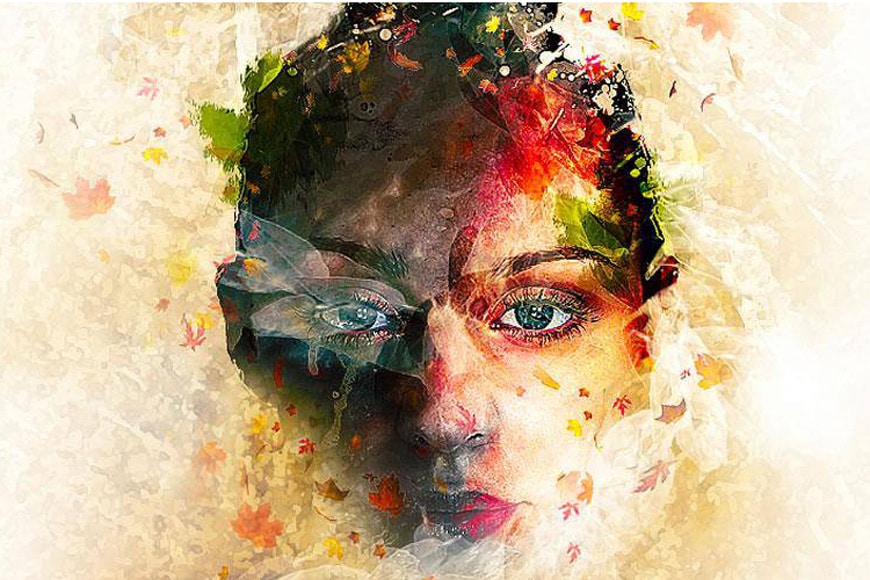
Autumn Beauty
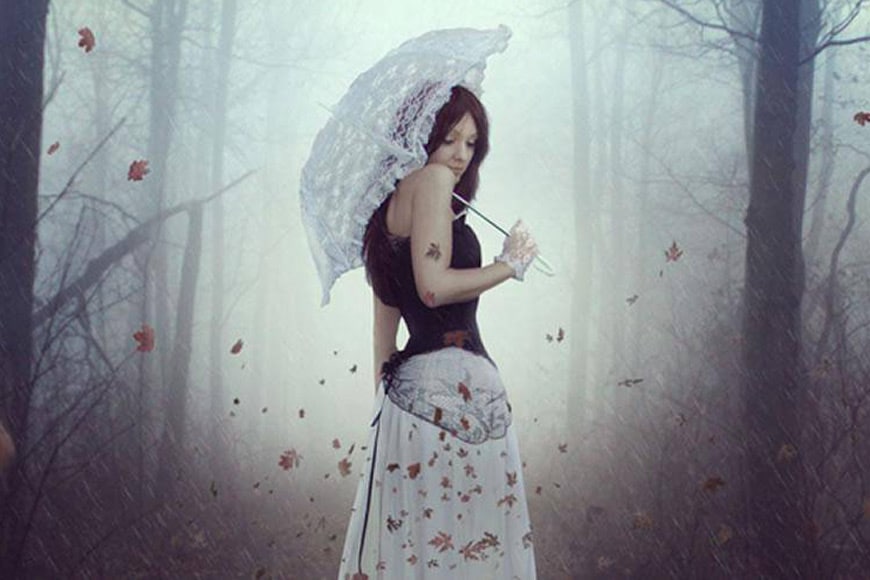
This tutorial will show you how to seamlessly blend all the stock photos together into soft, autumnal, whole. You’ll also learn how to retouch the model, work with groups, and create rain.
More Photo Manipulation Ideas: 8 Artists to Follow
Need some more inspiration? Check out the work of the fantastic modern digital artists listed below!
- Anka Zhuravleva: A fantastic Russian digital artist who mixes her art background with her love of photography.
- Cristophe Gilbert: A master image manipulator from Belgium, Christophe Gilbert can turn just about anything into anything and then back into its original form.
- Andhika Zanuar: Andhika Zanuar creates compelling fantasy images in Photoshop and then shows you how to recreate them via his YouTube channel.
- Natalie Shau: Based in Lithuania, Natalie Shau creates haunting, dark, surreal pictures through the art of combining photography and digital painting with her work in 3D rendering.
- Shaun Ryken: Based out of Ontario, Canada, Shaun Ryken creates some stunning photo composites that will leave you inspired and longing for more.
- Jeremy Blincoe: Focusing on a world of metamorphosis and infinite becomings, Jeremy Blincoe explores how each thing flows into and becomes the other.
- Martin Stranka: Martin Stranka has won a number of awards in recent years for his composite images. His work focuses on the interstitial space between dreaming and awakening.
- Ysabel Lemay: A master image compositor, each of Ysabel Lemay's works is comprised of hundreds of smaller images, all woven together so deftly one could get lost in the beauty of the details as well as in the overall Gestalt.
Unethical Photo Manipulation
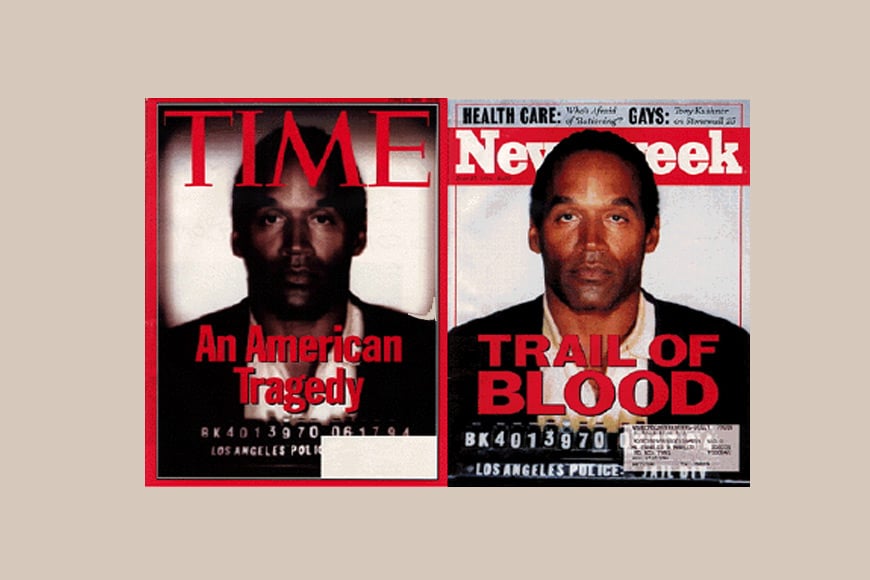
One of the more famous photo manipulations in the media industry, Time Magazine ran a heavily stylized version of O.J. Simpson's mugshot that many felt was biased. It didn't help that Newsweek released an unchanged version of the photo at the same time. They sat on newsstands side by side. Time Magazine eventually apologized, but only after it came under considerable pressure.
You probably know that as incredible a tool as photo manipulation is, it's been used unscrupulously over the years.
The greatest controversies tend to occur in photojournalism and on social media sites, where viewers expect to see photographs that represent their subjects accurately.
As a result, the National Press Photographers Association (NPPA) created a very clear code of ethics regarding photo manipulation:
“Editing should maintain the integrity of the photographic images’ content and context. Do not manipulate images or add or alter sound in any way that can mislead viewers or misrepresent subjects.”
Another situation where photo manipulation can cross the line is in the area of photography contests.
Many photography contests, unless explicitly stated, are looking for photographs that have not been altered beyond standard photo editing. If they're looking for digital art, they generally say so.
Of course, there's a lot of gray areas here. While technically photo manipulation, removing distracting elements such as power lines is pretty standard and won't violate any ethics in contests.
Other changes – particularly image compositing – are likely to be considered unethical if the contest is not looking for digital art. In the end, it'll be up to the photographer to decide…and the judges if they notice.
Other tips for ethical photo manipulation:
- Make sure you're not stealing other people's images. Either use your own photography, get free stock images, or register for a paid stock photo account like iStock.
- As mentioned above, don't use photo manipulation to deceive or misrepresent news or current events…or really, to misrepresent anything.
- Make sure that what you present is your own work. (I know this should go without saying but you may be surprised at the amount of image theft that's out there.)
- In terms of photo retouching, do what's needed to make the photo its best self. Don't skewer the bodies into unnatural forms and then pass it off as “beauty.”
- Check a photo contest's rules carefully before submitting photos that have had their content manipulated.
The bottom line: photo manipulation is meant for artistic expression and creativity, not deception. (This goes for video as well.)
Photo Manipulation FAQs
Is photo manipulation illegal?
Photo manipulation itself is legal, but using someone else's content without their permission is not. It falls under copyright infringement.
What is the difference between photo editing and photo manipulation?
In photo editing, the photographer works with the information that already exists in the image. With photo-manipulation, one is adding in, subtracting, or substantially changing the information present in the image.
Can digital photography be manipulated and not be noticed?
Yes. Any good photo editor can manipulate an image and pass it off as unaltered.
How do you tell if a photo has been manipulated?
- Check the Edges: Edges are notoriously tricky to get right in photo manipulation.
- Inconsistent Lighting: In most photos, lighting should generally come from a consistent direction. If a group of subjects are close to each other in a photo but have light and dark areas on different sides of them, the photo has probably been manipulated.
- Look at the Shadows: Amateur photo manipulators will often neglect to make the shadows of their added elements match the lighting of the overall scene.
- Check for Missing Reflections: Reflections are commonly overlooked.
- The Perspective is Off: You will probably notice this before you're aware you've noticed it. Something will just feel “wrong.”
- Zoom In: Mistakes that are challenging to see when the image is zoomed out will often quite apparent once you take a closer look at the image.
- Keep an Eye out for Warping: If someone's not skilled in Photoshop and uses the Liquify tool, they'll probably change more pixels than they intended.
- Third-party Apps: There are a number of apps that specialize in detecting photo manipulation. FotoForensics is probably the most well-known, but there are plenty of others out there.
Final Words
Whether you're using photo manipulation to enhance a portrait's complexion, remove telephone wires, or alter reality is some great and fantastic way, learning the tricks of the trade can really take your artwork to its next level.
The more you practice, the more you'll find amazing results right at your fingertips.
What are your favorite image manipulation techniques? Do you already use Photoshop for photo manipulation? Have any examples of photo manipulation techniques you'd like to share?

Check out these 8 essential tools to help you succeed as a professional photographer.
Includes limited-time discounts.

Usnea Lebendig is an experienced photographer and reviewer who loves to photograph professionally and in moments where the world’s beauty and/or strangeness leaps in front of the lens.
1 Comment
Leave a Comment
👋 WELCOME TO SHOTKIT!
🔥 Popular NOW:

The tutorials above are super fun, but can be pretty complex. Definitely give yourself a lot of time when trying them out. Also, feel free to use your own images.