


How to Reduce Photo File Size (Compress a Picture)
Learn the simple and effective methods to reduce photo file size by compressing pictures, ideal for sharing online and saving storage space.
Learn | By Yatharth Gupta
Shotkit may earn a commission on affiliate links. Learn more.
If you're wondering how to reduce photo file size, this guide is for you.
You'd want to compress a photo for various reasons, including uploading it on the web, sharing it with friends, or posting it on social media.
In this article, you'll learn all the ways to reduce the size of your photos, whether you're using Windows, Mac, or a smartphone.
Sometimes, you'll need to lower image quality to make the photo smaller, but it's also possible to resize an image without losing quality.
There are also new AI-based image compression tools arriving on the scene – you can check out some of the best ones here.
Let's dive in!
When & Why You Should Compress a Picture to Reduce Photo Size
Photo file size is one factor that impacts the viewing experience and speed on various platforms.
Reducing the size or compressing images would make it load faster. However, it would also mean a lot of details would be lost.
Resizing and compression are two main ways of reducing a photo's size.
Resizing achieves a smaller file size by reducing an image's dimensions, whereas compression lowers the quality while keeping the original height and width.
That being said, compression and reduction of photo file size are not ideal for all situations.
Below are some of the common scenarios where you'd benefit from compressing photos.
Web Upload
A webpage has various components, including photos, that impact its overall size and how fast it will load in a browser.
Photos are one of the most heavy parts of a website; the smaller their size, the faster the website loads.
The purpose of a photo on a webpage also dictates how much resolution you'll need; for example, a portfolio image would call for a high resolution, whereas a blog post would load faster with compressed photos.
Social Media Post
Posting on social media is similar to posting on a website; you need optimized photos for each platform for the best look.
Most social media sites recommend specific dimensions for various post types and have a built-in compression mechanism to get fast loading times.
Uploading photos with specified dimensions ensures they look good and sharp.
Sharing Online
Whether you want to share your photos on an instant messaging app like WhatsApp or an email, there are limits to the file size.
It makes sense to compress your photos so that you can pack more files in each email and send them faster.
It's one of the most common reasons you'd want to reduce the file size of your photos.
Saving Storage Space
Our devices have limited storage space, and with digital data increasing daily, managing our files's often challenging.
If you're a photographer, you know how raw photos quickly fill up your hard drive. That's where converting and compressing your files would result in better storage management.
For example, a raw file ranges from 10-40 MBs, a high-resolution JPEG would be 4-10 MBs, whereas a compressed JPEG can go as low as 100 KBs or less.
You can reduce the file size of a photo in multiple ways regardless of your operating system or device type.
How to Reduce Photo File Size (Mac)
Mac computers have built-in functionality to resize your image dimensions and alter its resolution.
The default way of viewing photos on Mac is the Preview app, which also features a photo editor.
Let's examine how you can resize and compress your photos with the Preview app on a Mac.
Follow the steps below to reduce the file size by resizing the image dimensions.
Step 1: Locate the photo you wish to resize and open it in the Preview app
Step 2: Click the markup toolbar button or size adjustment icon (whichever is visible)
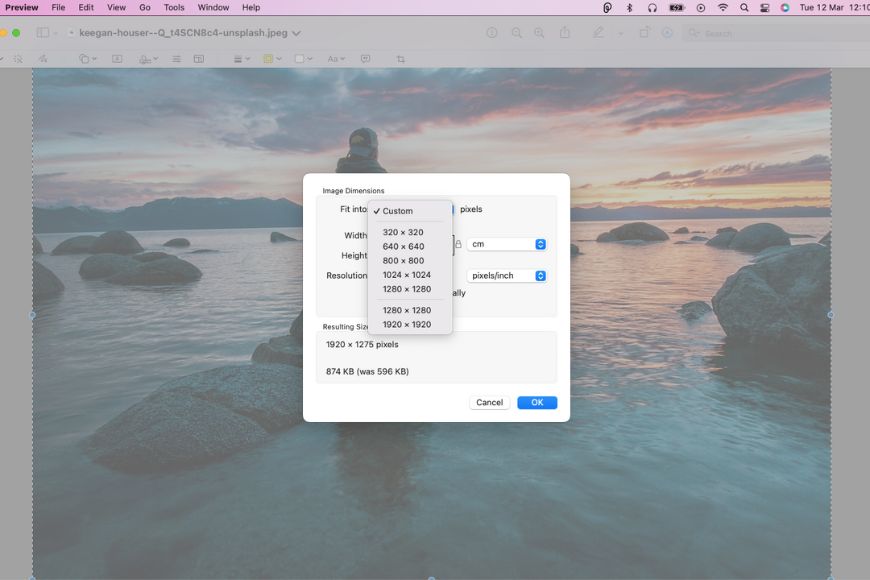
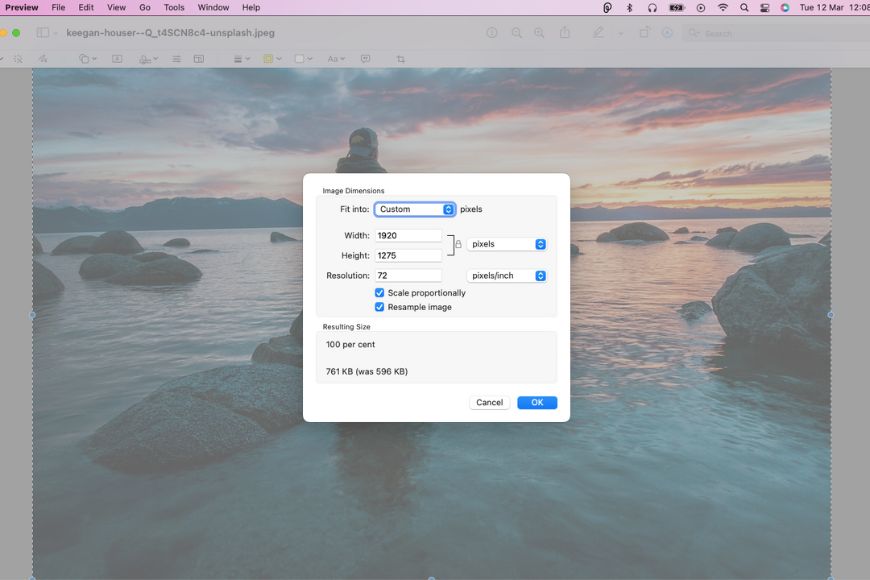
Step 3: Update the pixel values in the width and height section. Alternatively, you can click the “Fit Into” menu to choose the desired size or adjust by entering a desired percentage
Step 4: Select “Scale Proportionally” to ensure you keep the original dimensions intact and deselect “Resample Image” to preserve the details in the photo
Step 5: Save your new image by clicking Save in the top menu
You can resize images in bulk by displaying all of them in the same window and going to Tools> Adjust Size in the sidebar.
Adjust Image Resolution in Mac
If you wish to reduce the resolutions and file size, use the below steps for quick results.
Step 1: Open the image in the Preview app on a Mac
Step 2: Navigate to Tools> Adjust Size and select “Resample Image.”
Step 3: Choose a new value for the resolution; the new size will be shown at the bottom of the screen
Step 4: Save the image to your desired location
You can also use apps like Photoshop and Lightroom to compress and resize your images. These tools give you better control over quality and various image format options.
How to Reduce Photo File Size (Windows)
Digital photo files—especially those taken with a high-res camera—are sometimes too large to send over the Internet.
In such scenarios, it's important to compress the file to reduce its size and make it shareable yet light.
When it comes to compressing photos in Windows, there are many options, ranging from easy to complex.
Let's examine how you can reduce the file size by resizing and adjusting the image quality with the built-in Photos app.
Step 1: Double-click the photo you want to reduce in size to open it in the Photos app
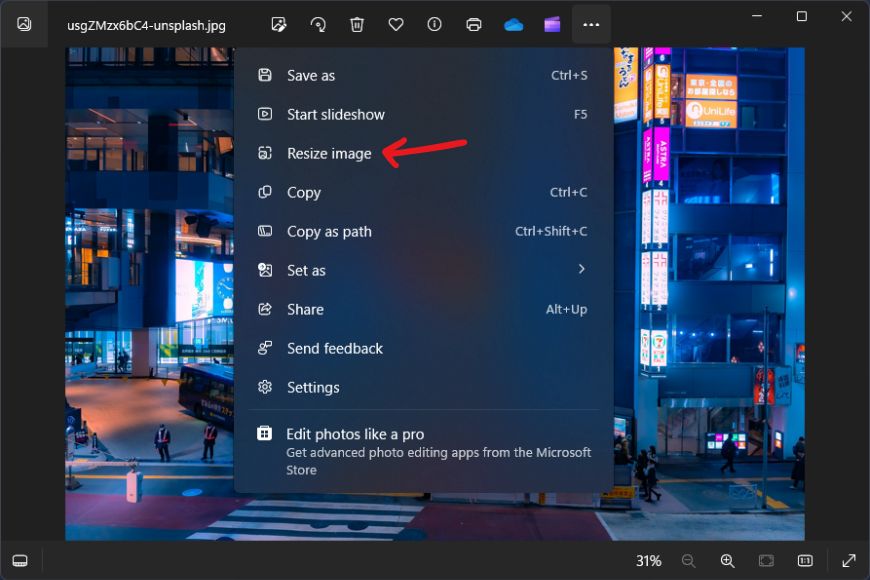
Step 2: Click on the three dots button on the top menu panel and click Resize Image
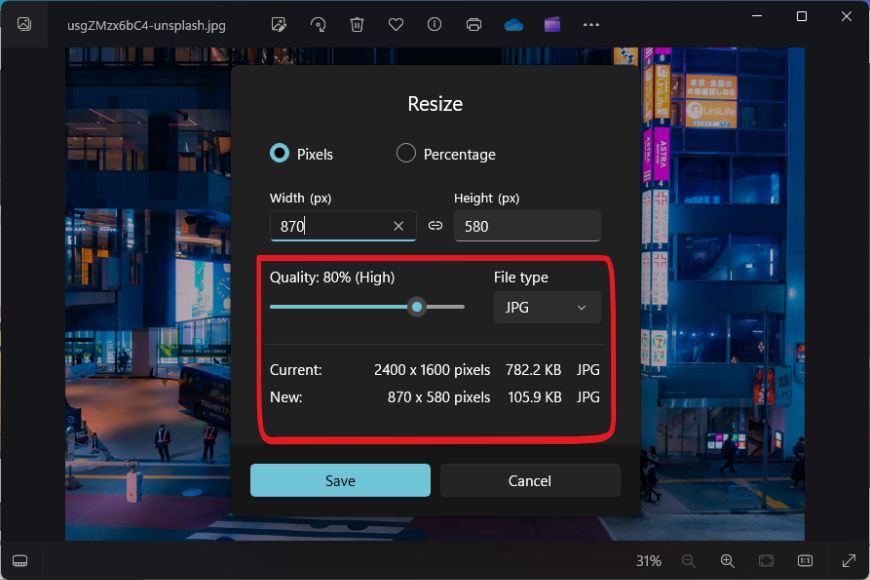
Step 3: Reduce the pixel value on either width or height to make the photo smaller. You can check the new file size at the bottom of this window.
Step 4: Alternatively, you can reduce the file size further by lowering Quality slider and choose the desired format for the output file such as Jpeg, PNG, TIF and BMP.
Step 5: Click Save and choose your desired location to save the output file
You can also reduce the file size of raw files by resizing and converting them to .jpeg, .png, or .tif.
However, if you're using an older version of Windows without the Photos app, you can resize images using Microsoft Paint.
Additionally, you can use photo editing software like Adobe Photoshop and Adobe Lightroom to reduce a photo's size.
How to Reduce Photo File Size Online
You'll find many sites on the web offering image compression functionality.
Some popular services like TinyPNG and Img2Go are often at the top of the search results when you look up a tool for image compression.
Below are the steps for compressing your images using TinyPNG; however, most popular websites would have a similar workflow.
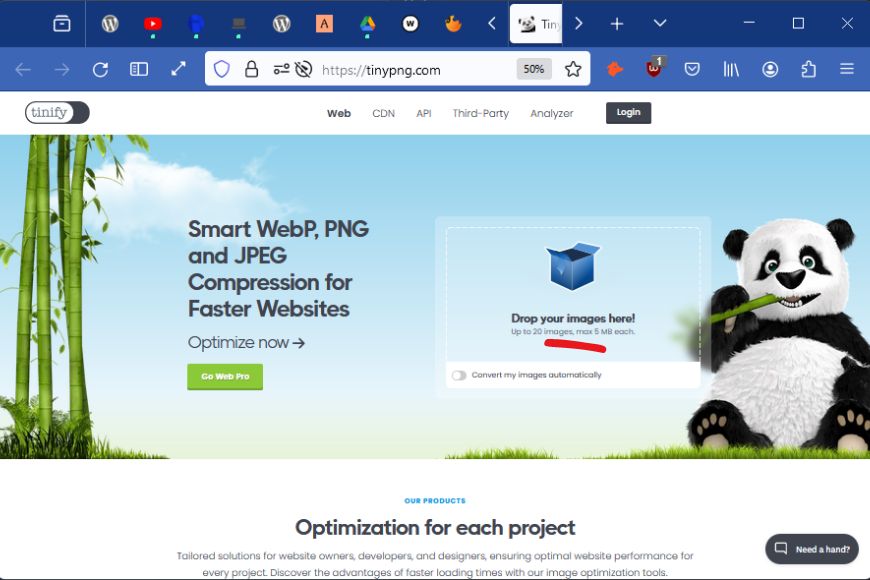
Step 1: Open TinyPNG.com in a web browser
Step 2: Locate the photos you wish to compress, select them, and drop them into the area that says “Drop your images here.”
Step 3: It will automatically compress images. It will show you the percentage reduction, new file size, and the option to download, upload to Dropbox, or post on X (formerly Twitter).
You can upload as many as 20 files of 5 MB each.
Other websites work similarly; you'll find them intuitive and easy to use.
Some websites like Img2Go allow you the option to choose quality and resize your images.
Please note that some of the features are part of the paid plan, depending on your service.
How to Reduce Photo File Size (Android)
Regarding Android, there are multiple ways to approach image compression.
There are a variety of apps and built-in features by smartphone manufacturers.
Currently, Android does not have a built-in method for resizing and compressing images. However, third-party apps offer this functionality.

This section will examine how to reduce your image's file size using the Photo & Picture Resizer app.
You can achieve the same results using a similar app or a photo editor like Lightroom Mobile, Photoshop Express or ProShot.
Step 1: Open the Photo & Picture Resizer app on your Android phone
Step 2: Click on the Select Photos button and choose the image files you wish to make smaller
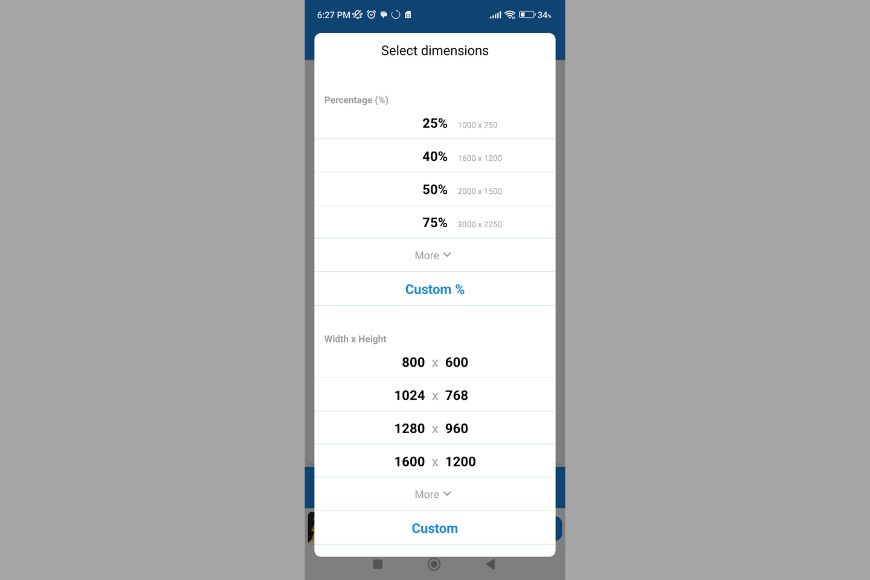
Step 3: Click on Resize button, located in the bottom center of the screen
Step 4: You can choose to resize by percentage, dimensions, file size, resolution, or specific dimensions for various social media sites.
All options support custom values, allowing you to choose your desired dimensions and file size.
Step 5: Selecting any of the options will automatically resize the image and save it in a specific folder, which you can access by clicking on the link.

If you prefer to do this online instead of downloading an app on your phone, you can follow the steps in the above section, which elaborates on how to resize photos online.
How to Reduce Photo File Size (iPhone)
There are two main methods of resizing image files on iPhones.
You can either use the built-in Photos app or use a third-party solution.
The default photo viewer app on iPhone allows you to crop a photo and reduce its size.
However, if you want to resize your photos while maintaining their original dimensions, you will have to use a third-party app like Image Size.
Let's look at how you can resize and reduce the size of your photos using the Image Size app on your iPhone.

Step 1: Install and open the Image Size app on your iPhone
Step 2: Tap the image stack icon located at the top left corner of the screen
Step 3: Grant the required access to the app and select the desired photo from your library
Step 4: Enter the required dimensions in width and height boxes and check the difference between the new and current size
Step 5: Once satisfied with the new size, you can download the image by tapping on the download button in the bottom left, marked with a down arrow key
FAQs on Reducing Photo File Size
How do I compress an image without losing quality?
Compression of image files often results in loss of quality. However, you can opt for a high-quality lossless compression format such as HEIF to compress images without sacrificing quality.
How do I reduce the file size of a photo on a Samsung S22?
You can use the default gallery editor on your Samsung phone or opt for a third-party app like Lightroom Mobile or Photo & Picture Resizer.
Is it better to use Photoshop to resize an image, or can I compress it using native software?
You can use the native software on Windows and Mac to resize your image files. However, Photoshop allows more control over quality, compression, and dimensions.

Check out these 8 essential tools to help you succeed as a professional photographer.
Includes limited-time discounts.

Yatharth Gupta is a seasoned portrait and travel photographer based in India. He is also a writer and a blogger and loves to explore new places.
👋 WELCOME TO SHOTKIT!
🔥 Popular NOW:
