


How to Timelapse in Filmora (Fast or Slow)
Want to create a time-lapse video that will captivate your audience? Follow this easy Filmora tutorial to learn how.
Filmora | Software | By Judyth Satyn
Shotkit may earn a commission on affiliate links. Learn more.
Time-lapse video is often used by bloggers and influencers for marketing and storytelling. It's perfect for cooking demonstrations, DIY tutorials, gardening renovations and more.
It’s a brilliant, non-complicated way to quickly relay information and increase audience engagement.
Time-lapse videos also open up a world of creative possibilities for your movie-making projects.
So, I bet you're wondering how to create a time-lapse video to captivate your audience. Well, just follow the steps below.
Download the latest version of Wondershare Filmora to follow along with this simple tutorial.
Start a free 7-day trial today
How to Timelapse in Filmora
Time-lapse video is when you shoot only a selection of frames per minute instead of filming and capturing real-time footage.
This means the actions of the subjects are lapsed, and therefore instead of watching a video played out in normal time, you will see the actions staggered.
Time-lapse videos will appear to be sped up or slowed down, but never replayed in real time.
A time-lapse video clip appears to be a video made from moving frames like a video, but it is actually a sequence of photos taken at time intervals.
When do people use Timelapse?
Time-lapse video is not only used for marketing but for educational and research purposes. Slowing a video allows us to further investigate and explore how mechanisms work, such as flowers opening or bees flying.
Time-lapse video is also used for art videos or when crafting a storytelling video.
Shoot to Start
Before you create a time-lapse, you will need to shoot some footage, such as videos or photos.
Shoot your footage using your camera of choice, be that a camera phone, mirrorless or DSLR camera.
Use a tripod so that the background remains stable and the frames are consistent in size.
Alternatively, you can select stills from a video and create a timelapse that way.
Download and Launch Filmora
The first step, if you haven't already done so, is to download Filmora's video editing software from their website. Launch and install it on your computer or device.
Upload Media
When Filmora is ready and fired up to go, you can upload your media.
Click on New Project. The video editing workspace will open.
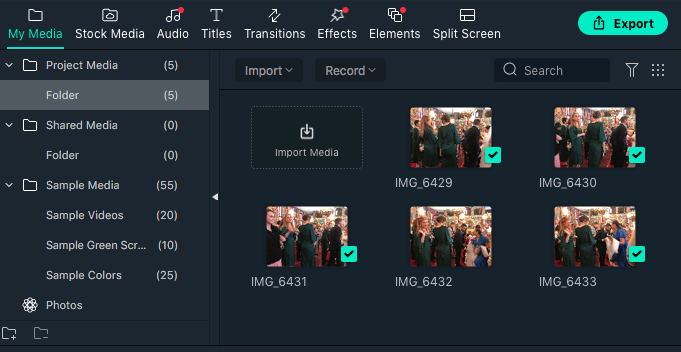
Click the Import button, then locate and upload your media or drag your media into the workspace.
Add to Timeline
When your footage is uploaded, drag and drop it into the video timeline track.
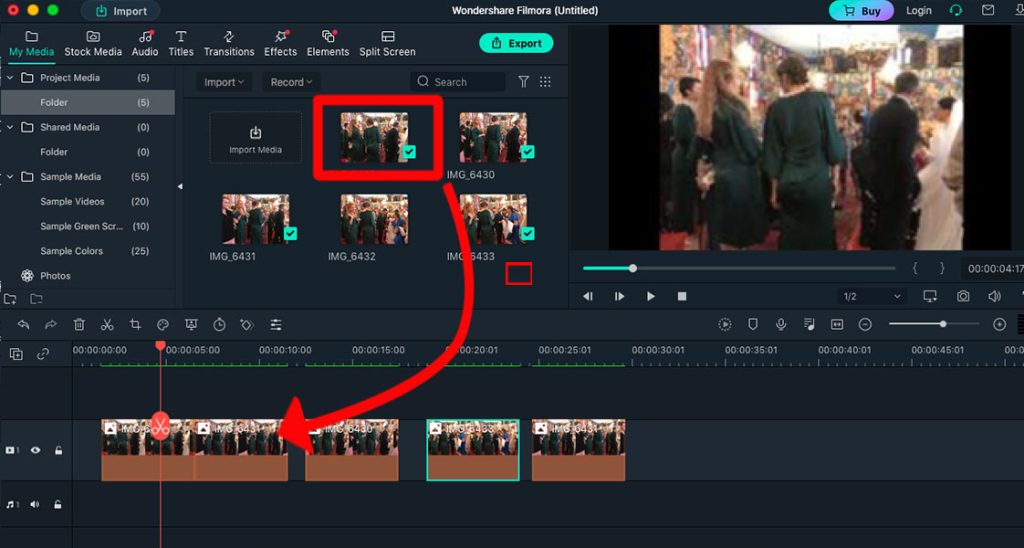
Here you can preview your footage and adjust it.
Check that all shots are in the correct order, and rearrange or delete any that aren't.
- Read more: How to Crop in Filmora
If you used a tripod to shoot your footage, it's unlikely that you'll need to resize images, as all images should be the same size. If you do need to adjust, follow the steps below.
Resize and Adjust
To edit, simply click on the frame you wish to edit.
Double-click on the frame to open editing options above the timeline track.
In the editing options, you can enlarge or reduce the size of frames, or rotate images.
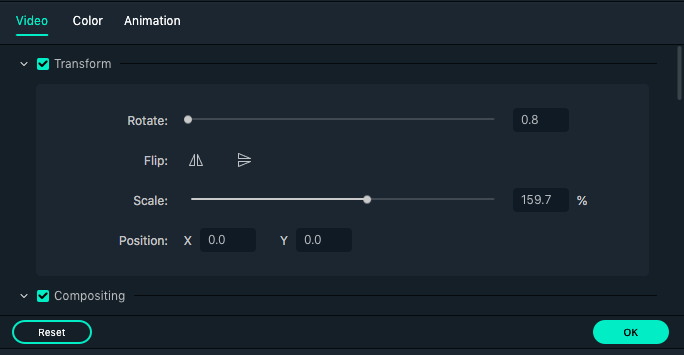
Rotate or alter the scale to create a consistent time-lapse video, then click OK.
Set the Speed
To adjust the speed of frames, right-click on a frame and select Duration from the drop-down menu.
Once selected, the Duration Settings pop-up box will appear.
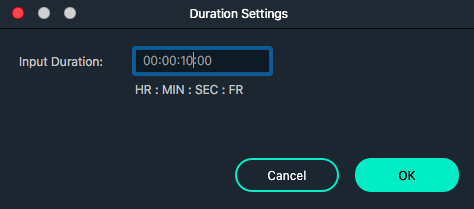
Enter the length you want the frame to be by hour, minute, second, and fraction, then click OK.
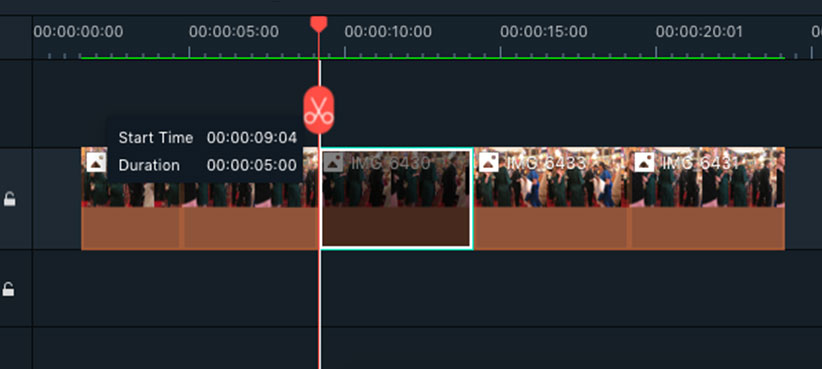
Alternatively, you can adjust the time length of each frame in your time-lapse video by dragging the ends of the frame inwards or outwards.
A pop-up window will appear as you drag, giving end time and duration information.
Background Music
This is where the fun starts. Add your favorite soundtrack, overlay a frame, or add some sparkles; the choice is yours.
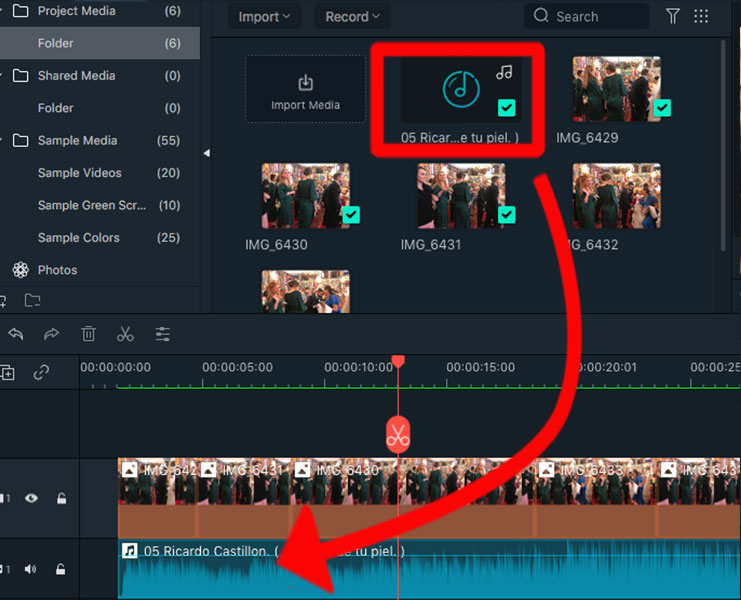
To add background music, upload your preferred music by clicking the Upload button or by dragging and dropping from your desktop into the workspace.
From the media folder, drag and drop the music track down onto the audio timeline at the bottom of the timeline track.
Preview
When you're happy that all the frames in your time-lapse video are in place, hit Play on the preview window and watch to see if there are any final edits needed.
Make any adjustments needed to your time-lapse video before you export.
Render and Export
Now that you've finalized all the edits and have mastered this amazing technique, you are ready to export and share with the world.
Unless you have set Filmora's settings to render as you go, you will want to render the time-lapse video before you export it.
To render, hit the Render button on the right side of your workspace above the timeline track (the dotted circle with the play button inside).
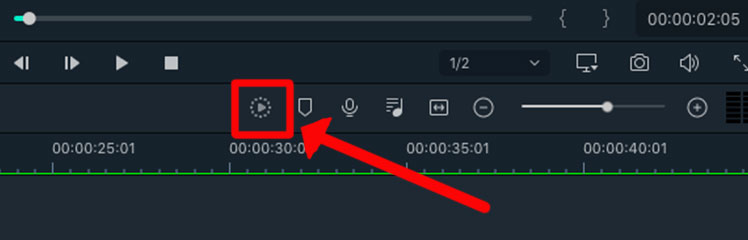
The Render pop-up window will appear, giving you an estimation of the time needed to render your video clip.
- Read more about How to Render in Filmora.
When the rendering process is finished, head to the top of the workspace and click the green Export button.
You will be presented with the export options.
Select the format and location for your time-lapse video clip, then go ahead and export it.
And that's it! Now you know how to make a time-lapse video.
You can add the time-lapse effect to your growing skills in video editing and have fun creating interesting video clips.
How Do You Speed Up a Video in Filmora?
Do you want to speed up a video without creating a staggering time-lapse effect?
Well, you can, and it's so simple you can change the pace of your video in just a few clicks.
All you need to do is change your video's playback speed.
When your video clip is selected in the timeline, click on the Duration button (a stopwatch icon) on the top left of the timeline track.
Once clicked, the Duration settings pop-up window will appear.
In the box beside Input Duration, you can enter the time length you would like to change the clip to.
If you want the video clip to run at a faster speed, enter a shorter time length, then click OK.
Now head to the preview window and hit play to watch your video clip play at a faster speed.
We hope you found this tutorial helpful. Next, why not check out this guide to How to Mask in Filmora so you can really let your creativity run wild.

Judyth is an experienced studio photographer and glass artist. When she isn’t Photoshopping comedians into the bellies of sharks, you can find her cooking delicious treats for her guests.
👋 WELCOME TO SHOTKIT!
🔥 Popular NOW:
