


Guide to Water Reflection Photography
Check out these 10 Tips to ensure your next water reflection photograph will amaze your friends! Learn how to capture mind-blowing mirrored images using water.
Shotkit may earn a commission on affiliate links. Learn more.
Successful water reflection photography is a mix of awareness, aesthetic sensibility and camera techniques.
Water reflects whatever is above and around it – it’s a natural mirror – and the creative possibilities with photographing water reflections are endless.
In this guide we will look at types of subject, still and moving water, shooting at daytime and night-time, plus the right equipment and camera settings to use to get you started with water reflection photography.
So let's begin with the reflections!
10 Tips for Capturing Amazing Water Reflections
Below you will find our top tips to use when exploring water reflection photography.
1. Photograph a lake when the water is calm
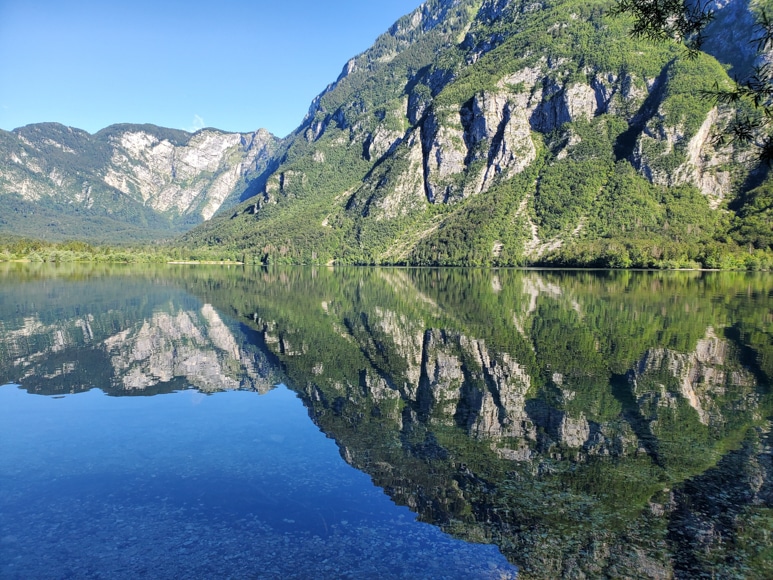
Credit: Hasmik Ghazaryan Olson
Let’s start with one of the all-time photographic favourite subject – the lake. Lakes have long been a popular subject for photography – but when you photograph a lake makes a big difference.
We recommend you try early in the morning. This is because the water will often be calm thus providing a perfect mirror image reflection.
The sunrise during calm weather will give off a glow of warm colour and with the sun being low it will help define any surrounding mountains, buildings or trees.
As an added bonus, still waters provide a sense of calm and serenity. You can also experiment with shutter speeds to make the water look even smoother.
2. Consider your composition

Credit: Juan Di Nella
When choosing your composition, consider, is the line where reflection and subject meet to be midway or slightly up or down – or perhaps on one of the horizontal thirds?
Try using Live View on a tripod to really study the framing of your image. If you are using the eyepiece, then teach yourself to look into the corners and not just the s central area.
Then find a perfect horizontal where the reflection meets reality; you can use the camera grid to check – as anything off true can show up as very awkward.
As you choose your framing it’s like balancing the different notes in a chord of music. Get the horizon line in the right position by choosing whether sky or sea takes up the larger part of the composition.
Then all you have to do is use patience for the perfect cloud formation to appear, for the right light to appear, a passer-by or bird to be caught in the reflection.
Perseverance and patience give you the opportunity to try different compositions.
3. Photograph the sea at sunrise or sunset

Credit: Ralph Ravi Kayden
Unlike a lake, the sea is never still. It can range from gentle ripples to raging storms; the faster the water moves the less reflection.
But at all times, the sea reflects the colours of the sky, clouds, the sun and moon. You don't have to be able to see the sun or moon in the reflection of the sea – in fact, you'll often find that quite hard to achieve.
However, a great sunrise or sunset with all its dramatic colouring and shapes will spill out over the sea below. It lets you record something a little more impressionistic with your water reflection photography.
4. Photograph the reflection of birds
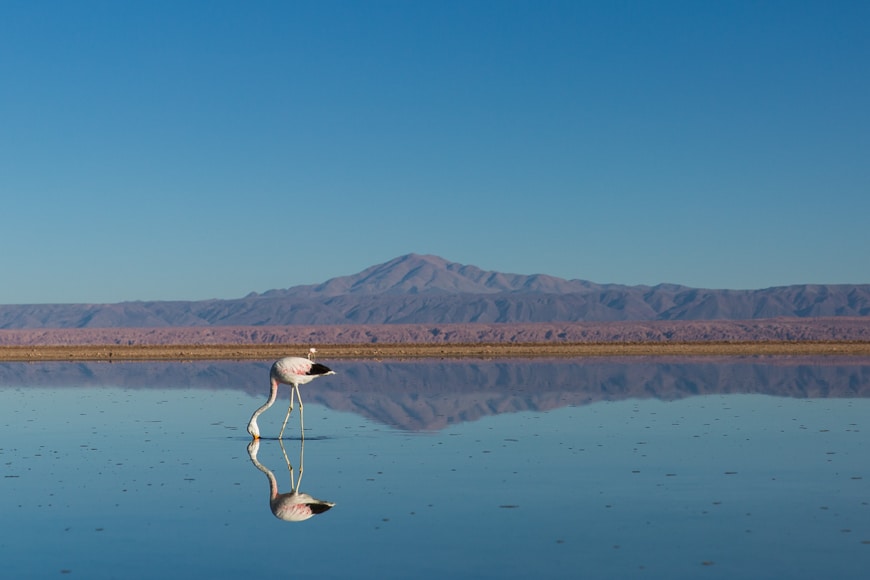
Credit: Pablo Garcia Saldana
Capturing the reflection of birds can be tricky – however, when done well, it can create some really fantastic images.
First of all, you obviously need water with birds in flight nearby – or perhaps you may want to try to capture a bird standing in or near a stretch of water.
If you know a spot that birds frequent regularly, pick a good spot there, compose your shot using the best light and then – wait! When photographing wildlife of any kind, being quiet and patient is a great must.
If you try to take the image the other way around – find a bird and then approach it – you will probably find your presence causes it to, well, fly off!
5. Try puddles to capture your reflections
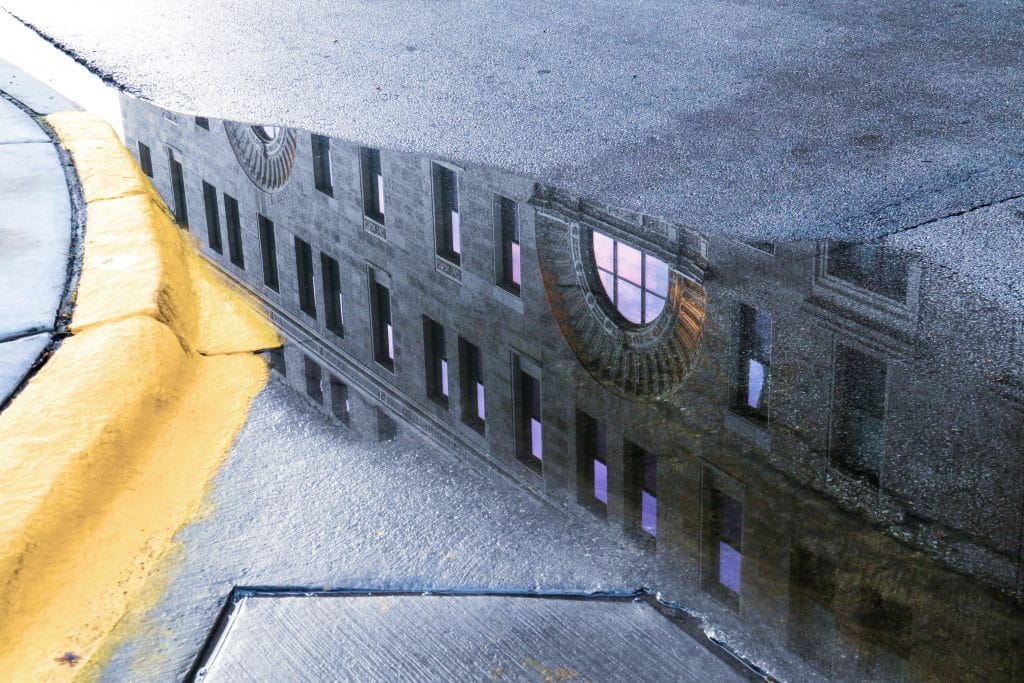
Credit: Nick Fewings
One of the most iconic images – by Henri Cartier Bresson – captures a man jumping over a puddle (search ‘Behind the Gare Saint-Lazare’).
The man’s reflection perfectly mirroring his leap at full stretch and caught just before his foot touches the water leaving us with the frisson of what might follow – splash and soaking feet?
The composition is quite complex with the abstract shapes of the railings behind and the barrel rings in the water – itself clear.
So, why not take inspiration from this famous image!
In photography, puddles are often used to heighten the look of the city at night with the puddles or gutter water reflecting neon signs, lamps and headlights.
Reflections in puddles have often been used to reflect sky or trees making a direct contrast to urban surroundings.
So, next time there's a heavy downpour, go outside after the rain stops, go outside and search out some puddles to photograph. You'll find there's a whole world of reflections waiting to be photographed.
Another option is to go outside and shoot during the rain – the puddles' water reflections can create some amazing effects.
6. Choose your subject carefully
Credit: Alex Rainer
Subjects that look great in water reflections are forest landscapes, lights of the city skyline at night, mountains, birds, and waterfalls.
But there are often things, for example animals and people, that enter into the mirror view. Any of which can be used to create a composition or additional interest or indicate scale.
So why not consider looking for: reeds and tree trunks sticking out of the water, rocks and piers running into the sea.
Or you could look out for people running or walking along a path by a lakeside or standing on rocks at the seaside – or ships out at sea; boats on a lake.
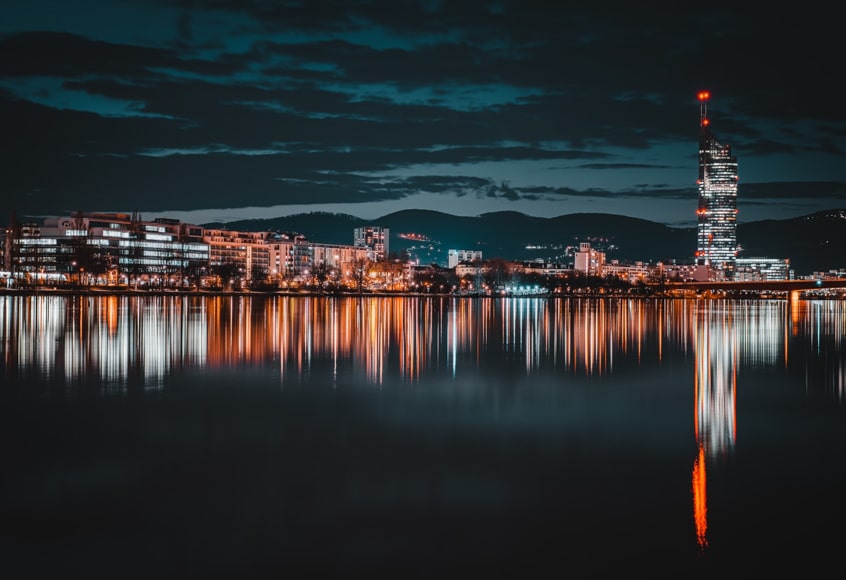
7. Shoot water at the perfect time

Credit: Johannes Plenio
To achieve the perfect water reflection image – the mirror effect – you'll want the water to be perfectly still.
Consult the weather forecast and pick a time that you think will work best. But what time is best? That really depends on what you want to achieve.
The golden hour – shortly after the sun rises in the morning and late in the day before the sun sets – are two times of the day when reflections can be good.
The blue hours, just before sunrise or after sunset, when indirect sunlight is evenly diffused, may be the best time of day for water reflections as the light is less harsh and the water Is often at its calmest.
Shooting the city lights in the background of the water surface, and just before nightfall approaches is a good subject. The light from the sky is blue at this time of day together and taken with the artificial lights from the buildings and streets can produce dazzling photographs.
Shooting water reflections under bright sunlight will give glare from the sun and harsh shadows destroying the reflections. It can have its own aesthetics, but not If you want mirror effect Images.
Pro tip: you can use a polarizing filter on your lens to reduce the glare from the sun on the surface of the water.
8. Use Post-production to enhance your reflections

You can use post-production to increase vibrance, colour intensities, contrasts, and sharpness as usual.
In the case of water reflections, the question is, is the reflection the same as the actual? Or does the reflection actually look different in its colour, tones, and sharpness?
This can be down to the water and how still or otherwise it was – or you can make these decisions in editing. However, doing too much post-production can produce a startling image but maybe one that stultifies with further looking.
Remember you are not just photographing the reflection but the depth of the water beneath, as well as surface texture on which we see the reflection. Water isn't air. The colours aren't actually the same.
You can read more about this in our article on how to photograph water.
9. Use the right camera gear
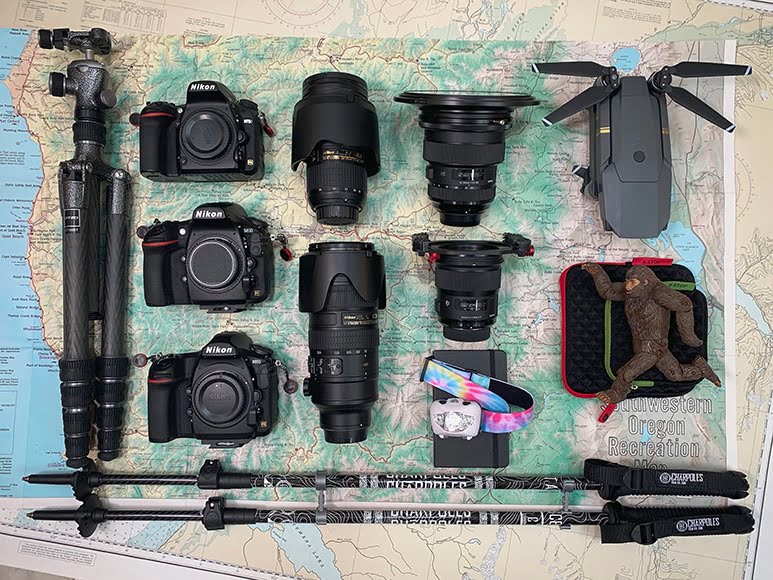
Camera gear of landscape photographer Matte Hanna
Here are some tips for picking the right camera gear for your water reflection photography.
- Lens – there is no one answer for the right lens for capturing reflections. If you're photographing a landscape with a reflection, you can use a wide lens such as a 14mm or 24mm prime, or zoom wide-angle like 16-35mm. However, you may want to use a telephoto lens to photograph the reflections of birds or other wildlife. In these cases, try a 70-200mm or 85mm.
- Tripod – a tripod is not a must, however, it can help with carefully composing images particularly when starting out in photography. Also, crucially, it allows you shoot long exposures.
- Filters – when shooting long exposures, try adding on an ND filter to create smooth looking water – or use a polarising filter to capture more vivid colours.
10. Use the right camera settings
We recommend putting your camera into manual settings to capture the best reflection photographs. Manual will give you full control of the image – and allow you to experiment in your image-making.
If the water you are photographing is moving visibly, put your shutter speed up – try 1/500 or higher – to freeze the movement and capture reflected shapes sharply.
Or, you can use a slower shutter speed with moving water to make it appear softer.
In terms of aperture, if you're looking to photograph a dreamy sunset, try shooting at a shallow aperture, such a f/1.8. Or you can capture sharp detail and emphasise reflections by stopping down – try f/5.6 or above for really sharp and detailed reflections.
Of course, whatever changes you make to your settings for shutter speed or aperture, remember you will need to compensate for this with your other settings.
For example with a shallow depth of field such as f/1.8, you will need a low ISO (such as ISO 100) and high shutter speed.
This is because the aperture will be letting in more light. Use your meter to ensure that you are getting your settings and exposure right.
11. Photograph just the Reflection

Credit: Linus Nylund
The obvious image is of the subject and its reflection. However, an interesting variant is to take away the subject – be that a mountain, buildings, sky – and shoot just the reflected image.
Interesting compositions can be found if you leave the main subject out of the frame and only include the reflection in the shot.
You could even just make light – the essential external component to any photograph – and its reflection your subject, like the example above.
Final Words
We’ve looked at different types of water reflection, different ways of composing the image and setting up your camera.
Now, all you need is the weather, the right light and the patience!
Please get in touch via the comments section below with any questions and I will be happy to respond to you.

Check out these 8 essential tools to help you succeed as a professional photographer.
Includes limited-time discounts.

Patrick Mateer is an award-winning photographer who lives in Yorkshire, England with his wife (wedding photographer Hollie Mateer) and two children.
1 Comment
Leave a Comment
👋 WELCOME TO SHOTKIT!
🔥 Popular NOW:

I really enjoyed writing this article – and hope you enjoy reading it too! If you have any questions at all, please leave them as a comment and I will get back to you.