


How to Use Foreground in Your Photography
The foreground is an important element in photography. Want to learn how to use it for eye-catching images? Check out this guide!
Learn | Photography Guides | By Greg Cromie
Shotkit may earn a commission on affiliate links. Learn more.
Knowing how to use foreground in your photography is an essential lesson in composition and creating eye-catching images.
In this guide, we'll cover the compositional elements of foreground, middle-ground and background. We'll also explore how to use these elements in landscape images, just like the pros.
To guide you in mastering the use of foreground in your photography, we'll cover several essential tips, tricks and rules.
Let's take a closer look at how you can elevate your photos with the use of foreground.
What Is the Foreground?
By definition, the foreground is the part of a view that's closest to the observer. As a photography term, it's the part of the view that's closest to the camera.
Understanding and controlling the foreground elements in a photo can deliver intense compositions and narrative.
A photo that has strong foreground elements is more appealing to the viewer. It can be a core focal point or point of interest that pulls the viewer into the image.
When you consider that the foreground is the first thing we observe in life and photos, it's no wonder it's such a vital part of good photography.
What's more, the foreground in a photograph provides perspective and adds dimension to a flat physical image.
In landscape photography, ignoring the foreground is a big mistake as your eye doesn't have a starting point to anchor the image. On the other hand, landscape images with an interesting foreground subject will lead your eye on a journey.
What Is the Difference Between Foreground, Middle Ground and Background?

In photography, we tend to break up a physical three-dimensional space into ‘ground' sections – they're the foreground, middle ground and background.
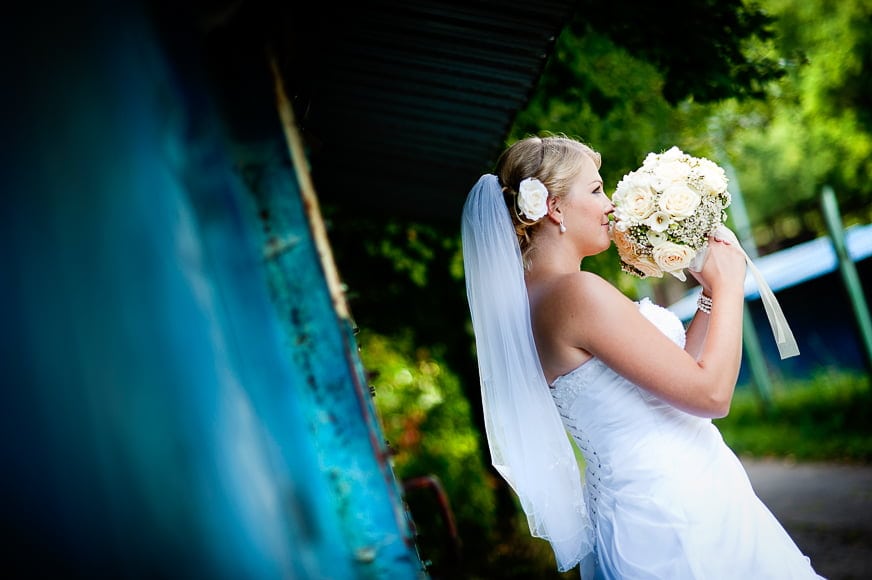
Foreground elements can take several forms depending on the genre of photography you're shooting. In portrait photography, the foreground subject is usually going to be a person that's the main focus of the image.
The subject is closest to the camera, and there's the distance between them and the scene behind them. In these cases, the foreground subject is in focus, and the background is blurred to achieve optimal subject separation and bokeh.
The background is generally the scene that's the furthest away from the camera. This can be in sharp focus or blurred.
Going back to our portrait example, if the person is the foreground subject, then the backdrop or natural setting behind them is the background.
In portraiture, we soften the background so that the in-focus subject stands out stronger. It's is known as subject separation, and to achieve this, you need distance between the foreground and the background.
As for middle ground elements, they're everything that exists between the foreground and the background.
Let's refine it by saying that middle ground is just as important as the other ‘grounds' in a composition. While it may not gain the same level of attention as the foreground, and may not be as dominant as the background, the middle ground is critical.
The middle ground is the bridge between your interesting foreground and your compelling background.
If you're shooting a headshot of a person, chances are there's only the subject in the foreground and then some form of background. In this case, the middle ground is out of the frame and is unnecessary – which is why strict adherence to the rules of the composition isn't necessary.
I'll point out that there are no set rules around the distance between each of the ‘grounds'. You get to decide what works best for the composition and the genre you're shooting.
You determine the layout of the subjects; except, perhaps in landscape photography, where nature has already done that for you.
Let's take a closer look at how foreground, middle ground and background apply to the landscape genre.
Why Do Landscape Photographers Include a Foreground, Middle Ground and Background in Their Images?
While almost every genre of photography has us considering foreground, middle ground and background composition, there are somewhere you can optimize these planes of view.
The best use of all the ‘grounds' is in landscape photography. Landscapes are rich and deep with the scene drawing the eye deeper and deeper into the setting.
Our role as photographers is to faithfully capture that scene and effectively reproduce the same experience of depth.
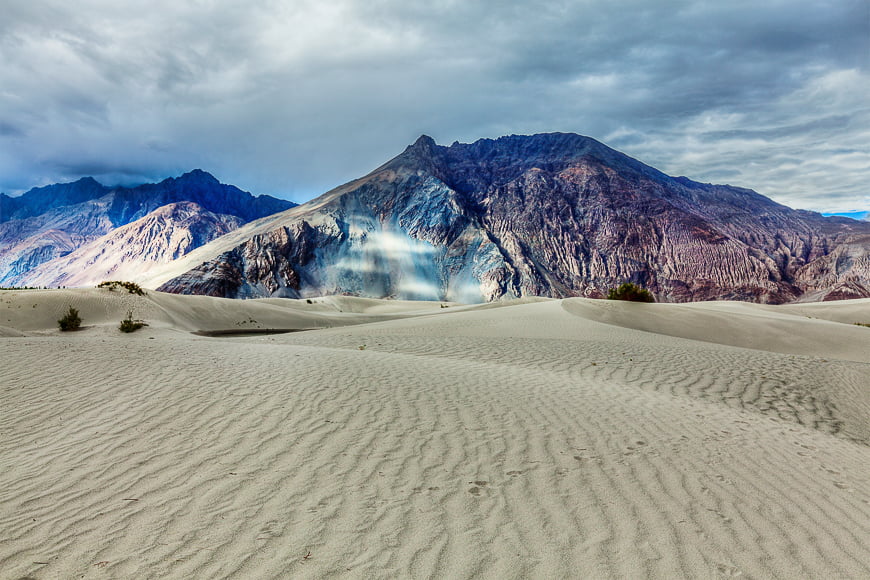
The best way to achieve this is to find a mesmerizing scene to photograph and, from there, use the ‘grounds' to your advantage.
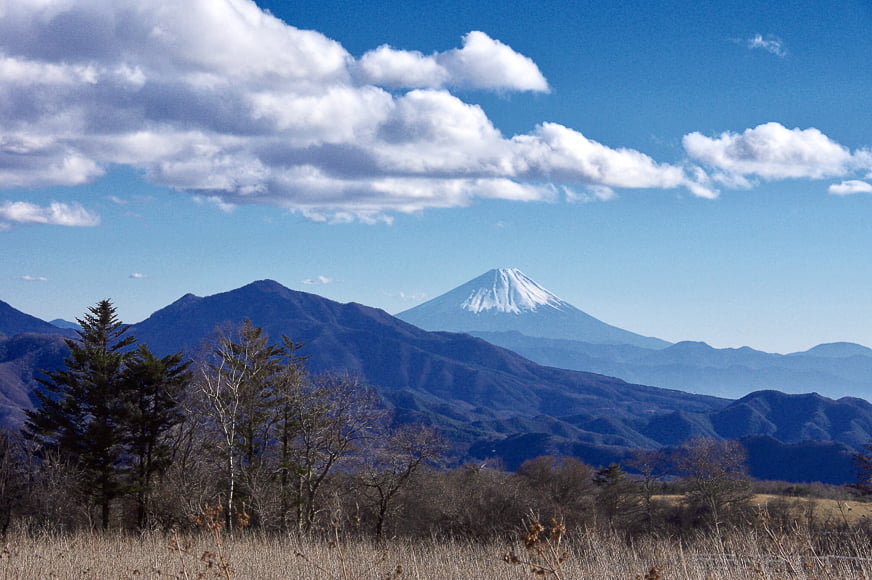
In landscape photography, the foreground is not going to be a mountain range but something that adds drama and interest to the photo. It could be a giant boulder, a lone tree, a pebble beach or an abandoned farmhouse.
Either way, the foreground subjects are what initially draws the viewer into the image. With the right foreground subjects, your viewer sees them first and then travels around the composition – always returning to the foreground.
Having the foreground element in focus delivers a level of subject separation from the middle and background. But this isn't a hard and fast rule. You can also achieve a dramatic and appealing image with the foreground out of focus and the middle ground being sharp.
And again, there are no rules of photography that say every landscape MUST have a foreground element. You get to make your own rules of composition with this one.
In landscape settings, the background will usually involve elements above the horizon line – but it's not the only way to do it. Mountain ranges, distanct forests, a vast body of water and even the sky fall into the category of background.
It's the background elements that pull the viewer into the landscape, across the distance and out of the space they physically occupy. Backgrounds are no more or less critical than a foreground as, more often than not, they include staggering displays of nature's scale.
When it comes to the middle ground in a genre like landscape, it plays a critical role in bridging the gap and leading the eye between the foreground and the background.
Midground plays a critical role in delivering a natural experience to the viewer. An ice tundra, a vivid blue lake, an Iceland waterfall or rolling hills all make for interesting middle ground elements.
When paired with the right foreground and background these can create a stunning landscape shot.
How to Include the Foreground in Your Photography
Now that you understand what foreground is in photography, and the difference between the three different ‘grounds', let's look at some tips on how to include foreground in your images.
Tip 1: Lead The Way
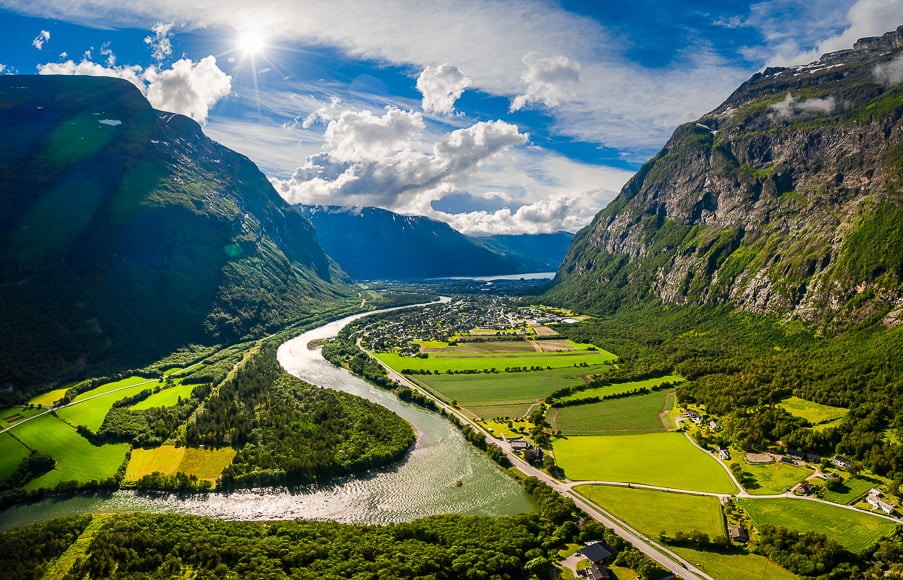
Leading lines are a brilliant way to add drama and direction to your images.
Their purpose is to draw the viewer's eye along a path. This could take the form of a mountain ridge or a rustic fence running from foreground to background in a landscape setting.
In a street scene, it may be a tram or train lines or even overhead power lines that draw the viewer's attention.
When done right, leading lines can direct the viewer to another point of interest in the middle ground or background.
Tip 2: Follow The Bouncing Eye
The bouncing eye is a little like leading lines, but there are no actual lines in the composition. Instead, some elements cause the eye to leap from one subject to another in a linear way.
Giant transmission lines dotting a mountain range create a path in a landscape image. Traffic cones or road signs spatially distanced down a street from the foreground to the background could work in a city scene.
Tip 3: Start at Chapter One
As we discussed, the foreground elements in a photo are what kicks off your visual story or narrative. The foreground is framed in such a way that your viewer sees it first before being led through the middle and background chapters.
Introducing a foreground subject can turn a good composition into an amazing one.
Tip 4: Go Wide Or Go Home

A brilliant way to emphasise a foreground element is to use a wide-angle lens. These lenses take in a more significant amount of the middle ground and background to deliver context in a composition.
They also allow for a foreground subject to be emphasized within that frame. Changing the angle from which you take your image can add a lot of drama to how your foreground elements impact the rest of the picture.
Using emphasis in photography is a powerful technique to direct the viewer's eye.
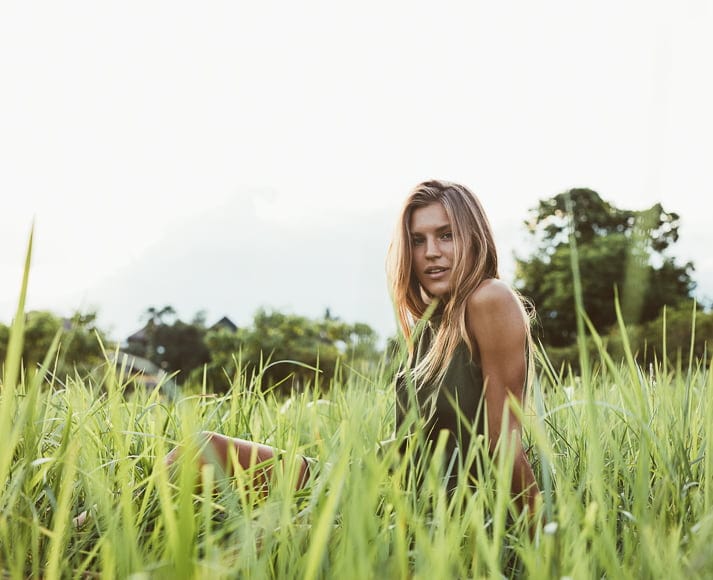
Tip 5: Use Angles For Drama
Changing your angle of composition is a straightforward way to emphasize your foreground subjects.
In street photography, an example of this is shooting from the hip and pointing the camera up to catch dramatic angles of people walking through the frame.
The same approach applies in a landscape by shooting from a lower point such as amongst a field of wheat or a pebble beach.
Tip 6: Set The Scene

We've mentioned composition a lot throughout this article, and the ‘ground' layers are the most significant part of framing your shot.
You need to consider your composition as fitting it into a box or field of view – within which your foreground, middle ground and background exist. Don't settle for the first composition you find.
In a landscape setting, spend the necessary time to walk around the location and find the best angle or position to capture the ‘grounds' within your frame.
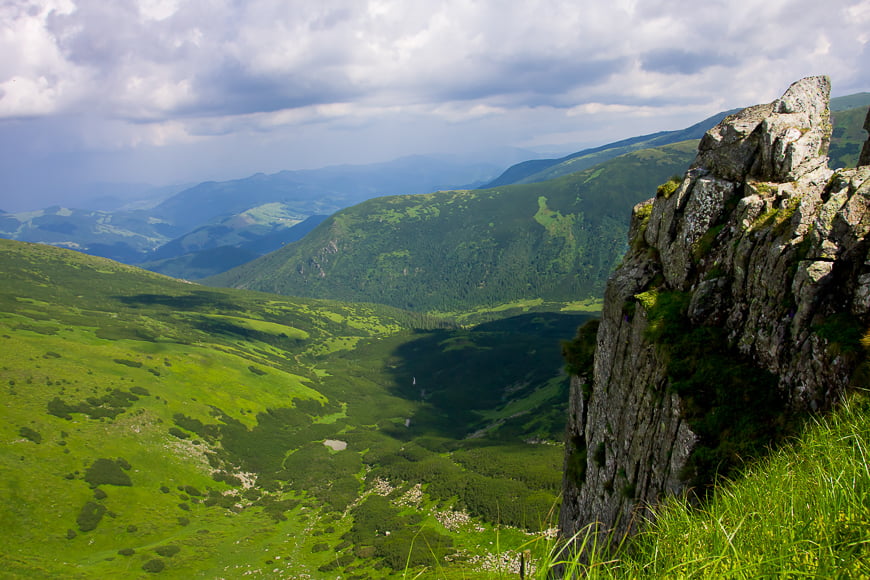
Tip 7: Experiment With Framing

While the borders of your field of view can assist in framing a composition, there are other ways to create an impressive frame of a physical kind.
In a natural setting, you may use elements such as the parting of trees to form a clearing or the gap between two giant boulders to create a frame. With these as the foreground subjects, you can then direct the view through those gaps to the middle and backgrounds.
Imagine a landscape scene as shot through a pair of barn doors or the window of a rusted out car.
In an urban setting, you may use the angular shapes formed by buildings, doorways or even the gap between two people to create a frame.
Using a ‘frame within a frame' style of composition is a great way to create depth in an image and focus the viewer's attention to a finer point.
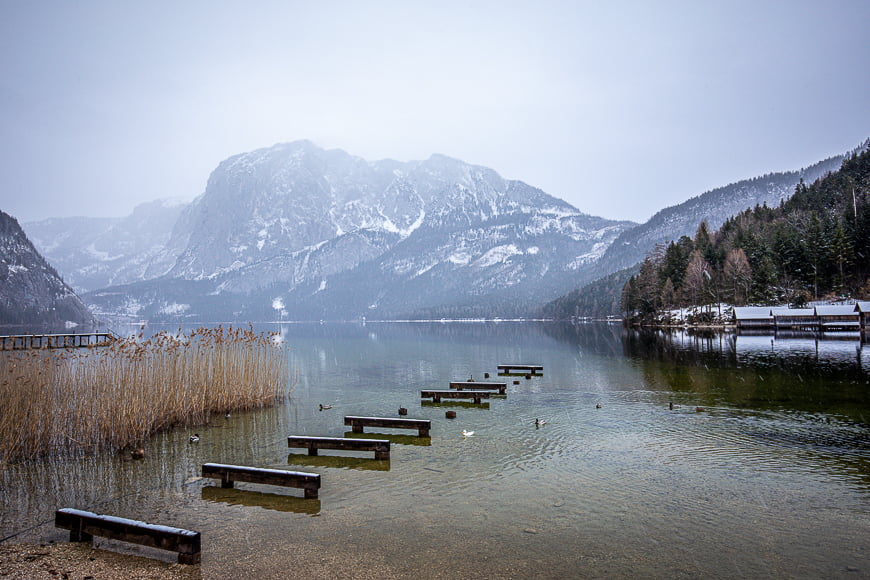
Tip 8: Depth And Focus
One of the best ‘tricks' in photography is to use depth of field and focus to catch the viewer's eye.
Having a foreground element in sharp focus while the middle and background are soft and blurry is a simple way to achieve subject separation (much like we discussed with the portrait examples).
But, the foreground doesn't always have to be the area in focus. An out-of-focus foreground element with a sharp middle ground subject can be just as dramatic.
To achieve this, you'll use a lens that has a wide aperture so that you can capture a finer depth of field. The wider the aperture, the faster the out of focus elements fall away from the in-focus ones.
Tip 9: Manage Exposure
A great way to optimize the foreground, midground and background elements is to ensure that each is adequately exposed.
There's no point having a stunning foreground subject if it's too dark while the background sky blows out.
Understanding your camera settings and even the use of filters is a simple way to effectively manage exposure – especially in a landscape setting.
Using a camera function such as exposure bracketing to create High Dynamic Range images is also an effective solution.
Tip 10: Control Contrast

Much like managing exposure, being able to control the contrast of a composition is a simple way to make your ‘ground' work to your advantage.
And when it comes to contrast, it doesn't have to be about light and shadow elements of the image – although they can certainly help.
Contrast can also include the difference between textures or colours that appear in your image. A green hilly middle ground and a cloudy red sunset delivers amazing contrast and helps with drawing the viewer into the picture.
Tip 11: Try The Rule Of Thirds

With this rule you have to promise not to overdo it – it's more of a guide than a rule. The rule of thirds is one of the founding principles of photography composition.
An image cuts into three equal sections on both the horizontal and vertical axis. The points where those cut lines intersect are known as points of interest.
When creating a composition with the ‘grounds', you'd consider the foreground elements sitting on those points.
For example, a lone tree may look better if it touches the point of interest on the left rather than sitting in the middle of the frame.
See more rule of thirds examples here.
Foreground Photography FAQs
What is foreground vs background?
The foreground is the part of the scene that's closest to the camera, while the background is the part of the scene that's most distant or far from the camera's view.
Should all photographs include a foreground, middle-ground and background?
Not necessarily. You might have a striking portrait of a person in the foreground with a wall in the background, for example, or a landscape photo with middle-ground and background elements only. It's up to you how you compose your shots – though being conscious of all three tends to result in a more balanced composition.
Is it best to avoid foreground images in landscape photography?
Foreground images can certainly work in landscape photography. Including some element in the foreground can add interest to a landscape photo, give it more depth, and draw the viewer into the photograph.
Final Words
Understanding the many rules of composition that involve foreground, middle ground and background are crucial to your photography education.
But once you know them and understand how to apply them, try to forget them as hard rules and keep them in mind more as gentle guides to an exceptional composition. The rest is up to you.

Check out these 8 essential tools to help you succeed as a professional photographer.
Includes limited-time discounts.

I’m a Melbourne-based street photographer and blogger. I love to travel to Japan to photograph and document its dynamic people and culture.
1 Comment
Leave a Comment
👋 WELCOME TO SHOTKIT!
🔥 Popular NOW:

Thanks for taking a look at my article. If you have any comments or questions please leave them here and I’ll get right back to you. Cheers. G