


How to Make a Photo Wall Clock (Easy DIY)
Discover how to create a unique photo wall clock with our easy guide, transforming your favorite pictures into a functional and decorative timepiece.
Learn | By Ana Mireles
Shotkit may earn a commission on affiliate links. Learn more.
Do you want to learn how to make a photo wall clock?
Welcome to this easy-to-follow tutorial!
If your old clock no longer complements your home decor, or you want to add a personal touch, you can revamp it with a brand-new photo.
Maybe you don't have a wall clock yet. No problem! You can buy a clock mechanism and DIY one using your favourite photo.
Photo wall clocks are also a great idea for a present.
Whatever the reason is, if you're looking to learn how to make a photo wall clock, I'll guide you through it. Let's get started!
More fun DIY photo projects:
Materials
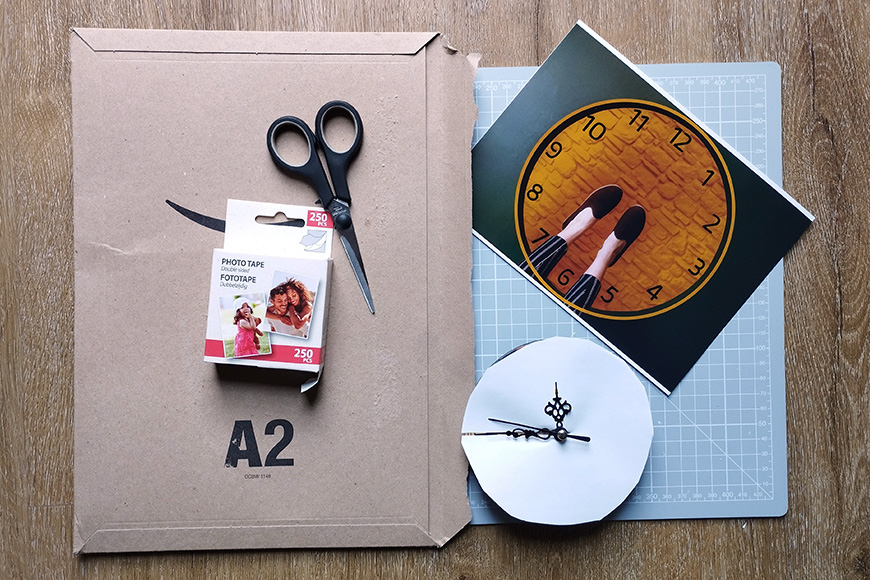
- Photo
- Clock template
- Photoshop (or a Photoshop alternative)
- Card stock
- Clock mechanism/old clock
- Glue/double-sided tape
Process
The first part of this project involves photo editing. I'll show you the steps to follow in Photoshop, but you can follow along using a different photo editor as long as it allows you to work with layers.
The second part will show you how to assemble the clock.
You can buy clock mechanisms on Amazon and other stores. Otherwise, you can use an old clock you want to revamp – I'm doing the latter.
Step 1
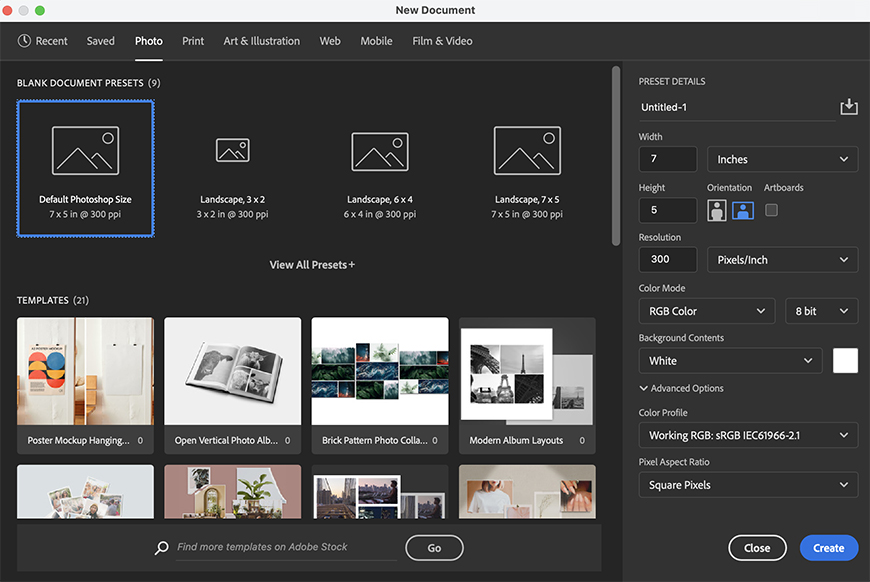
Open a new document in Photoshop. Here, you need to establish the parameters for the document – both the size and the resolution.
The size depends on how big you want your clock – I'll make mine 5 x 7″. Regardless of the size, you should set a resolution of 300 ppi because you'll be printing this.
If your photo isn't big enough, you can lower the resolution, but I don't recommend going lower than 150 ppi.
Now, click OK.
Step 2
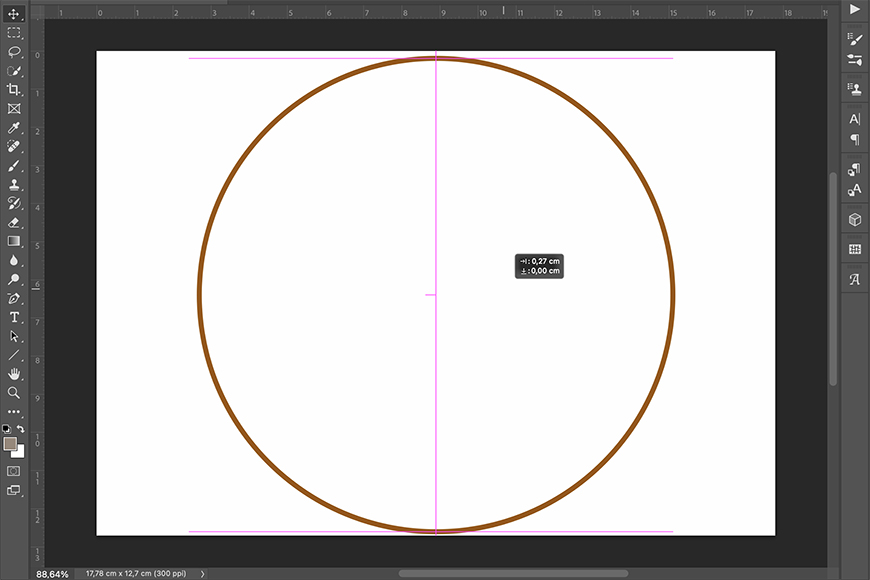
If you want to make your photo clock irregularly shaped – let's say a sunflower – you can skip this step. This is useful only if you're making a circular clock.
Activate the Shape tool on the Toolbar. Press and hold to open all your choices and select the circle.
On the Options bar, set the Fill to none. Then, choose the stroke's color. If you prefer to wait and see how it looks with the photo, you can decide on this later in the project.
Now, press the Shift key on your keyboard while you click and drag the cursor on the screen to create a circle.
Using the Move tool, drag the circle to place it exactly in the center of the document. Automatic guidelines appear to help you with this operation.
Step 3
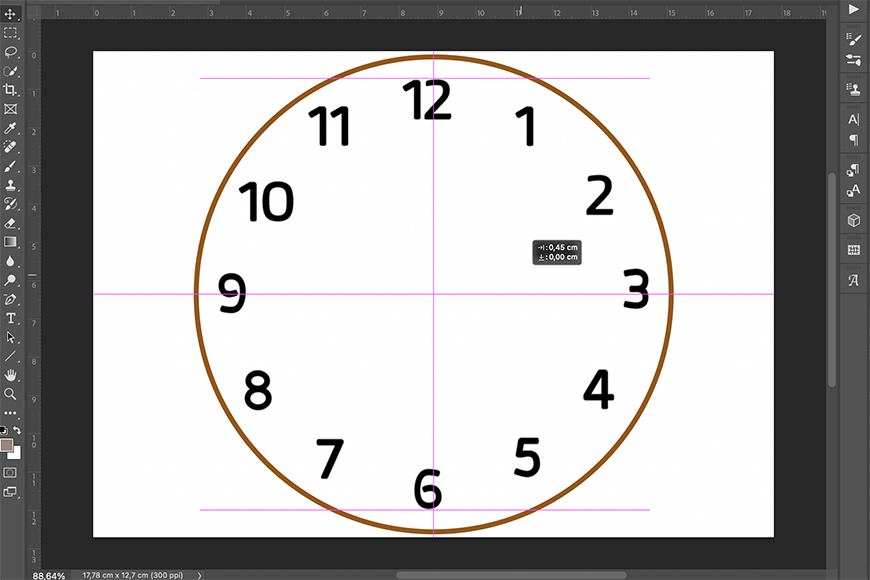
Now, copy and paste a clock template onto the document. You can also use the Place Embedded feature from the File menu.
Your clock template can have numbers or lines – the design is up to you. I used one from the Public Domain I found on Wikimedia. If you like it, you can download it here.
You don't need to do anything else if your template has a transparent background. If it has a white background like mine, you need to change the Blend mode to Darken. You'll find this feature at the top of the Layers panel.
Next, use the Move tool to center the clock in the document inside the circle.
Step 4
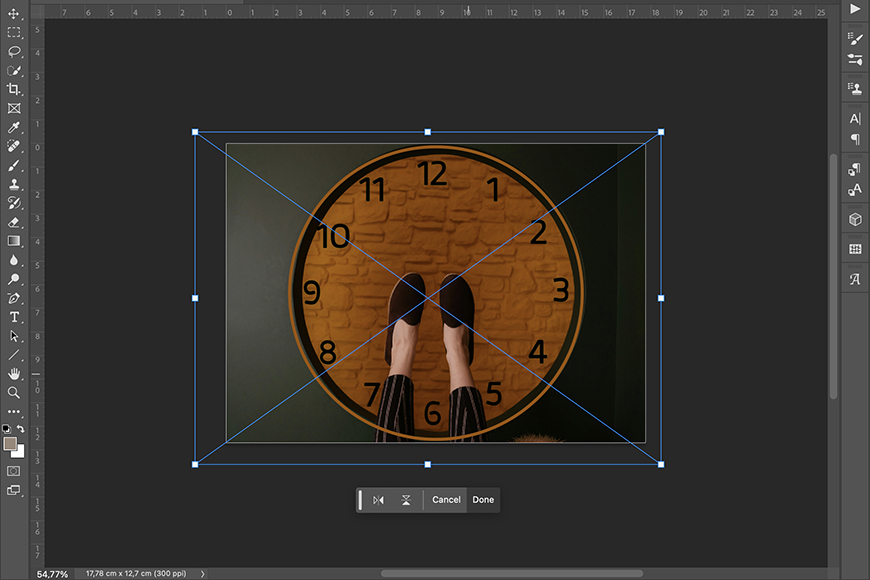
Photo credit: Alp Yıldızlar
Now, you need to add the picture. Again, you can copy-paste it or use the Place Embedded feature.
Make sure this layer is underneath the shape and the clock template. The photograph needs to be at least as big as your document – a smaller image will look pixelated and low-quality.
If your photo isn't big enough, you can enlarge it using Photoshop or a dedicated program such as Gigapixel AI. There are also online tools for enlarging images without losing quality.
Once the photo is the right size, drag it to the correct position using the Move tool.
The choice of the image is very important. I wanted to use a rectangular photo with a circular element inside, where I could fit the clock.
However, you can choose a photo from which you can cut out a circle or even a shape. Some common examples are symmetrical flowers or the face of your pet.
Step 5
You can flatten the layers once your photo is ready, and then save the document.
Then, you can print it at home or have it printed at a lab or a photo kiosk.
Step 6

Now, cut cardboard or card stock to the size and shape of the photo you're using. You can even cut it from a cereal box. I'm using an envelope from an Amazon delivery.
It doesn't need to be super rigid – the idea is that it will make your photo lay flat. Also, because it will be facing the wall, it doesn't need to be anything special.
Step 7
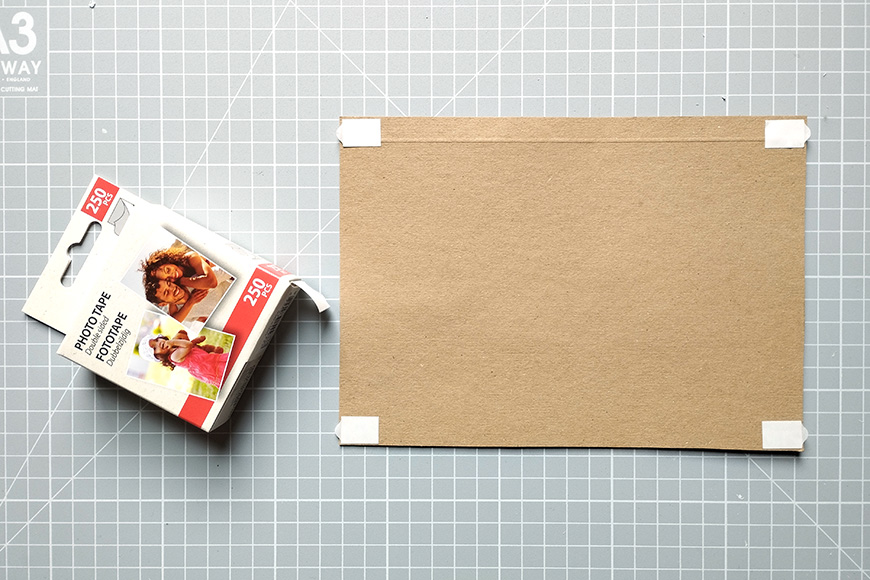
Using the double-sided tape, paste the photo to the card stock.
You can also use school glue or any adhesive you have at hand.
Step 8

Next, find the center of the image and make a hole that's big enough for the clock mechanism to pass through. You can use the tip of the scissors or an X-acto knife to do this.
You have to be careful not to tear the paper more than you need. However, it's not a pinhole – it must be big enough, but the clock hands will cover the hole's edge, so you don't have to worry so much.
I advise you to work from the front. This way, the paper will tear towards the back, and you won't risk any visible damage.
Step 9
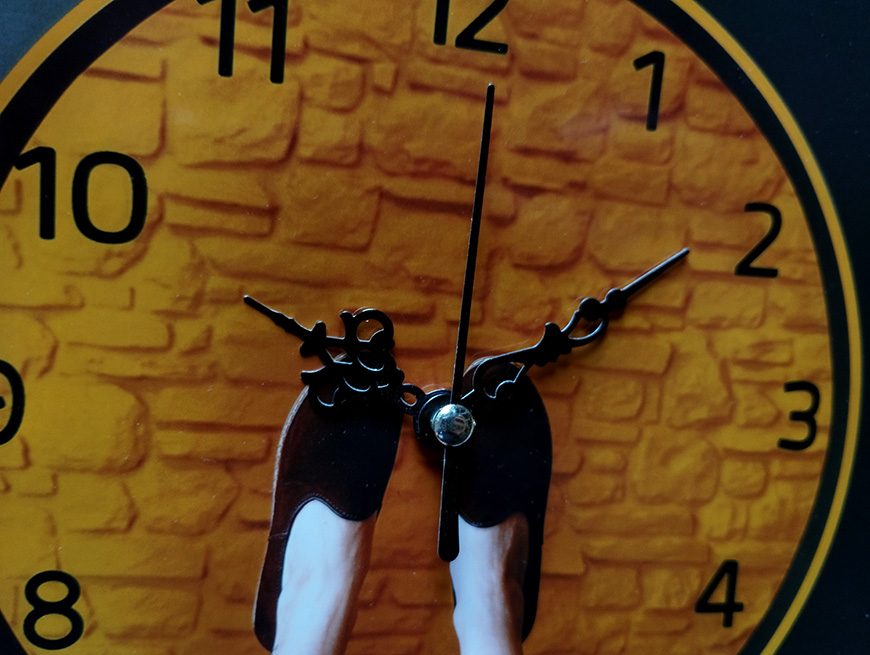
Now, assemble the clock following the instructions provided with the mechanism.
Then, put a battery in the clock and check it's all in working order. Now it's ready to hang on your wall.

Check out these 8 essential tools to help you succeed as a professional photographer.
Includes limited-time discounts.

Ana Mireles is a Mexican researcher that specializes in photography and communications for the arts and culture sector.

👋 WELCOME TO SHOTKIT!
🔥 Popular NOW:
