


Guide to Steel Wool Photography
Steel Wool Photography is a fun and creative technique for taking captivating shots. Learn 17 fresh tips and tricks in this ultimate guide!
Shotkit may earn a commission on affiliate links. Learn more.
If you like light painting, long exposure photography, or simply trying something new, you might want to look into steel wool photography. While there's definitely a bit of an art to it, any standard of photographer can give it a go.
Never worked with long exposure or light painting before? No worries. Steel wool photography isn't that hard to learn – it just takes a bit of practice.
So let's take a look at what it is, what it involves, and how to get some truly stunning shots.
What is Steel Wool Photography?
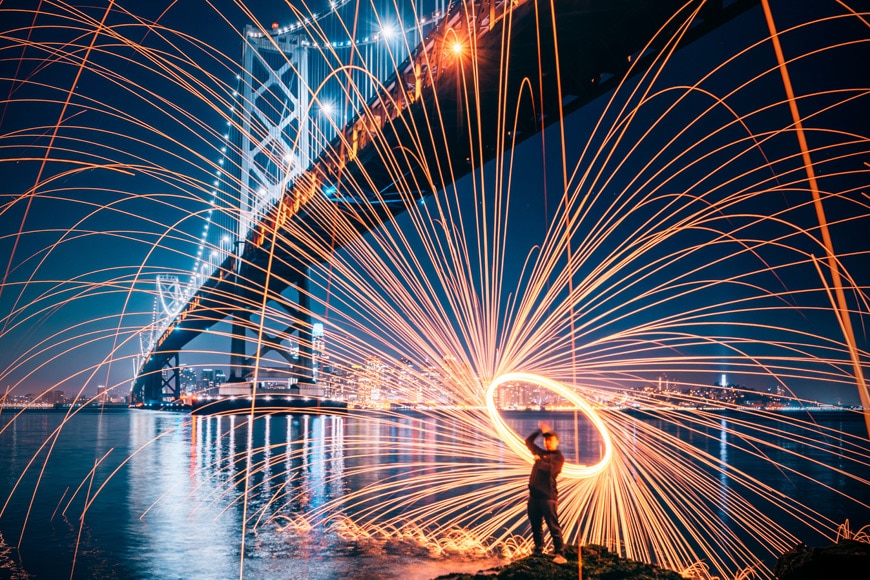
Steel wool photography is a type of light painting that uses steel wool that's been set on fire.
As the burning steel wool is spun around on a cord or a string, embers fly and create streaks of light when shot with a camera at slow shutter speeds.
What is steel wool used for?
Steel wool has a fantastic number of uses.
Odds are, you're probably already familiar with steel wool. It's often used for getting crusted food off of pots and pans. It also works great on windows and even porcelain, as it doesn't scratch.
In the wood and metalworking world, steel wool is often used to clean, sand, or polish.
You can also use steel wool to plug up rodent holes. It will cut up their mouths if they attempt to chew through it, so they don't bother.
Best of all though, steel wool is a great tool for light painting. Setting steel wool on fire lets off plenty of sparks, which creates fantastic light streaks when paired with long exposure photography.
Steel wool will even light when wet and can be used as tinder in an emergency.
Is Steel Wool Photography illegal?
Steel wool photography does deal with open flame. As a result, it will likely be illegal wherever open flames are prohibited or wherever there's a substantial fire hazard. However, if you take care and check your local laws, you can safely experiment with steel wool for your creative photography.
How do you make steel wool at home?
Steel wool is generally created in factories – where metal rods are pulled through a series of metal dies. These dies slice into the rods, cutting away unnecessary metal (otherwise known as “drawing.”) This process reduces the rod to a fine strand. Multiple strands are then bundled together into large masses, cut to size and pressed into pads.
The entire process takes a fair amount of machinery and cannot really be done at home.
What Equipment do you need for Steel Wool Photography?
Luckily steel wool photography doesn't require any fancy or expensive equipment.
Here's what you need:
• A camera that can shoot in manual mode.
• Tripod.
• Remote shutter release cable or remote (optional).
• Steel wool.
• Cord, chain, or leash. Two feet is generally a good length.
• Stainless steel whisk (make sure it's metal, not silicon!).
• Lighter or another way of generating flame.
• Protective clothing and fire safety gear.
• A friend to spin for you as you take the shots (or vice versa)
How to Do Steel Wool Photography
Once you've gathered up all the gear needed for steel wool photography, it's time to have fun!
Here's how:
1. Set up your camera and tripod and dial in your camera settings.
2. Attach the whisk to whatever you will be spinning it on – a cord, chain, leash, etc.
3. Fluff up the steel wool. The more space between the fibers for air to flow, the better the wool will burn.
4. Stuff the fluffed steel wool inside the whisk, taking care not to stuff it in too tightly. Again, the better the airflow through it, the better it will burn.
5. Light the steel wool. Don't worry if it doesn't catch fire right away. It only needs to be glowing or sparking a bit. Once you get the steel wool spinning, the air movement will cause it to ignite fully.
6. Start the spin.
7. Open the shutter just after the spin really starts going. Generally, you'll have between 10-30 seconds before the steel wool burns out.
Camera Settings
One thing that's helpful to have dialed in right away is your camera settings. It's best to shoot in manual mode when burning steel wool, as you'll need full control over the exposure.
Shutter speed: Steel wool photography looks best when you turn the flying sparks into streaks of light – and that takes a medium-long exposure. The sweet spot will generally be between 5 and 20 seconds.
Aperture: If you're looking to have the entire scene in focus, you'll probably want an aperture between f/8 and f/11. Anything below f/5.6 probably won't keep all the light streaks in focus.
ISO: Keeping a low ISO isn't just for noise reduction – it also helps you keep from blowing out the highlights of your light streaks. For most cameras, shooting between ISO 100-400 works well.
A good place to start is 10 seconds, f/8, and ISO 200.
17 Steel Wool Photography Tips
As you may have guessed, there's definitely an art to getting the best steel wool shots. Following the tips below will definitely shorten the learning curve and help keep you and your camera safe.
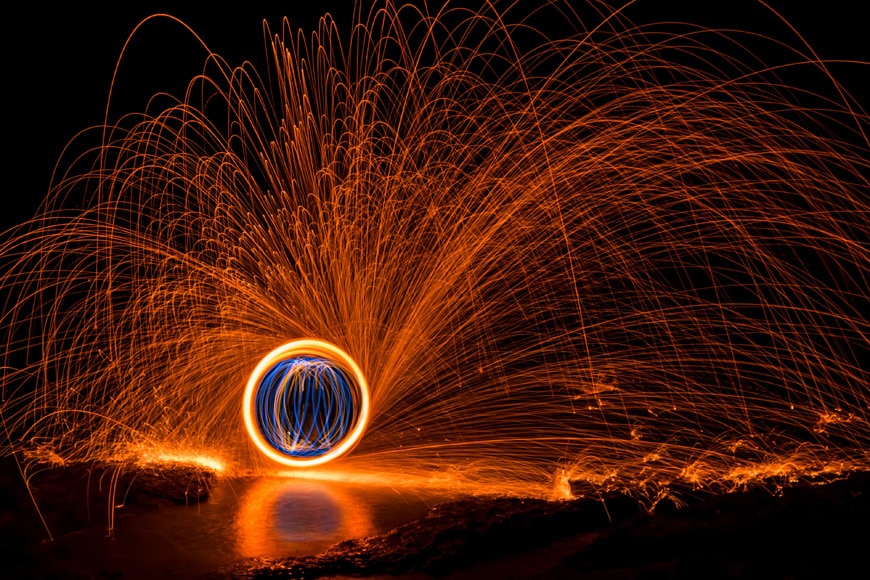
1. Use a Wide Angle Lens

Credit: Andrew Read
Using a wide-angle lens in steel wool photography will make the images look closer and more immediate. For the most dramatic shots, get as close to the sparks' arc as you safely can. (See the tip below on protecting your lens.)
2. Dress for Safety

Credit: Arun Clarke
Steel wool photography is literally playing with fire – the sparks can land anywhere, including on you.
Make sure you have your skin fully covered, ideally with a long sleeve shirt or jacket made from natural fibers. (Some synthetic fibers such as fleece or nylon burn easily.)
You'll also want a hood or hat to cover your hair and safety goggles for your eyes.
3. Protect your Lens
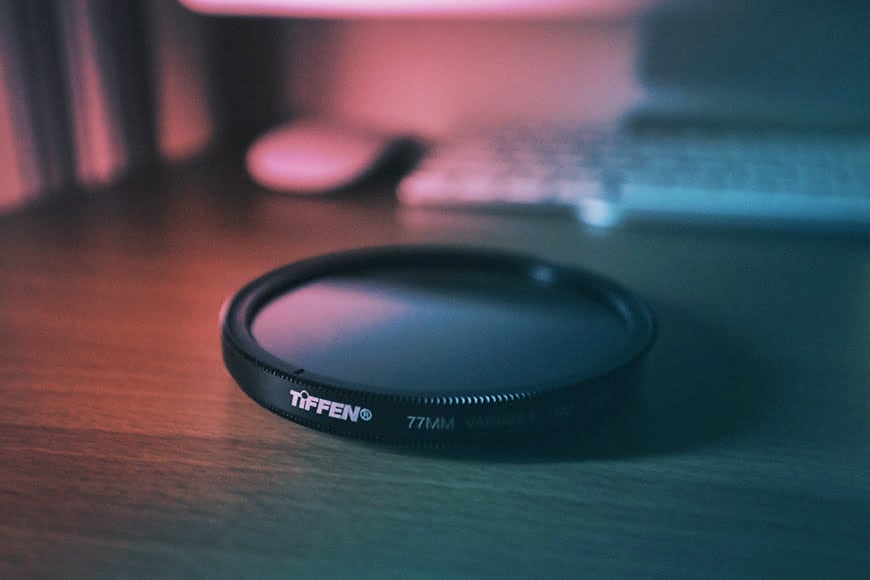
If you're shooting anywhere near where the sparks are flying it'll be a good idea to protect your lens. A simple glass or UV filter will do the trick. If you're using an expensive camera, be aware that a cheap filter can really affect the quality of your shots. Buy accordingly! Here's a guide to camera filters.
4. Use the Right Grade of Wool
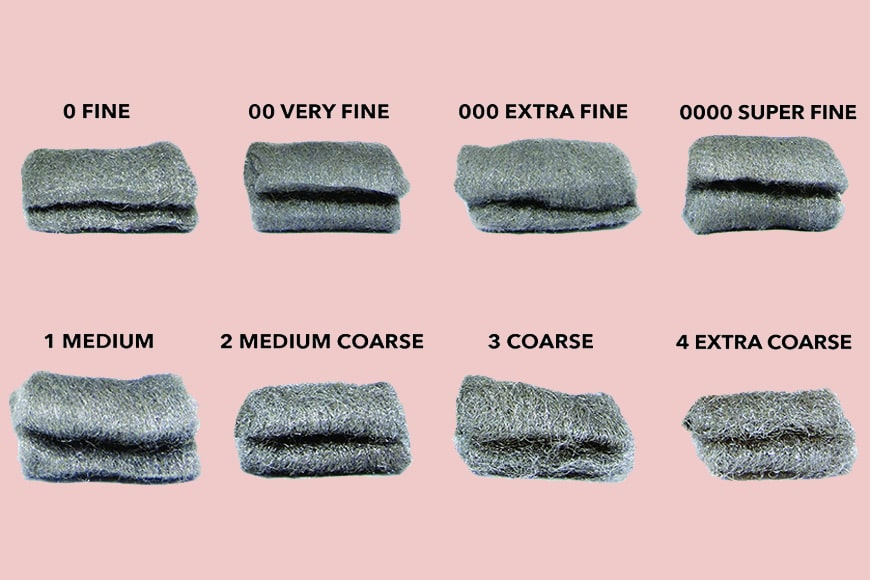
When choosing the steel wool, keep in mind how the different grades of wool burn.
Fine-grade steel wool is the easiest to light but burns out quickly. Medium-grade wool is harder to light but burns longer.
You can get by with just using fine-grade wool (000 or 0000), but the best of both worlds is to fill most of the whisk with medium-grade steel wool while leaving a space at the bottom for a bit of fine steel wool as a fire starter.
Grade 1 or above doesn't work for steel wool photography.
5. Choose the Right Location

Let's hope this gazebo was built out of metal! Credit: Steve Halama
While it might be tempting to use recognizable landmarks or old, abandoned houses for your steel wool fire spinning, it's best to avoid any place that could easily catch fire. In fact, there have reputedly been a number of instances where structures caught fire from steel wool photography.
In general, avoid any place that's flammable in any way. This includes wooden buildings, dry fields or forests, and even vehicles. In particular, stay away from buildings of historical significance, as old paints, oils and soot are especially flammable.
Beyond this, look for a place with enough room for the sparks' full arc, which has an interesting foreground and/or background.
6. Have a Bucket of Water Handy

If you're light painting in addition to the steel wool, keep a bucket of water handy so you can quickly dowse the whisk and switch implements. Credit: Sean Pierce
While a bucket of water can be used as a backup for fire safety, it's also handy as a quick whisk dip when you want to cool the whisk completely before reloading it.
Also, if you intend to do additional light painting, it's helpful to have a quick way to put the fire out so it won't distract from whatever else you're doing.
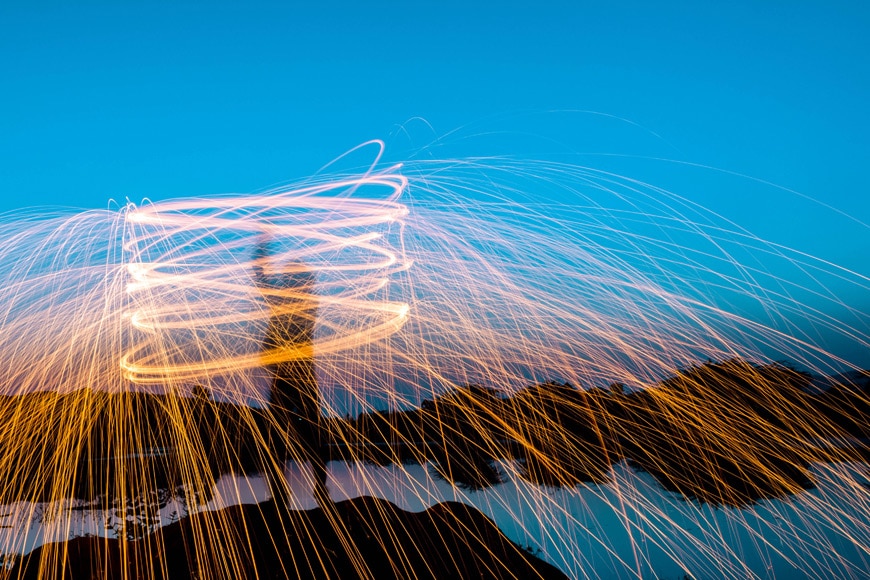
7. Shoot at Night or During the Blue Hour
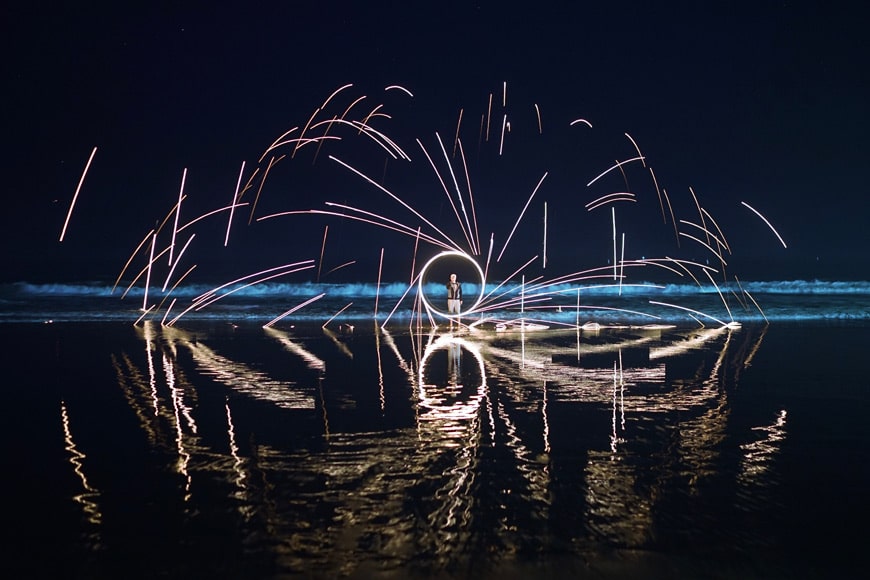
Credit: Ethan Robertson
The best steel wool photography happens in the dark – you want the fire streaks to stand out.
If you're working with an interesting background, shoot at the blue hour so you can light it up with more than just the light streaks from the steel wool.
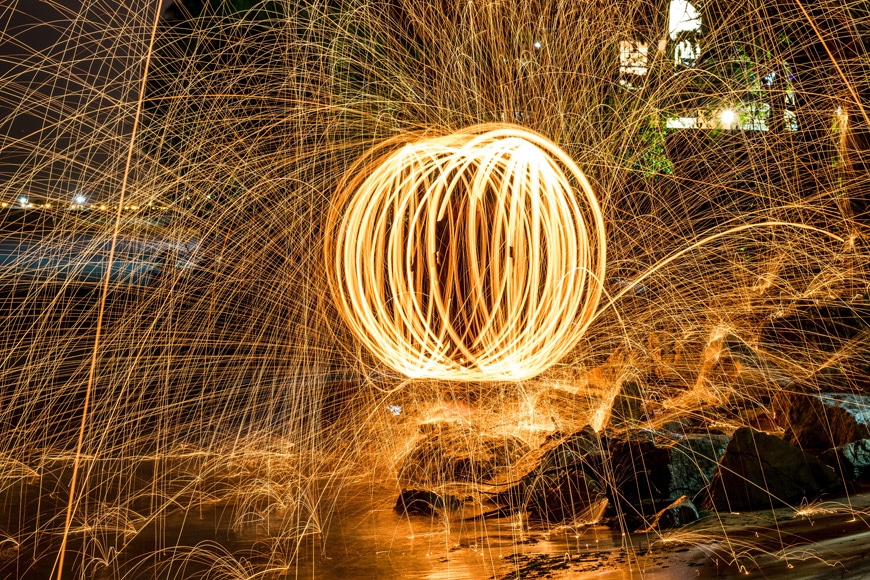
8. Compose Your Shot Beforehand
Credit: Joshua Rondeau
Since the steel wool only burns for so long, it's best to have your shots composed ahead of time.
If you have someone else spinning the wool (recommended), have them stand where they will be spinning and light them up with a flashlight. Focus on them and then switch your camera over to manual focus so you won't lose the focus point.
9. Practice First!

Credit: Genessa Panaint
There are a lot of different ways to spin the whisk. If the spinner hasn't done it before, it'll definitely help get some practice runs in. This will help compose the shot; it'll also give them a chance to practice stopping the spin without hitting themselves. (This is more difficult than you think.)
10. Shoot In Raw

Credit: Reuben
Shooting in Raw is recommended for just about all forms of photography, but is especially important here as you're working with bright sparks in a dark scene. Raw files are much more forgiving if you need to recover shadows, deepen highlights, or adjust the colors or white balance – which you probably will.
Adjusting the white balance can create incredible effects and neat colors. You'll also probably find yourself reducing the highlights by half or even more. Shooting in Raw combined with a good post-processing program makes all of this easy.
11. Hit the Shutter Button at the Right Time

Credit: Ricardo Rocha
It'll take a moment for your spinner to really get the whisk burning, so don't jump the gun with opening the shutter too soon. At the same time, the sparks will last half a minute or less, so don't wait forever.
It'll take some practice, but you should be able to get 2-3 exposures per burn in the end.
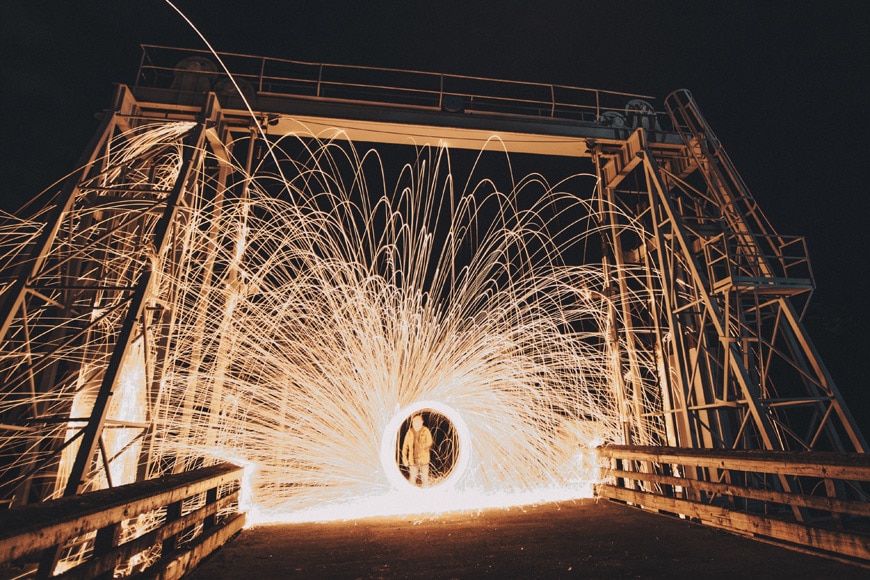
12. Hide the Spinner
Credit: Paul Carmona
If you don't want to see the spinner, you can either have them dress all in black or place them directly behind a foreground element. Some photographers add in a person with an umbrella in the foreground and hide the spinner behind them.
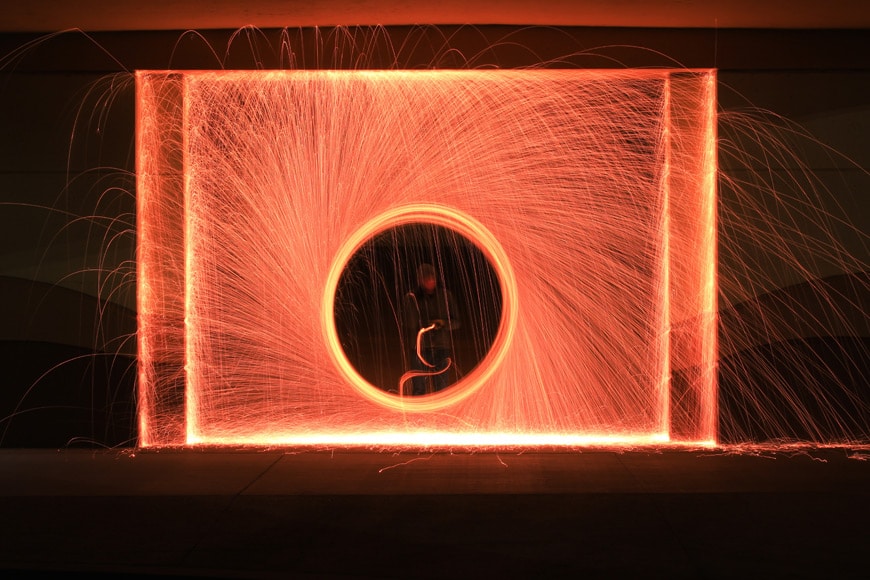
13. Spin Along Different Axes
Credit: Alok Sharma
One cool thing about fire spinning with a chain is that there are a number of different axes to work with. With practice, you can master spinning over your head, horizontally, and in figure-eights.
Each will create a different spark pattern, so try them all and see which works best.
14. Add Additional Light Painting
Attaching a light stick to the whisk will add some interesting effects to the image. Credit: Makayla Ostapa
If your camera has a bulb setting, you can create super long exposures that leave time for additional light painting. Quickly dip the whisk into a bucket of water and then use your flashlight, laser pointer, or even glow sticks for additional effects.
Speaking of glow sticks, you can also try taping them to the whisk for added effects during the spin. Conversely, attaching a string of LEDs along the chain will also make for some awesome streaks.
15. Use the Zoom

Credit: Juliana
The spinner isn't the only one who gets to be creative during the shot. Adjusting the zoom during the shot can create all sorts of interesting spirals. Try moving both in and out.
16. Bring a Fire Extinguisher
Surprises can happen even in the least flammable of places. Better to be safe than sorry. Credit: Ankush Nath Sehgal
This should go without saying, but as with any fire, steel wool photography can be dangerous. Make sure to bring a fire extinguisher, even if you think there's no possibility of anything catching on fire.
Things happen, and YOU don't want to become one of the many anecdotes of steel wool photographers setting things on fire.
17. Consider Using Multiple Exposures
Credit: Simon Zhu
The most compelling steel wool photography shots are those with fascinating surroundings. The trouble is, it's not so easy getting the right exposure for the bright sparks while lighting up a dark background – at least without a bright moon or other ambient light.
If this is the case for you, try capturing the environment first. If it's really dark, you'll probably need a longer exposure and/or higher ISO for this. Once you have that dialed in, reset your camera settings for the steel wool. Remember to switch back to manual focus if you were on auto.
Once you have the two exposures, you can blend them together in post-processing for the ideal shot.
Final Words about Steel Wool Photography
In the world of photography, steel wool probably isn't the first thing that comes to mind. Who would have thought that such amazing images could come from the metal sponge we use to clean our pots?
Put together a little experimentation, add a few dashes of creativity, find a partner or two and a beautiful non-flammable spot and extraordinary images will be right at your fingertips.
What do you think? Have you ever used steel wool for photography? Have any tips to share?

Check out these 8 essential tools to help you succeed as a professional photographer.
Includes limited-time discounts.

Usnea Lebendig is an experienced photographer and reviewer who loves to photograph professionally and in moments where the world’s beauty and/or strangeness leaps in front of the lens.
1 Comment
Leave a Comment
👋 WELCOME TO SHOTKIT!
🔥 Popular NOW:

I’m curious, how many Shotkit readers have tried this before? I was surprised to find out this was a more wide-spread technique than I’d imagined.