


Guide to 3D Photography + Fun Tips & Tricks to Try
Find out how to create your own 3D images. Whether you use film, digital camera or smartphone app, this guide has you covered!
Learn | Photography Guides | By Ana Mireles
3D means three dimensions, which is the way we perceive the world: length, width, and depth. Photography represents the world on a flat surface, using only length and width.
When you introduce depth in this image, you have a 3D photo. In this article, I’ll talk about different ways to create your own three-dimensional pictures with film, digital, or smartphone cameras.
Find the method that suits you best and give it a go.
What is 3D Photography?
3D photography is just a new way of referring to a very old technique called stereoscopy – but let me start from the beginning.
Try extending your arm in front of you and hold up one finger. Close the right eye and look at it only with the left one. Then close the left eye and look at it with the right one.
See how it seems to move? That’s called parallax, and it’s what allows us to perceive depth. Stereophotography was based on this principle.
There was a camera with two lenses separated by 2.5 inches, which is the average distance between human eyes.
When you pressed the shutter, two images were taken, each of them with a different point of view from each lens.
When you see those images together, you see a picture in 3D. That’s why it was called stereoscopy, i.e. stereo images.
The stereoscope was invented by the physicist Sir Charles Wheatstone in 1838. He used drawing to demonstrate it. Then, photography was patented in 1839 by Daguerre and became a gift to humanity by the French government.
It was just a matter of time before the two inventions got together, and by the 1850s, stereo-photography became extremely popular.
Many cameras and viewers were developed since then. I remember the View-Master with scenes of Disney characters, as you probably do too if you grew up in the ’80s.
Nowadays it’s still possible to do 3D photos with digital cameras, and it has become increasingly easy with smartphones.
So, whether you want to do some vintage photography with an analog camera or a Facebook post with a 3D effect, let’s find out how you can make it happen.
How Do You Make a 3D Picture?
Credit: Athena
There are many ways to make a 3D picture. From using film to using an app, here are some suggestions.
-
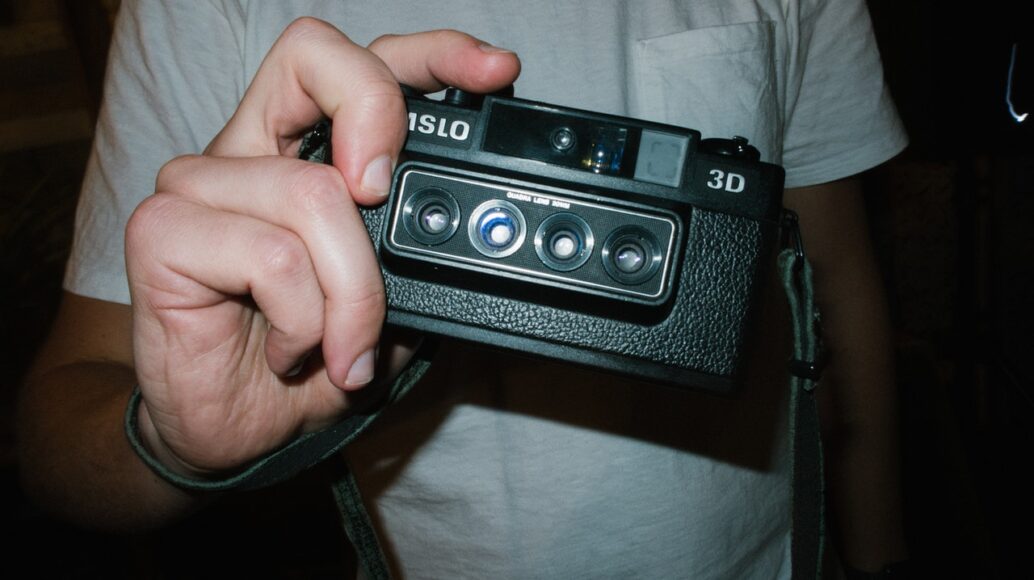
Use a Stereoscopic Camera
As we all know, vintage is making a comeback. Film photography is no exception so you can always use an analog camera to make your 3D picture.
Vintage cameras can be found in flea markets or thrift shops. Otherwise, look for them on secondhand websites like eBay if you can’t find them locally.
Some famous models are the Holga 120 3D, Nimslo 3D, Kodak Stereo Camera, and the View-Master Personal Stereo. Some of them use a 120mm film (medium format), others 35mm. Both types are available to buy online or at local photography shops.
You just shoot the camera normally and it will automatically create both negatives. It’s one of the easiest ways to produce 3D photography.
-
Use a Digital Camera
You can use two cameras to replicate the effect of the stereoscopic camera by mounting them on the best camera rigs you can afford.
How Much Do You REALLY Know About Photography?! 🤔
Test your photography knowledge with this quick quiz!
See how much you really know about photography...

This way you’d get two images with different points of view that can be used to make 3D images.
Just make sure that both of them have the same camera settings.
If you don’t have this equipment, here’s a 3D photography method that works for any digital camera regardless of the format or resolution.
Step 1: Choose your subject. To make the three-dimensional effect more noticeable, choose a scene with a vanishing point. If the scene is flat you won’t see much difference.
Step 2: Frame the scene with the subject in the middle. It’s best if you use a tripod to keep this framing as similar as possible in the next step. Take the first picture.
Step 3: Move the tripod to the left. Remember the parallax effect from the beginning of the article? The apparent movement of your finger if you look at it with one eye at a time?
Well, repeat the experiment now. First, do it with an extended arm, then do it with the finger close to your face.
Notice how the finger ‘moves’ a bigger distance when it’s close to you. The increase of the effect is due to something called depth perception.
The same thing applies to your photograph. If the object is close to you, move the tripod approximately 2 inches (5 cm).
If the subject is further away, you can also take the second picture with more distance from the first one to make the effect more noticeable.
Only move your position though, the camera settings should stay the same.
Step 4: Afterwards, you can print the two images and use a special viewer to see the 3D photography effect. You can also create a GIF in Photoshop, or put them next to each other and ‘defocus’ your eyes to see the 3D.
-
Add a 3D Effect in Photoshop

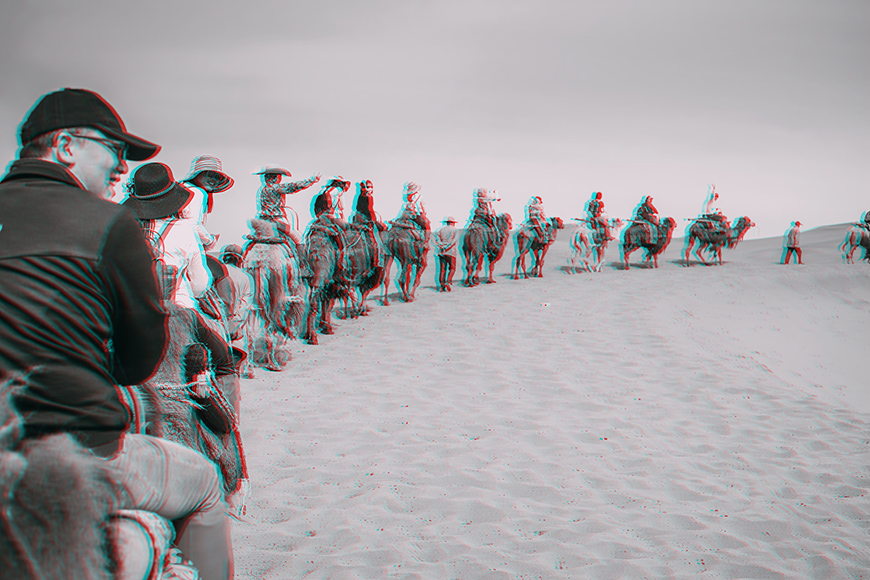
Credit: Chandler Chen
You’ve probably seen the color glasses used to watch a 3D film. These are used to appreciate anaglyphs.
An anaglyph is done by superimposing two images in different colors – usually cyan and red, like the glasses. You may have seen something similar with ‘Magic Eye’ images that were popular a few years ago.
This is how you can create this effect using Photoshop:
Step 1: Open your image and duplicate the layer.
Step 2: Duplicate the background. You can do this by dragging the layer to the Create New Layer button at the bottom of the panel.
Alternatively, you can go to the menu Layer, Duplicate Layer.
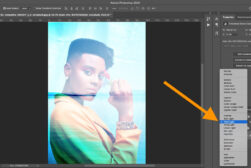
Step 3: You only need the red channel from this duplicate, so open the Layer Style dialog by right-clicking on the layer, and choosing Blending Options.
This will open the Layer Style dialog box. In the Advanced Blending section, uncheck the boxes under Channels marked G (Green) and B (Blue).
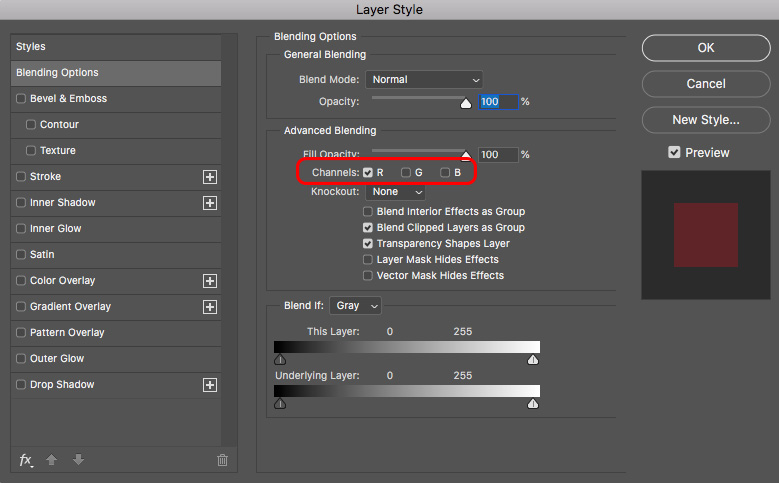
You won’t see any difference, because your background layer is active. But you can click on the eye next to it to turn it off and see the difference. Now turn it on again.
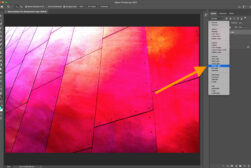
Step 4: Get back to your duplicated background and grab the move tool. Then, using the arrow keys move it slightly to the left. You’ll see how the cyan and red lines start to appear. Stop when you’re happy with the result.
-
Use Your Phone
There are many apps that you can download to your smartphone to make 3D pictures. Some of them simulate the effect, like the anaglyph I just described.
Others use dual cameras to take the image from two different points of view and create a real stereo image.
If you’re looking for a good camera app, here are some of the most popular:
1. Wigglegram Maker – This free app uses the dual camera of the iPhone create 3D images by taking two photos and putting them together in an animated gif. On the downside, Wiggle 3d is only available for iPhone and iPad.
2. LucidPix – This app is available for Android and iPhone. The good thing is that it doesn’t require a dual-camera phone. It uses AI to get the information for a second image and then puts it together to create 3D photos.
3. Parallax: 3D Photo Live Camera – This one requires that you move your phone and provide the images much like you would to make a digital 3D image with any camera. The helpful thing about it is that it provides you with a guide to do it. You have to position the + in the correct place in live-view. Then it automatically processes and delivers the 3D photo.
4. 3D Effect. This app can make a 3D image out of any picture by applying filters and effects. Some of them you can personalize.
-
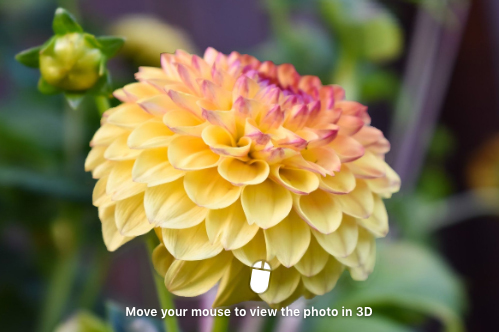
3D Scan and Model
This technique is much more complicated than others. The result is amazing though. You can drag your mouse along the 3D images to turn objects around and see them in 360 degrees – much like you would do while holding the physical object in your hand.
To do this you would have to photograph every angle of the object, taking multiple images all around it, including top and bottom.
You can include markers to make a more precise scan of it and help the software automatically identify them in the image.
Otherwise, you have to add them manually and this can be very time consuming depending on how many images you’re processing.
Once you have them, you need to use special software for modeling. Agisoft Metashape is an excellent program for this kind of work, but you have to buy the license.
There are some free alternatives that you can use; one of the most famous is Meshroom.
How Do You Take a 3D Picture on Facebook?
When you’re scrolling through Facebook, you’ve probably noticed that some of your friends post 3D pictures that move as you scroll.
Here are the ways photographers can create an instant 3d model of an image:
-
Using a Smartphone
For many people, this is very easy to do. Just open the Facebook app and start a new post by clicking on the “What’s on your mind?” space.
Then click on the three lines on the top right to open the menu and choose 3D Photo. Then all you have to do is click on any photo from your gallery and Facebook does the rest.
If this is not possible in your case because you don’t see the 3D Photo option on the menu, then you’ll have to use a third-party app.
Almost all the apps that offer to create 3D photos or 3D effects have the option to share the result on Facebook.
-
Using Photoshop
Facebook doesn’t have an option to upload 3D pictures on the browser version. Fortunately, there’s a way around it. Don’t worry, it’s very easy – just follow these steps:
Step 1: Choose your image and open it in Photoshop.
Step 2: Select the subject. You can use any of the selection tools – go with the one that suits your needs best. In this case, I’m using the Object Selection tool.
Step 3: Refine your selection. Zoom into your selection and refine any areas that need to be adjusted to make the selection as perfect as possible. You can also go to the menu Select, Modify to expand, feather, or contract the selection.
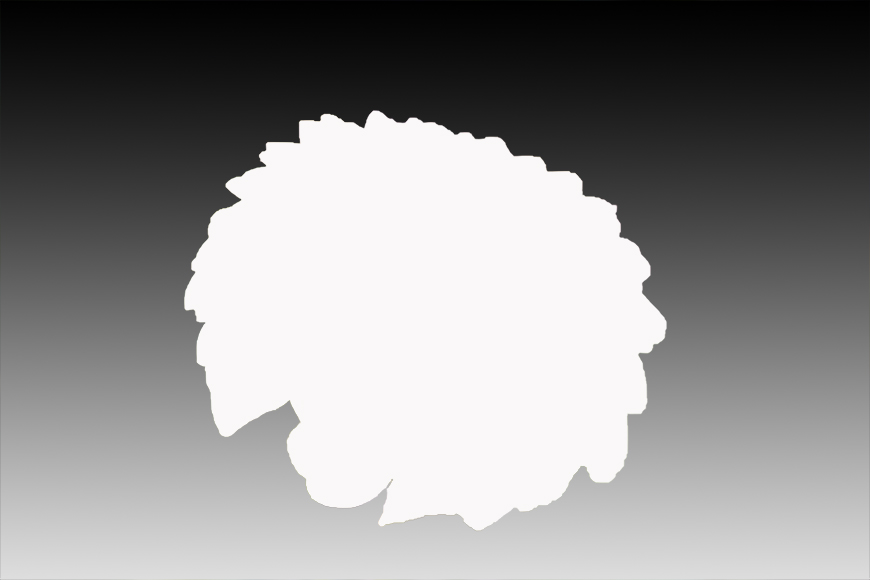
Step 4: When you do depth maps, the objects that are closer need to be in white, and the ones that are further away will be in black. Since you’re working on the main subject now, you need it to be white in a separate layer.
To do this, add a Solid Color Layer. This will open a color picker window – here choose white. Because the selection was active, the layer will be empty except for the white area that corresponds to your subject.
Step 5: Now invert the selection to do the background. You can do this in the menu Select, Inverse. Otherwise, you can use the keyboard shortcut Cmd + I.
Step 6: Then, add a new layer in between the other two. You can just click the Create New Layer button from the bottom of the Layers panel to do this.
Step 7: Grab the gradient tool. Choose the basic pattern black to white in a linear mode. All of this can be selected and modified in the top Options bar of the Gradient tool.
Then, click on the top of the image and drag it down. This will make the top completely black, which is what we want because it’s the part that’s further away.
As it comes down (hence closer to your subject) in the depth map it will be lighter.
*Note: if you want to make your image more complex, create more layers selecting the different planes. Then, use the black for the furthest one and then different shades of grey for the ones that are closer until you reach white.
Step 8: Save the document you just created using the ‘Save As’ option. Don’t just use ‘Save’ because it would overwrite the original and you will need both of them.
So, in the Save As dialog box, name the file exactly as the original, otherwise, the effect won’t work. To avoid typos you can click on the original file and this will automatically put the same name.
Then, add an underscore and the word depth at the end of the name. For example, if the original file is Flower.jpg this one should be called Flower_depth.jpg.
Choose the .JPEG mode and click save.
Step 9: Open your Facebook profile in your computer browser. Start a new post by clicking on the “What’s on your mind?” space.
Step 10: At the bottom of the post, you’ll have the option to add to your post different media elements. Choose photos. Next, upload both files, the original and the depth map.
Facebook will recognize the files as 3D photography and automatically create a 3D image on your post.
3D Photography FAQs
How can I make a regular picture into a 3D picture?
Two easy methods are to add a 3D effect in Adobe Photoshop (see above for steps on how to do this) or to use an app like LucidPix.
How do 3D photos work?
They’re usually constructed from two images of the same scene, taken from slightly different angles. When we see these two images merged, it creates the effect of depth perception (called stereopsis). In other words, it simulates the effect of a third dimension (depth) in the image.
What is the best 3D photo app?
LucidPix 3D Photo Creator is one of the best and most popular apps for creating 3D photos.
Final Words
As you can see, there are many ways to create three-dimensional images: analog or digital, with one or two cameras, simple or complex.
Just find the 3D photography method that suits your needs and the equipment you have available to try it out.
Feel free to share your experiences and the 3D images you create in the comments below.

Check out these 8 essential tools to help you succeed as a professional photographer.
Includes limited-time discounts.


Ana Mireles is a Mexican researcher that specializes in photography and communications for the arts and culture sector.


