


25 iPhone Photography Tips
From simple beginners tips to advanced tricks to enhance your iPhone photography, make sure you getting the most out of your phone camera with this guide.
iPhone Photography | Learn | By Polina Raynova | Last Updated: January 10, 2025
Shotkit may earn a commission on affiliate links. Learn more.
iPhone photography is getting more and more popular, especially after the most recent updated product releases.
Whether you have the latest iPhone Pro models or one of the earlier editions (like me!), the most important thing is that you're taking photos with your smartphone.
After all, it's far more enjoyable to simply pull your phone out of your pocket to capture a photo, instead of unpacking all your camera gear from your bag.

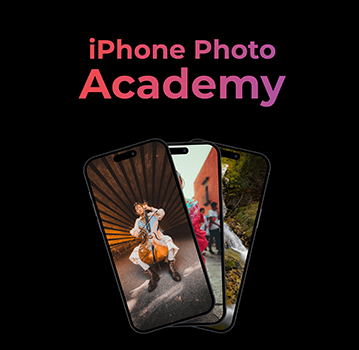
The fastest, simplest and most fun way to improve your smartphone photography skills this year.
Tap red button to save 80%
Your phone is also most likely to be the camera you have on you every single day… and that, after all, is the best camera you could wish for!
In this guide, I've included a mixture of tips for beginners and more advanced ones too. (If you're interested to learn many more, check this popular course out.)
Let’s take a look at these iPhone Photography tips that can significantly improve your mobile photos.
26 Top iPhone Photography Tips
Here's how to take good pictures with the iPhone:
1. Get fast access to your iPhone camera
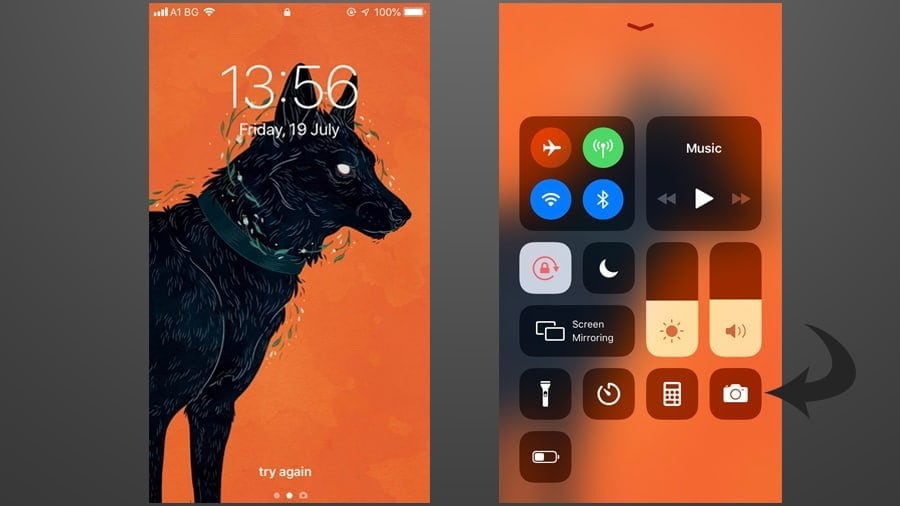
Let's start with something nice and simple!
One of the greatest advantages of using the camera on your smartphone is that it’s always so easy to access… but did you know there’s a shortcut you can use to activate it?
Sometimes when it’s really crucial to capture a moment there’s no time to waste in unlocking the phone, finding the iPhone camera app and waiting for it to load.
You can do this much faster by simply swiping up on your lock screen and tapping the camera icon.
2. Blur the background on the cheap
If you don't have one of the newer models of iPhone, like the XS, XR, X, 8 or 7 Plus, did you know you can still blur the background in your photo?
This tip applies to any kind of photography, but it's not so apparent when using a smartphone to take a shot.
Simply get closer to your subject, and try tapping your finger on the screen to set the focus point. You'll see that the closer you are, the blurrier the background will become.
Another option is to use a clip-on 3rd party telephoto lens, since ‘zooming in' on a subject can help produce a blurred background too – check out the best iPhone camera accessories for some options.
Pro Tip: Blurring the foreground is another way to create interest in a photo. Simply move close to your subject, then override the phone's automatic focus (see tip below), and tap on the background element. This will throw the foreground out of focus.
3. Use the volume button to take sharper photos
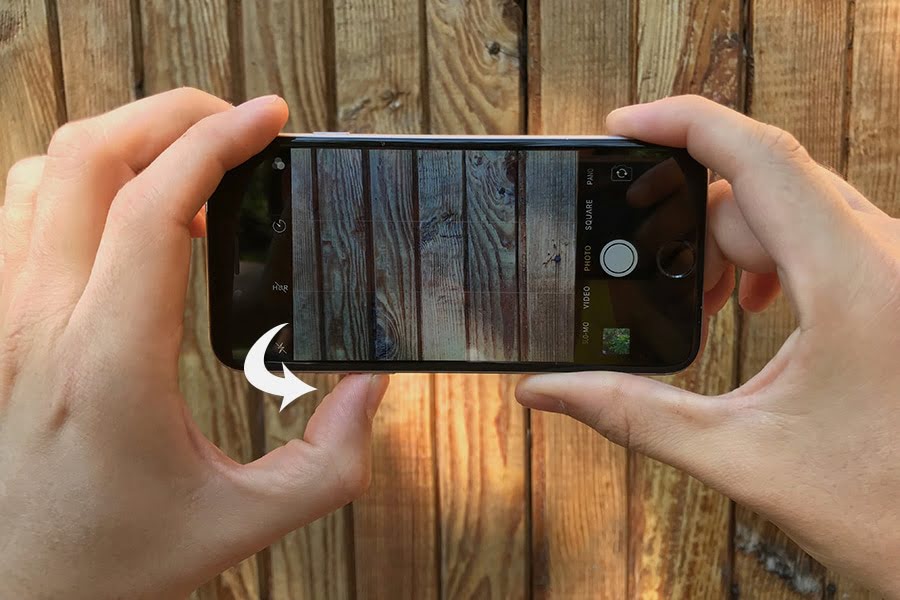
Using the volume button can help you stabilize your shot while pressing the shutter.
iPhone photography tricks aren't always about getting amazing shots. Sometimes it's a quality-of-life hack for things like camera shake.
Camera shake is the main enemy of getting a sharp. If it happens, it’s bound to cause blurriness, and that's an effect you won’t be happy to see in your photo… unless it’s intentional, of course!
Here’s how to take crisp & clear photos with iPhone:
When taking a selfie, it's really hard to tap the camera shutter button, especially with your hand outstretched.
The easy way is to simply squeeze the volume up button on the side of your iPhone to snap the picture.
Obviously, this is most convenient when the phone is helpful in landscape orientation (i.e. sideways) – We have a guide on landscape vs portrait orientation if you'd like to learn more on which to use.
Pro Tip: You can even use the volume button on your earphones – it's worth carrying the white ones that come free with your phone for this very reason.
4. Get a candid shot with your earphones
Following on from the previous iPhone camera tips, have you ever considered using your smartphone's earphones to shoot without being noticed?
If you’ve been thinking about how to take family pictures with iPhone without them noticing, this might be for you.
This doesn't have to be as creepy as it sounds! You may want to take a candid shot of your kids, without them staring and doing one of those fake smiles into the camera, for example…!
Next time, try holding your camera towards your subject, and holding the earphones in your other hand. Use the volume up button on the earphones to take some candid photos.
Also, if you have the earphones actually in your ears, no one will suspect you're taking a picture ;-)
5. Get a deal on iPhone Photography Education
There's so much to learn about taking great iPhone photos!
There are no iPhone photo tricks better than learning how to take proper photos from an expert.
Yes, that's right – just as paying for lessons to improve at regular camera photography is highly recommended, so too is spending a little to learn iPhone photography!
The iPhone camera seems like a simple device at first, but most people are really only scratching the surface of its capabilities.
In the right hands, the photos taken with a modern smartphone are almost indistinguishable from those taken with a bulky DSLR camera 3x the price.
So if you’re looking for iPhone photoshoot ideas at home or trying to learn how to take good indoor photos with an iPhone, this course might be the right choice.
Just as there are techniques to photography with a DSLR, there are numerous important skills to learn when photographing with an iPhone. After all, iPhone photo tips and tricks are just a collection of photography skills geared towards the iPhone.
Whether you want to learn how to take cool pictures with an iPhone or get creative iPhone photography ideas, I highly recommend you check out the iPhone Photo Academy – it's a video course packed full of amazing tips and tutorials on getting much better photos with your iPhone.
(UPDATE: There's now also iPhone Landscape Mastery ).
iPhone Photo Academy – Limited Time Sale
Taking amazing smartphone photos requires learning a handful of relatively simple techniques, and then making the most of the functions that come with your phone – many of which are hidden, or at least, not immediately obvious. This is where good iPhone photography tutorials come in.
If this interests you, be sure to check out this hugely popular online course which will teach you everything you need to know. If you want to learn how to take good photos with iPhone, this is the place to start.
6. Keep a clean lens for clearer photos
If you’re wondering how to take quality pictures with an iPhone, you must know that most of the time smartphones are in the hands of the user which makes them prone to fingerprints and dirt.
Very often those fingerprints are found on the place where you want them the least: your lens!
A useful habit to develop is to get used to quickly cleaning your lens before taking a photo – that can ensure there will be no smudges, dust spots or blurry areas on your image.
It may sound like a really simple tip, but this one thing alone can have the biggest impact on getting clear photos… and most people never bother wiping their phone's lens (they usually wipe the screen!)
This tip is especially important if you're using any of those clip-on lenses for your iPhone, such as these macro ones.
7. Turn on the grid for better composition
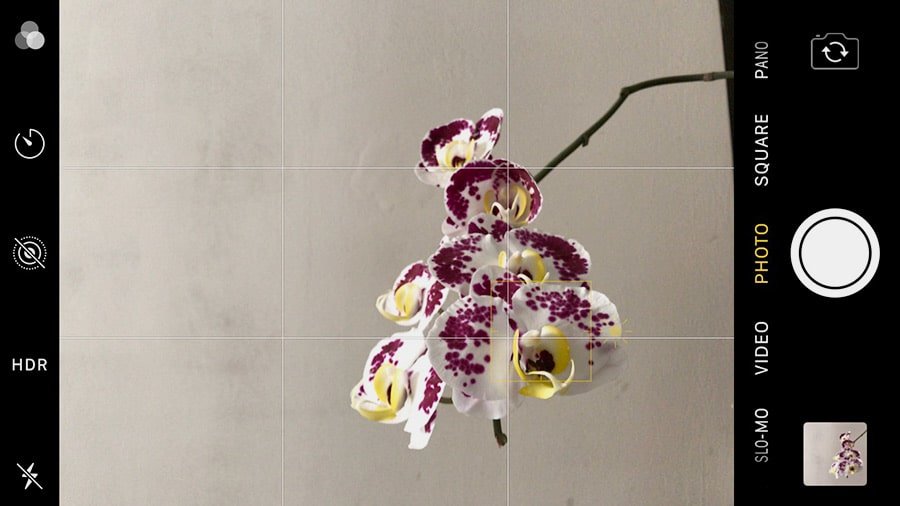
Align your subject with the grid lines for better compositions.
Mastering iPhone photography is a lot like mastering any other kind of photography. It’s all about the person behind the lens and about great compositions that catch the eye.
The rule of thirds is a powerful method that applies to composing not only photographs but also paintings, posters and all kinds of images.
According to this rule, each picture should be divided into nine equal parts by two vertical and two horizontal lines. The significant elements in the photo should be placed at the intersections of those lines or along them.
It’s much easier to imagine the lines and the sections if you have a grid to help you see them. In order to turn the grid on, you need to go to your iPhone camera settings, then scroll down to find the camera icon and make sure the Grid option is activated.
8. Get perfect focus with manual override
Here's one of the most nifty iPhone camera hacks.
Even if you make sure that your lens is clean in advance and there’s no camera shake, the photo might still look a bit off. One possible reason for that could be that your phone didn’t focus on the right place.
To prevent this from happening, did you know you can actually select your iPhone focus point manually?
Just tap on the screen where you want it to appear. You’ll be able to see the outlines of a yellow square when you tap, to show you that you’ve set the focus on the right place.
Pro Tip: the above video is by the guys behind the excellent iPhone Photo Academy – I highly recommend you check out their video courses here.
9. Lock your focus for sharper subjects
Now you know how to set your focus point manually using the above iPhone photography tip, but there are some instances where this won't work.
For example, if there's movement in the scene, the camera might be constantly readjusting the focus point to compensate for the subject's new position.
To overcome this, did you know you can ‘lock' your focus? Next time, just tap on your subject on the camera screen, and hold your finger down for a couple of seconds – you'll see ‘AE/AF Lock‘ appear.
You can either swipe your finger up/down the screen to adjust exposure or simply tap the shutter button to take the shot.
The focus lock will remain until you exit the camera app, or turn off your phone.
10. Enhance your photography experience with accessories
Accessorize your smartphone to extend its capabilities.
Buying new accessories for your iPhone might not spring to mind when researching how to take good pictures with a Phone.
However, if you intend to shoot with your smartphone frequently, it's worth investing in some basic accessories. Some of them I consider essential, while others are simply fun to have, or useful in the right situations.
For example, if you’re wondering how to take pictures of small objects with an iPhone, a clip-on macro lens would be an ideal accessory. On the other hand, If you’re looking for how to take distance photos with an iPhone, a telephoto zoom lens for an iPhone would be a great choice.
Let’s have a look at a few of the top-rated accessories:
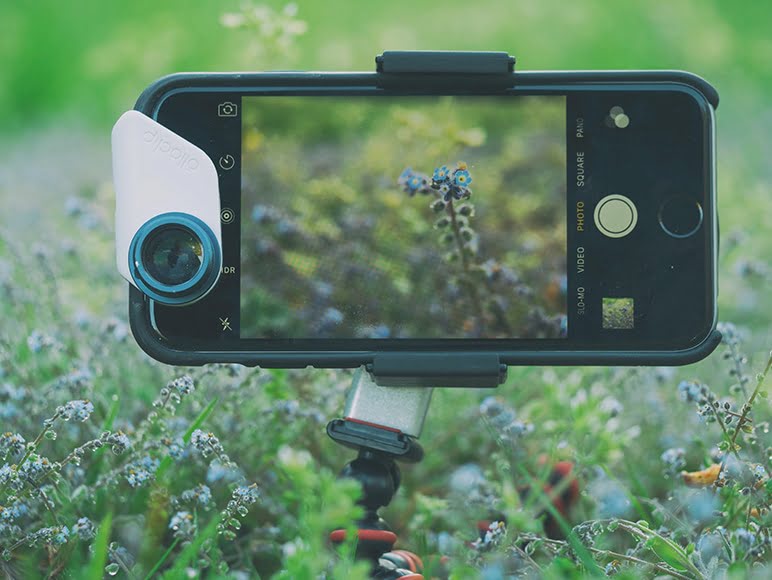
- An iPhone tripod – this might be the most important thing on your photography kit when starting out. These can be acquired for less than $10, but really help when the light starts to drop, to achieve those gorgeous slow shutter speed photos. Check our Mobile by Peak Design review to see a great option.
- A portable battery charger – in general, you get what you pay for. The more expensive ones charge your phone quicker and offer more charges before they run out.
- A mini LED light – this can help when shooting after dark -a light shone from an angle is much more flattering than the iPhone's flashlight, which shoots at the same angle as the lens is facing. This is a good one.
- A simple backup device – paying for an iCloud subscription when your phone gets full of photos isn't necessary with the SanDisk iXpand Base – a smart, affordable gadget that backs up whenever you charge your iPhone. You should also consider deleting photos from your iPhone to make more room.
- Clip-on lenses – definitely not essential, but can really extend the possibilities of your standard lens. I recommend the Moment ones.
- A good case – shooting frequently with your phone will greatly increase the chances of you dropping it! Invest in a good case.
11. Look for leading lines
Keep your eyes peeled for leading lines!
This isn't really a specific smartphone photography tip, but I thought it was important to include it anyway.
The use of leading lines in your iPhone photos is a powerful way to create a better composition. If you start noticing them once you’ll probably find yourself surrounded by them all the time. They’re literally everywhere!
You can use them to draw the viewer’s attention to the subject. Leading lines could be rails, paths, streets, buildings, tunnels or even trees.
With this method, you can get really creative and explore countless possibilities to make your images stand out. It also creates depth in the photo as it can connect the foreground with the background.
12. Use the Self-Timer for Sharper Photos
Most people know that the self-timer function on the iPhone is useful for taking a group photo or selfie – simply prop your iPhone up somewhere stable, tap the self-timer button, then run in front of the camera with your friends to be a part of the photo.
This function opens up possibilities for many cool iPhone camera tricks whether you want to delve into self-portrait photography or place yourself at a distance in a landscape scene.
However, you can also use the self-timer as a kind of remote trigger for an iPhone photo. This is really useful for when you've forgotten your earphones, and can't trigger the shutter of your phone without having to resort to tapping the on-screen shutter button.
So next time you need to get a perfectly steady shot, set your iPhone up somewhere sturdy, compose the shot, then hit self-timer and stand back so as not to disturb the phone with your movements.
Pro Tip: The iPhone has the additional benefit of having zero moving parts, in contrast to a DSLR for example. This means that when the photo is taken, there is absolutely zero movement within the iPhone itself, which in theory means the sharpest possible image capture. Pretty neat!
13. Shoot in HDR mode for more impact

HDR iPhone photo by Linda Steinberg, an iPhone Photo Academy graduate from Ontario.
Have you been thinking about how to take beautiful pictures with iPhone?
We often capture beautiful scenes with our phones, but the photos don’t reflect the beauty we see with our own eyes. That’s because our eyes can perceive highly contrasted scenes such as sunsets, and we’re so used to it that we don’t even pay attention. The iPhone camera (or any other camera), however, doesn’t have the capability of registering such great dynamic ranges of luminosity. This is why showing HDR mode is one of our favorite iPhone photo tips on the list.
So, if you’ve been searching for how to take beach photos with an iPhone, here comes the HDR option to save the day! HDR, or high-dynamic-range imaging, is a technique that makes it possible for the camera to capture details both in the dark and the light areas of the photo.
To activate the HDR option you’ll need to open the camera app, tap on “HDR” at the top left corner of the screen and then choose “On”.
Pro Tip: Turn on the option in Settings > Photos & Camera to save the original photo too – that way you can take advantage of HDR photos, but also have the non-HDR version as well for you to choose from.
14. Capture it all with burst mode
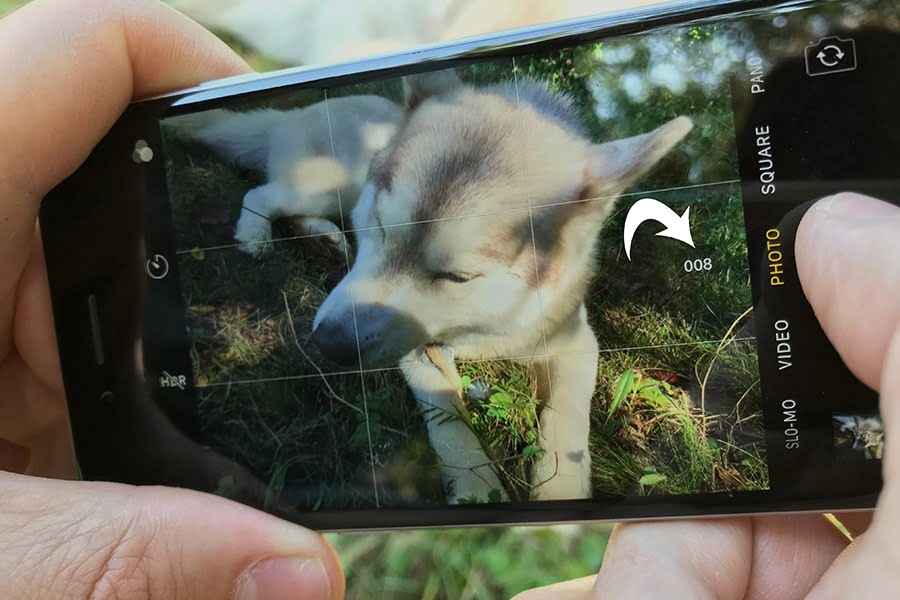
Even when your subject's not moving fast, burst mode can help you get the perfect moment.
There has always been something magnetic and attractive about moving subjects. They’re very often the reason for the “Wow” effect of your photo, but they’re also notoriously difficult to catch on a phone.
iPhone photography offers an easy way to make sure you’ve grabbed the precious moment: it’s called burst mode.
Here’s one of the cool photo tricks for iPhone; simply hold your finger on the shutter button once you have the camera app up and running, and multiple shots will be fired off automatically.
The camera has the capability of taking around 10 photos per second until you remove your finger from the button!
Using the burst mode significantly increases the chance of capturing the subject in the most desirable pose. You can also play around with live photos, which capture 1.5 seconds before and after your photo.
- See also: How to use iPhone Live Photos
Pro Tip: Shooting in burst mode too often can quickly fill up your iPhone storage. In order to reduce the number of unnecessary images, click ‘Select' after shooting the burst, tap the photo(s) you want to keep, then tap ‘Done' and choose to keep only your favourite shots – everything else will be deleted.
15. “Frame” your image to draw attention

Frames occur naturally all around you, so keep on the lookout!
This tip can be applied not only to iPhone photography but to most types of visual art in general. It’s basically creating a frame within the frame that’s already defined by your photo itself.
To create this inner frame you can use any element of the scene you’re shooting. It could be the branches of a tree pointing to your subject, pulled back curtains, an open door or a window.
Framing draws the attention of the viewer right to the subject of your photograph and it also creates a “layered” effect which saves the photo from looking flat and unexciting.
16. Get creative with Shutter Speed
Adjusting your shutter speed can give you additional creative options when photographing moving subjects – slowing your shutter down, for example, allows you to display moving water as a sea of creamy fluff. Speeding it up allows you to freeze a jumping child, etc.
The iPhone camera app doesn't allow you to alter the shutter speed, but many 3rd party photography apps do – Camera+ 2 is a good one.
Next time you're out at night, try placing your iPhone on something sturdy, then using Camera+ 2 to slow your shutter speed right down, then trigger the shutter using your iPhone earphone's volume up button – you'll see how much more you can capture in the image, vs a straight shot at a higher shutter speed.
17. Steady yourself to nail a low light shot

Brace yourself on a sturdy object for a sharper image.
iPhones are great for photography when the light is good, but as soon as it gets darker, they tend to struggle.
There is, of course, the option to use the built-in flash, and that's what a lot of amateurs choose to do, but you'll find that this often yields less-than-ideal results.
Here’s how to take bright photos with iPhone in low light; first, you’ve to eliminate any camera movement and raise the exposure a tad bit. There are a few ways to do this.
The best way is to use an iPhone tripod – these are often available cheaply, and can easily be slipped into your pocket.
Another way is to rest your phone on a solid object and prop it up with whatever is close by – a cup of coffee, your bag, etc.
If there's nothing to rest it on, prop yourself up by leaning against something solid like a tree or lamppost. Then, brace your arms close to your body, and try and press the shutter button (or better still, use your earphone's volume button), to get as steady a shot as possible.
Pro Tip: Another option is to use a separate light, be it a torch, an LED keyring, or even someone else's phone light – by angling the light on your subject's face, the effect can be much more pleasing than a direct flash.
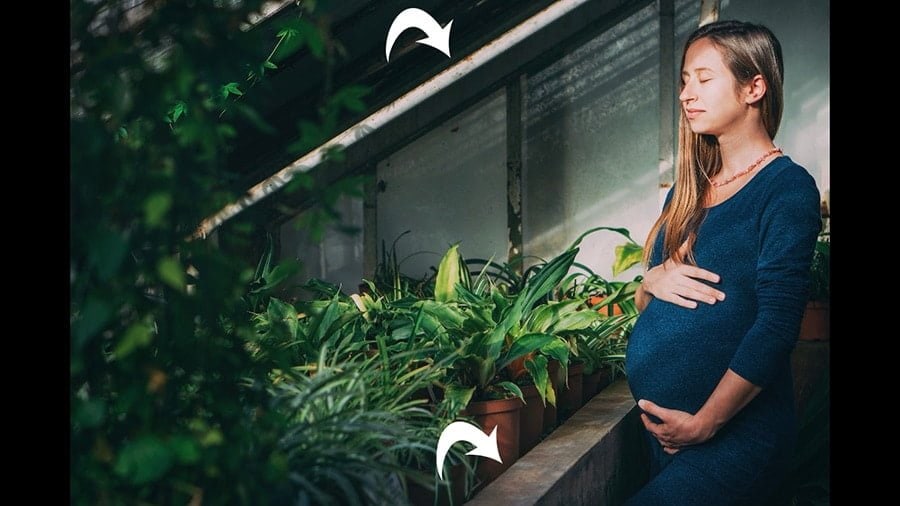
18. Make the most of Portrait Mode
If you've been looking for how to take a headshot with an iPhone and got a newer model of iPhone (such as the X series, 7 Plus, or 8 Plus), you can take advantage of ‘Portrait' Mode to blur the background of your photos.
Normally, blurring the background in an image is reserved for expensive lenses and cameras, so being able to do this with a smartphone is simply incredible, and a taste of what's to come in the exciting world of computational photography.
It takes a very keen eye to actually tell the difference between a photo shot on an expensive camera, and an iPhone using portrait mode.
First, open the camera app, then select ‘Portrait' at the bottom of the screen. When the camera has focused on the subject and blurred the background, you'll see ‘Natural Light' or ‘Depth Effect' appear on the screen.
Then just tap the shutter button to take a stunning portrait photo, complete with a blurry background.
Pro Tip: On some of the latest iPhones, you can actually adjust the blur strength after you've shot the photo. Simply tap ‘Edit' in the Photos app on the photo, then drag the Depth slider beneath your photo – a lower ‘f-number' designates more blur, and vice versa with a high number – see also our guide on how to edit iPhone photos professionally.
19. Post-process your photos for maximum impact

Editing your photos is the icing on the cake of smartphone photography.
This one is closely related to exploring the opportunities which the third-party editing apps give. I often use the VSCO Photo & Video Editor app and RNI films to tweak my photos and add a bit of atmosphere.
(It's also a great iPhone app for vlogging.)
They both offer a wide variety of filters which are also customizable so you can always play with the opacity of the filter itself or simply get rid of the green tint you don’t like in the shadows.
These editing apps also make it possible to additionally adjust contrast, saturation, white balance, vignetting and a few other handy things.
20. Use 3D Touch to jump to get a camera headstart
If you have any iPhone newer than (and including) the 6s model, you can take advantage of something called ‘3D Touch' – basically a forceful tap/press of your finger on the screen to evoke other options.
By pressing down harder on the icon for the Camera app on your iPhone screen, you'll get the option of jumping straight to slo-mo, video, selfie or regular photo mode.
No doubt in a future update of iOS, we'll be given even more 3D Touch options, which will further extend its capabilities.
21. Experiment with backlight

Using sun flare is the best ‘real' photo filter!
If you’re into photography, you’ve probably heard more than once that you shouldn’t point your camera towards the source of light. Well, rules are made to be broken :-)
As long as you know them in-depth, you can purposefully break them – there’s nothing that will guarantee a more intriguing photo.
Backlight can really create an amazing atmosphere in your images, it’s also great for emphasizing outlines and forms. If you haven’t tried it – you should definitely experiment!
Next time the sun is out and coming in from an angle (early or late in the day works best), compose your shot, then slowly move your iPhone so the sun creeps into your shot.
Pro Tip: If your iPhone allows you to adjust your aperture (or you're using a camera app that does), experiment with ‘stopping down' – i.e. making your aperture smaller. This can create some unusual effects with the light flare.
22. Experiment safely with filters
You've probably already played around a lot with the filters you can apply when taking photos on your iPhone – if not, you access them by tapping on the three overlapping circles icon in the top right corner of the Camera app.
If you're indecisive like me, it's often hard choosing the right filter… and then you get another pang of indecisiveness after taking the picture that you wish you'd chosen another.
However, all is not lost! Even though the filter looks like it's been applied permanently in the Camera Roll, the iPhone has actually saved the original photo, which can be accessed (and further edited with another filter) just by tapping the ‘Edit' button.
This goes for the Light, Color and B&W controls too – everything has been applied ‘non-destructively' – i.e. you're free to swap and change the effect after you've shot the photo.
You could also try one of the many apps that turn photos into paintings – converting your latest iPhone snap into a work of art could be just one click away!
23. Keep it simple

Eliminating distracting backgrounds adds impact to an image.
Nowadays it’s so easy to get distracted by everything and it’s such a challenge to stay focused. The same goes for the photos: Keep in mind that the more subjects you have the more confusing it might get.
Sometimes it’s best to keep it simple and minimalistic by eliminating all the distractions on your iPhone screen when composing your photo.
If you include only one main subject in your shot on a plain, or un-distracting background, that could make a powerful impression on the viewer.
It could also ensure that your image is easily remembered which is something very valuable in our disposable era.
24. Adjust the exposure for a perfect shot

Take control of your iPhone's exposure for creative effect.
If you’ve seen the yellow focus square, you’ve probably paid attention to the icon right on its right-hand side. This little icon along with the slider will help you adjust the exposure of your image.
If you need it to be darker and underexposed, simply drag your finger down on the screen. If you want it to be brighter and overexposed, then you just drag it up.
There are a number of reasons why you would want to sacrifice a perfectly exposed image for a darker or for a brighter one – it all depends on what mood you want to convey.
Often when shooting a backlit subject, for example, the smartphone will underexpose the subject, due to all the light in the photo. This is when overexposing would be useful.
25. Find the right photo 10x faster
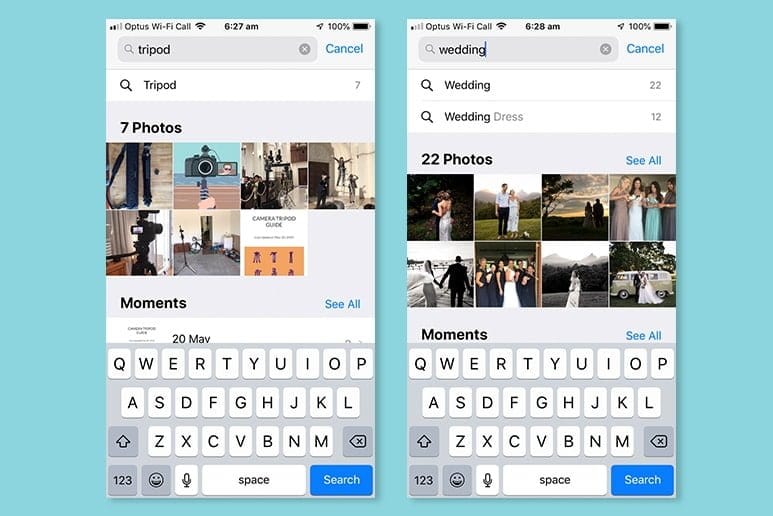
The iPhone's artificial intelligence does an amazing job when searching for photos.
After taking in all these great iPhone photography tips, I'm sure you'll be shooting better iPhone pictures than ever!
The downside of this is that your iPhone will likely be full of photos. Finding the one you want in the Photos app can be a bit of a chore if you don't know what you're doing.
Not many people know that the Photos app was given a huge A.I. update in iOS 11. Now you can use the search bar to type in a noun, such as ‘bike', and the iPhone will find all the images of a bike that you've taken!
With iOS 12, this has become even better – you can now search for several people, or you can combine search terms like ‘Red, car, 2018'.
To do this, simply type in a search term into the search box in Photos. Then tap one of the suggested search terms that'll appear, and it'll turn into a ‘token' inside the search box. Then you can keep adding more terms until you've narrowed down your search to find the exact photo you want.
Pro Tip: You can even search by peoples' faces – open the Photos app, then tap Albums and the People album. Then tap a face you want to name, and ‘Add Name' at the top of the screen. The iPhone will then try and associate the other photos on your phone with that face, to keep everything better organised.
26. Make a Live Photo a Long Exposure

A long exposure of rolling dice shot with nothing but a tripod and my iPhone camera app
Did you know you can shoot long-exposure photos on an iPhone?
All you need to do is to make sure you take the photo with ‘Live Photos' enabled – tap the little circular icon in the top right of your iPhone's camera screen.
Then, after your photo has been taken, open it in the default iPhone Photos App and tap ‘Live'.
Finally, choose ‘Long Exposure' and adjust the settings until you get the desired creative effect. Easy!
iPhone Photography Tips | Final Words
I hope these tips have added to your knowledge about smartphone photography, and photography in general!
If you haven’t tried them out: go ahead and experiment and if you have any other secret discoveries or pieces of advice – please share in the comments below! Also, don't miss this useful article which gives some advice on the best phones for photography.
Alternatively, you can also check out the iPhone photography for Dummies guidebook.
Remember to bookmark this page – I intend to keep it up to date with the latest tips and tricks to improve your smartphone photography experience.
Owning an iPhone is an exciting thing. Let's all make the most of its wonderful camera :-)
The fastest, simplest and most fun way to improve your smartphone photography skills this year.
Use link to save 80%

Hi there! I’m Polina, a freelance photographer, always on the look out for creating simple images with powerful impact.
10 Comments
Leave a Comment

👋 WELCOME TO SHOTKIT!
🔥 Popular NOW:

Oh, very usefull content, I will share it to our site about iPhone photography https://cameratimer.com. Thanks!
Hello, can anyone tell me how this was done: https://www.27red.com/photo/
You are so right about adjusting the exposure. It worked great when we tried.
very insightful tips on taking photographs using an iPhone..
Thank you for the tips!!! I am really bad at taking pictures haha, I feel like a 50 year old when taking them because they are blurry, or just bad angles. This was helpful.
I never knew that the volume up could be used as the shutter button! That is so cool!!! It is so useful. I wish I had known about it before because moving a finger to the shutter button definitely has caused pictures to blur on occasion.
Hey, I was looking for useful information on iPhones and just came across your blog and found it quite interesting, can’t wait to see your new post. You’ve been sharing really insightful posts and I’m an avid reader of your posts. Keep sharing the knowledge and adding value to our lives.
Thanks Roslia, will do!
Re: Tip number 9. You can also undo the auto focus lock by tapping anywhere else on the screen. I also recommend the iPhone Academy if you can get it when it is on sale, it is a great deal.
Hey Judith, thanks for that additional tip! And good to hear you’re enjoying the Academy ;-)