


How to Post on Instagram from PC or Mac?
Save time and your sanity with this guide on how to post on Instagram using your PC or Mac. Updated for 2023, explore the secret tips of the pros.
Instagram Guides | Learn | By Usnea Lebendig
Shotkit may earn a commission on affiliate links. Learn more.
Whether you’re a casual photographer or a pro, Instagram is undeniably one of the most important social channels around.
Not only does it have the highest average engagement rate of all the main social channels (even higher than Facebook and Twitter) – it’s a goldmine of opportunity.
For pros, Instagram is one of the best places online to grow your brand. Even hobbyist photographers, with enough dedication, can get their work in front of a lot more people with a percentage of them converting to sales.
That being said, the fact that Instagram is designed to be a mobile-only app can be a true headache for serious photographers…
Even if you won the best camera for Instagram, you still need to send your photos from the camera to your computer, then on to your phone – this can be super tedious, especially if you shoot a lot.
Luckily there are some effective work-arounds. Some are easier than others, and the one you choose will really depend on your workflow, but all of them beat having to upload to Instagram via your phone.
3 Easy Methods to Post on Instagram from PC or MAC
Method 1. Using a Plugin
LR/Instagram plugin
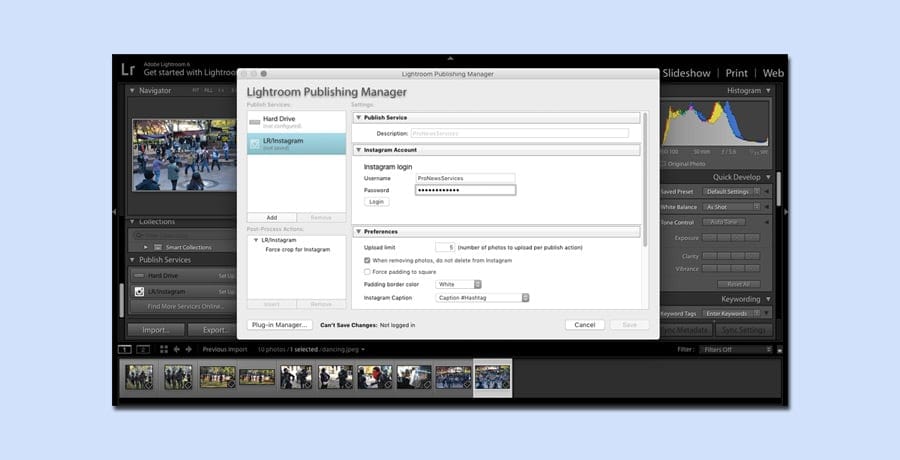
Lightroom rocks in so many ways, and plugins like LR/Instagram are one of the reasons why. It’s hands down the easiest way to get around needing to send images to your phone.
Simply install the plugin, go to the Lightroom Publishing Manager (under publishing services), and then login with your Instagram account. You don’t have to open a web browser or deal with any other app.
LR/Instagram comes with a metadata panel where you can create custom formats, caption images, and add Instagram-only hashtags. You can also set it to force-crop images to any Instagram aspect ratio or use the default automatic white-border padding.
You can also publish to multiple accounts, upload multiple images at once (as separate posts), and edit their metadata in Lightroom... even after the photos are published.
You won't have access to Instagram's built-in features (i.e. their filters), but if you’re already editing in Lightroom, you probably don’t need them.
You also can’t tag people on the photo like you can with the Instagram app (though again, you can tag them in a one-word caption). You also can't create carousel posts.
Still, unless multiple-image posts are your primary visual outlet on Instagram, there’s not really much that this plug-in doesn’t do.
(See our guide on how to post multiple photos on Instagram for more info on that.)
LR/Instagram is compatible with just about every version of Lightroom out there, from Lightroom 3.x-6.x on Windows XP (or later) and Mac OS X 10.7 (or later) to Adobe Lightroom Classic CC.
It’s shareware, so it’s free to download and try out, but they do ask a modest $10 licensing fee if you decide you like it. Honestly, a more than reasonable fee for all the headaches it saves!
You should also check out our guide to the best Lightroom export settings for Instagram.
Method 2. Using your Browser
Browser Extensions
One often-overlooked solution to the mobile-only problem on Instagram is using browser extensions. A quick search will show a few options for both Google Chrome and Firefox, all allowing you to upload from your desktop.
They vary a bit in their abilities to tag, caption, and add hashtags, and not everyone seems to be able to get them to work, but when they do work people are very happy with them.
To-date you can't do any direct messaging, and like with the Lightroom preset, you can't create carousel posts.
But again, if your main goal is working out how to post pictures on Instagram from your PC or Mac, neither of these issues will be deal breakers.
Here are a few of the more commonly used ones:
- Chrome Browser
Desktop For Instagram by Devanco (478,896 users)
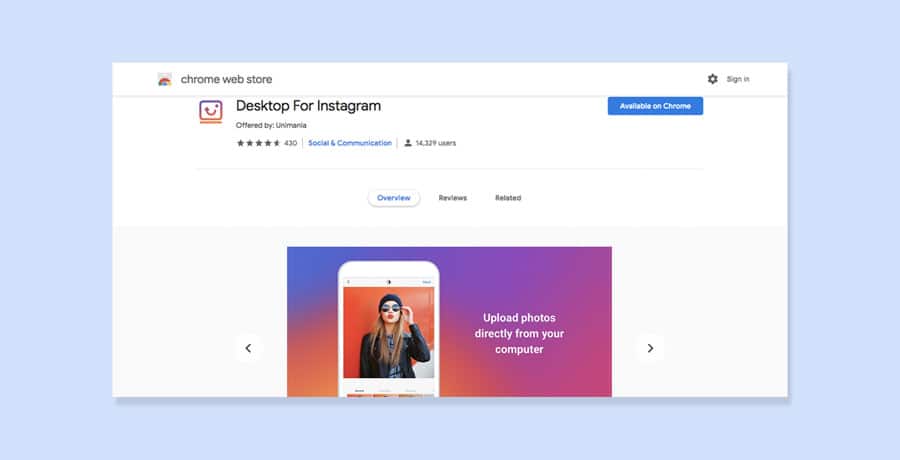
Desktop For Instagram by Unimania (14,329 users)
- Firefox Browser
Instagram by Alan Jiang (43,387 users)
Instagram by Bolaram Paul (17,529 users)
(I couldn't find any extensions of this kind for Safari.)
Use the Vivaldi Browser
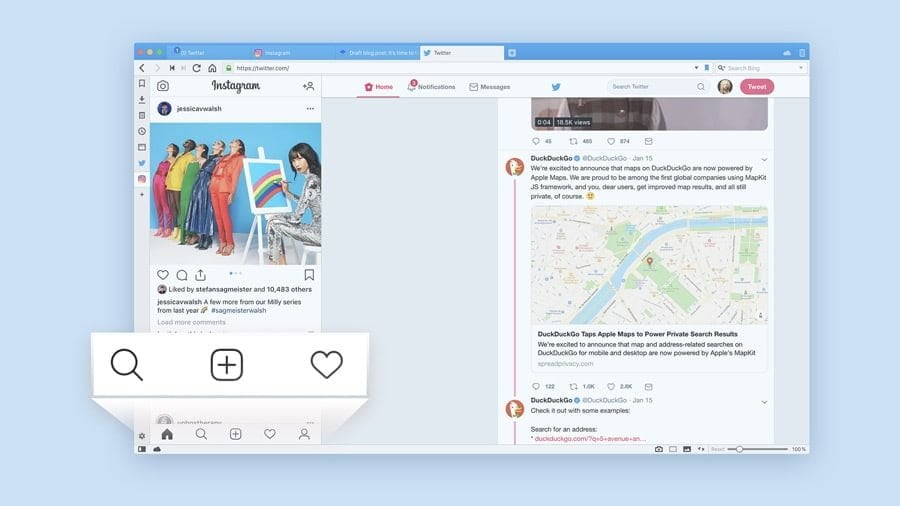
Vivaldi is a relatively new, cross-platform web browser that has some unique features. One of these is the fact that it will run mobile versions of any site you wish. That means you can easily run Instagram with almost full functionality straight from the Vivaldi browser.
Sure, it means adding yet another browser to your desktop, but if you’re a heavy Instagram user who doesn’t use Lightroom, this is by far the easiest way to go about things.
- How to access Instagram from Vivaldi:
- Download and install Vivaldi.
- Log in to Instagram
- Right-click and select “Create new web panel” from the menu. (Alternatively you can create a new web panel by clicking on the “+” sign in the left-hand navigation bar of the expanded view.)
Now, a mobile version of Instagram (or any other mobile site you wish to use), will appear in a sidebar on the left-hand side of the browser, all while allowing you to browse other sites normally in the main window.
If you need to, you can resize the sidebar to make the mobile window fit better.
Once your mobile window is up, hit the camera icon to upload images or videos to Instagram. Yep, that's right – no more racking your brain for how to post videos on Instagram from PC or Mac – this is a slick solution.
While being able to access mobile sites might be your gateway into the Vivaldi world, there are actually a number of other reasons to give it a try. What's more, it's free and continually updated.
Browser Spoofing
Today, most modern web browsers have a built-in feature that allows you to change how they’re perceived by the websites you’re visiting. It’s called “spoofing” your browser user agent.
It’s quick, safe, and relatively easy to do, but you won't get all the features that come with the true mobile version of Instagram. For instance, it doesn’t work with video files or gallery/carousel posts.
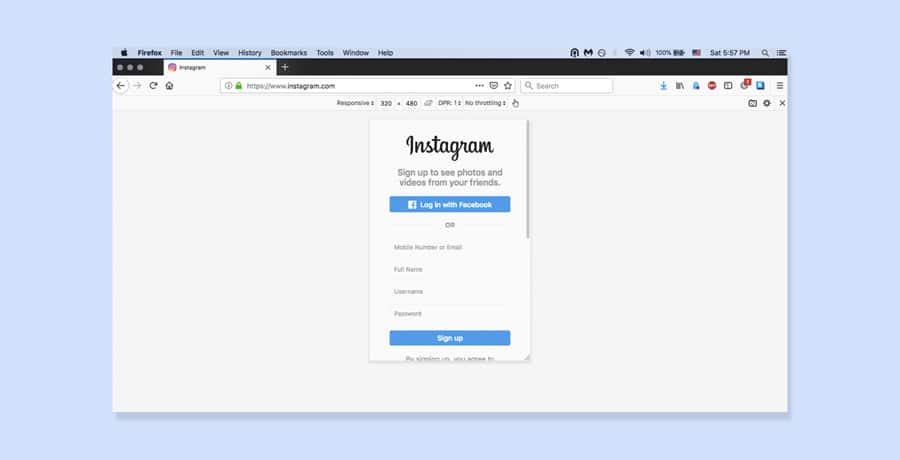
- Firefox
Go to your menu bar and navigate to tools -> web developer -> responsive design mode.
Your view should change to look like a small smartphone screen. If the screen size is too small, you can adjust it by clicking on the bar across the top. (You might need to refresh the page.)
Once you log in, use the “+” button to upload a photo, just like on your phone.
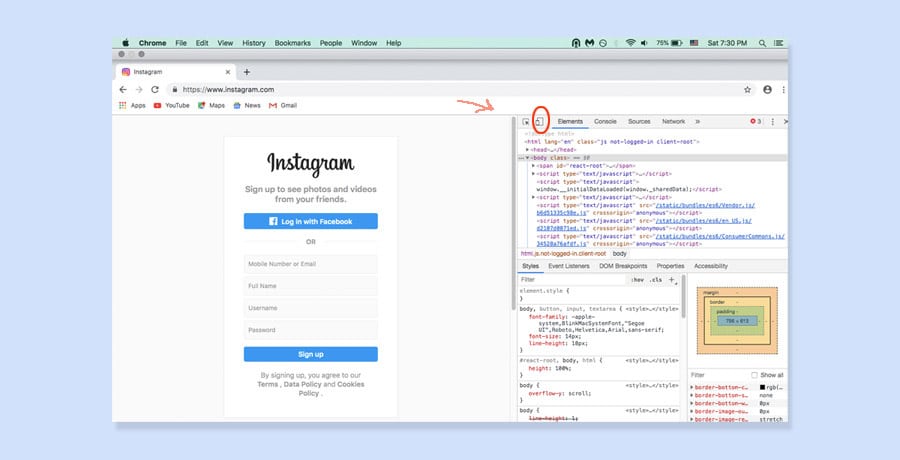
- Chrome
Google Chrome is a bit trickier.
1. Go to Instagram and log in.
2. Right-click anywhere in the window. (From the keyboard, CTRL-SHIFT-I.) When the menu appears, select “Inspect.”
3. Ignoring all the code (it’s irrelevant to this operation), go to the little icon that resembles a tablet/phone at the top of that Inspector window. Click on that.
That should turn the left side of your screen into a mobile form of the web page selected (in this case, Instagram).
If you wish to change the phone sizing, go to the “Responsive” menu and pick the one closest to your device (or the dimensions you prefer to work in).

4. If you click on the screen size area of your browser (mine shows 100%), you’ll see an option for “Fit to Window”. Select that.
(If you don’t, you may not see the bottom of the Instagram screen, which where the “+” button is for adding photos.)
Conversely If you don’t see the upload photo “+” button, try refreshing your browser window.
- Safari
1. Open Safari and select “Advanced” from the preferences menu.
2. Click on the “Show Develop Menu” box at the bottom of the preferences box.

3. Go to Instagram and log in.
4. Head over to the Develop menu and select USER AGENT –> Safari – iOS 11.3 iPhone (or whatever device is closest to your own).
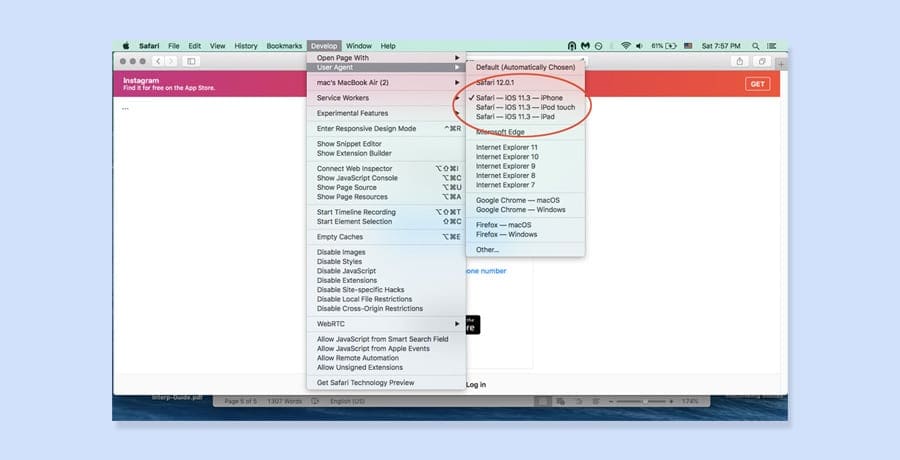
From here, navigate through Instagram as you normally would.
Sometimes a message to rotate your device might crop up. If that happens, try making the window narrower by dragging the edge of the window inwards.
Like with the other browser spoofs, you won’t be able to post multiple photos or upload videos, but it’s a decent enough work around in a pinch.
As a side note, you can also check out a free for downloading media in bulk from Instagram called 4K Stogram.
Method 3. Using Third-Party Apps
From Android emulators to Instagram uploading and scheduling apps, there are a number of third-party apps to help you post to Instagram from your desktop. Just be careful, though…
Instagram frowns on third-party apps uploading content to their site, and there are plenty of reports of accounts being flagged for doing so.
There are also some potential security issues, as some of the apps require your Instagram login details.
I haven’t heard of any problems with the apps listed below, but I’d still recommend only using these apps if the other methods in this post don't work for you.
That being said, here are some of the more widely used third-party apps for posting to Instagram:
With the ability to not only bulk upload, schedule and recycle your Instagram posts, Bulkly connects directly to Buffer. Buffer then publishes these posts directly to your Instagram account (unlike other tools that send you a push notification in order to post on Instagram).
Since it's connected to your Buffer account, you can also post to your Facebook, LinkedIn and Twitter accounts as well.
It's ideal for people who want to share their social media content more than one time.
Bulkly offers a 7-day free trial. Plans start at $10/month (if paid annually). And they also have everything you need to know about scheduling Instagram posts, so you'll know exactly how to leverage this approach.
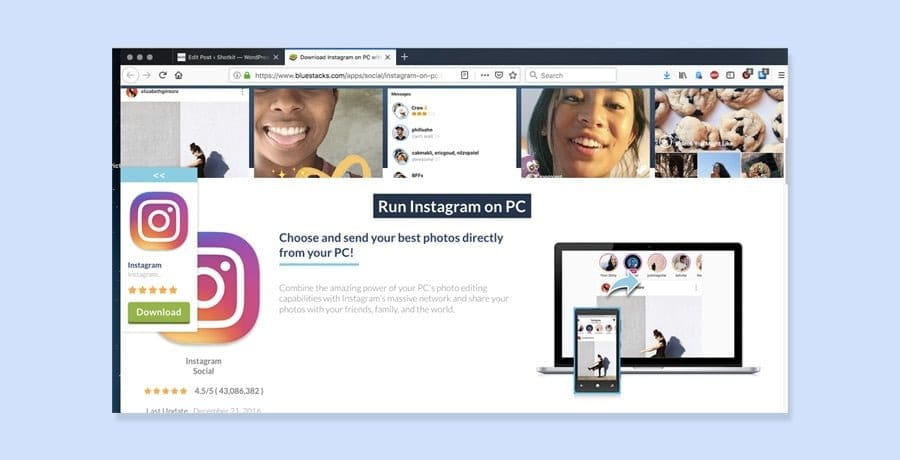
Bluestacks in an Android emulator for both Mac and PC. It allows you to run a light version of the Instagram Android app on your desktop. There’s no bulk upload and you can’t manage multiple accounts, but you can do all basic Instagram actions.
Some of the reasons to choose Bluestacks over, say, changing the user agent in your browser are that Bluestacks allows you to edit posts and share to other social networks. Not a big deal to me, but for some people that might make it worth installing.
Deskgram lets you do from your Desktop most of what you’d do from your phone – upload, browse, use filters, hashtag searches, tag other accounts, etc.
You need to use it through Google Chrome, though. Also, as of this time Windows users can’t upload videos and there are no scheduling or batch uploading options.
Another downside is that the version that allows you to upload runs on a subscription – $2.99/month. To get to it, you first need to download the free version and then ‘upgrade’ to the Pro version.
A fully-automated Instagram post scheduler allowing you to set up in advance when you’d like your posts to appear. It has bulk uploading of both photos and videos (up to 50 at once), editing and cropping, and allows you to post to numerous accounts (including Facebook and Twitter).
Basically it’s for people who need to manage their Instagram accounts at a larger scale (i.e. businesses).
There’s a 14-day free trial. After that, subscriptions start at $16/month. They also have an awesome free guide on the best times to post on Instagram, so you can really hone in on your audience.
Like Hopper HQ, Iconosquare is meant for managing Instagram accounts at scale. Some of it’s more unique features include a social media calendar for remembering “hashtag holidays,” a filter that lets you know when most of your followers are online, and a feature that tells you when to post for maximum engagement.
Basically, it's a marketer's dream. So if you're trying to really work Instagram for maximum engagment, this app might be your best choice.
Pricing starts at $29/month.
- Uplet (Mac Only)
Uplet allows you to bulk upload photos/videos and send posts to multiple Instagram accounts. You can edit your posts as you would on Instagram and add individual captions to each photo. It also has a crop option that lets you upload either the original or a square-size photo.
It doesn’t, however, allow you to reply to direct messages, browse your Instagram feed, or search for new accounts to follow.
You can try it for free, but after that there’s a one-time fee of $19.95 for a personal license.
FAQs
- Can I post something on Instagram from my computer?
Yes, you can upload photos to Instagram from your desktop or laptop computer, bypassing the mobile app completely. However, using the mobile app is easier and offers more features.
- How do you post on Instagram on Mac Safari?
Navigate to Safari>Preferences and choose Advanced from the menu tabs at the top of the window. Then, check the box next to ‘Show Develop menu in menu bar'. When you go to your Instagram account using Safari, from the top menu, click on Develop > User Agent > Safari > iOS (current version) > iPhone. This will ‘force' the Safari browser to behave just like your iPhone.
- How do you post on Instagram on Mac Chrome?
Open your Instagram account in Google Chrome and right-click anywhere on the page and choose Inspect to open the Developer Tools panel. Click the icon that looks like a phone next to a tablet, which should switch your view to mobile mode. Now you should be able to make Instagram posts with your Chrome browser as if you were using your phone.
Final Words
Even with all of these different options, I have to say I really prefer working with the Lightroom plugin. It’s simple and works really well with my workflow.
Still, if you’re not a Lightroom user or if you need options like bulk uploading, it’s good to know there are options.
What do you think? Know of any other options?

Check out these 8 essential tools to help you succeed as a professional photographer.
Includes limited-time discounts.

Usnea Lebendig is an experienced photographer and reviewer who loves to photograph professionally and in moments where the world’s beauty and/or strangeness leaps in front of the lens.
14 Comments
Leave a Comment

👋 WELCOME TO SHOTKIT!
🔥 Popular NOW:

I am using deskgram.app and it’s amazing. I can upload photos,videos, reels, stories and carousels by using deskgram. I think it’s the only app which is providing such features. It is free and pro version also. Even I can download also from Instagram to my pc. Not only this I can also do scheduling in just 15$ for unlimited account
Deskgram is 100% free now and you can upload photos, videos, carousels, stories and reels directly from you PC or Mac.
I just downloaded Vivaldi and followed the instructions, thank you, but like Safari using the developer menu, I can only upload one picture. I always need to upload 2 to 10 pics for every instagram post. Any idea how I can do this? Thank you!
Thanks for the comment about refreshing your browser window on Chrome. Whew.
Hi there, unfortunately, LR/Instagram plugin isn’t working anymore. There’s a message on their site right now:
Service Note: Instagram has updated their protocol and currently plugin does not work.
We are investigating the issue and the plugin will be updated when a fix is available.
I’m so fed up with the scourge of humanity and the Earth that is Facebook, which ultimately is responsible for this, pushing their mobile-only agenda. Flume and Gramblr, both previously great apps for uploading from computers, are both defunct as well, and oddly, both just “disappeared” with no trace, no support, no announcement saying they were stopping. I paid $20 for a Flume Pro license. My guess is that Facebook paid them out behind closed doors and they just disappeared. It’s high time some developers create a new app like Instagram USED to be, and have in their missions statement: “We will never sell to Facebook.”
SO OVER IT.
Flume no longer works either – I wouldn’t waste money on it. I bought the pro version and now get an error anytime I try to upload.
easiest way to edit igram posted captions using PC? i know the workarounds in chrome to get the window up to post but the ‘edit’ is not there like on my android.
thanks
stephen
I have been using the “Grids for Instagram” app on my MacBook Pro laptop for more than two years. Works like a charm!
I prepare all my images in Photoshop, add a small copyright signature, plus a small black border before uploading. Grids for Instagram allows you to create carousels too, those multiple stacked images that visitors to your page can swipe left to view. You can easily add caption text and if necessary, edit or add to the caption once posted.
Adding a location is a snap, by typing in a location, then selecting from a drop down menu of listed locations. Sometimes the exact place you took a photo might not be available, so a general listing might be best. Example: Instead of “Dorval Island”, which is part of Montreal and was not available, so I would use “Montreal, Quebec”.
You can also view your images on your laptop or computer monitor in four different formats – Square, Brief (caption info hidden) Vertical and Horizontal – the latter two displaying your caption info and comments received.
A square at the bottom right on a posted image, allows you to view your images, or others, in a full screen mode. This allows you to check the quality. Click to enlarge, click to return to normal.
The app lists your number of posts, followers, who you are following, plus your saved and archived images. Basically most of what you can do on your iPhone, but instead on your laptop, with the advantage of a larger keyboard!
Note: This app does NOT support emoji’s of any kind, so I add them after I have posted on my iPhone7 Plus or when commenting on others photos. The one flaw I miss, but not a deal breaker.
Hope this helps!
Frederic Hore
Montreal, Quebec
https://www.instagram.com/frederic_hore/
Wow, thanks for the comment Frederic! I hadn’t heard of that app – sounds like a good one. Hopefully they’ll add emoji support in the future 😀
great advice.
thanks
Frederic
Any Idea on how to upload video?
I keep getting an error message on my phone preventing me from uploading any video content and cannot for the life of me figure out how to fix it!!
Maybe try using one of the computer apps listed in this article then Andy – there are several that support direct video uploads to Instagram.
Hi Andy, You did not say what platform you are on, however I used FilmicPro on my iPhone7 Plus, and have no problems uploading to IG or FB direct from my iPhone. LumaFusion is a good app for iPhone to import and edit videos shot on an iPhone using their native app, or FilmicPro.
Hope this helps!
Frederic in Montréal.
Thank you so much for sharing, I greatly appreciate it.