


How to Do High Key Photography (Examples, Settings & Ideas)
If you want to give your images an airy, light and clean look, then having a go at high key photography is a great first step. Here's how to get it right.
Learn | By Ana Mireles
Shotkit may earn a commission on affiliate links. Learn more.
Do you how to do high-key photography? If you like the airy look of high-key images, you're in the right place.
In this article, I'll explain how to do high-key lighting in the studio and outdoors.
I'll also talk about the uses, advantages, and characteristics of this type of light.
You'll also find a compilation of high-key images to get you inspired and a FAQ section to round up the most important points about this lighting technique.
If you're ready to get started, let's get to it!
What is High Key Photography?
Credit: Pixabay
Many people think that a high-key photograph needs to be all white. That's not true, high-key is a photographic lighting technique. This lighting creates minimal contrast resulting in bright subjects and no dark shadows.
Therefore, high-key also doesn't mean that you should overexpose the photo. In a high-key photograph the subject is correctly exposed, you simply don't have a full tonal range. Most of your data will be on the right side of the histogram.
High-key photography is the opposite of low-key photography. In low-key images, the majority of the frame has dark tones.
You can use high-key lighting in color and black-and-white photography. In both cases, the mood of the photograph will be peaceful, happy, or innocent.
This is why this type of light is often used in wedding or newborn photography. However, you can also use it for any type of portrait. It's also popular in landscape photography, and you can use it for still life or food photos.
To do high key photography you can use natural or artificial light. You can also do it with one or more light sources. In this case, the important thing is to keep a low light ratio.
How Do You Do High Key Photography?
White on white is the most classic high-key photograph you can take. So, using a white subject and white props will make it easier for you to start practicing high-key lighting.
Of course, this doesn't mean that you can't have a darker subject. If you were to use only whites, you couldn't do almost any portrait because the skin or the hair color wouldn't work out well.
However, as I mentioned before, high-key lighting is about the contrast and light ratio. So, feel free to experiment with any subject.
What you do need is a white background or a very light color. You can keep the subject close to the background so that it stays nice and bright.
If you place the background further away from the subject, make sure you add extra light pointed directly at it. Otherwise, you'll end up with a grey or darker backdrop.
Next, use soft light to avoid harsh shadows. Point the light in such a way that the subject doesn't cast a shadow on the background, so to the side or from above. Alternatively, add a fill light or a reflector.
Remember to use the camera in manual mode and expose it to the highlights. I'll talk more about the camera settings in the next section. However, if you use the automatic mode, it will underexpose the picture. Also, make sure you put the flash in manual mode and not TTL.
How do you set up high key photography in the studio?
The easiest way to do high-key images is by using artificial lights in the studio. This way, you have full control over the direction and quality of the light. You can also control the intensity so that you get the correct exposure using the camera settings that you need.
It's possible to do high-key photos with continuous light or with flashes – whichever you feel more comfortable using.
You can use a single light or a more complex high-key lighting setup. If you use more than one, the important thing is that you keep a 1:1 ratio between the key and fill lights.
You may also add background lights to keep a pure white background. You may also use it to fill any dark shadows created by the key light.
To make high-key images with a single light source, you can use a softbox to reduce shadows on the main subject.
To avoid casting a shadow on your otherwise completely white background, you can make the light come from above or the side.
To avoid high contrast, you can add a reflector on the opposite side of the light source. This way, you can make sure there's enough light to fill the shadow areas.
Creating high-key shots this way can become a bit monotonous. So, if you have the lighting equipment, you can add fill lights, background lights, or hair lights.
Using a high-key lighting set with three lights or more, you can achieve different shades of white or add a pop to your high-key look.
What setting should I use for high-key photography?
The first setting you need on your camera to make high-key photography is the manual mode. If you use an automatic program, it will make an average of the light in the scene and will try to match it to an 18% grey.
This is what cameras are supposed to do because it's the middle ground between black and white. However, this works when you have a scene with highlights, mid-tones, and shadows.
Here, you have one with mostly highlights. So, you need to tell the camera to ‘overexpose' the photo to get the correct exposure.
Next, you have to adjust the settings from the exposure triangle. Unless you're dealing with moving subjects, you should start with the aperture.
If you want a sharp image use an f/8 aperture as a starting point. Instead, use an f/2.8 or the widest aperture of your lens if you want selective focus.
The next two settings should be adjusted following the first one. So, if you used a closed aperture, the shutter speed will be slower. Instead, if the aperture is wider, you'll use a faster shutter speed. Then, set the ISO as low as possible to avoid any digital noise.
If you don't want to use the camera in manual mode, you can use the aperture priority mode. Then, use the exposure compensation feature to ‘overexpose' the image.
Is it possible to do high-key photography in daylight?
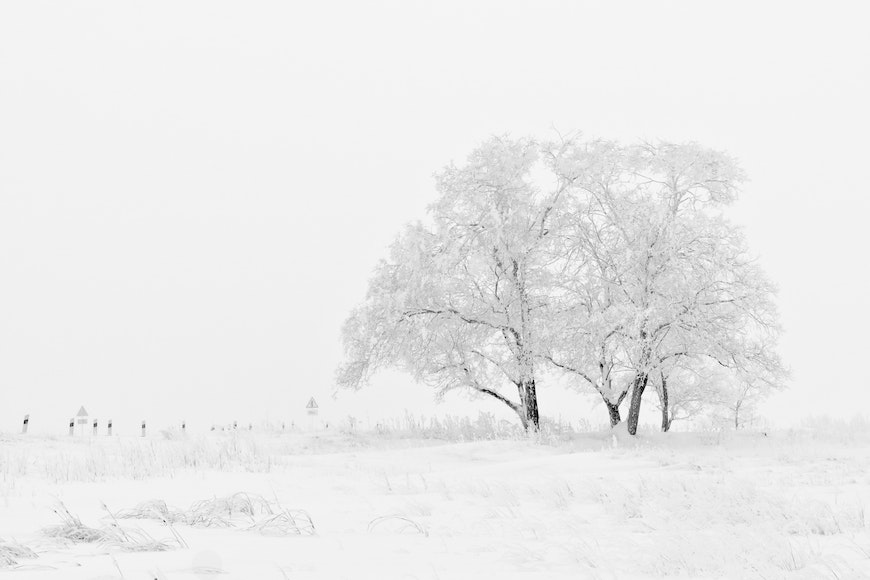
Yes, it's completely possible to do high-key photographs outdoors. In fact, high-key is very in both landscape and wildlife photography.
One of the techniques to do high-key photography with natural light is by overexposing the background. Make sure that your subjects are correctly exposed, though.
Another way to do it is to find a subject and a background with light tones and even light. This will create a high-key effect, however, your images might need an extra humph to gain interest.
You can do this with composition or by using a visually interesting subject.
Lastly, it's possible to do high-key photos with artificial light during the daytime. The only thing is that you need powerful strobes. This way, you can overpower the ambient light and gain full control.
3 High Key Photography Lighting Techniques to Try
Four lights setup for high-key portraits
You can do high-key photography using a single light source. However, you can make your images more interesting by using multiple flashes.
In portrait photography, you can do a high-key lighting setup with four lights. To do it, you need to place your key light in front of your subject just above the camera. Remember to use a wide softbox or an umbrella to soften the light and avoid any hard shadows.
Next, put a light on each side of your model to shape the face. These lights should have a 1:1 ratio with the key light.
Lastly, light the background with a strong light. This one doesn't have to be as intense as the other lights, but it shouldn't have a higher ratio than 1:2. Remember that you don't want to create too much contrast.
By using a single hard light for the background, you'll create a vignette. If you don't like this effect, you can use two lights for the background – one for each side.
Milk bath photography
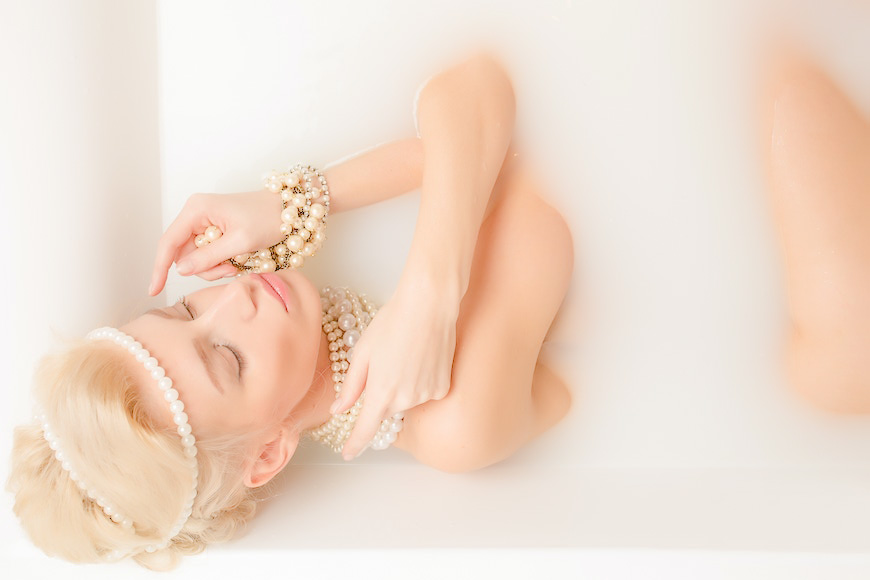
Credit: Ferdinand Studio
Milk bath photography is great for high-key photography. This is because you have all the white from the milk covering a big part of the frame.
The subjects are also a good match since it's usually done for portraits, maternity, and baby photoshoots. So, the ethereal mood from the high-key lighting is perfect.
To enhance the effect, you should use a high water-to-milk ratio. You can find all the details on how to do milk bath photography in this Shotkit's guide.
You can use natural light if there's light coming in from the window. Otherwise, you can use a large softbox on the key light and a fill light or two lights to have a bright background evenly lit.
Shoot outdoors into the light
Creating high-key photos when shooting against a bright light can be a challenge. However, it can make a brighter photo with a minimalist style.
In this case, you need to change the metering mode in your camera so that it considers the exposure of the main subject.
As a result, the background will be completely white which makes a very interesting high-key shot.
12 Examples of High Key Lighting
Now that you know some basic high-key lighting techniques, let's see how you can put them into action with these examples.
High-key portrait
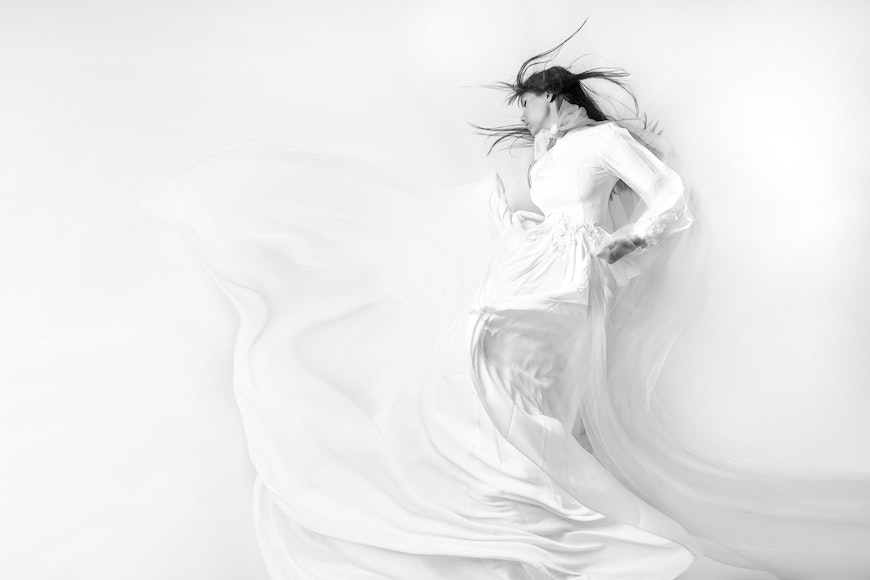
Credit: Marjan Taghipour

Credit: This is Zun
Wildlife (high-key bird photography)
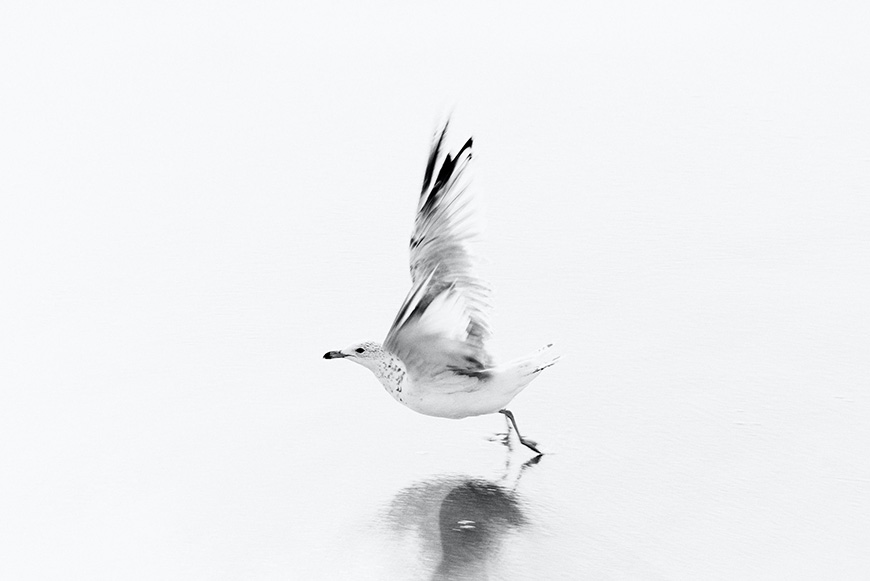
Credit: Christian Lambert
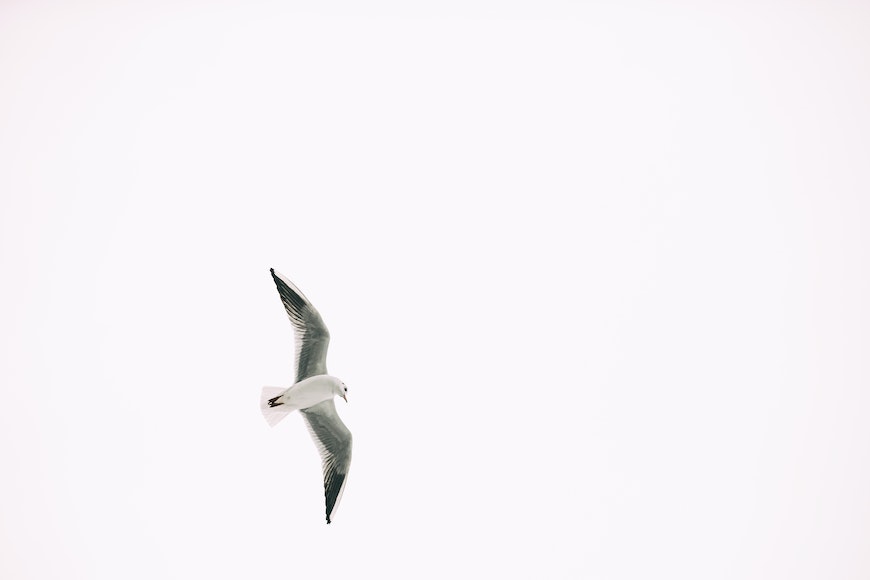
Credit: Tolga Aslanturk
Flower photography high-key style
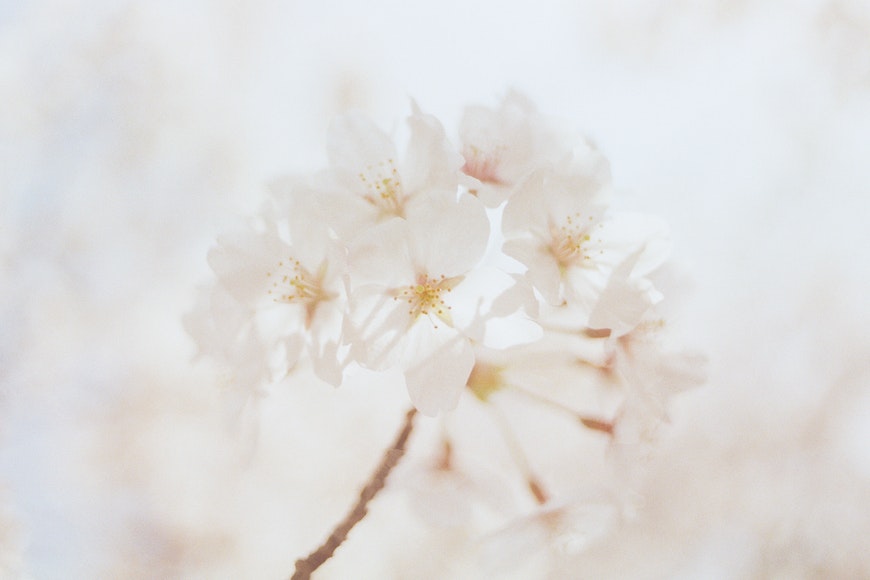
Credit: Sl Wong
Credit: Karolina Grabowska
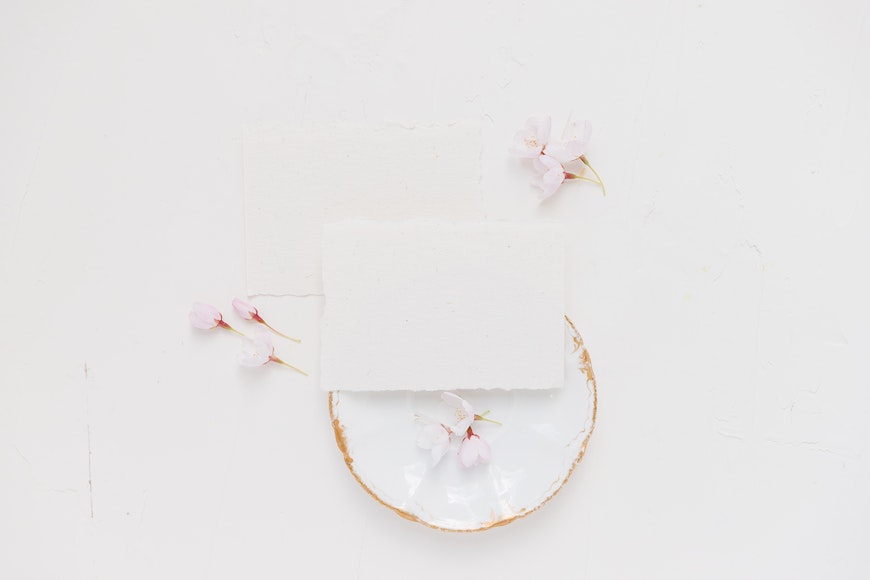
High-key still-life shots
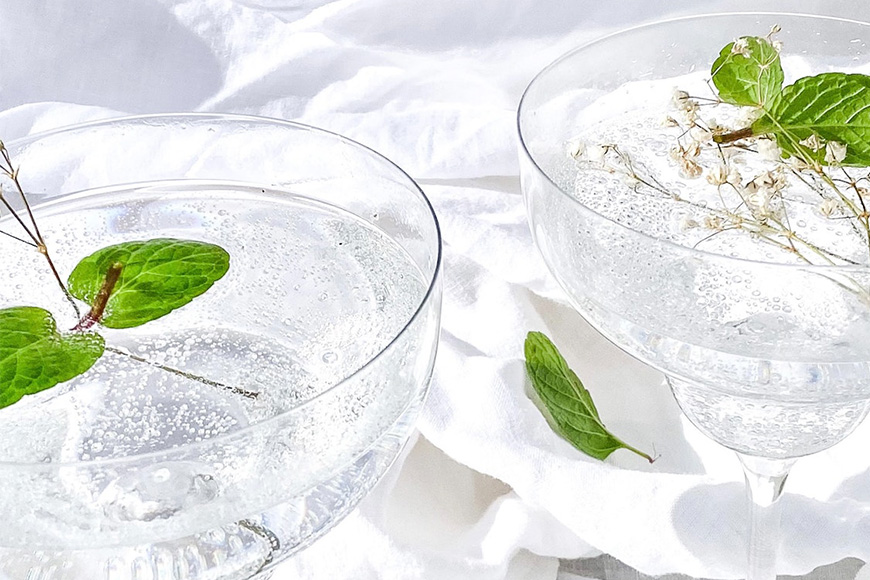
Credit: Studio Naae
Credit: Katie Goertzen
Black and white high-key images
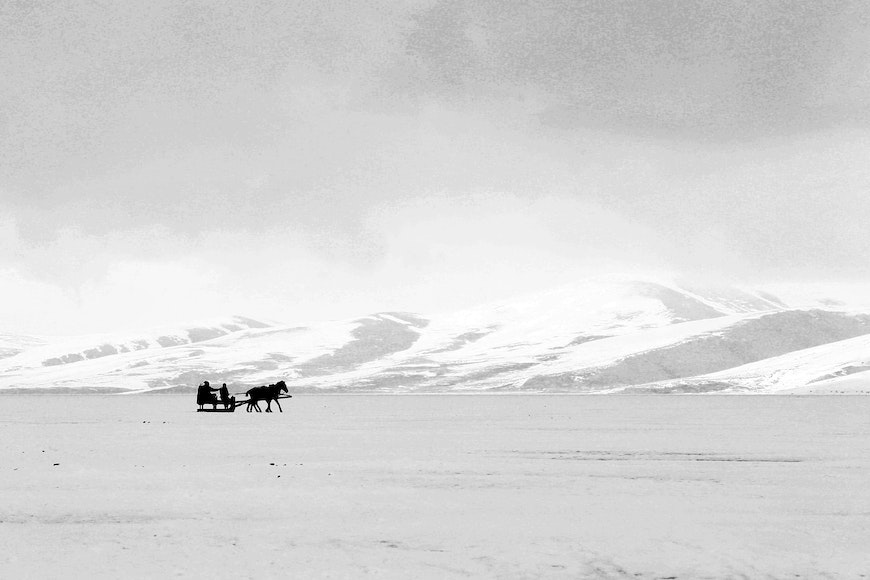
Credit: The Humantra
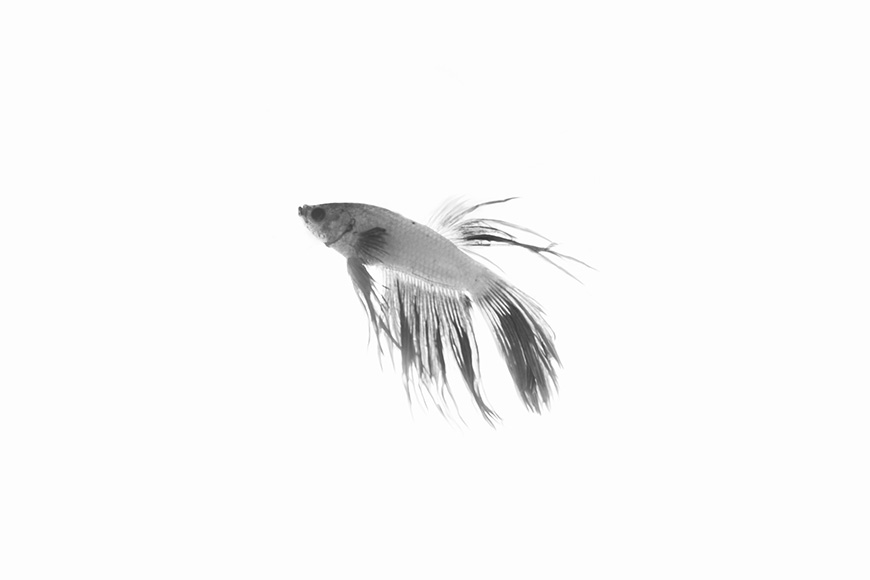
Credit: Dai Lopez
Product photography with a high-key look
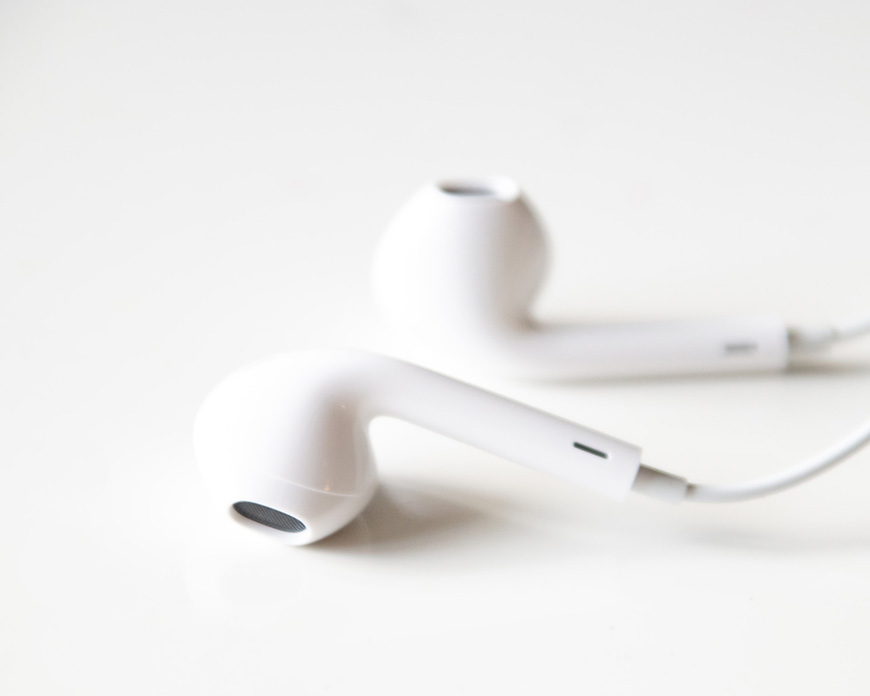
Credit: Sharon Janssens
Credit: Kader D Kahraman
How Do You Post Process High Key Photography?

High-key images are done in-camera with low-contrast lighting. However, you can reduce shadows or brighten the final image in post-production for better results in just a few clicks.
You can do your post-processing in the program of your choice. I like to use Lightroom with Photoshop, but most photo editing software has similar features to work on high-key photos.
Start like you would with any other photo by fixing the white balance and correcting the lens distortion. Next, use the Exposure slider to make the image brighter if necessary. This step works on the overall image.
For a more targeted retouching of a high-key image, you should lighten the black and open the shadows. You can do this using the sliders from the Edit panel.
Next, open the Tone Curve and brighten the mid-tones and the darker tones. This should create a low contrast without affecting the highlights.
If you want, decrease the texture and clarity to create a soft, dreamy effect to round up the high-key look.
FAQs about high-key lighting
- What are the advantages of high-key lighting?
A high-key portrait has the advantage of smoothing the skin without the use of post-processing. Also, high-key shots communicate a light and happy mood unlike low-key lighting which adds drama and mystery.
- Why is high-key lighting used in photography?
The high-key light is often used in portrait photography – especially for brides and newborns. It's also popular in nature photography whether that is wildlife, landscapes, or flowers.
- What is the lighting ratio for high key?
In a high-key setup, the key light and the fill lights should have a 1:1 ratio. However, the background light can be 1:2 or 1:1 depending on if you want bright backgrounds or slightly darker.
- What do high-key images have more of?
Contrary to low-key photography which has high contrast and dark tones, a high-key photo is very bright with minimal contrast. Therefore, it has light tones and you'll see the data on the histogram mostly on the right side.
- Who are some famous high-key photographers?
Michael Kenna has wonderful high-key landscapes. John French was famous for the low contrast in his Hollywood portraiture. Anne Geddes occasionally uses high-key lighting for her newborn photography. Also, some portraits from Richard such as Dovima are famous high-key photography examples.
- Where should the lights be positioned in a high-key portrait?
The main light should illuminate the majority of the subject, so it should come from the front and slightly above head level. If you're using multiple light sources, you can put the main light from the side and fill light on the opposite side. If you have three lights or more, you can use the other lights to light the background and add effects such as rim lights or hair lights coming from behind the subject.

Check out these 8 essential tools to help you succeed as a professional photographer.
Includes limited-time discounts.

Ana Mireles is a Mexican researcher that specializes in photography and communications for the arts and culture sector.
👋 WELCOME TO SHOTKIT!
🔥 Popular NOW:
