


Improve your Car Photography (16 PRO Tips)
Get amazing photos of your car with 16 pro tips. Selling your car? Showing it off on Instagram? Want an automotive photography career? This guide will help!
Learn | Photography Guides | By Ana Mireles
Shotkit may earn a commission on affiliate links. Learn more.
Car photography is a popular genre for both amateurs and professional photographers. You might think that capturing a car is easy, but there’s actually a lot more to automotive photography than meets the eye.
While cars can make very appealing subjects, they are also very tricky to capture well, much like motorcycles.
In this article, we’ll cover some of the basics like the best gear and camera settings, some more complex car photography techniques such as panning or light painting, and some ideas and images to inspire you.
Whether you want to improve your images to sell a second-hand car online, or you want to become a professional car photographer, this guide will blend a helping hand.
Let’s get stuck in.
16 Car Photography Tips (Automotive Photography)
If taking car photos is one of your hobbies, maybe it’s time to take it to the next level. If you’re wondering “How can I become a car photographer?”, check out these car photography tips to turn your passion into your profession.
1. Pack the right gear
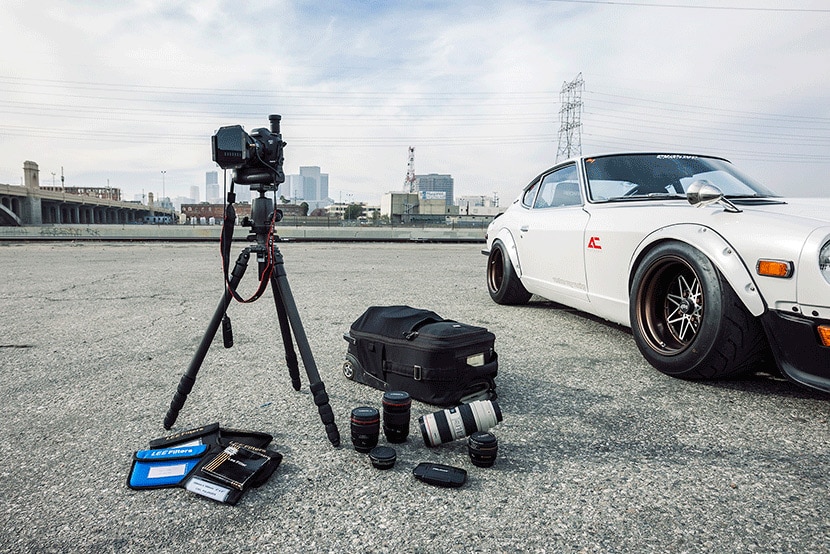
Equipment used by automotive photographer Nate Hassler.
The best gear for car photography depends on the situation. Is it a moving car or is it parked? Are you shooting outdoors or inside?
To adapt to all the situations, you’ll want a camera with interchangeable lenses that allows you to shoot in RAW format.
Also, if you can afford it, get a full-frame camera to ensure that you get the best image quality.
Here’s a list of popular cameras and lenses for automotive photography.
Cameras with a high megapixel count are useful for capturing all the details of the car, and a fast auto-focus/frame rate is helpful if the car is moving. Full frame sensor cameras are recommended – medium format if you can afford it!
- Nikon D850
- Sony a9 II
- Sony a7R IV
- Canon 1DX III
- Sony a1
Want to earn yourself some kudos from the car owner? Pack a flexible borescope camera in your bag – this will allow you to take a peek in places no one else normally sees – engine bays, exhaust pipes, suspension struts etc.
What lenses are best for car photography?
The right lens will depend on the type of shot that you want to accomplish. It’s a different thing to capture a car in a sports race to photograph one parked in the studio.
Here’s a list of choices to help you find the best one for you. They’re all Canon, but you can look for the equivalent from Nikon, Sony, etc.
- Canon RF 24-105mm f/4 – Great all-round lens allows you to do everything from wide-angle shots on location to action shots from the side of the road.
- Canon EF 16-35mm f/4 – Good to use on location as it’s wide enough to include more of the scene for action or parking shots.
- Canon EF 70-200mm f/2.8 USM – Excellent Canon telephoto lens for car photography.
2. Keep reflections under control
Most cars have a glossy finishing that makes them highly reflective. The same goes for all the windows and the windshield, so you have to be very careful about the surroundings of the car to avoid distracting reflections.
(Remember also that the screens of backup cameras, GPS units and other gadgets on the dashboard of most cars are also highly reflective.)
Using a circular polarizing filter can be of great help. Just attach it to the front of your lens and turn it to find the best position.
If it’s not fixing the entire car’s reflections, try doing different exposures by rotating the filter. Then blend them to compose the perfect shot in post-production.
3. Use soft light
Credit: Kelson Downes
Because cars are very reflective, you’ll want to avoid using hard light that can create hot spots on your photos.
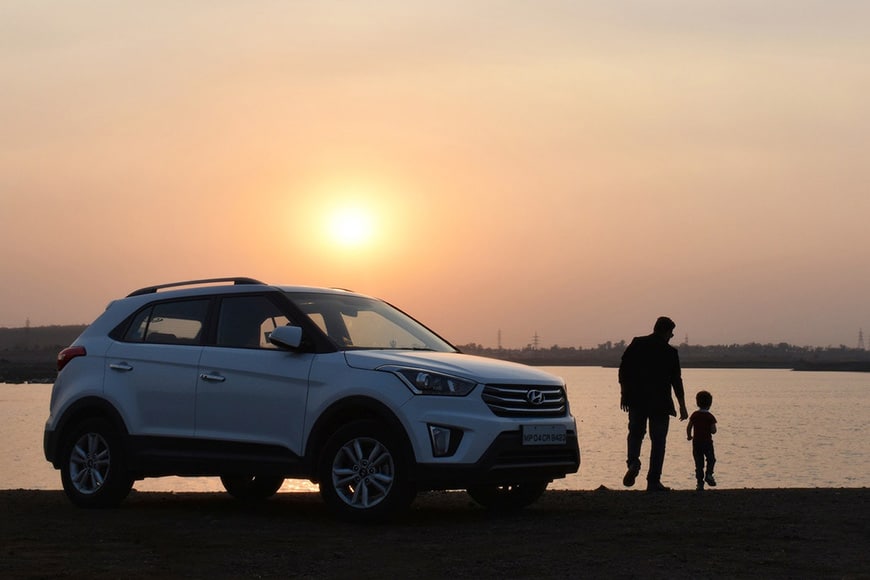
If you’re shooting outdoors, you can control this by choosing the right time of day. Early morning and late afternoon are best to catch the golden hour and blue hour.
If you can’t choose the schedule, then try to shoot the car in a shady spot.
If you’re using strobes or flashes in your photography, make sure you use modifiers such as softboxes or diffusers.
4. Watch the white balance

Credit: Popescu Andrei Alexandru
When you’re doing car photography for editorial purposes, social media or fine art, you can give your photos the style that you want.
However, if you’re doing it as a product shot for a dealership’s website or selling used cars then your photo needs to represent the car accurately.
Setting the wrong white balance can make the car look like it’s a different color and that can create unhappy clients!
The best way to control it is by adjusting the custom white balance on your camera. You can photograph a grey card or a neutral surface to calibrate it. Remember to adjust it if the lighting conditions change.
Also, consider the tint of the windshield when you’re photographing from the inside out. You can fix white balance in post-processing, but as with any kind of photography, it’s always better to nail it in-camera.
5. Pay attention to composition
Credit: Matthew Leland
When the subject is already eye-catching or harmonious (like cars are by design) it can be easy to forget something as basic as composition.
All photographs need a good composition and car photography is no exception. To get started, you can follow the rule of thirds, which is marked on the grid of all cameras.
This is just the most basic ‘rule’, but there are so many other composition guidelines that can dramatically improve your photography.
You can try to use leading lines to direct the viewer’s eye to the vehicle. For example, place the car in the vanishing point where the road and the power lines converge.
You can learn the golden ratio, the rule of odds, and so on. Look at professional photographers’ photos to train your eye and see how to better compose your shots.
6. Nail the depth of field
Credit: Jose Carbajal
Car photos rarely have everything in focus – you either want to have a sharp car in front of a blurry background, or highlight a specific detail by blurring the rest of the car.
That’s why you want to take control of the depth of field (DOF). To do this, you need to balance three factors: the aperture, the focal length, and the distance between the car and the camera.
Aperture: Small f/numbers represent a wide aperture, this will give you a narrow depth of field. To have a larger focus area, use narrower apertures.
Focal length: Longer focal lengths such as telephoto lenses are better for selective focus.
Distance: When you step away from the subject, you’ll have more of the scene in focus. Obviously, when you get closer, you’ll get a shallower DOF.
(See more essential photography terms here.)
To have a more accurate result, you can use DOF calculators. You can find many free apps for your phone that you can download.
7. Try painting with light

Credit: Samuele-Errico Piccarini
Another way to photograph cars is at night. Light painting is one of the most fun shooting techniques out there – and you don’t have to worry about reflections.
Place your camera on a tripod and compose your image. Then, set the shutter speed to Bulb, and the rest of the settings can be f/8 and ISO 100 – of course, you can experiment with those.
Press the shutter and start ‘painting’ your car with a flashlight or a glowing stick – you can get as creative as you want. Once you’re done, release the shutter – a remote trigger like these are very handy to avoid camera shake.
See our complete guide to light painting for more tips and inspiration.
8. Add some action
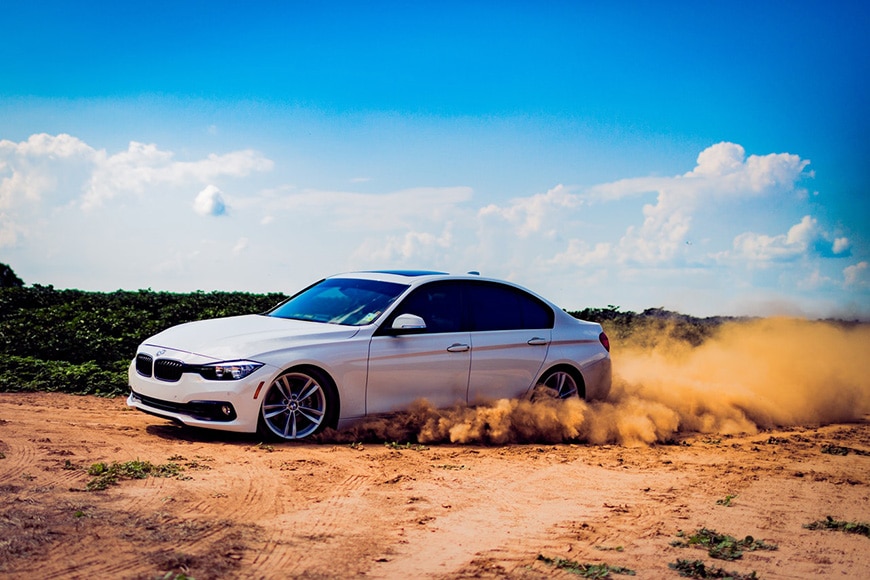
Credit: Trace Constant
If you freeze a moving car with a fast shutter speed, it will look much the same as if it’s stationary. This can be a perfectly good photo, but it’s not the best one if you want to show some action.
You can add a sense of speed by capturing the action around the vehicle. For example, water splashing from under the wheels, or dust from a dirt road when cornering.
If you’re not very confident handling the camera settings in manual, you can try using the shutter priority mode. This way you can decide the shutter speed, and the camera will compensate the f/stop to get the correct exposure.
For more on the basic camera settings, see our guide.
9. Experiment with motion blur
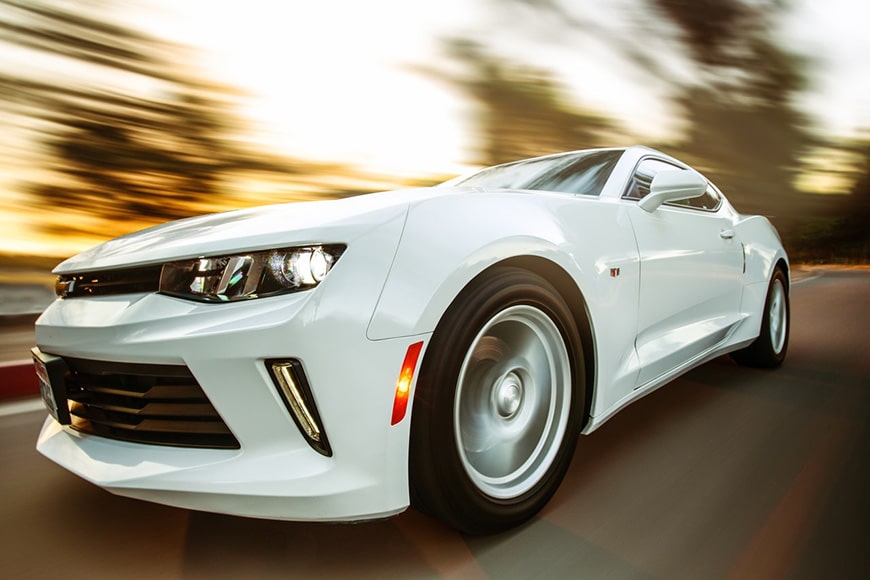
Credit: Jesse Zheng
Another way to add action to your car photography is by using motion blur. This means that you use a slower shutter speed so that anything that’s moving leaves a trail.
There are two ways to do this: either the car stays sharp and the background is blurred or you have a steady background and blur the car.
To have a sharp car, you need to move with it, employing a technique known as ‘panning’ – you need to pan the camera to follow the motion of the car during the camera’s exposure. To do this, you need to choose the right shutter speed and move your camera at the same speed relative to the car.
Panning is a bit tricky, so don’t worry if you make mistakes and just keep practicing. Using a monopod can make it much easier.
Another car photography technique to capture motion blur is to shoot from another car. Be careful though, you don’t want to put anyone at risk. Make sure you find an empty street and don’t distract the drivers.
With the previous techniques, you were capturing the movement of the background while the car appeared sharp. In contrast, if you want to show the car’s motion, you need to leave the camera still.
You’ll need to adjust your shutter speed depending on how much blur you want and how fast the car is going. Remember to use a tripod because slow shutter speeds will also capture any camera shake.
10. Don’t forget the details

Credit: Denin Lawley
When you’re shooting cars, detail shots can be essential. A small characteristic can distinguish between different car models or the year of production.
Sometimes the only (visible) change is the shape of the headlights or a hood scoop, so you want to make sure you capture them.
The best way to approach this is to talk to your client first and get all this information. Learning about the specific car on your own before the photo shoot will also give you a good idea.
11. The inside is also important

Credit: Pixabay
The car’s interior is a big part of the design and has a big impact on usability, so you want to show it off in your photographs.
What does the car look like on the inside? You can focus on the features or a specific knob or switch. Photograph the texture of the seat’s fabric, anything that’s special about it.
Capture the view from the inside. You can try to shot the landscape through the windshield with the steering wheel to place the viewer in the driver’s seat.
Correctly exposing both the interior and exterior such as in the photo above require the use of a complex lighting setup, or editing techniques such as HDR or image stacking.
12. Include some context

Credit: Alfonso Escalante
It’s always a good idea to leave enough space around the vehicle to put it into context. To make better use of the scene around the subject, follow the basic photography composition rules.
This is especially true when you’re on location, or if you’re shooting a driving scene. The last thing you want is to capture the best moment, but accidentally cut out a piece of the car.
13. Try different angles
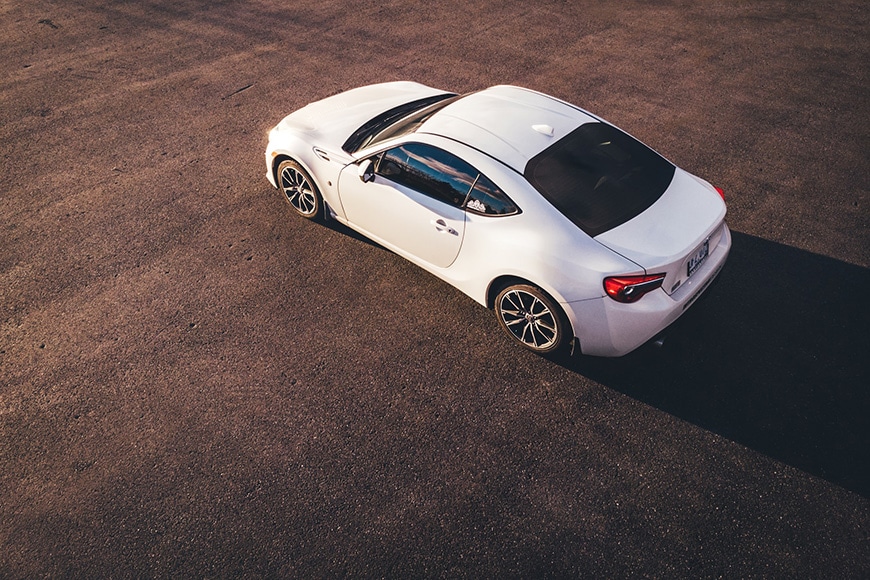
Credit: Erik Mclean
Shooting cars at eye level can make good descriptive photos, but they’ll probably lack in creativity. To find your personal style and add a wow factor to your images, you should try different angles.
Don’t be afraid to get yourself dirty; get low on the ground or climb a tree – whatever it takes to get the best shot.
You can even try drone photography – some beautiful scenic roads can serve as perfect locations for your car photography project, but you’ll need to remember to edit out any shadows or reflections caused by the drone.
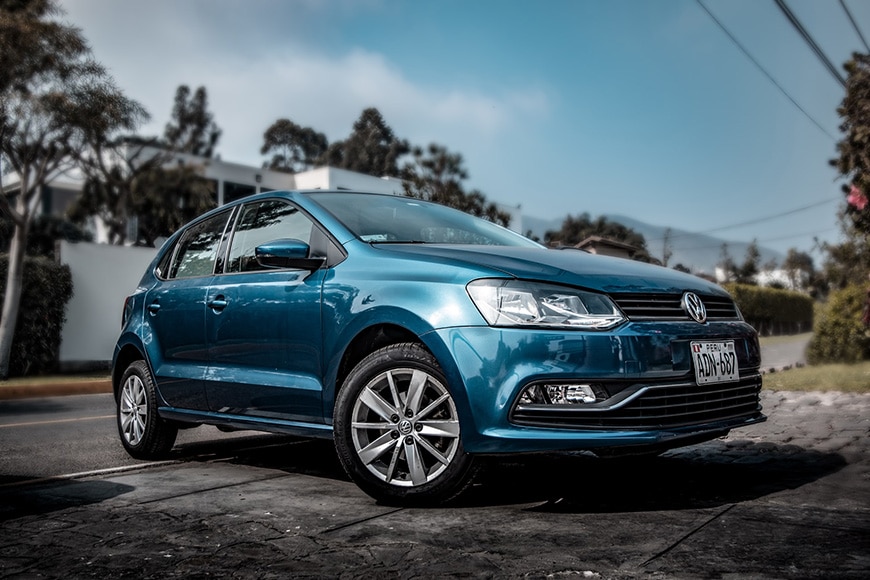
14. Check the background
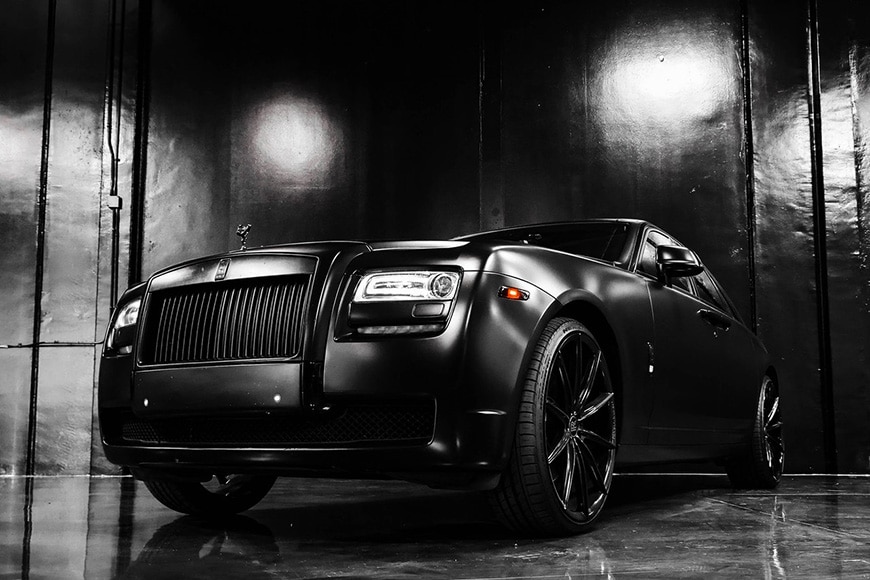
Credit: Jae Park
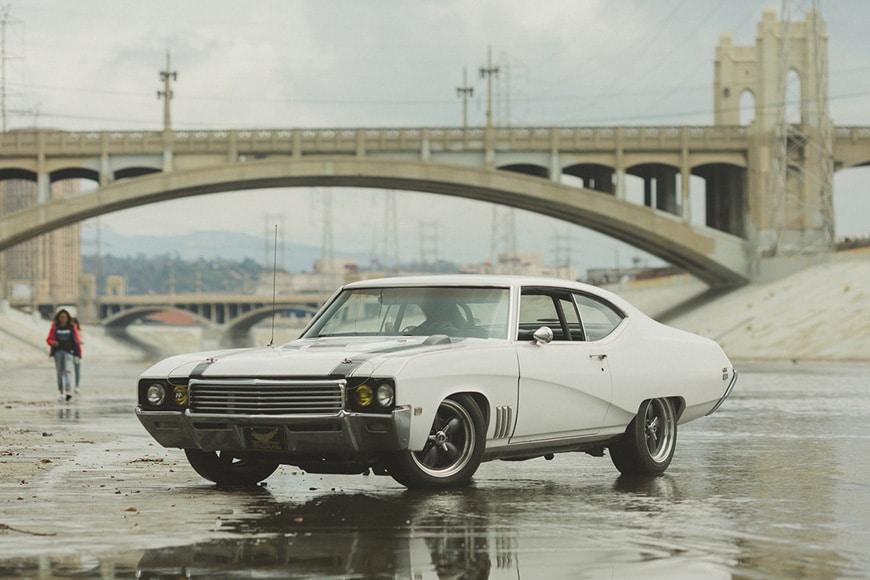
It’s always important to consider the background when you’re shooting cars. The vehicle is the focal point, so the background can’t be distracting the viewer from it.
You can choose a background that complements the subject – something that puts it into the context or tells a story. It can be a landscape or an urban location like a parking lot.
Otherwise, you can choose a neutral background: a solid color that contrasts with the car’s color or the classic white, black or grey.
15. Tell a story
Credit: Jagmeet Singh
As with any other type of photography, it’s important to tell a story so that people can relate to and engage with your photos.
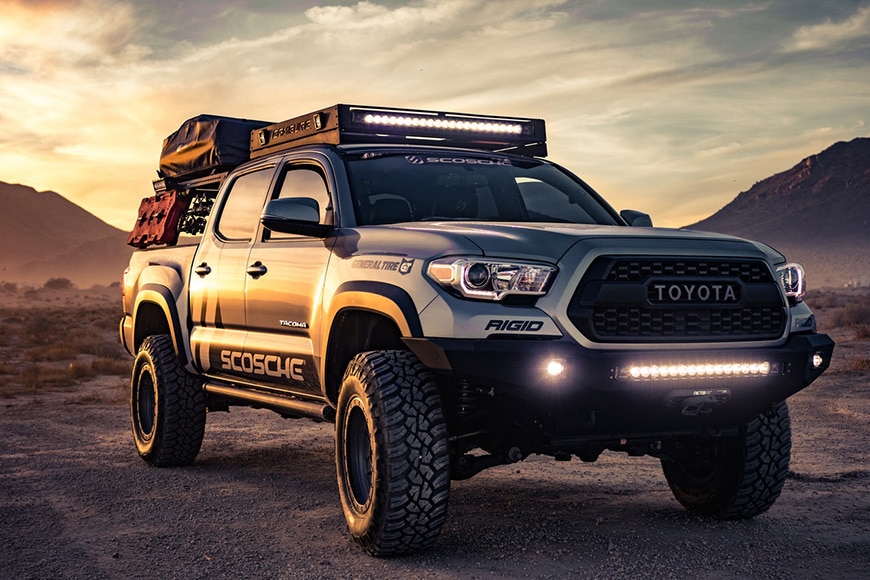
Is it a family car? What makes it one? Maybe because it has a lot of interior space for everyday errands or because it’s safe to go on a day trip. Show that in your picture, pick the right locations and maybe include the family.
Is it an all-terrain vehicle? Shoot it on a muddy road with people living an adventure. Ask for some guidelines from your client during the briefing so you can plan ahead.
16. Post-production is the icing on the cake

Credit: Land Rover Defender by Ahmad Syahrir
Most famous car photographers incorporate post-production into their car photography workflow. If you use Lightroom, you can batch edit several images shot in similar lighting conditions, but with Photoshop you can do more complex editing.
Of course, you can also use free software such as GIMP, an open-source photo editor with some handy plugins to make editing quicker.
The first thing to do is to adjust the curves, white balance, saturation, and overall image exposure. You can also crop your photo if you think it’s necessary. In Lightroom, you can use crop overlays to help you with your composition.
One of the most common retouches for car pictures is fixing the sky. Sometimes when you correctly expose the subject, you overexpose the sky. You can adjust it in post-production, especially if you shot your images in RAW format.
Alternatively, you can replace the sky in your photos altogether using AI software such as Luminar.
As mentioned before, cars are very reflective, so you might want to zoom in and check there isn’t anything distracting. For example, you or your gear might appear in one of the reflections. If you do, use the clone and heal tools to fix it.
You should also ‘clean’ the car and the road from any dirt, smudges or anything unflattering and distracting.
Most photography of cars can benefit from a little extra sharpening. Make sure you don’t overdo it because you don’t want to introduce noise into the photo.
You can also do some dodge and burn to highlight the reflections and darken the shadows. This way, you’ll enhance the shape of the car.
See also: How do you Photoshop wheels on a car?
Final Words
I hope this article got you excited about automotive photography.
Photographing cars is fun and rewarding, but it’s a big mistake to think that a beautiful subject will make a wonderful picture.
Even the most well designed and expensive vehicle can look dull if you just go out and shoot the car. So, make use of these car photography tips to take the most eye-catching images regardless of what kind of car you have in front of the camera.
If you have any questions or suggestions, please let us know in the comments section.

Check out these 8 essential tools to help you succeed as a professional photographer.
Includes limited-time discounts.

Ana Mireles is a Mexican researcher that specializes in photography and communications for the arts and culture sector.

👋 WELCOME TO SHOTKIT!
🔥 Popular NOW:
