


Overexposed Photos? Here’s How to Fix or Use Them
Learn what overexposed photos are and discover techniques to either fix them or creatively use their unique aesthetic in your photography projects.
Learn | By Ana Mireles
Shotkit may earn a commission on affiliate links. Learn more.
If your photos look washed out or have parts so bright that they don't have any detail, I'm here to help.
Overexposed photos are one of the most common problems in photography.
In this article, I'll tell you how to know if your image is overexposed.
I'll also explain how to prevent overexposure by taking a correct exposure reading and using the proper settings.
Lastly, I'll review different ways to fix it in editing – both on your computer and phone.
Let's go!
What Is an Overexposed Photo?
Credit: Shotkit
To put it in simple words, an overexposed photo is an image that is too bright.
Another way to see it is that overexposure is the opposite of underexposure.
Some photographers refer to an overexposed photo as being ‘clipped'.
Clipping in photography refers to a technical problem in which you don’t have any details in the highlights of your image.
A correct exposure shouldn't be too dark or too bright. Achieving this is one of the pillars of photography.
So, let's see how you can tell if your photo is overexposed and how to fix it.
How Do You Tell if a Photo Is Overexposed?
In more extreme cases, overexposure is noticeable to the naked eye. However, you should always learn how to use the histogram for a more scientific approach.
A histogram is one of the most valuable tools in digital photography. In this graph, you can see how the light is distributed in your image.
You'll see the tone values going from zero to 255. There's black on the left side (zero); then, you'll find shadows, midtones, highlights, and whites. The total white is 255.
If you can see in the histogram that some pixels are at 255, you have clippings because of overexposure.
Even without clippings, an image may be overexposed if it's brighter than it's supposed to be.
You have a very bright photo when you see a histogram with the most information on the right side. If this is intentional – for example, if you're doing a high-key scene – it's OK.
Otherwise, it may mean that your shot is overexposed.
Overexposed Photo Examples
Here are some examples to show you what overexposure looks like.
Overexposed scene
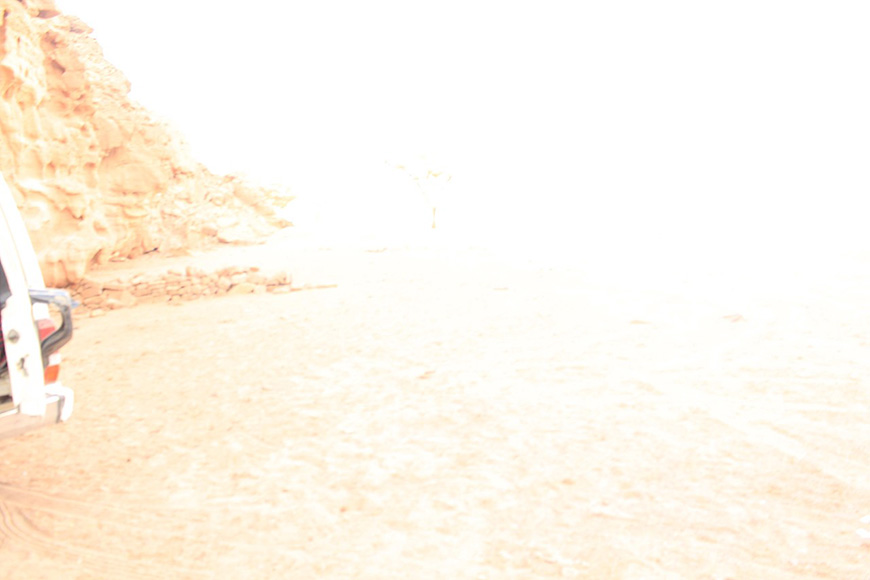
Credit: Credit: Kamal Osama Elgazzar, CC BY-SA 4.0, via Wikimedia Commons
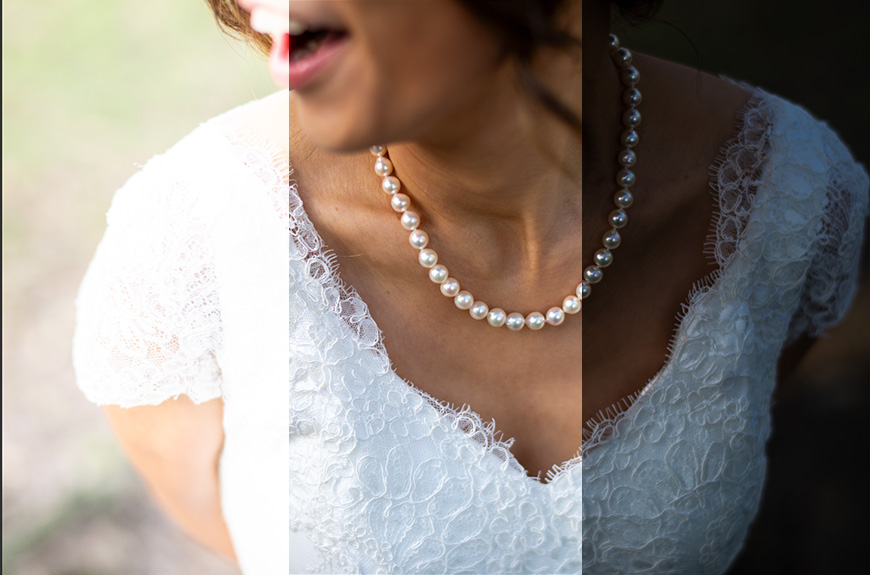
Only part of the image is overexposed
Credit: Shotkit
How to Avoid Overexposure (Camera Settings)
To avoid overexposure, determine the amount of light you need (metering) and adjust the camera settings to get the correct exposure.
You can use an external light meter to get a more accurate reading of the available light. These devices measure the incident light, which makes them more reliable.
However, you can always use the camera's internal meter. You can do a couple of things to make the results more accurate.
First, you can use a grey card. Remember that, in this case, you're using the grey card for exposure – it has nothing to do with the white balance.
Second, you should choose the correct metering mode for the situation you're photographing. Most cameras average the light of the entire image by default – but you can change this to center weight or spot metering mode.
Now that you know how much light there is, it's time to adjust the camera settings.
You can use the exposure triangle to control the brightness of your image. But what is the exposure triangle? It combines the ISO, shutter speed and aperture used in the exposure.
If you have an overexposed image, you can use any settings to darken your photograph. The decision of which one to use mainly depends on the results you want – but it may also have to do with practical reasons.
You can fix overexposure by using a faster shutter speed. This way, the camera sensor is exposed to the light for a shorter period of time.
However, if you want to introduce motion blur on a moving subject, it's best not to use the shutter speed.
So, you can fix overexposure using the aperture. By choosing a higher f/stop number, you'll use a smaller aperture – letting in less light.
A smaller aperture may result in a deeper depth of field. To avoid this, you can fix the overexposure using the ISO.
- Check out our Beginner's Guide to Aperture in Photography
The ISO is the third factor of the exposure triangle, even if it doesn't actually control the exposure. However, it does have an impact on the brightness of the image.
So, you can use a lower ISO value to fix the overexposure because the sensor becomes less sensitive to light. Most cameras can't go below ISO 100, though.
You can use ND filters if you can't move the exposure settings anymore and still need to lower the brightness.
How to Fix Overexposed Photos in Lightroom
If you can't prevent overexposure while taking the photo, you can try to fix it in post-processing. Here are a few ways to do it in Lightroom.
Using the Exposure slider, you can lower the brightness of the overall image. Simply drag the slider to the left to lower the exposure value.
Another thing you can do is use the Highlights slider. Using this, you'll only be targeting the brightest areas. You can also move the White slider if necessary – this determines the brightest point.
It's also possible to use the Tone Curve. If you do, you can use the right side of the graph, which corresponds to the Highlights.
To work locally, you can use the Masking tool. Once the area is isolated, you can use the Exposure slider or adjust the Highlights using the sliders or the curve.
Remember that when working with raw images, you'll get much better results fixing the exposure in Lightroom.
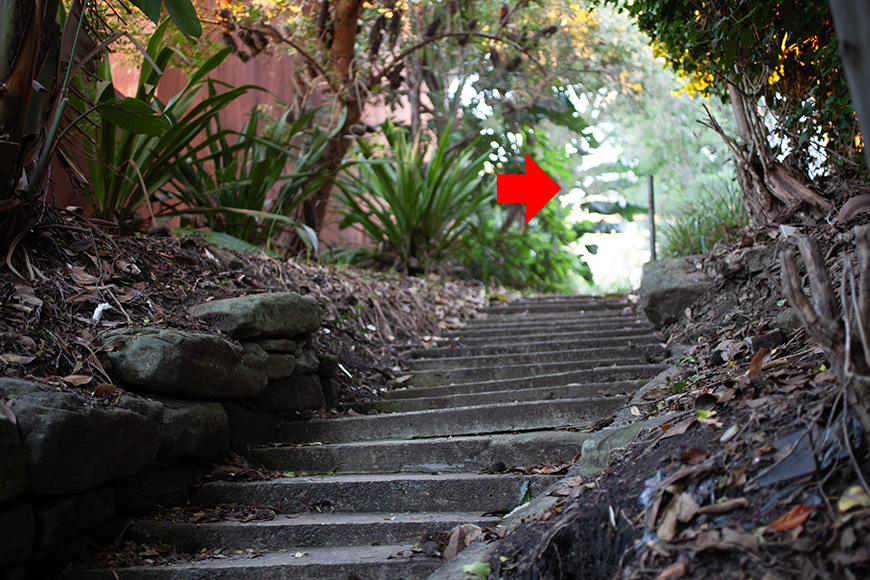
Is There a Way to Automatically Flag Overexposed Photos in Lightroom?
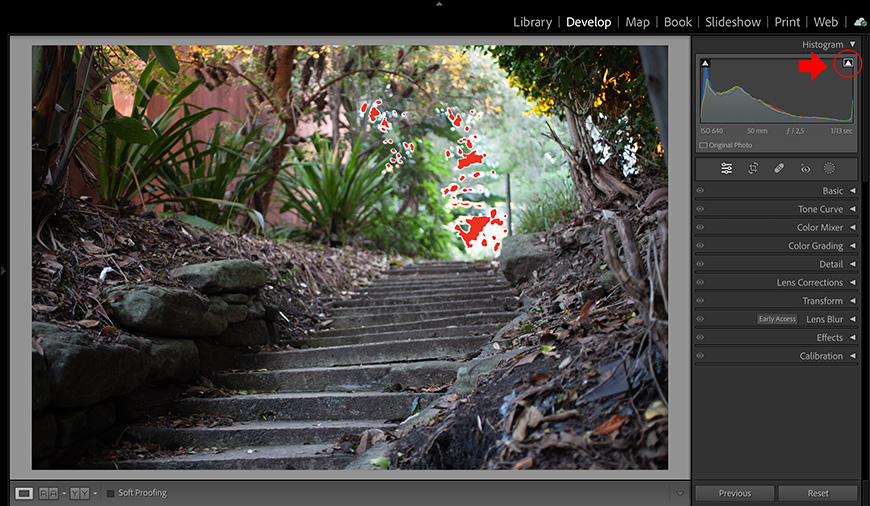
Yes, you can click on the top left corner of the histogram to enable the clippings alert.
It's also possible to do it using the keyboard shortcut by pressing the letter “J”.
Now, you'll see the blown-out highlights marked in red.
How to Fix Overexposed Photos on iPhone/Android
Most photo editing apps let you fix overexposure in your images. Lightroom mobile works in the same way as the desktop version. Simply use the instructions mentioned above.
Another popular app that's available for free on iPhone and Android is Snapseed.
To fix overexposed images in Snapseed, start by opening the photo with the app.
Then, open the Tools menu and select Tune Image. Here, you can use the Brightness and Highlights features to fix overexposure.
You can use the Brush > Exposure Brush if you want a more selective tool.
Then, select -1.0 Exposure and paint over the brightest parts.
4 Creative Ways to Use Overexposure in Your Photography
1. Create a lens flare
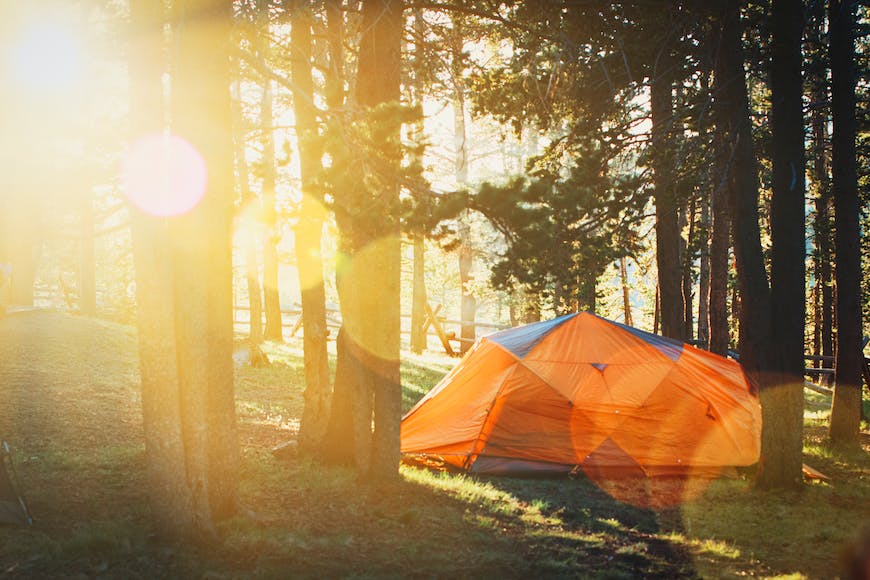
Credit: Todd Trapani
2. Loose depth for an illustration effect
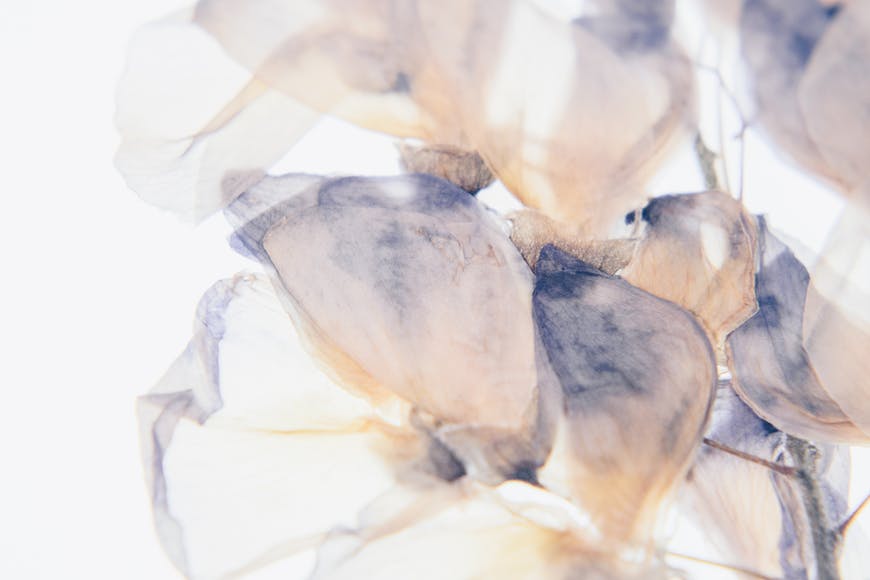
Credit: Evie Shaffer
3. Make the subject stand out
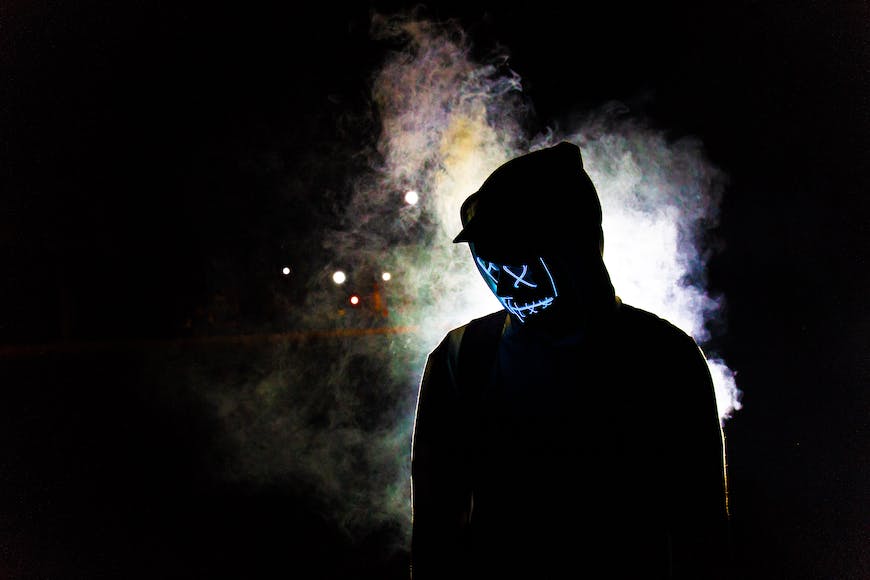
Credit: Sebatiaan Stam
4. Make a vintage film effect
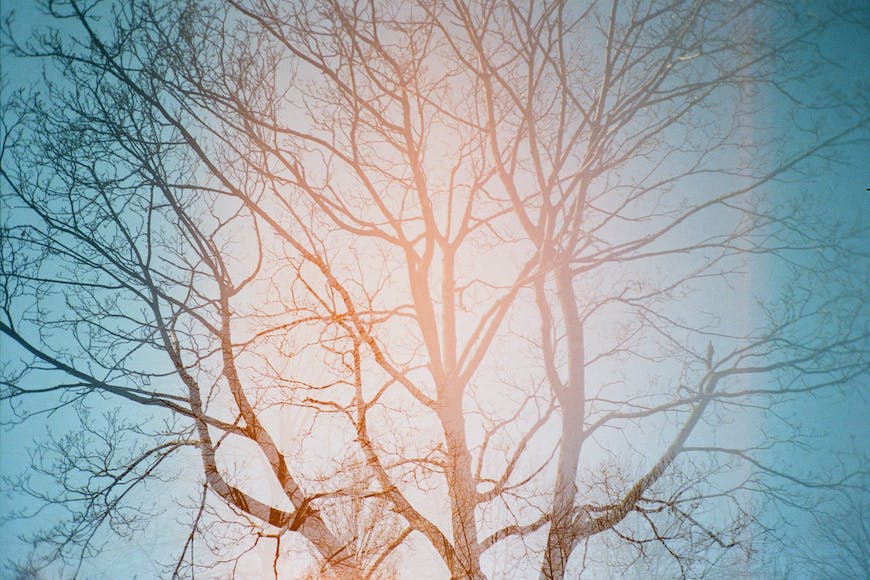
Credit: Jill Evans
Overexposed Photo FAQs
Can you fix an overexposed photo?
It may be possible to fix the problem while editing in digital photography. If you shot in raw, you'll have more information to recover from the Highlights. You can use Adobe Photoshop, Lightroom, or any other editing software.
Can you edit an overexposed photo?
Yes, you can edit overexposed photographs – especially if you have a raw file. On top of recovering detail in the highlights, you can also add contrast by darkening the mid-tones and the shadows.
What color is an overexposed image?
When the overexposure is so intense that it causes clippings, there is no information in those pixels – therefore, there's no color.
However, the rest of the photo will look washed out – the color will fade as if it were covered by haze.
Is it okay to overexpose pictures?
Yes, it is okay to break the rules if it's with a purpose. As the author of the photo, you may want to use overexposure as a creative element to tell your story.
However, if you didn't want to do this and the overexposure results from an exposure mistake, then you'll probably need to fix it in post-processing.
Why do photographers overexpose photos?
There are many reasons why a photographer may want to overexpose photos. For example, you can overexpose a photo to get more detail in the shadows.
Also, you may want to blow the highlights in the background to make the subject stand out.
It may just be a creative decision to mimic a vintage film photograph or to introduce a lens flare.
How do you make an overexposed picture?
To overexpose a photo, you must let more light into the sensor. So, you can use a wider aperture – for example, pass from an f/8 to an f/5.6. Or you can use a slower shutter speed – like passing from 1/250 to 1/125.
Another way to increase 1 exposure is to adjust the ISO – for example, changing from ISO 100 to ISO 200.
Is there an app for fixing an overexposed photo?
All photo editing apps can help you fix overexposure. You'll usually find an Auto feature in the menu if you don't want to do it manually. The icon usually has a magic wand, but all apps are different.
In any case, the amount of detail you can recover in the highlight areas will depend on the file type and how bad the problem is.

Check out these 8 essential tools to help you succeed as a professional photographer.
Includes limited-time discounts.

Ana Mireles is a Mexican researcher that specializes in photography and communications for the arts and culture sector.
👋 WELCOME TO SHOTKIT!
🔥 Popular NOW:
