


13 Tips for AMAZING Dark Photography (+ PRO Ideas)
Using dark colours & tones in your photography can produce beautiful results. It can be tricky for beginners to get it right, so read our guide for 13 top tips.
Learn | Photography Guides | By Greg Cromie
Shotkit may earn a commission on affiliate links. Learn more.
As the name suggests, dark photography is the art of taking dark, moody photos and relying on dark colours and tones.
Such photos are usually deep in shadow with much of the detail unseen – as a result, your mind fills in the gaps for you.
Another term often used to describe dark photography is low key photography. The opposite is high key photography, where bright colours and higher exposure levels form a core element.
It's essential to keep in mind that we're not referring to night photography – although shooting in low light does play a big part in this genre.
In this article, we'll take a closer look into the dark to discover what dark photography is and why it's a genre that delivers powerful photos.
We'll provide you with the best tips to create your own moody and dark photos without the need for costly gear.
You'll also find a list of the top dark photography artists for you to follow on Instagram, along with the most popular dark photography hashtags to use.
13 Dark Photography Tips
1. Choose The Right Gear

The great thing about dark photography is that it doesn't require any special gear – meaning you can get started right now!
However, as with any photography genre or process, there's a couple of essential bits of equipment you'll need to get it right.
For good measure, I'll also cover some of the more advanced gear needed for dark photography.
- Camera
A camera that has manual control settings is the best for dark photography.
If you attempt to shoot dark photography in Auto mode, chances are, it will try to compensate for it being so dark.
Your camera will elevate the exposure by boosting ISO, widening the aperture and slowing down the shutter speed too much. The result will be images that are all kinds of messed-up.
To prevent an Auto mode disaster, use manual settings to change ISO, aperture and shutter speed.
Your camera should also have a tripod mount and a hot-shoe. A tripod mount is a threaded hole in the camera base – use it to attach a tripod, mounting plate or tabletop stand.
The hot shoe sits on top of the camera and is a small metal bracket. The hot shoe is to attach a flash or flash trigger to the camera and is necessary for dark photography.
While some cameras have a built-in flash, they're often underpowered, overpowered or too directional – they cast intense light that creates ugly shadows.
The final element that's helpful but not essential is In Body Image Stabilisation (IBIS). It's a mechanical system that reduces the effect of camera shake when shooting at slower speeds.
Only use IBIS if shooting handheld – if using a tripod, turn it off.
Interested to learn more about the best cameras for low light? Check out our guide.
- Lens
The lens you use for dark photography will always depend on the style of photos you want to capture.
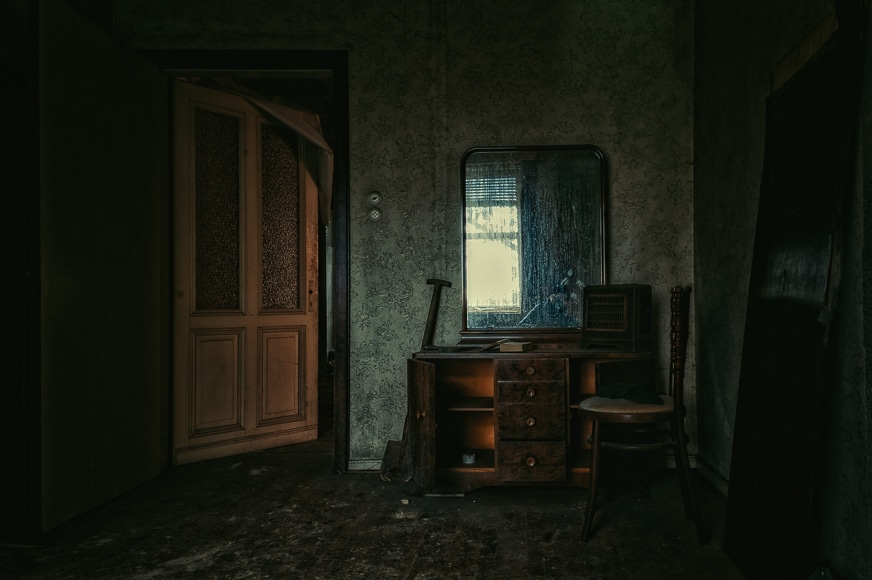
If you're photographing a large space such as an abandoned room or landscape, you'll need a wide-angle lens such as a 23mm.
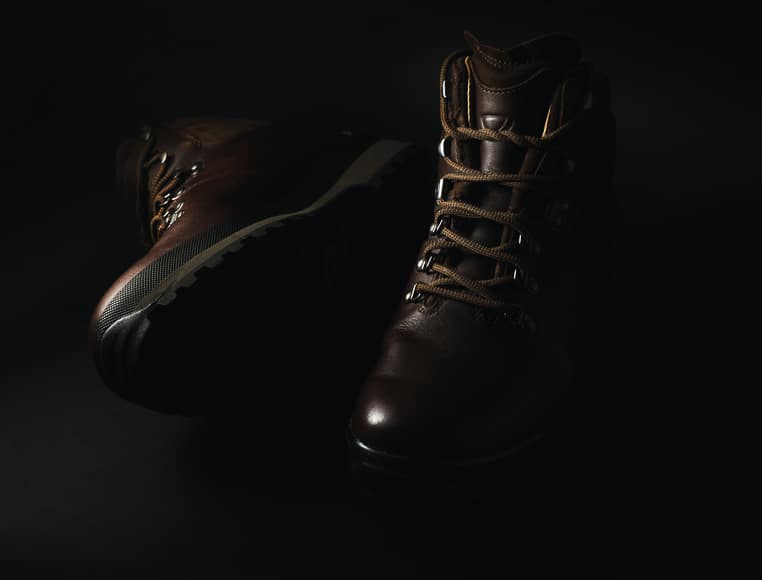
If you're shooting portraits or product and still life shots, then a 50-100mm lens is best.
Regardless of the focal range, you'll also need a lens with a wide aperture. The aperture is the circular opening that forms inside a lens.
A wide aperture lens allows that hole to open wider than a lens with a smaller aperture. It will enable more light when taking the photo – it also creates a more pleasing depth of field.
Depending on how dark things get, you may have trouble using Autofocus.
If the lens can't see an object to grab focus, you'll experience a focus-hunt where the lens tries and tries but fails to focus. To overcome this, switch the lens or camera to manual focus and turn the ring on the lens to acquire focus.
- Tripod
A tripod allows you to place your camera in a fixed position to compose your photo.
The added benefit of a tripod is that you can use much slower shutter speeds – we'll discover why in a moment. A slow speed means that the camera is more prone to picking up or recording movement.
With a tripod, the chance of shake reduces considerably.
Just don't trip over your tripod in the dark!
- Flash
A good (detachable) camera flash is the first piece of advanced kit required for dark photography.
A single flash or speedlight will help you gain complete control of directional lighting. With a flash, you add a soft amount of controlled light to highlight facial features, products and background elements.
You attach the flash to the camera via the hot shoe that sits on the very top. The hot shoe is a small metal bracket that includes miniature connectors to transfer data between the camera and the flash.
- Flash Trigger
A flash trigger is a communication device that allows you to use off-camera flash techniques.
You attach the flash trigger to the hot shoe and then place your flash somewhere else in the room. When you press the shutter button and take a photo, the flash will fire simultaneously.
The benefit of using off-camera flash is that you can be more creative where you position the flash to add drama to your composition.
The other benefit of using a flash trigger is that it controls multiple flash units. That way, you place more than one flash in the room, and all the flash units will fire in unison.
- Soft Box
A lighting softbox is a brilliant piece of kit for dark photography.
A softbox is a form of lighting modifier that softens the light emitted by a flash or speedlight.
Most softboxes come in a square or octagonal shape. They have thick black material on all side except the front side where an opaque white material covers the opening.
You sit the flash inside the softbox with the business-end pointed at the white material.
When the flash fires, the light hits the material. It's then dissipated and softens – the light is modified.
Softboxes come in a range of sizes and fit a light stand, allowing you to adjust your off-camera flash's height, angle, and position.
They're often sold as part of softbox lighting kits, such as these.
2. Select The Best Camera Settings
As mentioned, dark photography works best when you can master the manual settings to control the overall light and deliberately create a low exposure photo.
The three pillars of a camera's settings include ISO, Aperture and Shutter Speed. These three elements form what's known as the Exposure Triangle.
Mastering the exposure triangle is a sure-fire way to master dark photography. Let's take a look at each and remember to use the exposure compensation dial if your camera has one.
ISO controls the sensitivity of the sensor in how it reads the incoming light.
Too low an ISO and the images are too dark. Too high an ISO and you run the risk of your images becoming unusable due to a distorting known as noise.
For dark photography, I recommend starting with an ISO of around 800.
Avoid high ISO if you want skin to look smooth and natural, especially when shooting portrait photography.
Shutter speed controls how fast the camera shutter moves across the image sensor.
As it moves, the incoming light exposes the image sensor – it uses this light to record the details of your image. As most dark photo subjects are still, it's best to use a slow speed to allow the sensor enough time to read the incoming light.
If not using a tripod, drop the shutter speed to around 1/15 of a second before motion blur is evident.
If you're using a tripod, use as low a speed as you want. A good starting point for low-key photography is 1/60 of a second.
Regardless of using a flash, start there and go slower while constantly checking the results.
The aperture is a feature of the lens and is controlled via the camera or directly on the lens.
The wider the aperture, the wider the opening on the lens diaphragm. And the smaller the f-stop on the lens.
The narrower the aperture, the narrower the opening and the larger the f-stop.
In dark photography, the wider the aperture, the better. It serves dual purposes as it'll allow the most light to pass through the lens and create a narrow focal plane – the area in focus.
With low-key photography, a narrow focal plane results in a smaller amount of the subject in focus while the rest of the image falls into a blur. If shooting a portrait or product, a wide aperture will make the front portion of the subject in focus, and the rest disappears into the blurry blackness.
- RAW Format
The final setting (not part of the exposure triangle) is to change your file type to RAW.
RAW photo files are much bigger than a JPEG as a RAW file holds ALL the information captured by the sensor.
Photographers that use JPEG only capture the surface layer of information.
A RAW file is much easier to manage in post-processing software such as Adobe Lightroom.
The beauty of RAW files is that photographers can recover details hidden in dark shadows and have a far better chance of controlling the overall look of your low-key photos.
3. Use a Single Light Source

Dark photography is all about deep shadows and low-key lighting to cast minimal light on a subject.
A photographer working with a single light source, such as an off-camera flash, has greater control of the scene's darkness.
To create depth and contribute to the appeal of the photographs, use a single light source to draw attention to specific elements in the composition.
In a dark portrait, you want to hide the face in deep shadows. Our inherent knowledge of the structure of a human face allows us to fill in the unseen pieces mentally.
With a soft amount of light, the lips, nose, cheeks and brow will have highlights. Plus, a slight glow will appear in each eye with the correct position – or perhaps just one if you opt for side lighting.
A single light illuminates a subject or background to add context to your composition.
4. Use Multiple Light Sources

Once you've become a master of using a single light source in dark photography, it's time to elevate your game.
With the use of a flash trigger mounted to the hot shoe, the photographer controls more than one flash or strobe simultaneously. What's more, the trigger allows the photographer to adjust the settings on each individual flash.
You cast a soft light on your foreground subject with one or more light sources while also casting a light on an interesting background element. In doing so, you're taking your viewer on a trip through your photography.
The viewer's eye will be drawn from the front element to the lit background element and back again. It creates a very dynamic and engaging photo.
If you don't have access to multiple flash units, you can still make this work. You can use a simple flashlight or small LED light to cast soft light in the background.
Then, your flash casts light on your foreground subject.
5. Keep the Room Dark
The easiest way to set up a space for dark photography is to keep the room dark. While it seems like a no-brainer, you'd be surprised how much light exists in a dark room. You'll notice unwanted highlights later in an image.
The simplest way to manage the existing light in a room is to opt for a small one with as little natural light as possible. Opt for space where blinds or drapes block out the light from windows.
If you're having trouble getting complete darkness, consider hanging a blanket across the window or wait till it's dark outside.
With a dark room, the photographer has the perfect environment to create dark images such as portraits, products and lifestyle.
What's more, a dark room allows you to gradually build up your light with a single or multiple light sources.
6. Use Natural Light

If you're having trouble getting a room dark or the light entering through a window is too great, use it to your advantage. Rather than fight the light, harness it for your dark photography composition.
Provided it's not direct sunlight, natural light is soft and can add the needed highlights in a dark photo.
Of course, this depends on the size of the window and the position of the sun. If you have big windows, consider drawing the drapes across most of them and leave just a sliver of light to pass through.
Alternatively, filter the light further by hanging a plain white or dark bedsheet across the window. Depending on the sheet's colour and thickness, you'll get a range of filtered light effects.
In some cases, people use lace draped across a window in portrait photography.
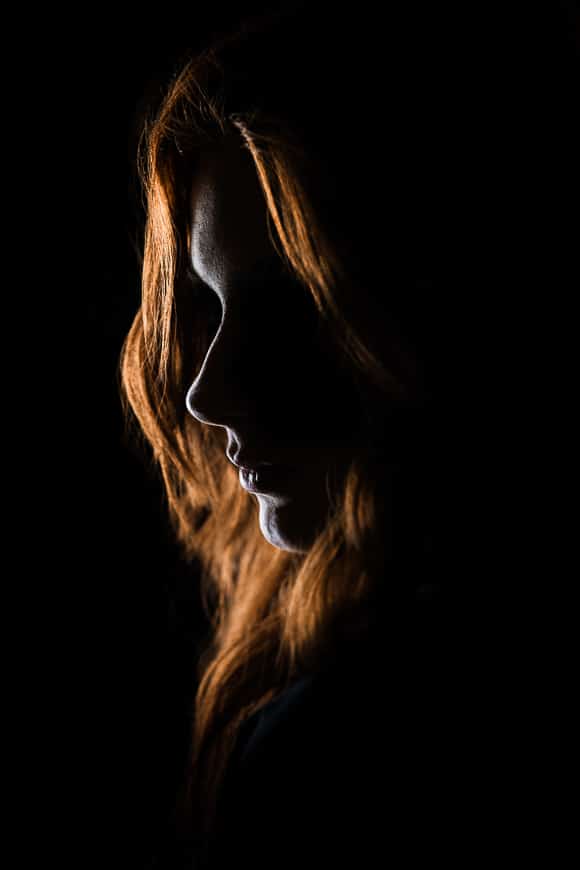
7. Create a Dark Silhouette
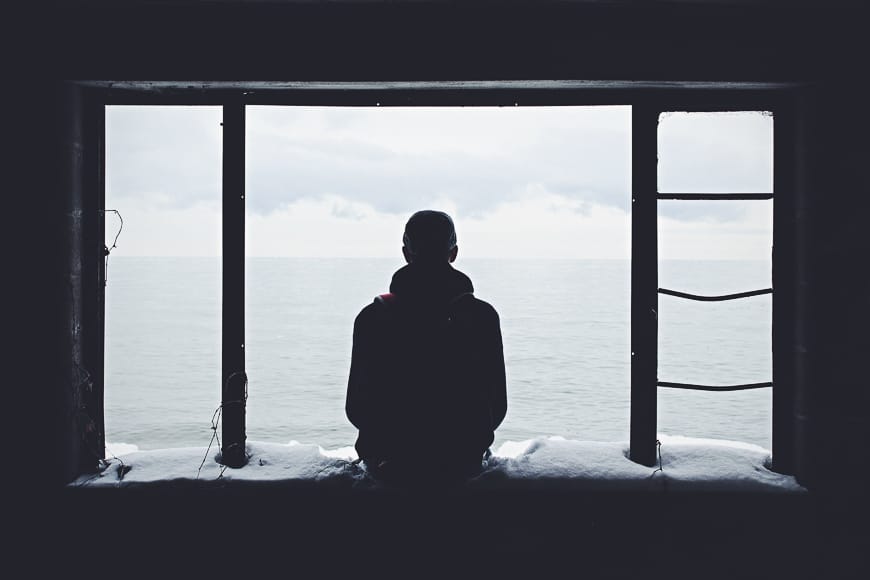
A visually stunning application of dark photography is to create striking silhouettes of people. A dark indoor or outdoor space is the perfect setting to backlight someone in a unique pose.
To achieve this, you'll need a light source to sit behind the subject.
If indoors, you can set up a flash or LED on a stand – ensure that it sits directly behind the person and none of it shows in the photo.
For this style of low-key photography, a dark background with a dark silhouette supports the use of rim lighting. A delicate glow outlining your subject's whole body defines the silhouette.
Another approach is to have an open window with soft light falling in – you can do this at night if you have nearby streetlights letting light into the room.
Stand your subject in front of the window to capture their silhouette in detail. The window light also lights up some of the elements in the room, so be aware of the placement of props.
8. Create A Moody Backdrop
Using a pure black backdrop suits low key photography styles such as product shots and portraits. However, in other situations, creating a moody background can elevate your images.
Given the low-key photography approach, textures and items that work with contrasting light work best. The shadows cast by different background elements can add to your overall fine-art photo.
For example, if doing a nighttime portrait in a forest, have your subject stand with their back to a tree. Provided that the tree doesn't dominate the scene, the texture of the bark or pine needles adds a story to your portrait photograph.
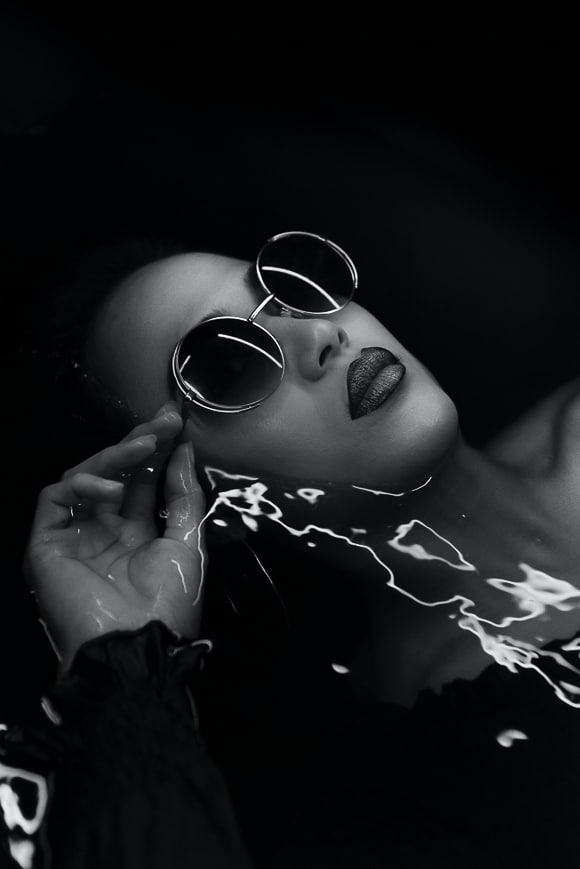
Another unique approach is to use a body of water. Provided you get the lighting right; the water will appear black.
Sit your subject in a steaming bath of water – the water will appear black like ink and contrast against the soft rising steam and skin.
For a more straightforward approach, consider using a textured background at home, such as a furry rug, corrugated iron or another feature wall.
Here's an article on creating DIY backdrops.
9. Create Dark Food Photography

By dark food, I'm not referring to a photographer taking photos of Oreos and burnt toast!
Food photography has become the modern-day equivalent of still life settings for fine art photographs. And, like with still life dark photography, style your food to make the most of low key lighting.
Dark food photography has a very moody, fine-art appeal that often makes a well-placed plate of food look like a painting.
“My cooking ain't no work of art, but with low-key lighting, it could pass as being desirable if not edible.” – Me.
Dark food photography requires a dark and moody background or a work surface with a muted tone. A great example is a top-down shot of a plated wintery delight like a stew.
Serve the food in a black cast-iron dish and sit that upon a wooden table or chopping block. Layers work well with any food photography so consider having a dark napkin across the surface at an angle.
The same approach works for product photography too.
10. Tell Your Dark and Moody Story

While product shots and simple portraits are an excellent subject for dark photography, consider elevating the composition with some story elements.
Building a composition takes time and practice, as does the need to light different elements within the scene. With a bit of forethought, you can build an interesting composition to tell a dark story.
Dark photography adds mystery and mood to photos – so why not capitalise on that?
Instead of taking portrait photos in a room, take your subject outdoors and stand them under a streetlight on a foggy night. All of a sudden, a simple dark portrait photo has become an intriguing gothic story.
It makes the viewer of the photo wonder what's going on. Why is that girl all alone in the dark? Who is she waiting for?
11. Take It Outside!

As mentioned, nighttime dark photography is a significant element of this genre as there's no better place or time than outside at night.
A dark forest, backyard swing set or abandoned beach make for great low-key photography settings.
Plus, their location alone adds to the all-important compositional story we mentioned earlier – what's going on here?
And while using light sources like off-camera flash is ideal for indoors, don't forget to use them outdoors. Alternatively, rely on the light cast by the moon, streetlights or even rely solely on starlight.
Taking your low-key photography outdoors presents you with unlimited options to create fascinating compositions.
Even outdoor product photography at night delivers stunning results – imagine your product softly illuminated in a bed of pine needles on the forest floor.
Be on the lookout for amazing dark photography landscape locations while you're at it.
12. Go Spooky
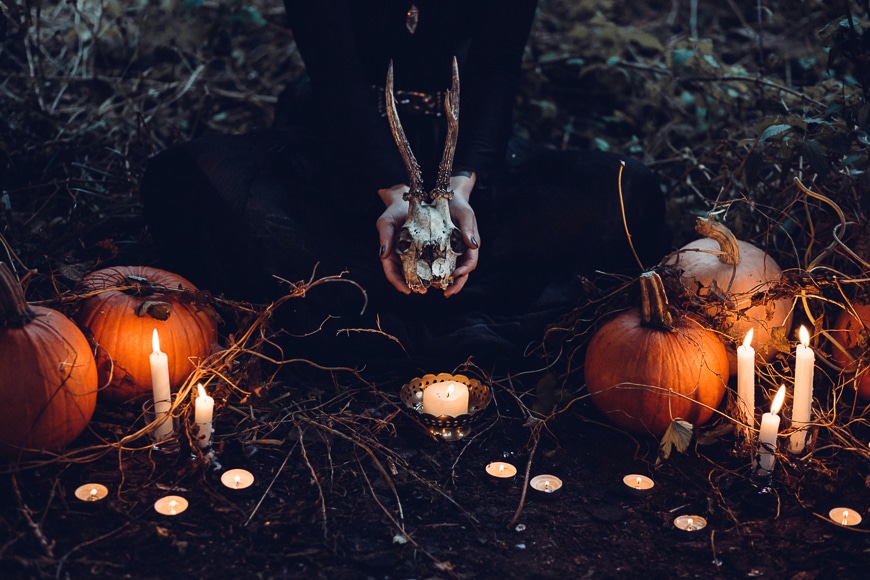
A fun approach to dark photography is to go spooky!
As any fan of Hollywood horror will tell you, the best spooky movies are set at night or in the dark. Darkness plays on our fears as the unknown sends our imaginations into a spin.
With that in mind, a photographer should build low key photo scenes that are spooky or play on the dark side of imagination. A shadowy figure creeping up on a lone figure adds a sense of drama and anxiety.
If dedicated to all things horror, use Halloween as the perfect time to take low-key photos of a clown in a forest or an abandoned factory.
Use the lighting techniques covered here and even consider adding smoke or another element to complete the horrifying photos. That way, you'll have a jaw-dropping image of someone's worst nightmare.
13. Edit To Enhance Low Key Photos
As mentioned, by capturing your dark photography fine art or portraits photos in RAW format, you have more options in post-production editing software.
With RAW photos, you have more freedom to alter the look and exposure of the finished product. You take a piece of lifestyle photography and, with editing, turn it into a piece of fine art.
You also achieve this with portrait photography, where you control the detail, depth of shadows and level of highlights to create a moody photo.
If you didn't get the lighting level quite right when taking the photo, with software such as Adobe Lightroom, you adjust it by increasing the shadows, making images darker and pushing back highlights.
There are no limits to what you can do with a dark photograph when editing – it all depends on the look you're going for. The people that view your photography will be the judge.
7 Dark Photography Artists to Follow
Here's a list of 7 talented artists and photographers who produce stunning low key work under cover of night.
- Amy Haselhurst @brokensundowns
- Chris Hieronimus @chrishieronimus
- Mikael Aldo @mikaelaldo
- Kyle Thompson @kylejthompson
- Kavan Cardoza @kavanthekid
- Laura Makabresku @lauramakabresku
- Gabriel Isak @gabriel_isak
15 Dark Photography Hashtags
Want to get your low key photography seen on Instagram? Here are the most popular hashtags to use when tagging your dark photography.
- #darkphoto
- #darkphotography
- #darkphotographypeople
- #darkphotographystyle
- #darkphotographyproject
- #darkphotoshoot
- #darkphotoart
- #darkphotolovers
- #darkness
- #darkart
- #darkaesthetic
- #darkmood
- #moody
- #creepy
- #darkpicturesphotography
See our guide to the best hashtags for photographers for more ideas.
Final Words
While photography is the pursuit of light, don't let the dark put you off. Dark photography is a fun and exciting genre that anyone can tackle day or night – mostly night.
Many photographers put their gear away at night, but the reality is that you should make the most of the lack of light.
With the right subject, background and equipment, you turn simple portrait photos into moody and intriguing representations of a subject.
What are your thoughts on dark photography and the use of low-key techniques? Have you experimented with this genre to capture moody photos? Do you have a dark photography collection that tells a horror story or two?
Share your thoughts and questions in the comment section and become part of the conversation. Happy Shooting.

Check out these 8 essential tools to help you succeed as a professional photographer.
Includes limited-time discounts.

I’m a Melbourne-based street photographer and blogger. I love to travel to Japan to photograph and document its dynamic people and culture.
2 Comments
Leave a Comment
👋 WELCOME TO SHOTKIT!
🔥 Popular NOW:

Great stuff! ~
I do have a question about protecting your dark images from manipulation. Is there an workaround to keep others from adjusting your images simply using “shadow” to reveal details? Even if one takes a screenshot of your work, it can be adjusted to expose details, verses somehow embedding the contrast profile to distort if attempted? Keeping intact your work.
Hi and thanks for checking out my article about dark photography. If you have any questions or comments please leave them below and I will get right back to you. Happy shooting. Cheers. G