


How to Make a Photomosaic Step by Step
Discover the art of creating a photomosaic with this step-by-step guide, transforming your favorite images into fun and whimsical creations.
Learn | Photography Guides | By Ana Mireles
Shotkit may earn a commission on affiliate links. Learn more.
Have you seen those photos that are formed by a bunch of smaller pictures and wondered how they're done?
Those artworks are called photo mosaics, and I'll show you how you can do them step-by-step.
I'll also tell you about some apps and websites where you can upload your photos and have them do the photo mosaic for you.
Lastly, I'll show you some amazing examples to get you inspired.
What Is a Mosaic in Photography?
Credit: Jim Bumgarnder, CC BY-NC-SA 2.0 DEED, via Flickr
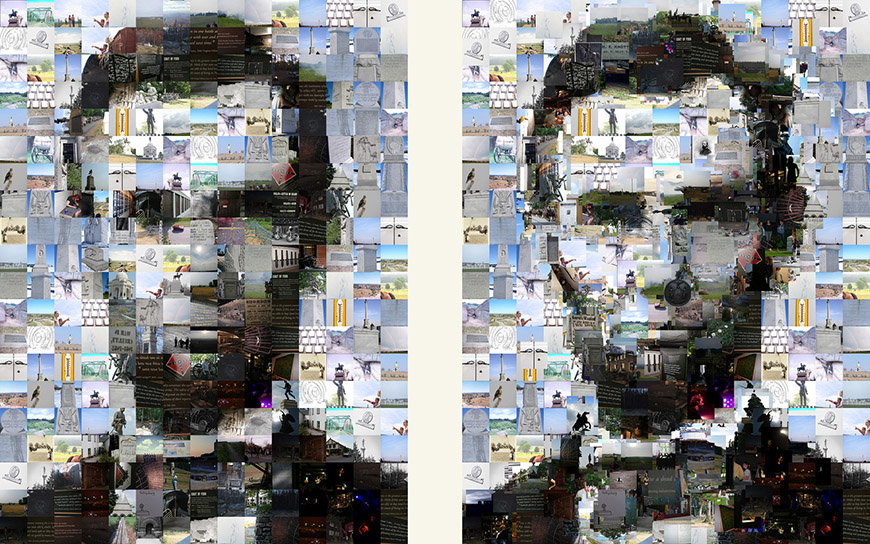
A photo mosaic or picture mosaic is a type of photo collage where you can use a series of individual images as tiles to create a bigger picture or design.
So, when you see the final result from far away, you see one image. However, if you enlarge it or get closer to it, you can see all the smaller photos that form it.
How Are Photomosaics Made?
Photomosaic is a word, concept, and algorithm trademarked by Robert Silvers in 1997. However, authors like David Hockney, Pep Ventosa, Christopher Kates, and others have used different techniques to make photo mosaics.
You can make a photo mosaic pattern in many ways – for example, using Polaroids, cutting and pasting paper magazine images, etc.
Digital photography allows you to make a photo mosaic very easily. You can use any number of programs to do them.
Adobe Photoshop is the best, especially if you prepare the individual photos in Lightroom.
How to Make a Photomosaic in Photoshop
If you were wondering how to make photomosaic art, here's one of the easiest techniques to make customized mosaics with your photos using Photoshop.
Step 1 – Select main image
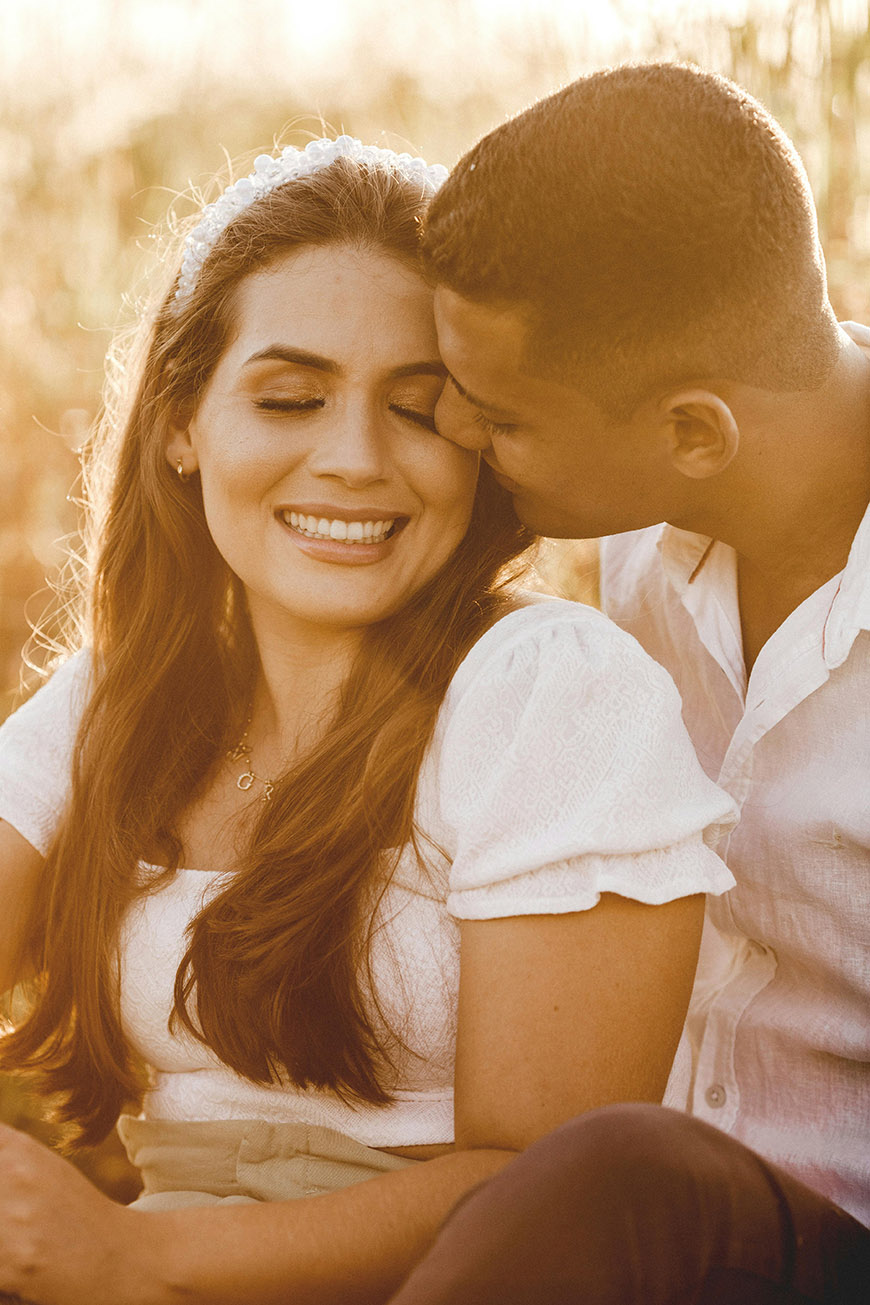
Credit: Jonathan Borba
You can choose any photo as your main image. Let's say you photograph a wedding – well, you might use a photo of the couple kissing as the main image to make a mosaic with all the event images.
The possibilities are endless – the choice is yours. However, I suggest you use an image without too many details. The finished product might look messy if the main image is too busy.
To show you how to do a photo mosaic, I decided to use the topic of couples. So, the main image is a close-up of a couple in a warm-sepia tone.
Step 2 – Prepare the mosaic images
Next, choose all the individual images you're going to use on your picture mosaic. The number of images depends on the size and format of the final image.
This time, I'm going with a square format – but you can use whichever you want.
To make a perfect square, I need the height and length to have the same number of individual images.
You can source images from stock photography websites if you need more photos. Also, consider using duplicate photos – repeated images don't create a problem in your photo mosaic pattern.
Most likely, all your individual images have different formats. So, you'll need to adjust them all to squares and resize them to the desired measure.
You can do this in Photoshop one by one or create an Action. However, I find it easier and faster to do it in Lightroom.
To do this, start by putting all the individual pictures in a dedicated folder. Then, import them into Lightroom.
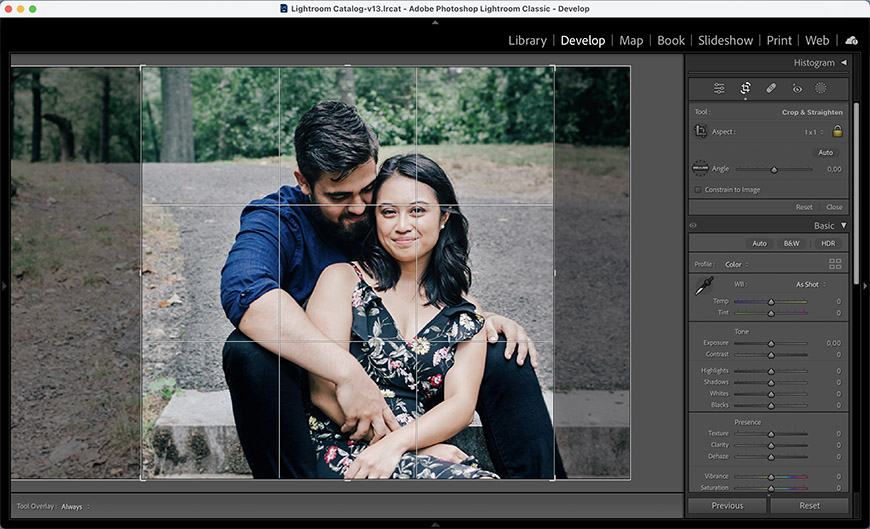
Select one of the single images and crop it in a 1:1 format. Then, select the rest of the photos from the folder.
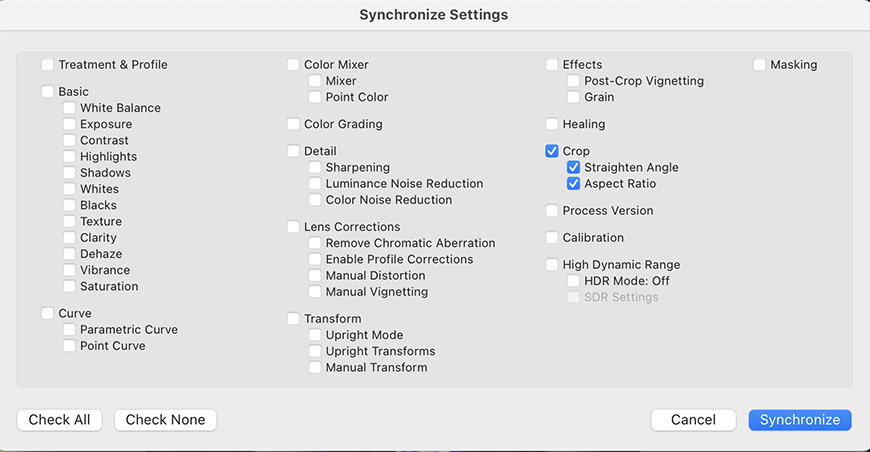
With all the images selected, click Sync to apply the crop to all of them. You can fine-tune the crop individually if needed.
Now, export the images, resizing them to the desired size – this will depend on how many images you have and what size you want the photo mosaic to be. I'll choose 150px and lower the JPEG quality to 80.

Step 3 – Make a contact sheet
Now that you have the small images ready, you need to open them in Photoshop to create the photo mosaic.
To do so, go to File > Automate. Then, select Contact Sheet II.
On the pop-up dialog box, choose the folder where you have your photos.
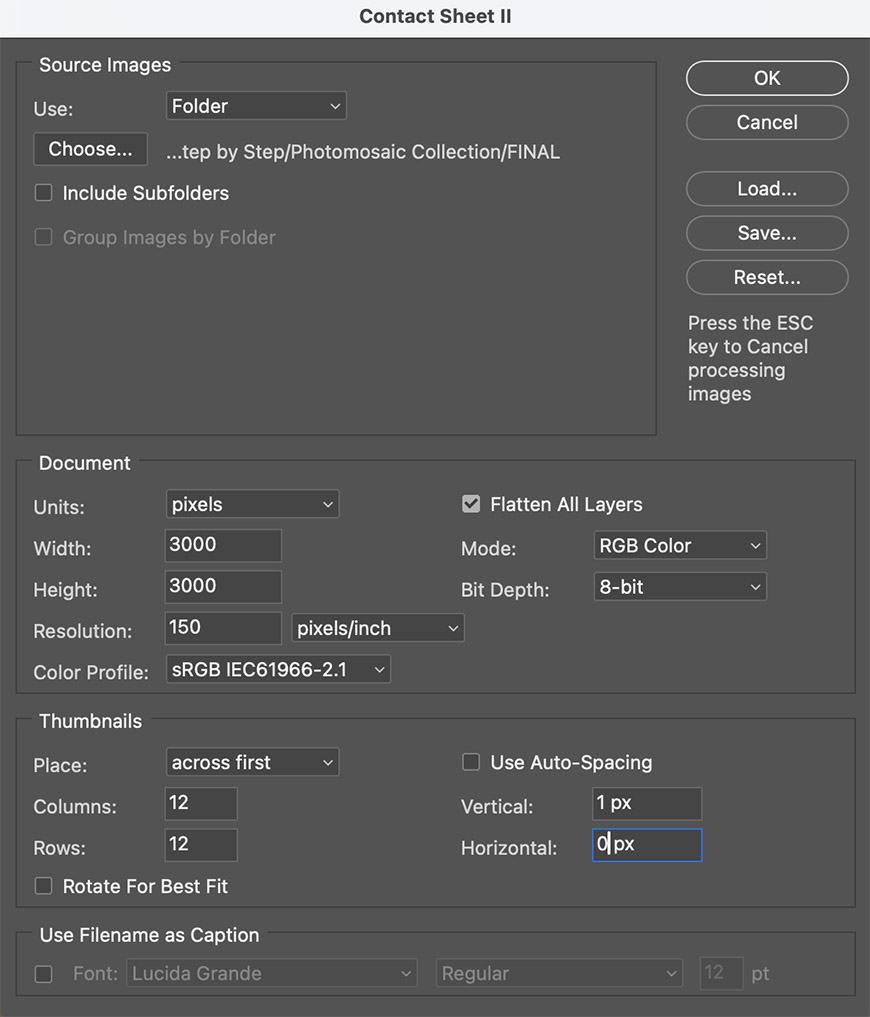
Set the size you want for your photo mosaic – I'll go with 3000 pixels per side. Then, set the number of rows and columns. Since I have 144 mosaic images for a square format, I'll put 12 on each.
If you still need to adjust the individual pictures, ensure Flatten All Layers is unchecked. This way, each one of the smaller images will be on a separate layer.
Since I already worked on the single images in Lightroom, I can have them all in the same layer. So, I'll check the Flatten All Layers box.
Then, set the spacing to zero so there isn't a blank space in between the photos. Also, uncheck the caption option.
Click OK.
(You can also make a contact sheet in Lightroom.)
Step 4 – Make a pattern overlay
All the images are together in a contact sheet – technically, this is already a photo mosaic.
However, to make a photo mosaic effect on your main image, you need to turn this mosaic creation into a pattern.
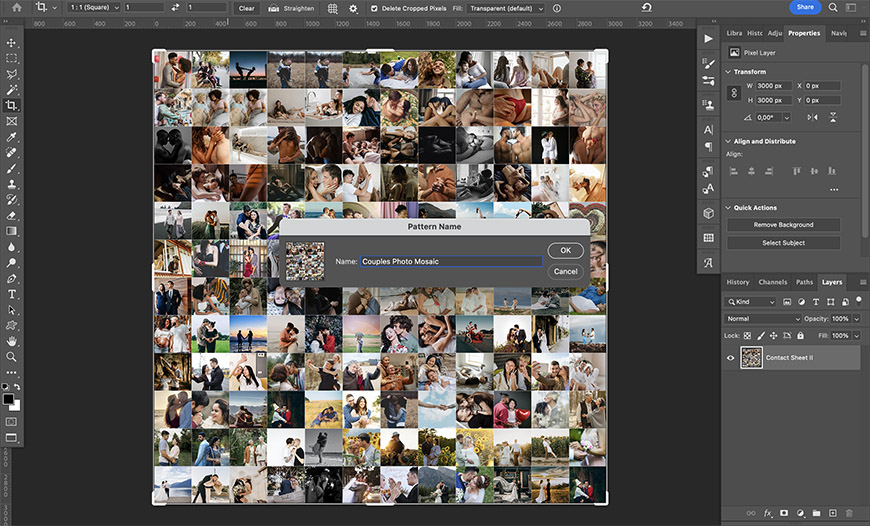
To do so, go to Edit > Define Pattern. You can name it in the pop-up dialog box. I recommend something recognizable, such as photo mosaic or mosaic images, plus the topic.
This is because it will now be saved in Photoshop for you to use on any photo you want in the future. I'll call mine Couples Photo Mosaic.
Step 5 – Open the main photo
OK, now open the main photo in Photoshop. You can make any adjustments you need before you turn it into a photo mosaic.
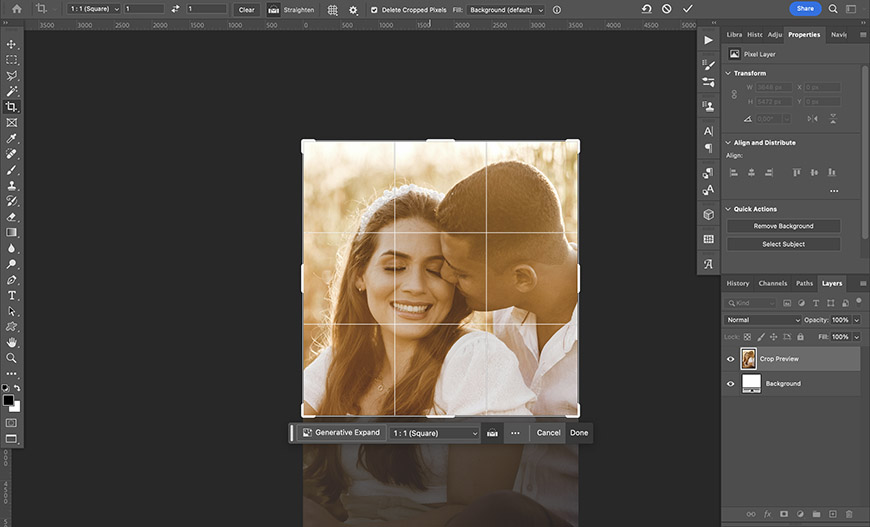
In my case, I chose a photo with a portrait format. Since I want a squared photo mosaic, I need to crop it.
This step may be different for you, or you might not need to do anything if you're satisfied with the photo as it is.
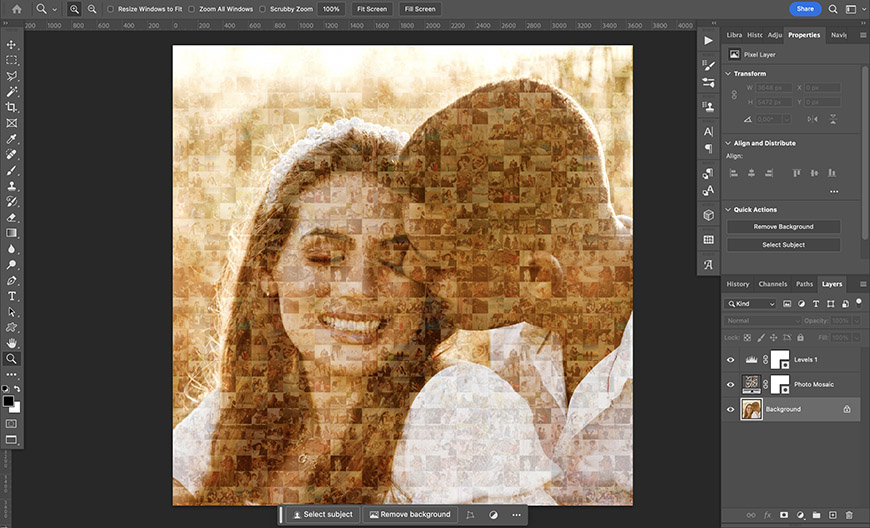
Step 6 – New Fill Layer
Next, you'll need to apply the photo mosaic as a new layer on top of the main photo.
Go to the menu Layer > New Fill Layer > Pattern.
Name your layer and click OK.
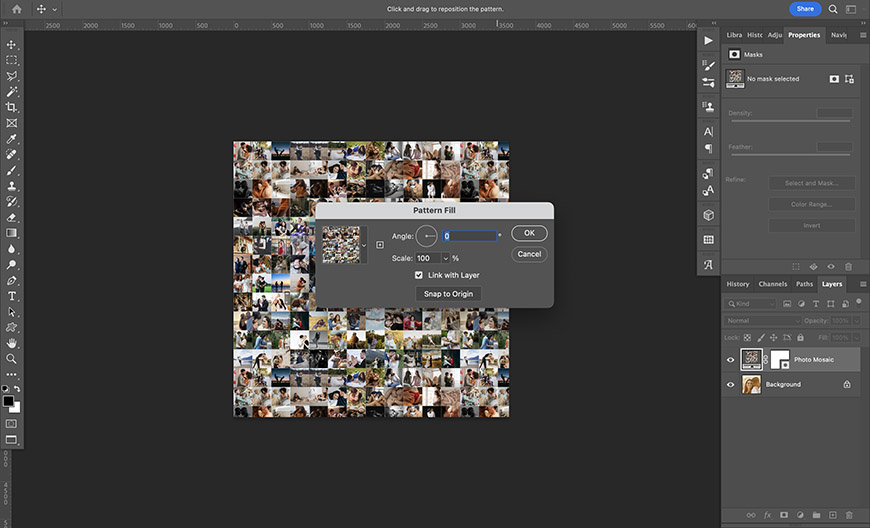
On the pop-up dialog box, select your photo mosaic pattern. For now, leave the rest as it is. Click OK.
You'll only see the photo mosaic right now, but don't worry.
Step 7 – Change the Blending mode
You must change the Blend mode to blend both layers and create the photo mosaic effect.
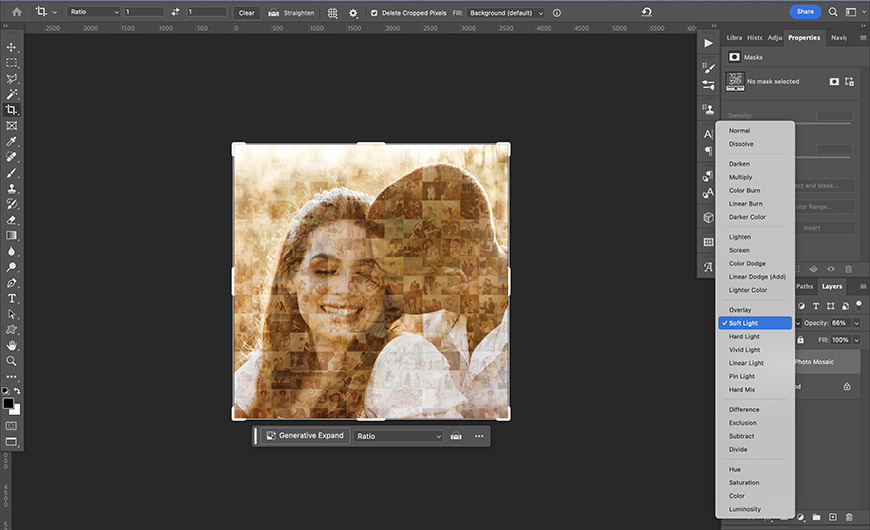
So, go to the Layers panel and make sure the top layer (the one with the contact sheet) is selected.
Now, open the Blend mode menu and change to Soft Light. You can also experiment with other blend modes if you want a different effect – Screen and Overlay may work, too, depending on the picture.
You can also adjust the Opacity if the overlay is too distracting.
Step 8 – Fine tune
You can adjust the scale if you prefer to have more pictures on each side. This will change how the effect looks.
To do so, double-click the pattern and adjust the scale on the pop-up dialog box.
You can add an adjustment layer if you want to modify the contrast, colors, or anything else.
What Is the Mosaic Blur in Photoshop?
The mosaic blur in Photoshop is a way to “pixelate” a photo or part of it – for example, to censor a car's license plate or a person's face.
To apply the mosaic blur, duplicate the layer and convert it to a Smart Object.
Now, select the area you want to pixelate.
Then, go to Filter > Pixelate > Mosaic.
On the pop-up dialog box, adjust the Cell Size to define the intensity of the effect. Make sure the Preview is on so you can see how it changes.
When you're satisfied, apply the blur.
- More: Best Pixel Art Software
3 Apps That Turn Photos Into Mosaics
These three apps are easy to use and let you make a mosaic out of your photos using your phone without any photo editing knowledge.
Mosaic Photo Effects (photoshop mobile apps)
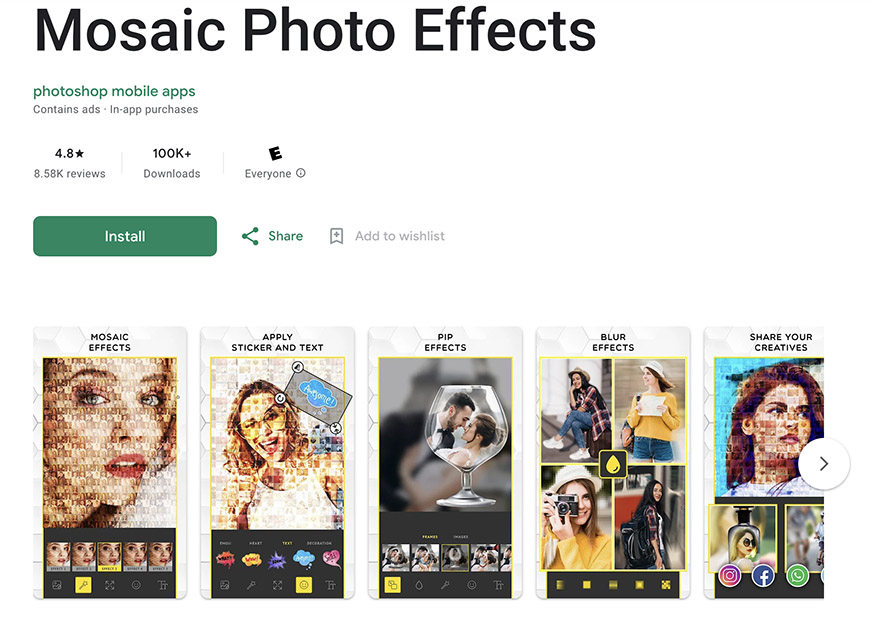
Credit: Google Play
Android / In-app purchases
With this app, you can easily create photo mosaics or apply a mosaic blur to your photos.
You can also add text, stickers, and other creative elements.
You can share your creations right from the app.
Pro Photo Mosaic Creator
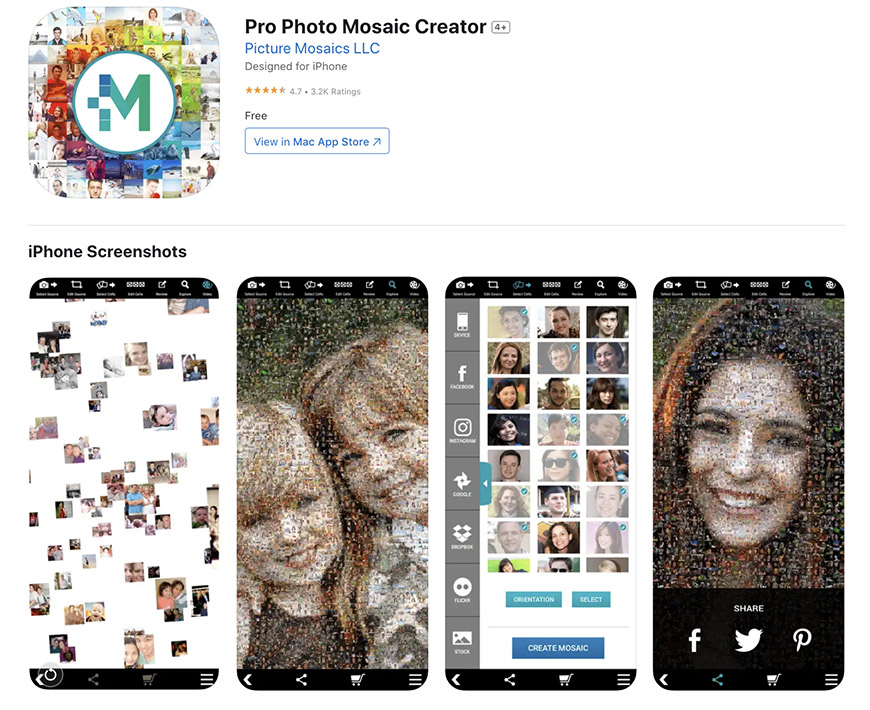
Credit: App Store
Android / iPhone / Free
This app lets you easily make photo and video mosaics on your iPhone. You can further customize the photo mosaic it creates for you.
You don't need to save your images on your phone; you can source them from your Instagram, Facebook, Dropbox or Flickr account.
Mosaic Photo Effects (Photo Cool Apps)
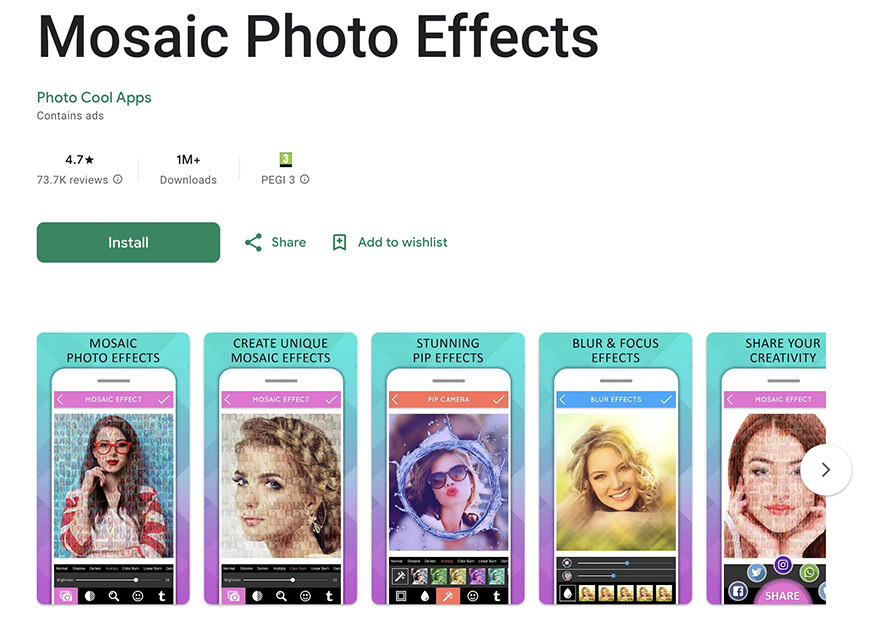
Credit: Google Play
Android / Contains Ads
This app creates photo mosaics you can personalize using any of your photos. It also has a PIP camera and blur effects to give free rein to your creativity.
You can share your photo mosaics from inside the app.
4 Awesome Photo Mosaic Examples
Now that you know how to create a mosaic, it's time to get inspired!
Here are some amazing examples of what you can do using this technique.
Benetton Group – AIDS
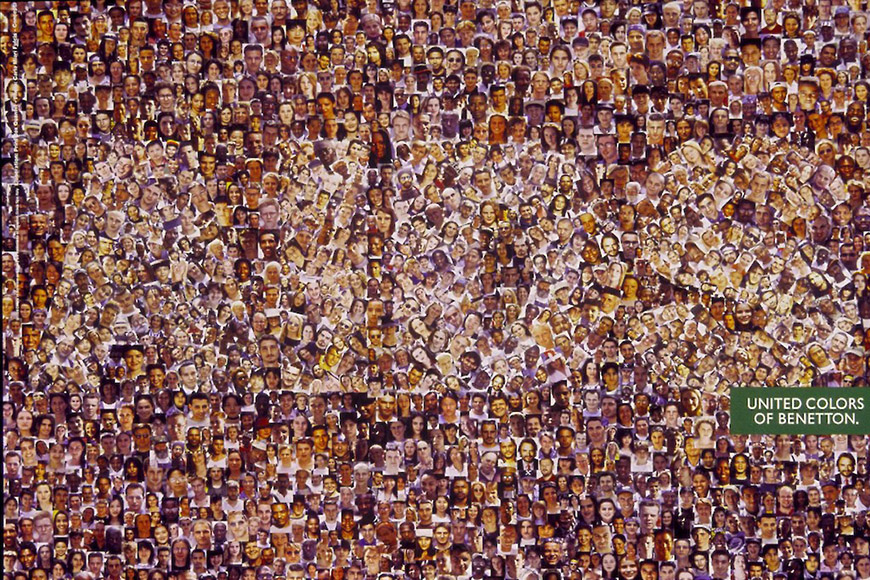
Aids Faces. Credit: Benetton Group
In the early 1990s, United Colors of Benetton launched an AIDS awareness campaign. It was a very controversial campaign that ranged from photographs to a huge condom placed on the obelisk at Place de La Concorde in Paris.
One of the pieces was a photo mosaic made with many passport photos, which, when looked at from afar, spells “AIDS.”
Mosaic: November 5th, 2008
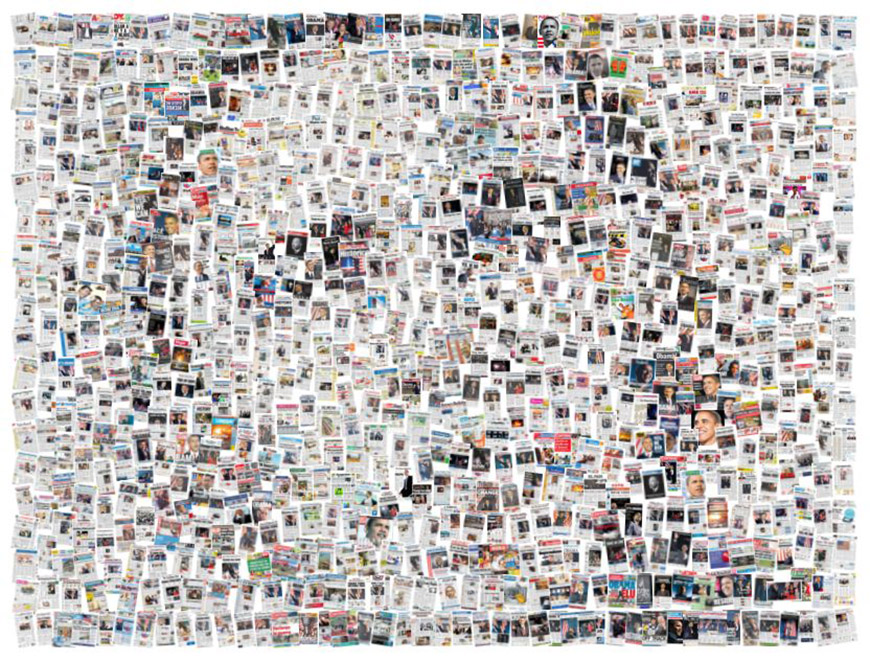
Credit: Jim Bimgardner, CC BY-NC-SA 2.0 DEED, via Flickr
This is a great example that shows how you can use sources different than just photographs to create a photo mosaic.
Here, Jim Bumgardner used newspaper clippings as the single images that form the pattern for the bigger picture.
Flickr Discovery Group
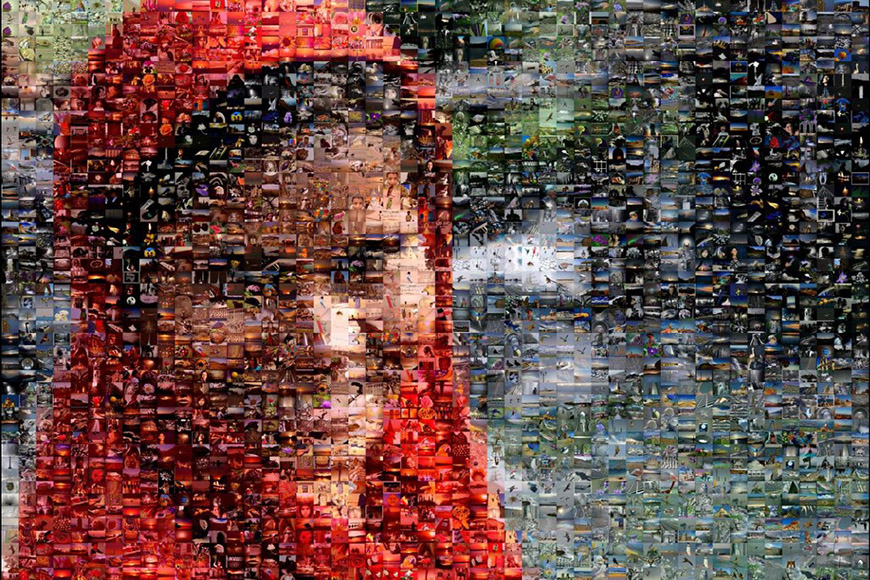
Credit: Mosaic Maniac, CC BY-NC-SA 2.0 DEED, via Flickr
The small pictures in this photo mosaic were posted in the group Discovery on Flickr. This is an example of how you can use photo mosaics to bring together a collective work.
Seagull Mosaic

Credit: Credit: The original uploader was J2thawiki at English Wikipedia., CC BY-SA 2.5, via Wikimedia Commons
Notice how the colorful pieces that form this picture mosaic are hexagons. As you can see, all shapes work fine to create a photo mosaic.
You can also notice how all the pictures are nature-themed – this way, they're coherent with the main image.
Photo Mosaic FAQs
What is mosaic filter in Photoshop?
A mosaic filter in Photoshop is an effect that lets you pixelate a photo. This filter is commonly used when you want to hide information or a face in a photo before sharing it on social media.
How do I make a free photo mosaic?
You can use free photo editors such as GIMP to create a photo mosaic. However, there are also free apps and online tools to do it – a great one is Mosaically.
Is Pro Photo Mosaic Creator free?
Pro Photo Mosaic Creator is a free app by Picture Mosaics LLC. The app is available for download on the App Store for iPhone and Google Play for Android, and it allows you to create a photo mosaic, among other effects.
How do I make a mosaic image without Photoshop?
You can use other photo editing programs aside from Photoshop to make a photo mosaic -for example, GIMP. You can also use websites that allow you to make photo mosaics online or apps on your phone.
How do I remove the mosaic from a photo?
If you have the original file, you can open the Layers panel and disable or delete the layer containing the contact sheet or the layers with the individual photos that form the mosaic.
Otherwise, it's not possible to remove it. You can use AI programs to bring out the sharper details from the source image. However, it will largely have to “make up” a good part of the details – so it won't be the same as the original.

Check out these 8 essential tools to help you succeed as a professional photographer.
Includes limited-time discounts.

Ana Mireles is a Mexican researcher that specializes in photography and communications for the arts and culture sector.
👋 WELCOME TO SHOTKIT!
🔥 Popular NOW:
