


How to Remove Audio from Video (Windows, Mac & Mobile)
Removing the audio from a video is simple no matter what device you're using. Here's how to do it on Windows, Mac, iPhone, Android and online.
Shotkit may earn a commission on affiliate links. Learn more.
If you’re learning how to remove audio from a video, there are many free tools you can use to achieve this result.
Windows and Mac users can choose from several free and easy-to-use video editing software that remove audio from video clips in a matter of minutes.
If you’re a videographer or YouTube content creator on the go, there are free apps to remove sound from your video files.
You don’t need to invest in expensive video editing software such as Adobe Premiere Pro to remove unwanted noise from a video file.
I’ve tested a range of excellent free video editing tools on mobile and desktop computers that I’ve used to remove audio while video editing.
It’s an incredibly simple process that I’ve used to get rid of unwanted background noise and free up the audio track for new music and dialogue.
Whether you’re removing audio from an iPhone video or tackling the problem on your Android phone, I’ll show you how to get the job done.
How to Remove the Audio from a Video on Windows 10/11
Filmmakers and content creators working on a Windows computer have plenty of options when it comes to removing a video’s sound.
While this can be achieved on professional video editing software such as Adobe Premiere Pro and DaVinci Resolve, I’ll be focusing on free tools you can use to remove sound.
Let’s begin with one of the most popular free video editing tools you can use, Windows Movie Maker.
Using Windows Movie Maker to remove audio from a video clip
Windows Movie Maker has undergone several transformations since it was first released by Microsoft.
Comparable to Apple’s iMovie software, it is currently bundled as an element of the native Photos app.
Here’s how you can quickly remove audio from your video clip in a few simple steps:
1. Open the Photos App and head to the Video Editor tab.
2. Click on New Project and give the project a name.
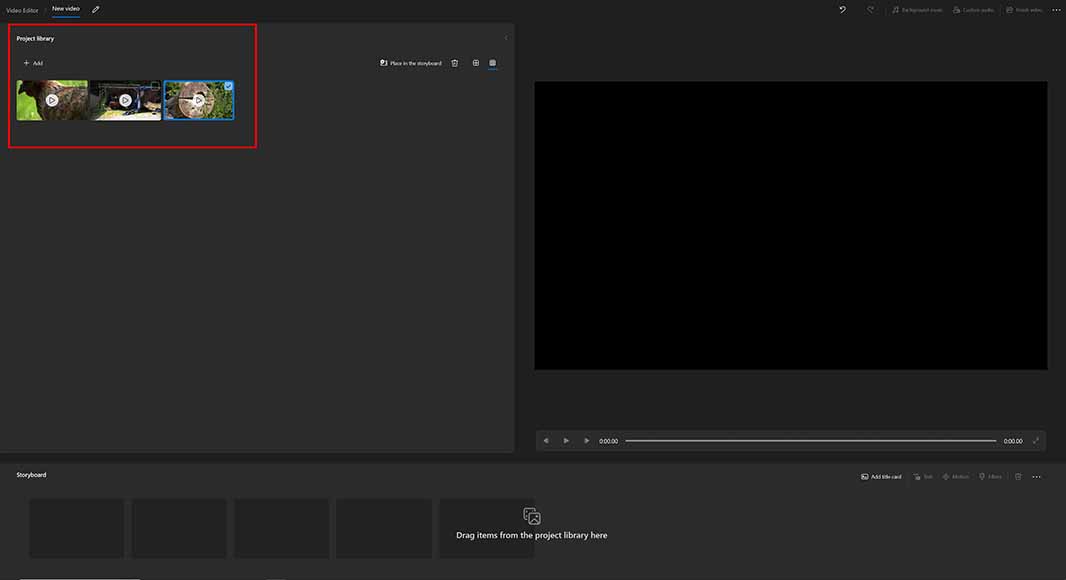
Adding clips to a Windows Media Maker project is simple to do
3. In the Project Library, add your video clips to the library.
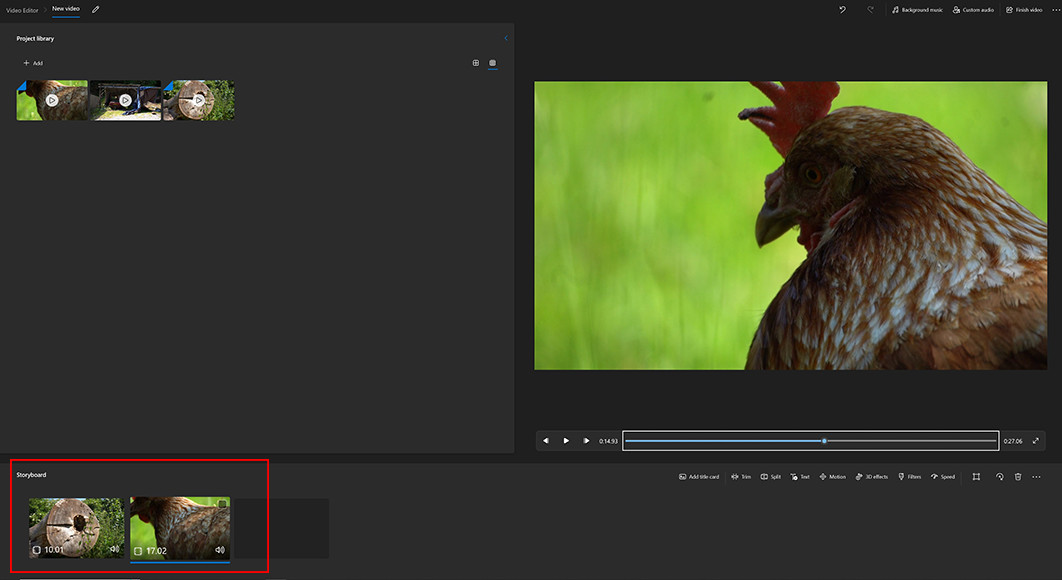
Video clips imported into Windows Movie Maker can be added to the project’s Storyboard
4. Click and drag your video clips onto the Storyboard section.
Each video clip on the project’s storyboard has a volume icon you can double-click to mute audio
5. Find the video volume of the clip you wish to mute and double-click on the speaker icon.
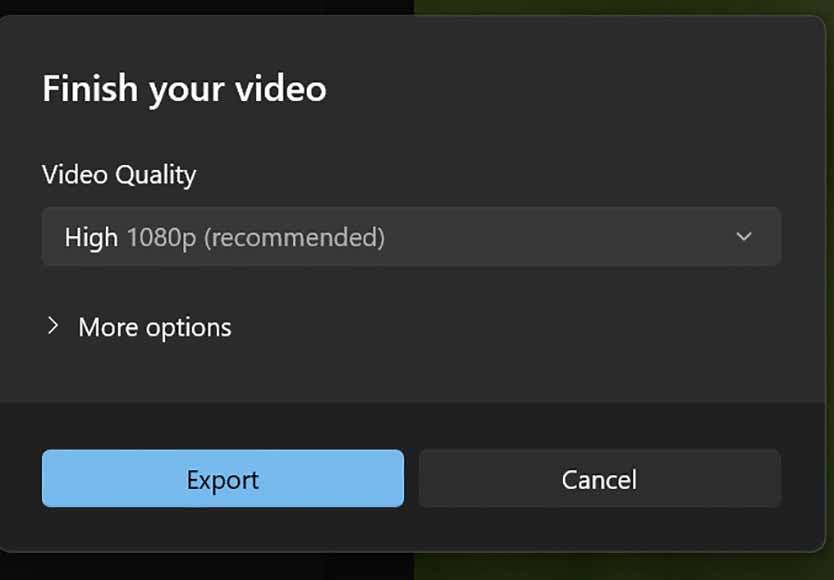
Once you’ve muted the audio in your clips, the video file is ready to export without audio
6. Click on Finish Video to export the video with the audio removed.
Windows Movie Maker is a great tool for removing background music across the entire video and allowing you to add original audio of your own.
Next, I’ll break down how to delete audio from your video project using the popular and free software VLC.
Using VLC to remove audio from a video clip
VLC has been one of the most popular programs for watching movies and television shows and features several powerful video editing tools.
While it lacks the comprehensive features of pro-editing software, it can still be used to mute videos and export them with the video sound removed.
Here’s how you can remove sound using VLC:
1. Open the VLC media player app.
2. Select Media from the top left menu, then choose Convert/Save.

Removing audio from your video files in VLC is performed in the Convert/Save options
3. From the next menu, choose the video you wish to remove audio from and add the media.
4. Next, click on the Convert/Save button.
Clicking on the wrench icon allows you to change the audio settings
5. Head to the bottom of the Convert/Save screen and click on the wrench icon located close to Profile.
6. In the Profile Edition window, click on the Audio Codec tab.
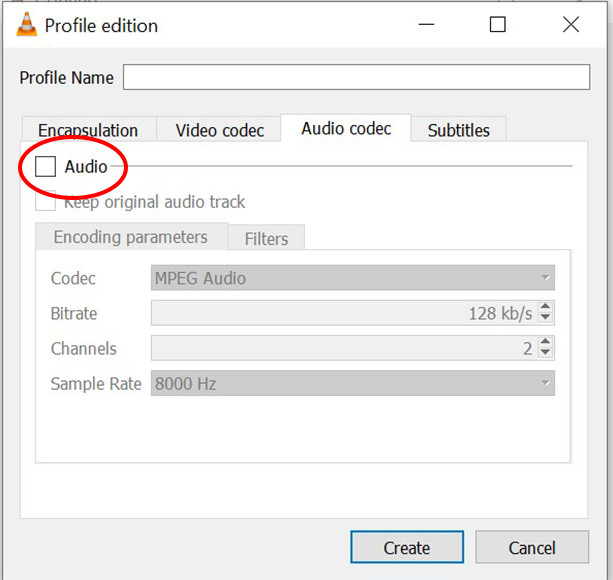
By unchecking the audio box, your video can be exported with the sound removed
7. Go to the Audio checkbox and make sure this is unchecked.
8. Add a name for your project.
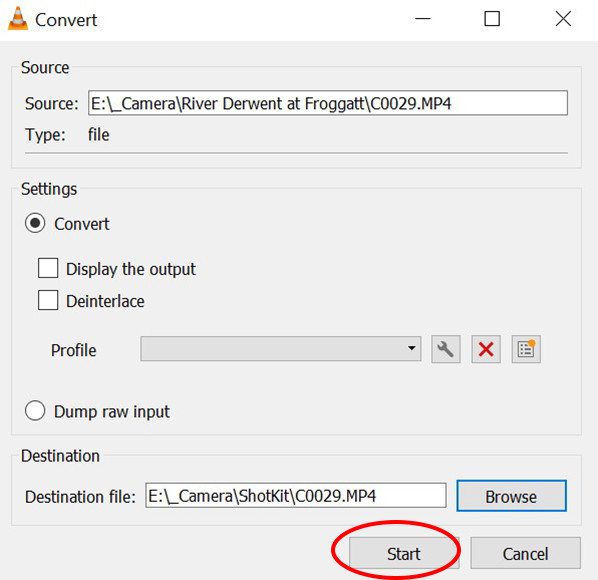
Once you’ve cleared the audio settings, your project is ready to export in VLC
9. Choose your destination file and click Start.
Once your project has finished processing, you’ll have a new video with the audio file removed.
How to Remove the Audio from a Video on Mac

Mac video editing software users also have several options to remove audio from their projects using free tools.
This can be accomplished by using VLC player and following the steps outlined above to achieve this on a Windows computer.
There’s also iMovie, another free-to-use editing tool that can be installed via the App Store.
Once you’ve downloaded and installed the app on your device, follow these instructions to remove audio from your video:
- Open the iMovie application and select the Projects tab from the top of the screen.
- Click the Create New button, then choose Movie from the drop-down menu.
- Using the Import button, choose the video file you wish to remove the audio track from.
- When the clip has loaded into the iMovie interface, drag it onto the project’s timeline.
- Right-click on the clip in the timeline and select the Detach Audio option from the menu.
- Now that the video and audio clip has been separated, you can select the audio file and press Delete to remove it entirely.
How to Remove Audio from Video on iPhone & Android
For iPhone and Android users, there is a plethora of free apps available in the app store you can use to remove audio.
iMovie is available as a mobile device app, which I’ve discussed above in the step-by-step guide to removing audio from Mac computers.
Using PowerDirector to remove audio from a video clip
Next, I’ll walk you through how to remove audio from video using another free video editing app, PowerDirector.
PowerDirector is available for both iPhone and Android devices and can be used to remove an audio track in a matter of seconds.
To do this:
1. Download and install PowerDirector from the App Store for iOS or Android.
2. Open the PowerDirector app on your mobile phone.

Create a New Project to include the video you want to mute
3. Tap on the New Project icon and enter your project name.
4. Select the Aspect Ratio for your project
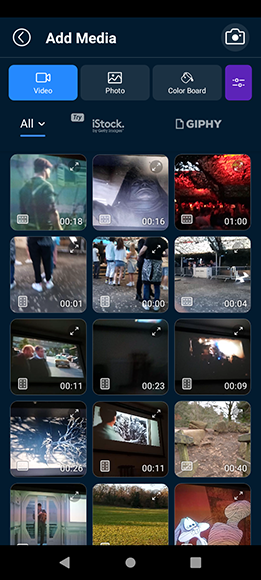
PowerDirector allows you to choose one of your own videos or select one from online
5. Select the clip you wish to remove audio from your Camera Roll.
6. Alternatively, choose a stock footage video file from Pixabay, Shutterstock, or iStock.
7. Tap the media to bring up the white frame and arrows highlighting your video.

Once you’ve chosen your clip you can then mute the volume
8. Choose the Audio Tool from the list of available options.
9. Mute the volume using the volume control slider on the audio track.
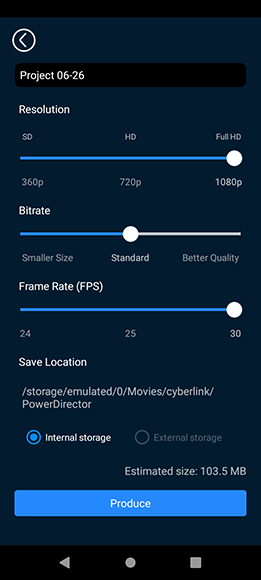
Select your export settings before saving the video to your device
10. Select Save to Device to download the video without the audio included.
You can also add your own music track to the project or a recorded voiceover before saving it should you wish to do so.
Using Timbre to remove audio from video
Android users can also use the free app Timbre to remove sound from their videos for free.
Here’s how Timbre can remove audio from video in a few simple steps:
1. Download and install Timbre, then open the app on your device.
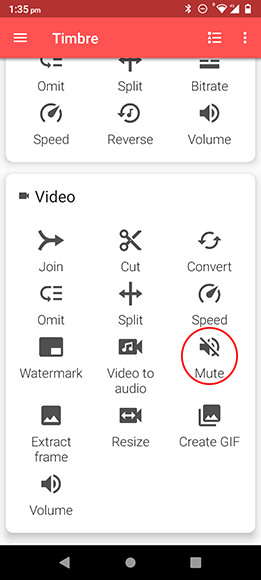
Timbre’s mute option is presented on the app’s home page before loading a clip
2. Scroll to the Video section and select the Mute option.
3. Choose the video you want to remove the audio from.

The Timbre app verifies the removal of audio when exporting a clip
4. Tap on the Save button, and Timbre will export the video with teh audio removed.
How to Remove Audio from Video Online for Free
For free online resources you can use to remove audio, there’s Canva and Kapwing.
Each of these allows users to choose a video format and remove audio using the mute icon before exporting.
Using Canva to remove audio from video
Canva is a popular resource for marketing professionals used to create visually compelling content for their campaigns.
To use Canva for removing audio from the footage:
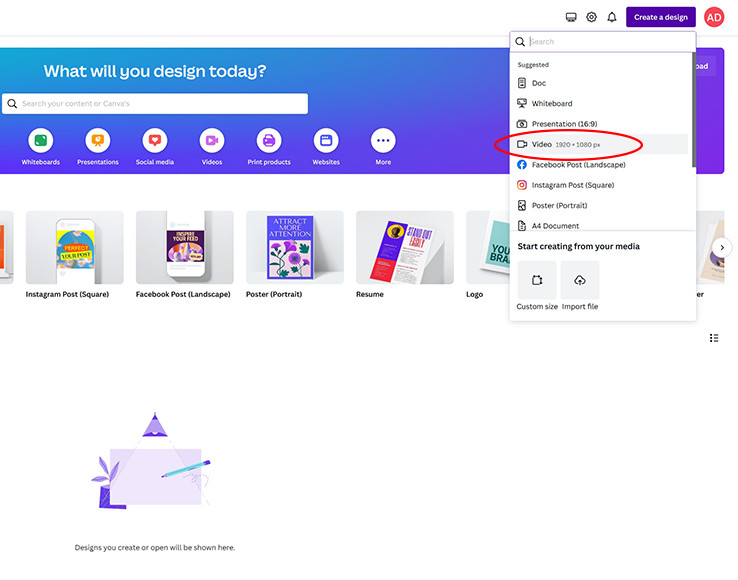
Select the Video option from Create a Design to get started
1. Head to the Canva website and click on Create a Design in the top right-hand corner of the screen.
2. Choose Video from the drop-down menu.
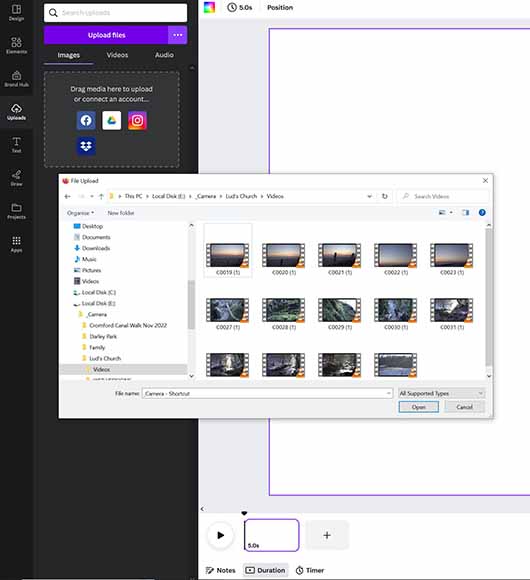
Upload the video file to Canva you want to mute
3. Select the Uploads tab, then choose Upload Files and search for your video files to import.
4. Drag the video file onto the storyboard, so it is displayed in the video preview window.
5. Click on the main video, then tap the speaker icon at the top of the video preview window.
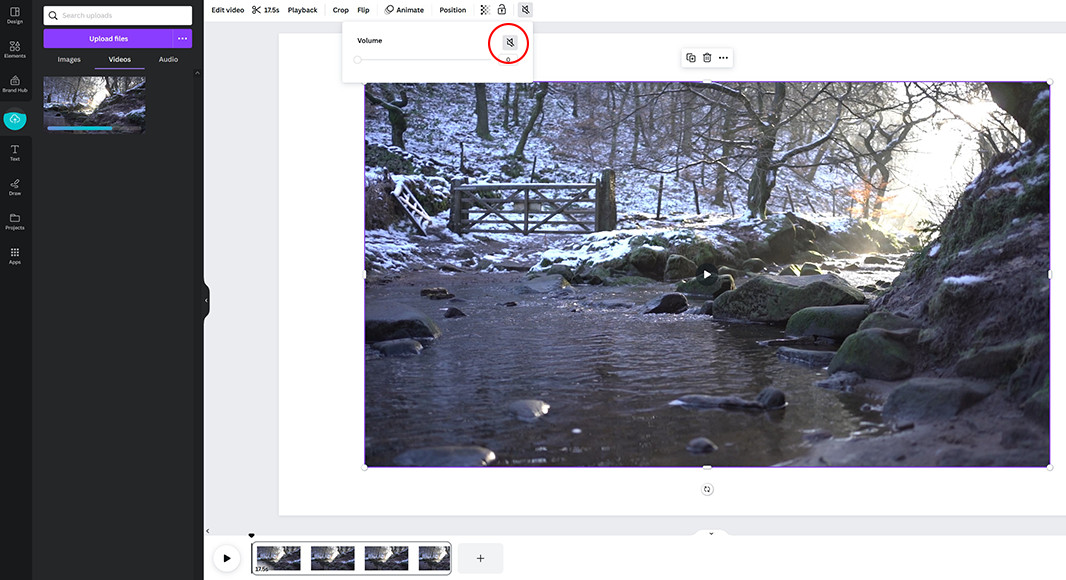
Mute the volume on your video to remove the audio
6. Click on the speaker icon so it is muted, showing a speaker with a black line running through it.
7. If you wish to add a new audio file, do so before saving and exporting.
8. When you’re ready to export the video, click the Share button in the top right-hand corner of the screen.
Using Kapwing to remove audio from a clip
Like Canva, Kapwing can be used to remove audio from video online for free by using the free trial version of the application.
Here’s how to use Kapwing to achieve this result with ease:
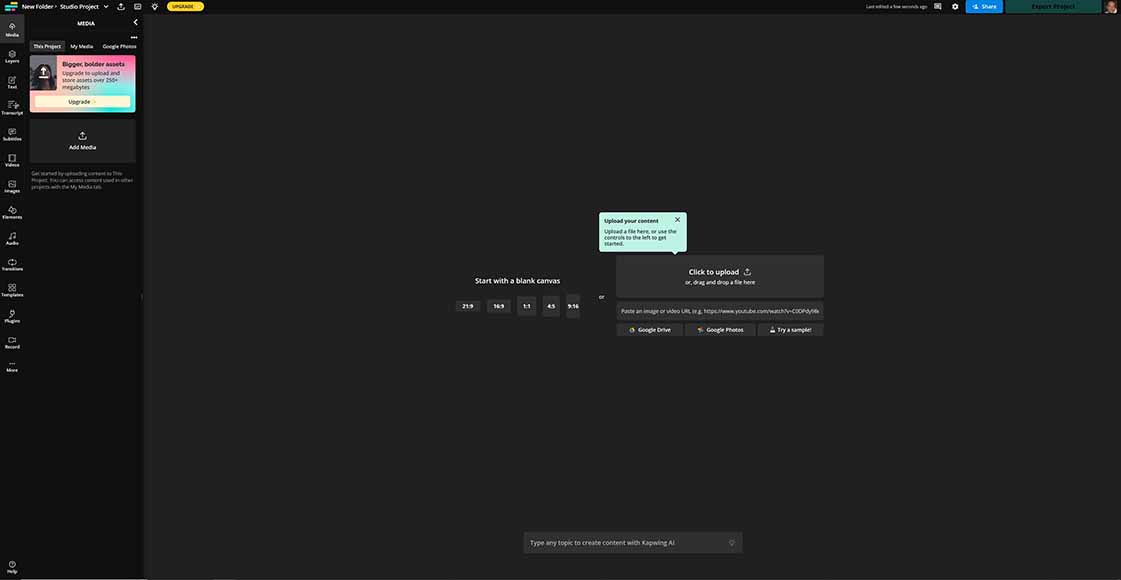
Adding video files to Kapwing is quick and simple1. Upload your video to Kapwing, either from your personal drive or from a website such as YouTube.
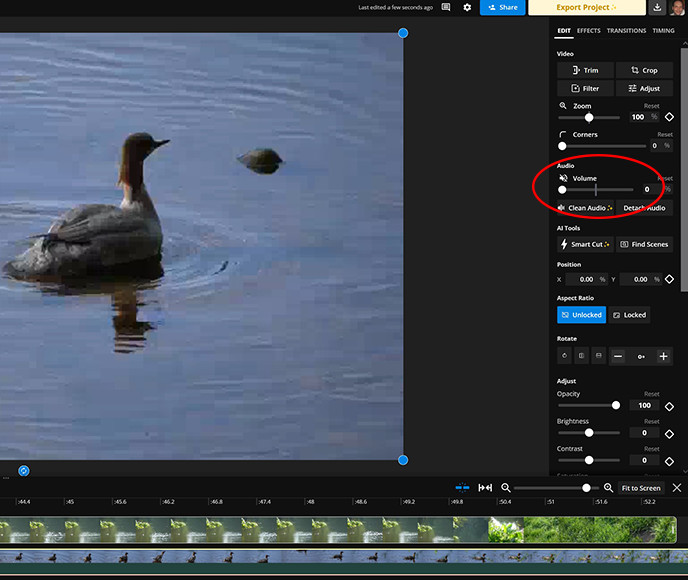
You can mute the volume control for your video in the audio options on Kapwing
2. Click on the volume icon located in the right sidebar to mute the audio.
3. Click the Export button to create the muted video.
As with the other great free tools, you also have the option to import new audio to the editing timeline before you export the final results.
How to Remove Audio From a Video: FAQs
Is there a free app to remove audio from a video?
There are plenty of excellent free apps you can use to remove audio from a video on all types of devices.
I’ve covered several options in this tutorial that are suitable for Windows and Apple desktop computers, along with various mobile-friendly programs.
Other free tools you can consider using include Veed, Movavi, and Google Photos, each of which has tools allowing you to mute video and remove it when exporting.
How do I remove the sound from a video but keep the voice?
If you want to remove background noise or music while retaining the voice, you can use the Vocal Reduction and Isolation effect on Audacity.
Media.io Vocal Remover tool also uses AI-based technology to break down audio tracks into their various components allowing you to keep the voice.
What’s the easiest way to mute the video?
Most video editing apps feature a mute icon in the editing timeline that can be used to quickly mute video.
Simply go to the clip in your video timeline and locate the mute icon and it will remove sound from your video.

Check out these 8 essential tools to help you succeed as a professional photographer.
Includes limited-time discounts.

Jeff Collier is an experienced film photographer who enjoys experimenting with modern digital photography equipment, software and apps. He’s also an ex-world champion triathlete and avid cyclist, clocking hundreds of km each week in the beautiful Tweed Valley of northern NSW, Australia.

👋 WELCOME TO SHOTKIT!
🔥 Popular NOW:
