


Guide to Infrared photography
Learn how to take stunning infrared photos using simple equipment. This infrared photography guide is all you need to get started now!
Learn | Photography Guides | By Ana Mireles
Shotkit may earn a commission on affiliate links. Learn more.
If you're looking for a new way to represent your subjects, then infrared photography (IR) might be the right move for you.
The great thing about IR photography is that it allows you to show things in a way that nobody sees, and isn’t that what creative work is all about?
Ok, I might be getting ahead of myself here. To understand how you can make people see what they’ve never seen before, I need to tell you a bit about how infrared photography works.
For that, I'll need to get a bit technical (I promise to keep this part short) and then we’ll get into the fun part: making an infrared photo.
Let’s get started.
What Is Infrared Photography?
Credit: Infrared photography using IR Filter by Jr Korpa.
Infrared photography creates images by capturing a different type of light than the one you naturally see.
To elaborate on that: photography is done by capturing the light that bounces off the objects in front of the camera.
This can be done using a digital sensor or a light-sensitive film. ‘Regular’ photography captures the same type of light that we see.
Infrared photography is able to see and register IR light that's invisible to the human eye. This is done either through specially made film for analog (film) SLR cameras, external IR filters for DLSR cameras, or with digital cameras modified to capture this part of the light spectrum.
Using any of these means, you can recreate very unique visual recreations of IR light. The resulting effect can be very different from the way you see things, which makes it highly appealing for its creative potential.
To understand this a bit better, let’s talk about light for a moment.
What Is Infrared Light?
I’m not going to be too technical, but as you probably know, light is made out of electromagnetic waves. Within that electromagnetic spectrum, you find different types of light according to the wavelength.
The human eye can perceive only the portion of the light spectrum that has a wavelength ranging from 400 to 700 nanometers. This is known as visible light; anything outside of that range is invisible to the naked eye.

Visible Light. Colorful spectrum simulation digitally created by Deborah S Krolls.
Infrared waves are between 700+ to just a bit over 1000nm across (1 millimetre). This means that their upper-frequency end is just outside the limits of human perception.
Just so you know, below 400nm you find Gamma rays, X-rays, and Ultraviolet light. Then, after the visible light (therefore over 700nm) there’s IR light, Thermal Infrared, Microwaves, Radio, and TV waves.
What Is Infrared Photography Used For?
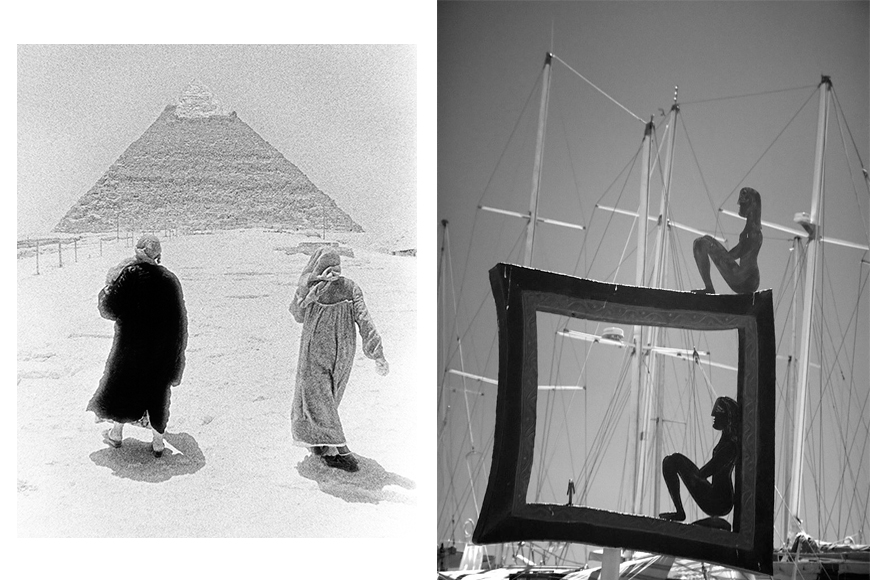
Left: Infrared photograph taken in 1979 by Michael E. Arth. Right: Black and white infrared photograph by Nevit Dilmen in 2004.
Infrared photography can be used for all sorts of things, both technical and artistic. One common example is military use.
IR photography can more easily distinguish between camouflaged buildings and natural vegetation, or between bodies of water and dry land.
NASA is known for using digital infrared photography too. For example, they superposed an infrared false-color image onto an image of the Sombrero Galaxy taken with optical light in order to see its glow.
Infrared images also have a medical application to detect health problems such as tumors or peripheral nerve diseases. They're also useful for dental imagery.
With an infrared camera or infrared filter, you can also execute technical art examination because certain pigments are sensitive to infrared light.
Then, of course, there's the creative use. For example, photographer Sandro Martini uses IR photography to capture his images as if they were fine-art paintings.
How Do You Take Infrared Photos With a Digital Camera?
The first question most people ask when it comes to infrared photography is, “How do I take infrared photos with my DSLR?”
Fortunately, this isn't hard to do.
However, for most DSLR cameras (or mirrorless models), you can't just go out and take IR photos right off the bat. A few options have to be considered first and all of them require certain external gear.
1. Get the Right Gear
Depending on how you're doing your digital infrared photography, you might need different things.
- Converted Infrared Camera
Credit: Renee Zernitsky. Olympus Mini E-PM2 Converted to be Infrared sensitive camera with a B+W IF Filter.
If you're really serious about infrared photography, the best gear that you can get is a converted camera (or you can convert the one you have).
The sensor in your camera is already sensible to infrared light. However, manufacturers put a filter to block those wavelengths. This way the quality of your images with visible light is better.
This IR blocker can be replaced professionally with an infrared filter converting your normal camera into an IR camera.
There are two downsides to this decision though: it's expensive and it will be permanent. You cannot use that camera for regular photography again.
There are some cameras where you can get around this invasive procedure and still take infrared photography with your digital camera.
In some cases, the infrared light can still reach the sensor when it’s exposed for long periods of time.
How to check if your camera can be converted to Infrared
To find out if your camera is susceptible to these light waves, point your TV remote towards the camera.
Then, activate the Live View and see if you can see the light coming off the remote when you press a button on it.
Safety note: don’t look directly at the light nor look through the optical viewfinder.
If you can see light from the remote, you can use your digital camera for infrared photography without any conversion. You will only be able to do it through long exposure times though.
- Infrared Filters
Credit: Andrii Ganzevych. Canon 550d FullSpectrum with IR filter (Chrome).
A more affordable option for shooting an infrared photo is with a special IR filter that you can attach to the front of your lens on your regular camera.
These filters block the visible spectrum of light and let the IR light come through. Each IR filter comes in different sizes, types, and prices.
Different types of filters capture different portions of the IR spectrum with distinct visual effects of each kind.
For example, the Hoya R72 filter blocks any light that has a wavelength under 720nm and lets in the 760nm – 860nm infrared spectrum. This is one of the most popular choices.
However, for photographers who prefer black and white, a better choice is the B+W 093 IR filter 830 because, as the name says, it blocks anything under 830nm. This way the image becomes highly contrasted.
So, when you choose the filter you want to buy, don't guide yourself only by price, instead, focus on the specs to understand the type of effect you would get.
See our complete guide to lens filters for more.
- Tripod
As discussed previously, unless you're using a converted camera, you’re going to be dealing with pretty long exposures.
Because of this, a tripod is unavoidable. Since you’re talking about 10, 20, or 30-second exposures, the tripod needs to be very sturdy – choose a tripod that's designed for a DSLR, rather than a flimsy lightweight travel one.
Of course, high quality comes with a high price tag and a fair amount of weight. This last one is an important consideration if you're planning to do landscape photography in places where you have to arrive on foot.
In any case, take all three factors into consideration and buy yourself a tripod for your infrared photoshoots.
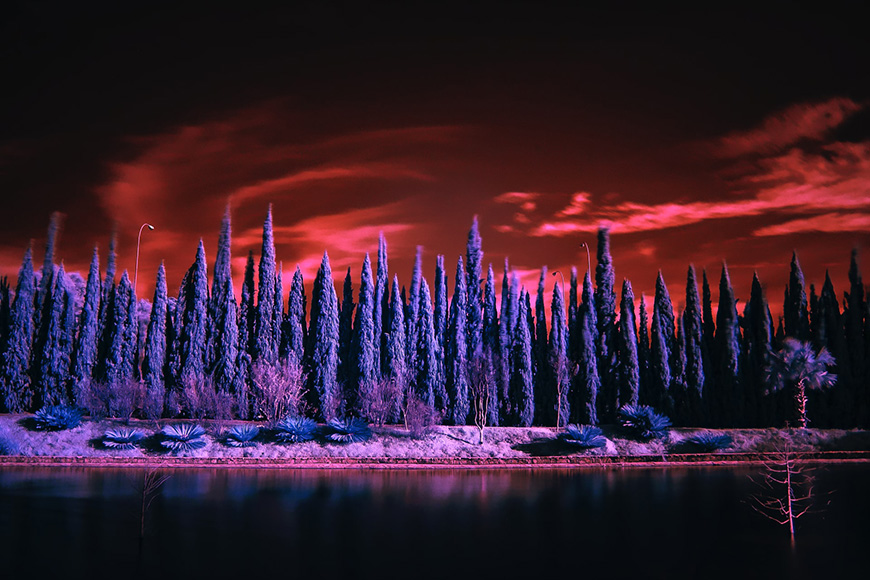
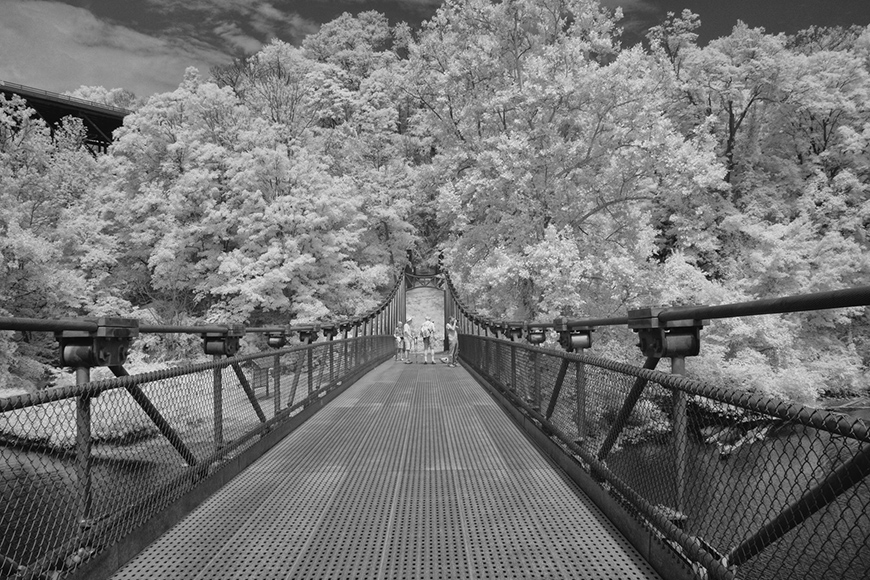
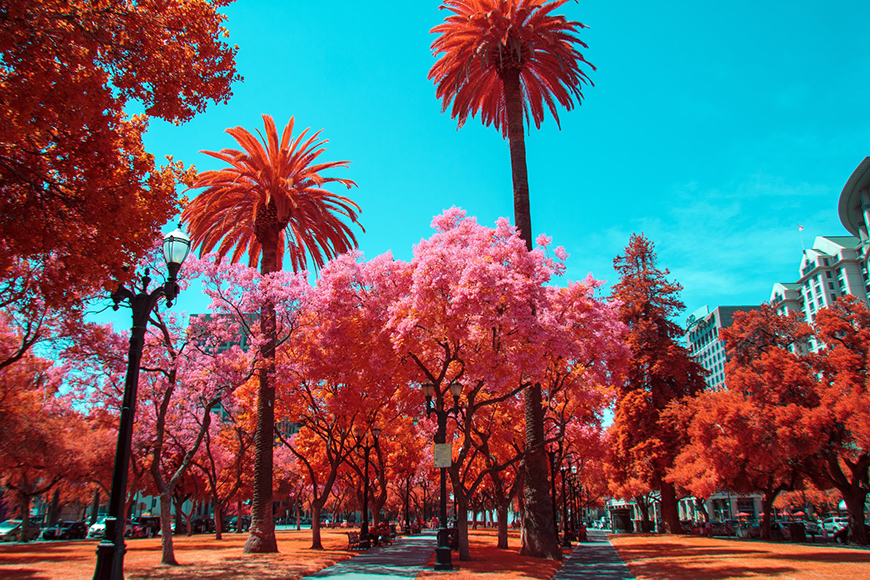
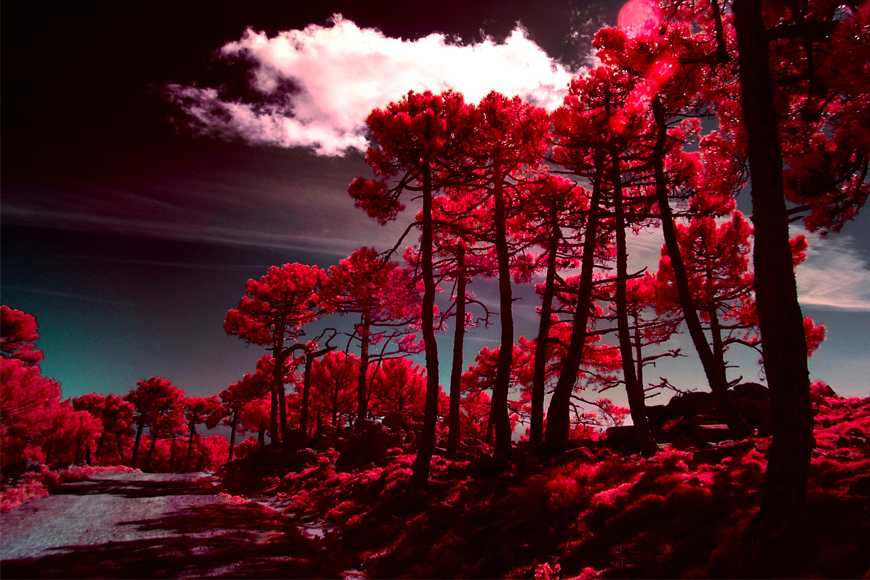
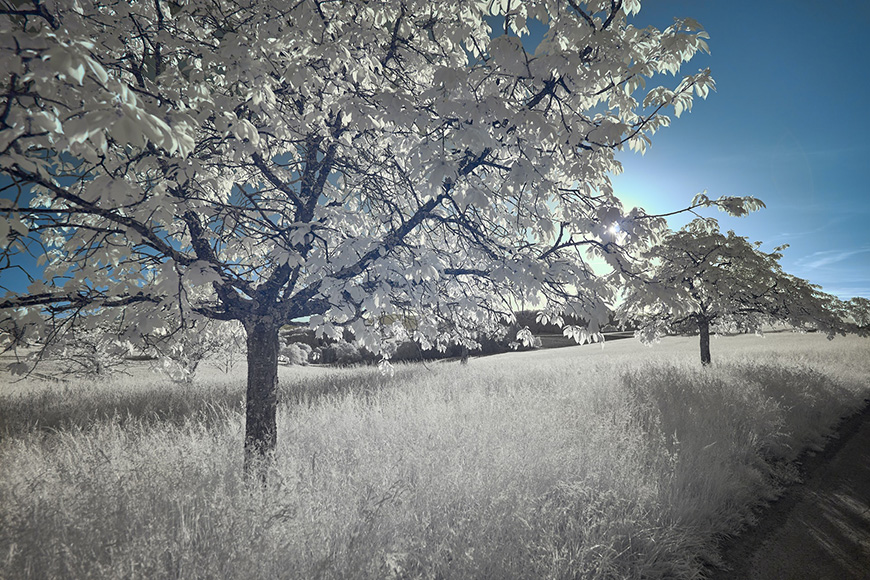
2. Choose the Right Subject
Credit: Jr Korpa
Most of the time you’ll see landscapes being featured in infrared photography. This is because they render a more appealing result.
The chlorophyll contained in leaves makes trees, forests, or fields glow when captured with infrared light. That’s why nature scenes can make a spectacular infrared image.
If you pair this with the darkness of the sky that will absorb most of the infrared light, you’ll get pretty dramatic images.
That’s why landscape photography is the most common subject for infrared photography, however, you can also get pretty amazing results with architecture.
If you want to use human subjects for your IR photography, you can do that too. People will become very white giving them a ‘ghostly’ vibe.
As you can see, infrared photography can be used to capture any subject you want.
The most important thing to consider when you're choosing your subject though, it’s that it will be shown in a different way to what you’re used to. That gives you a lot of creative potentials.
For some inspiration, you can look at any of the artists that use infrared photography for their work. For example, check out the photo series “Infra” from Richard Mosse or Paolo Pettigianni’s “Infrared NYC“.
3. Wait for a Sunny Day
While you would normally want to avoid shooting at noon on a bright sunny day, this is actually the best condition for infrared photography.
Forget the golden hour for landscapes or the cloudy days for portraits, as these won’t be good enough for this technique.
You need the sun to be shining to have lots of infrared light. This is also very helpful if you're shooting with an infrared filter because the exposure times might not be so extreme.
Now let's take a look at those all-important camera settings for nailing stunning infrared photography.
4. Dial In Your Exposure Settings
Near infrared photography. Credit: Jack B
The exposure settings you'll need for your IR photography will vary greatly depending on the camera you're using (i.e., if you're using a converted camera or a normal one with an IR filter).
They'll also depend on the lens and the light conditions of your particular scene. There are some tips that can help you out though.
First of all, you should set the image format to RAW. This way, you’ll have more flexibility in your editing. If you also want to take JPEGs that’s up to you.
If you're using a normal camera, you need to consider that IR filters are extremely dense so you will be losing a lot of light.
As a result, you’re going to need a slow shutter speed to make very long exposures. If the time is too long and your subject is coming off a little blurry, try compensating with other settings.
Whenever possible, keep the ISO on a low value to keep digital noise to a minimum.
As far as the aperture goes, there are two theories when it comes to IR photography. Some photographers advise shooting with a wide aperture to minimize the shutter speed time and ISO value. This will also diminish flare problems.
Others say it’s best to take your photos with a smaller aperture, f/8 for example, to keep your images sharp.
My recommendation is that you experiment with your own gear and see which one works best for you.
5. Dial In Your White Balance
The white balance of your camera is calibrated to the visible part of the light spectrum. When you go out of it, as you do with infrared photography, you can’t use any of the preset modes that you have.
Fortunately, there is a mode called Custom White Balance and that’s the one you're going to need.
So, point your camera to the ground and frame only grass. It’s important that everything in the frame is green. Adjust to the correct exposure and take a photo of it.
You can also do it with leaves on a tree but it’s more difficult to get even lighting, that’s why the grass would be better.
Then, go to the white balance settings in your camera and set this image as the source for the custom white balance.
6. Be Aware of Potential Problems
There are some additional issues that you have to deal with when you do IR photography. Nothing that can’t be fixed, but you do need to be aware of them to avoid disappointing results.
- Focus
Focusing subjects under natural light might not result in sharp subjects when you capture them with infrared light.
If you're using a modified camera, they probably adjusted the difference in focus when they did the conversion.
In that case, you’re probably OK, but it's best to double-check with the company if it’s part of the service they offer. Color infrared film won’t present a problem either.
However, if you're shooting with a normal digital camera using infrared filters or black and white infrared film, you will need to adjust the focus.
Many lenses have an indicator to compensate for the different focus – you have to use manual focus for this. If your lens doesn’t have it, you can try focusing with live view and some trial and error.
- Exposure
Trying to use the exposure meter from your camera or even a handheld meter won’t be very helpful during infrared photography. All normal gear is calibrated for visible light and therefore won’t be accurate if you're working with lightwaves from outside that spectrum.
Just do some trial and error shots to determine the correct exposure. Once you have it, do some bracketing.
This is recommended because the image from the LCD screen can be misleading – especially if you're a beginner and you're not yet used to seeing and assessing infrared photography.
- Hot Spots
A common problem with infrared photography is the hot spots that result in your images from the light flare.
There are certain lenses that work better for infrared photography. You can do some research to find the best ones as these will give you fewer problems.
Another thing that you can do to avoid or diminish the hot spots is to cover the optical viewfinder when you take the picture.
Some camera straps (see guide) come with a special piece to do this; if not you can just cover it with your hand or a piece of cardboard. Then, try to use a wide aperture, as you would do to diminish any type of flare.
Finally, you can get rid of the hot spots in post-production.
How Do You Shoot With Infrared Film?

Credit: Wrev. The Ribeira da Janela Valley on Madeira Island, taken on Infrared False-Color Film (Kodak EIR).
Unlike digital photography, analog film cameras can be used for infrared photography. You just need to use an infrared filter and load them with infrared film.
There are two types of film: black and white infrared film and infrared color film. Black and white IR film is still available on the market.
Color IR film is no longer being produced. Maybe it will go back on the market in the future if there’s enough demand for it, but that’s not yet the case.
You can find some expired rolls for sale, but they're not common and probably won’t be cheap either.
To develop any of these films you might have to ship your rolls to a lab outside your city (or your country) because not many offer this service.
How Do You Make Infrared Photos Using Your Smartphone?
Smartphone camera sensors are sensitive to infrared light, so you can use them with an IR filter. However, you might have to DIY an accessory to mount it because there aren’t any filters on the market especially for smartphones.
You can also use apps to simulate different infrared effects for your camera or to apply filters to your photos.
How to Edit Infrared Photos (Post-Processing)
Credit: Wolfgang Hasselmann. “Infrared picture with 720nm with the balance on the leaves and color adjustment on the sky.”
Post-processing is an essential part of infrared photography. A lot of people see infrared photographs online and when they try it and see a flat red/magenta image they think they did something wrong.
This isn’t the case: there’s nothing wrong with your photo, it just needs to be developed. For this, you can use any editing software, although Photoshop is the most popular.
If you're shooting in RAW, you’ll have more information to process your image and get better results.
There are different methods for editing infrared photos; it all comes down to the effect you're trying to achieve. Here are some suggestions to get you started:
- Auto-Tone
This is a quick and efficient method to post-produce infrared photography. You just have to open your image in Photoshop and go to the menu Image, Auto Tone. That’s it – with just one click you got most of the work done.
- Channel Swap
This method is straightforward as well, but it’s much more flexible for giving your infrared photography a personal style. Channel swapping is about inverting the colors in the different channels that conform to your image.
To do this you need to add a Channel Mixer Adjustment layer. Here you can move the values from different colors in each channel until you achieve the desired result.
For example, to swap the red and blue channels you need to go to the Red channel and input (or drag the sliders) to set the red color to zero and the blue color to 100.
Then, go to the blue channel and set the blue color to zero and the red color to 100. I think you get the idea. Experiment with different values on different channels. You can also move all three of them.
- General editing
Regardless of the method you used, you can tweak your images with some general adjustments.
This can be done in software like Photoshop or Lightroom. For starters, you can get rid of any digital noise using Noise Reduction, or any dedicated noise reduction software – here are the best options.
Then, you can make some adjustments to the tonal values using the HSL panel in Lightroom or in the Camera RAW filter in Photoshop.
If you prefer to use Photoshop adjustment layers, you can also use Curves, Levels, or Hue/Saturation.
- Black and White
A popular choice for processing infrared photos is to turn them to grayscale. To do this, first, process your images with any of the previous methods.
Then, in Photoshop, add a Black and White adjustment layer. There are other ways to convert your images to grayscale but I find this one to be the best.
With this method, you can move the sliders to give enough contrast to the image but maintain control over the details in the shadows and highlights.
Also, because it’s an adjustment layer you're working non-destructively so you can modify or delete the black and white effect if you change your mind.
Final Words
As you can see, infrared photography doesn’t have to be that expensive and it’s certainly not as complicated as it might sound.
Allow me to finish with a safety note: please never stare at the sun or any other source of light that could damage your eyes, even if you’re using dense filters.
Having said that, I leave you to your experiments with infrared photography. Let us know how you go in the comments section.

Check out these 8 essential tools to help you succeed as a professional photographer.
Includes limited-time discounts.

Ana Mireles is a Mexican researcher that specializes in photography and communications for the arts and culture sector.
5 Comments
Leave a Comment

👋 WELCOME TO SHOTKIT!
🔥 Popular NOW:

This was a very informative article, great to get understanding of infrared photography. However, both my nephew and myself felt that this would have been far more helpful if the pictures you included would have had the actual data included. I say this as a beginner it would definitely have been more helpful to see what each photo was taken with regardless of what can be done in post processing. Both of us still have no clue what 590 or 720 actually looks like .
Hi John
In future articles or resources related to infrared photography, I’ll certainly take your suggestion into consideration and aim to include more detailed technical information alongside the images. Thank you for sharing your perspective, and I hope this adjustment will enhance the learning experience for you and others interested in infrared photography. I appreciate that this information could help beginners understand the differences between various infrared wavelengths and how they affect the final result.
… and spring is best season to photograph trees (as leaves are full of chlorophil that reflects IR pure white)
Thanks for the sharing the great content here, if you are looking for the online Art gallery, then once visit “ArtBoxy”. They provide commission free service world wide.
loved your article Ana, i converted my old canon 400D to infra red and love it, having experimented during this last summer with the mid day sun i have been practicing with various editing techniques, but could you tell me. 1.. where is it best to focus, on the lighter or darker part of an image , and 2.. i am surprised sometimes when taking taking the photo in full sun that i get so many blown out highlights…. i have my iso at 200, F7.1 or 8 and have a custom white balance from the grass …. i do use canon DPP for starters to correct the highlights and shadows then go to ps cs6
Just these 2 things are bugging me at the moment.. Hope you are able to advise. Kind Regards Carol