


Best Mobile Photography Tips for Stunning Phone Photos
Master the art of mobile photography with our top tips, transforming your smartphone shots into captivating, professional-grade photos effortlessly.
Shotkit may earn a commission on affiliate links. Learn more.
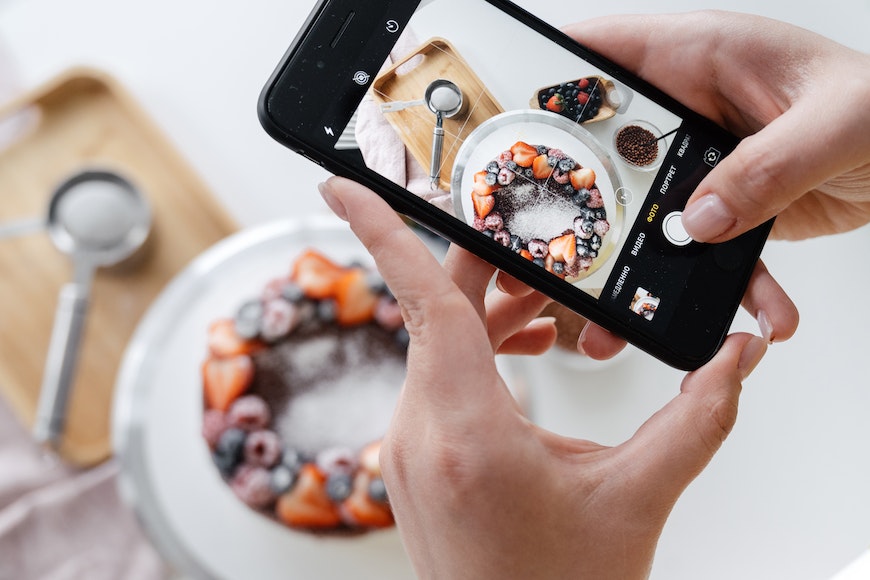
Mobile photography is becoming more and more popular.
However, simply pressing the shutter button on your phone isn't enough to stand out amongst all the others.
If you want to move past the average mobile snapshot and start creating good photos with your smartphone, this guide will help you out.
You're about to learn the best mobile photography tips to improve your pictures right away.

The fastest, simplest and most fun way to improve your smartphone photography skills this year.
Use link to save 80%
I'll also suggest some smartphone accessories you can get to get your practice to the next level.
Finally, I've included some examples of amazing smartphone photography to get you inspired to take better photos with your phone.
So whether you take photos with an iPhone camera or use an Android device, you're sure to find mobile photography tips to enhance your experience.
Essential Mobile Photography Tips to Try Today
If you want to become a smartphone photographer, here are some mobile photography tips to help you make better photos.
Choose the best camera mode
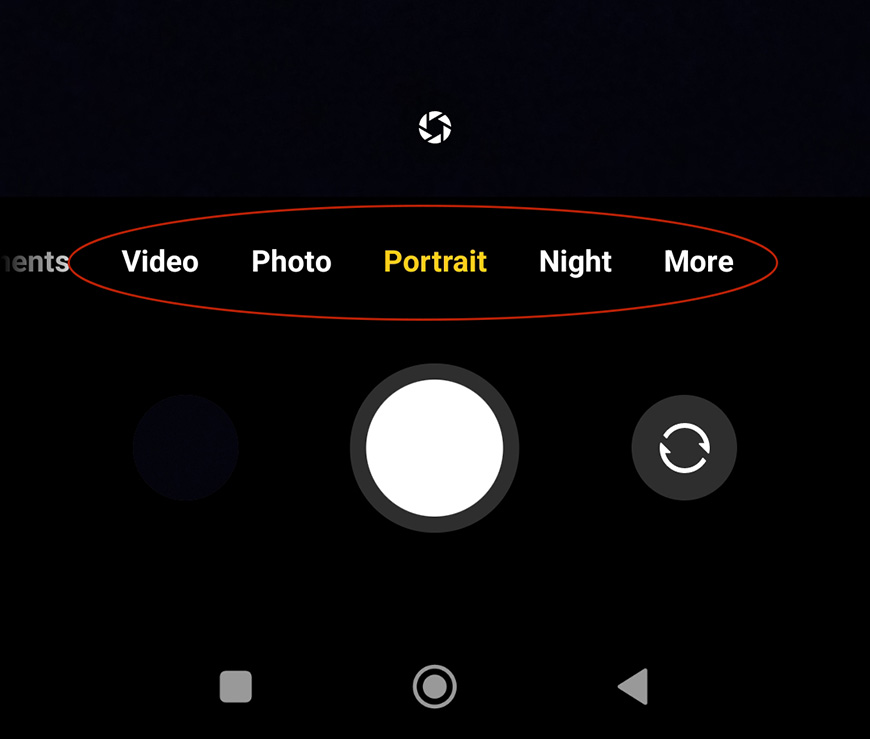
Most camera apps for smartphones – including the one that comes already installed, have different camera modes. How many and which ones may change from one app to the other.
When vlogging on an iPhone for example, some of the choices are photo, portrait mode, night mode, pro mode, etc.
By default, the app opens in Photo. However, this may not put emphasis on the features you most need for a specific subject or light situation.
Take some time to understand the advantages each mode offers and learn how to use them to improve your photos. If the camera app you use doesn't have the mode that you need – find one that does.
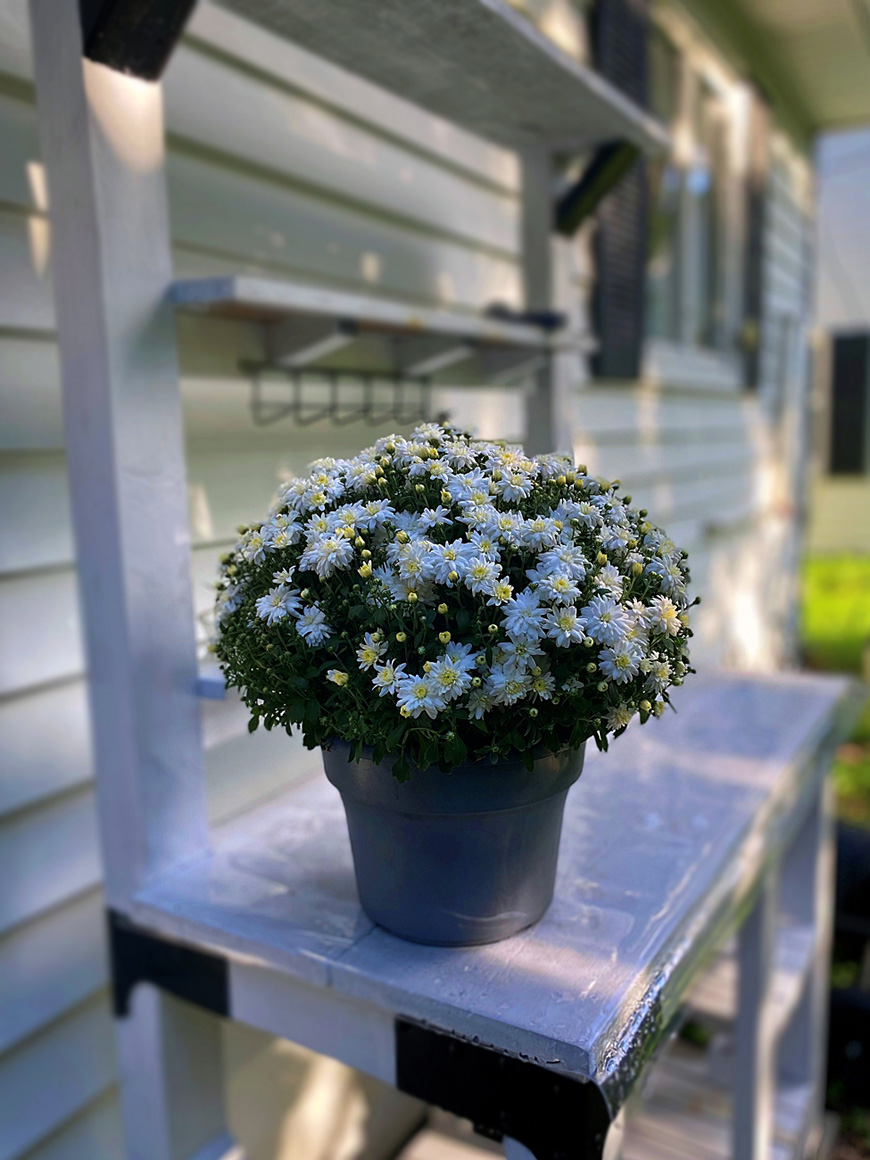
Control the depth of field with portrait mode
Apple iPhone 11
iPhone 11, f/1.8. Credit: Jo Zimny Photos, CC BY-NC-ND 2.0, via Flickr
One of the best mobile photography tips I've learned to put emphasis on your main subject is to use a shallow depth of field.
This is more difficult to achieve in mobile photography because phones have a fixed aperture. To compensate for this, camera apps have a feature that allows you to blur the background.
Usually, this feature is activated when you choose the portrait mode. Some smartphones only allow this when they detect a person on the frame. However, most of them allow you to use it with any subject.
You can also try to change the focal length and the distance to the subject. This will help you to control how deep is the depth of field in your photos.
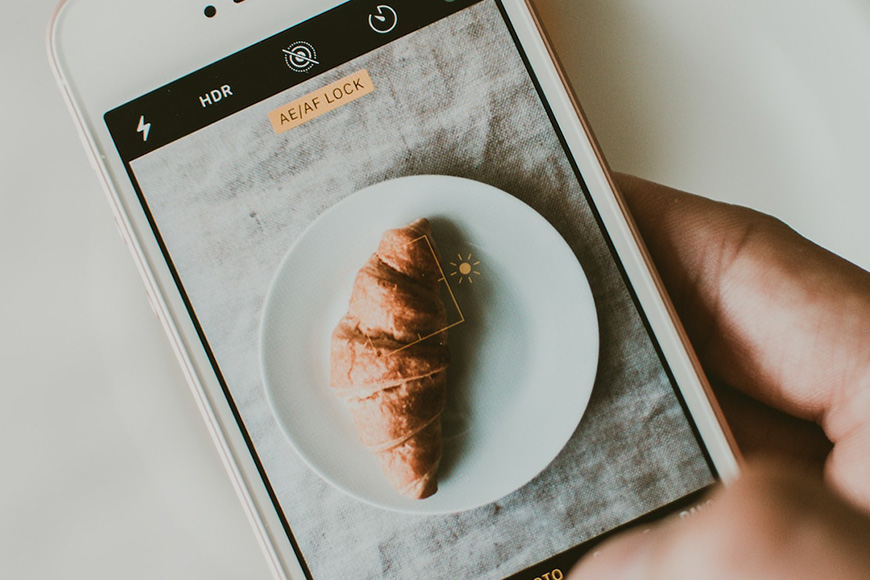
Use manual focus and exposure on your camera app
Credit: Lisa Fotios
Some mobile photography tips are so simple, but can totally transform your images.
For this tip, tap on the main subject in your smartphone photo to establish a focus point. From there, the camera will take the information to determine the exposure.
You can tap and hold to lock the focus and the exposure – in most phones this makes a yellow square appear on the screen. You may also see a sign AE/AF Lock.
Once it's locked, you can swipe up or down to manually adjust the exposure.
Most smartphone cameras I've used have this feature, so make sure you have an experiment as it's one of those mobile photography tips that can totally change your pictures for the better.
Make the most of natural light

Credit: Cottonbro Studio
While camera users have tons of artificial lights available, in mobile photography you mainly rely on natural light.
Of course, there are LED lights you can use for mobile photos – but it's always best to know your way around with natural and ambient light.
Get familiar with the type of light you'll get at different times of day and how the weather influences the quality of light.
Then, you can make informed decisions about when and where you need to shoot to get great pictures.
One more mobile photography tip about light – although it's not about natural light. If you practice iPhone photography, you have a studio lighting feature in portrait mode that can be very useful. Give it a try!
Avoid using digital zoom
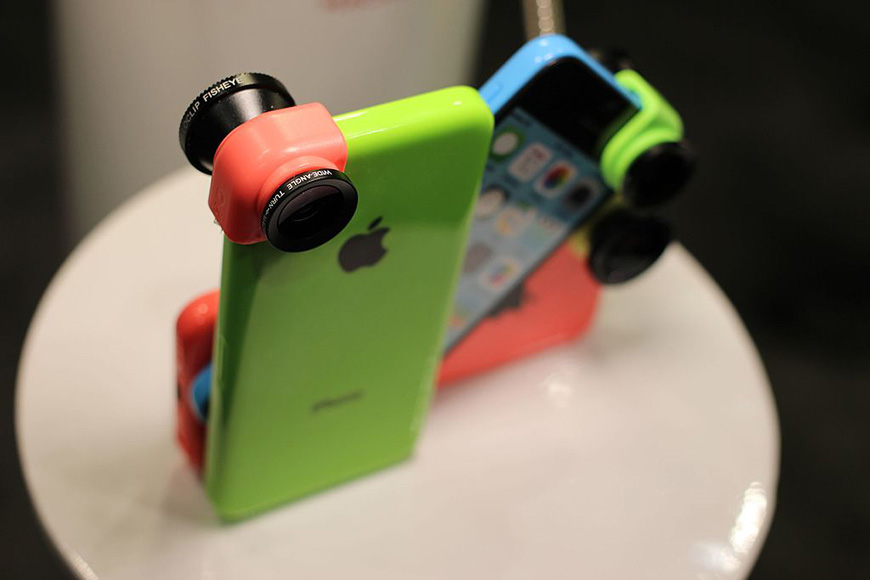
Credit: Maurizio Pesce from Milan, Italia, CC BY 2.0, via Wikimedia Commons
Here's another one of those mobile photography tips that you should have been told about long ago.
Most smartphones come with a digital zoom. While this is helpful to magnify a subject that's far away – it takes a toll on the image quality.
If you have a smartphone with a telephoto lens, you're in luck. The newer iPhones with 3 cameras have this, and so do newer Samsung mobiles.
I advise you to get a clip-on telephoto lens instead. This way, you won't have any problems capturing wildlife photography or sports competitions where you can't get too close to your subject.
Improve your composition
Credit: Shvets Production
Mobile photography tips don't always need to be just about smartphone settings.
Learning composition guidelines is the best way to take good photos. This is something that applies to photographers using a phone camera or a regular one.
The key to taking photos that engage the viewer is knowing how to position the subject and other elements in a strategic way.
This will help you guide them through the photo so that they discover the story you're trying to tell them with your image.
It's also useful for the aesthetics. A good composition helps you to create a stunning photo. So, how do you compose your image?
The first composition advice every photographer gets is to use the rule of thirds. This is easy to do because all phone cameras have a grid overlay with the rule of thirds.
However, this is just the beginning, and many photographers consider it too basic and overdone. To really get unique results you need to dig deeper.
Not only do you need to get familiar with other guidelines, but you should also learn when to apply each one according to your subject and the effect you want to create.
More often than not, you'll be combining two or three rules to get a more complex composition. For example, you can combine the rule of thirds with leading lines or with negative space.
Download camera apps that have different composition grids such as the golden grid, triangles, and the golden spiral.
This will help you to improve your composition until you train your eye to do this naturally without grids.
Recommended Accessories for Smartphone Photography
If you want to take your mobile photography to the next level, you'll need some smartphone photography accessories.
We've already written a guide on the best iPhone camera accessories, but most of the gadgets below apply to other smartphone brands too.
Credit: Matheus Bertelli
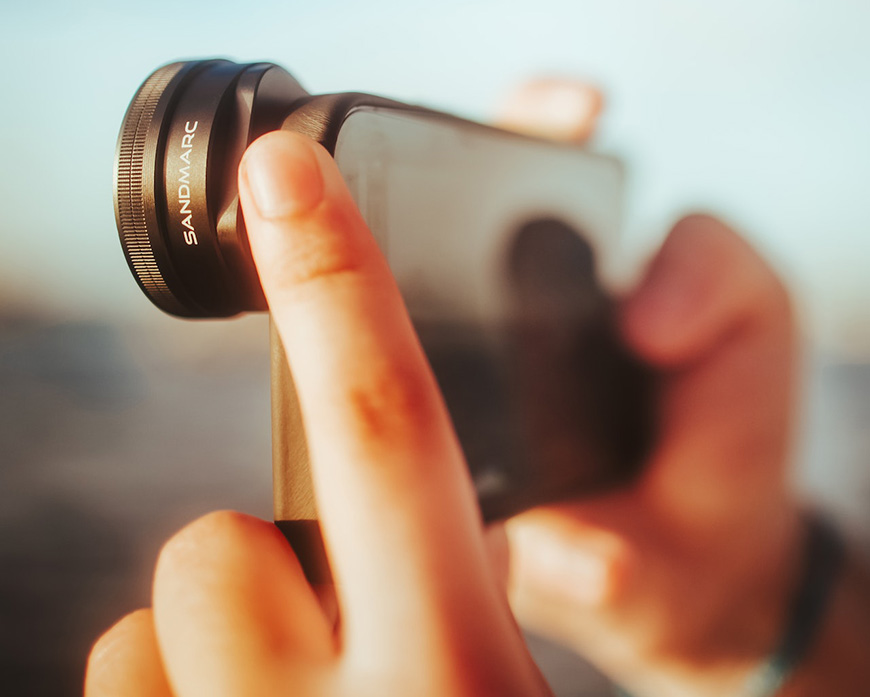
Clip-on Lenses
While many smartphones come with multiple camera lenses, not all of them do. Even if you do have multiple cameras on your device, you might need other focal lengths.
This is where mobile lenses come in. Simply clip them onto your smartphone camera, and you're ready to go. Here are some of the most common options.
Telephoto
- Moment 58mm telephoto lens
- Apexels 36x telephoto lens
- MIAO LAB HD 20-40x zoom lens
- See also: how to use iPhone telephoto lens
Macro
If you need to magnify a small subject such as bugs or you want to make abstract photography, you need a macro lens.
These are some of the best that can help with iPhone macro photography.
- Shiftcam 10x macro lens
- Apexel professional macro photography lens
- Sirui MC-02 10x macro lens
- See also: best macro lenses for iPhone
Wide-angle
For a wider field of view, ideal for interior photography as well as landscape photos, here are some clip-on lenses you might want to check out.
- Apexel No distortion 110° HD wide-angle lens
- Adcom full-screen wide-angle clip-on
- Sandmarc wide-angle lens
- See also: how to use iPhone wide angle lens
Fisheye
If you want to get creative or you need to shoot a very wide space, use a fisheye lens. Here are some recommendations.
- Moment 14mm fisheye lens
- Amir 180° fisheye lens
- Shuttermoon fisheye lens with 198° coverage
Lens kit
If you want to be ready for any situation, you may be better off with a kit. Here are some ideas.
- ShiftCam photography lens kit
- Ollokit 4-in-1 lens
- Nelomo Universal HD Camera Lens Kit
Tripods and Stabilizers
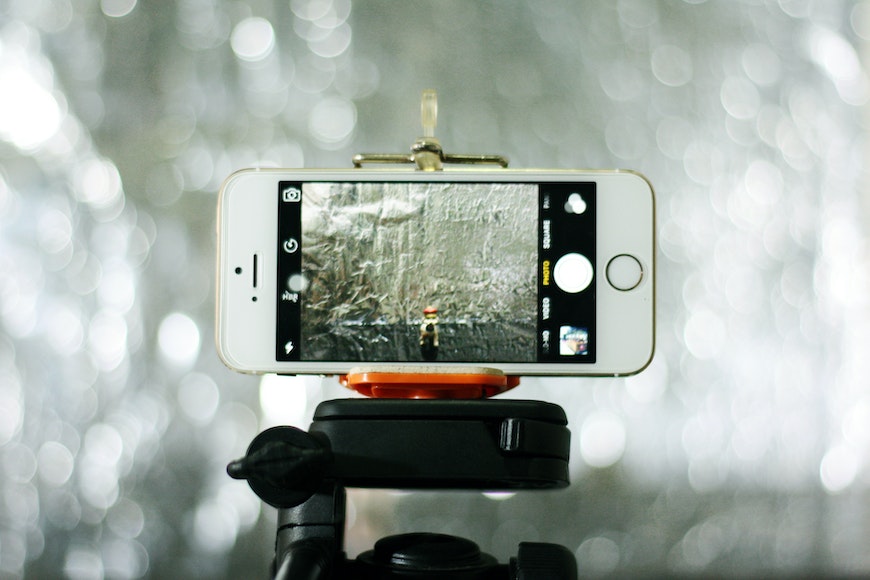
Credit: Jano Gepiga
If you want to avoid blurry photos due to camera shake, you need to use a smartphone tripod.
It's also useful to have a stabilizer if you want to make smooth and steady videos. Here are our recommendations.
Tripods
- Manfrotto PIXI mini tripod
- Joby GorillaPod Mobile rig
- Joby GripTight ONE micro stand
- See also: best tripods for iPhone
Stabilizers
- Insta 360 Flow
- Zhiyun Smooth 4 3-axis handheld gimbal
- Hohem iSteady MT2
External Lighting Solutions

Credit: Liza Summer
The built-in flash on your mobile device is not the most potent or flattering light. If you want to capture the perfect shot, you'll need an external light for enhanced illumination.
LED lights
- Aputure MC RGBWW LED light
- Zhiyun FIveray M40
- Newmowa 60 LED clip light
- Neewer 18″ ring light kit
- Razer ring light
- Okira LED RING DAR 240
Viewfinders
Smartphone screens are almost impossible to see in bright light.
You may find out too late that you cropped the image in the wrong place and now your subject is missing a foot, or the church is missing the cross on the top.
To avoid this, you can use a viewfinder.
There aren't so many choices in the market yet. However, we managed to find some that you may want to try.
- Smart Z-finder by Zacuto.
- iPhone Viewfinder with Daylight Viewfinder app.
- OKO immersive viewfinder.
Mobile Editing and SmartPhone Post-Processing Tips
Taking pictures is just the first part of mobile photography.
To really make stunning photos, you need to edit them properly. Fortunately, there are many photo editing apps for iPhone and Android devices.
Seriously, this is one of the most important mobile photography tips you'll ever learn – editing your pictures will take them from good to amazing quicker than anything else.
Popular Editing Apps for Smartphone Photography
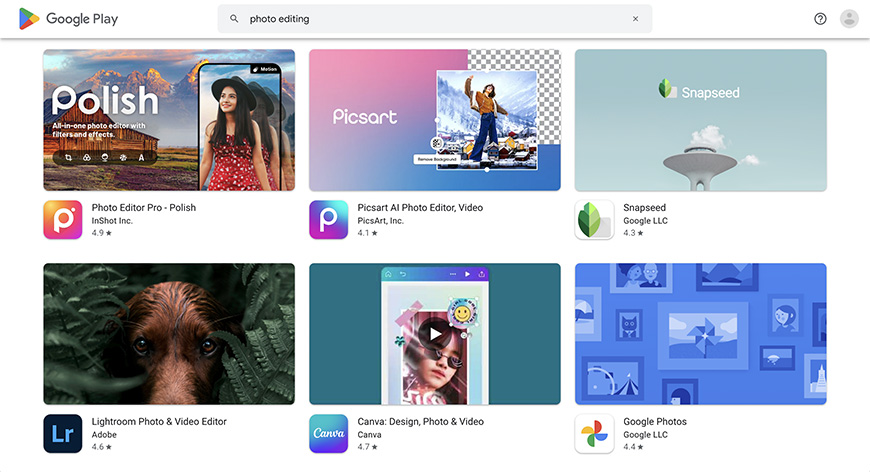
Google Play Store
Snapseed is a free aesthetic photo editing app available for iPhone and Android phones. It has basic and advanced editing features. it has some graphic tools as well such as a text tool. You can export your images in different sizes and formats. It doesn't have a camera.
As part of the Creative Cloud suite, Lightroom Mobile syncs and works with all desktop apps from Adobe. However, you don't need to have a subscription to use it – there's a limited free version. Even with the limits, this is one of the most powerful photo editing apps.
VSCO
VSCO is a popular photo editing app with a social component. You can use the editing tools and the filters to work on your photographs. Then, you can share them with the VSCO community. It's also possible to edit videos and make montages layering both photos and videos. There is a free basic version, but you need a membership to unlock the advanced features and the entire filter collection.
Essential Editing Techniques for Smartphone Photography
Regardless of the photo editing app you choose, here are some basic edits you can do on your mobile phone.
Cropping

Lightroom Mobile
The cropping tool allows you to cut the edges of your photographs. This is useful when you want to improve the composition or eliminate unwanted objects.
It's also used to change the aspect ratio of your photographs. Most cropping tools have a feature to rotate the image. You can use this to straighten the horizon in case it needs it.
Color correction

Lightroom Mobile
The most basic color adjustment you need to do in your smartphone photography is correcting the white balance. Each light has a different color cast, and it can really affect your photos.
Most photo editing apps have an auto-white balance feature. Some of them will let you adjust the color temperature manually – which gives you more control over the creative result.
Some more advanced features include color grading or split tone, but not all photographs need this type of editing. So, it's up to you.
Filters
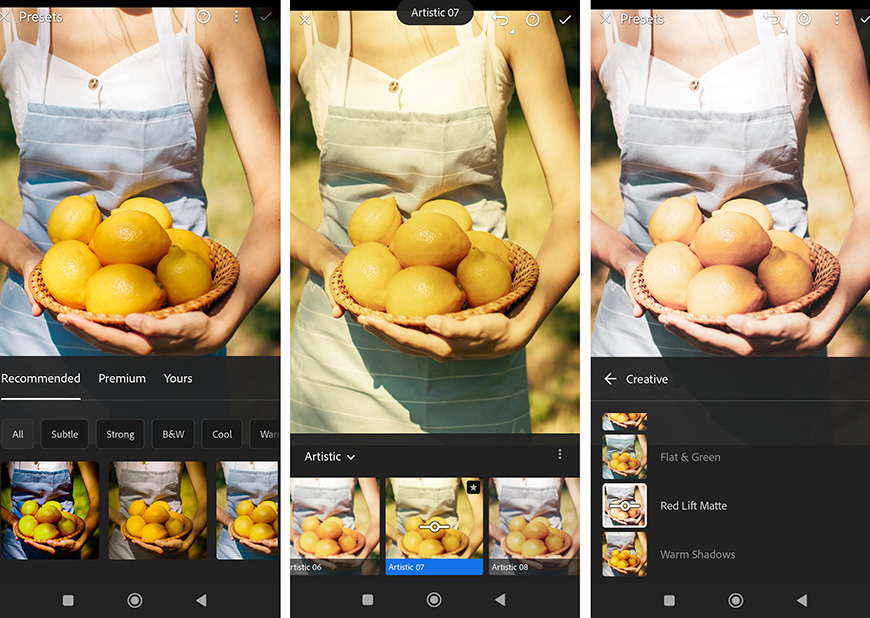
Lightroom Mobile
This is one of the most common edits in mobile photography. So much so that many apps exclusively work with filters without any editing tools. Of course, it's always advisable to edit your photos first and apply the filters at the end.
One of the most popular filter apps is VSCO due to its large collection. However, Lightroom isn't far in popularity with the use of presets.
Filters allow you to achieve specific looks with a single tap. They're also a good way to keep a consistent look across a photo collection.
You can learn more about the built-in iPhone camera filters for some more inspiration.
Overlays
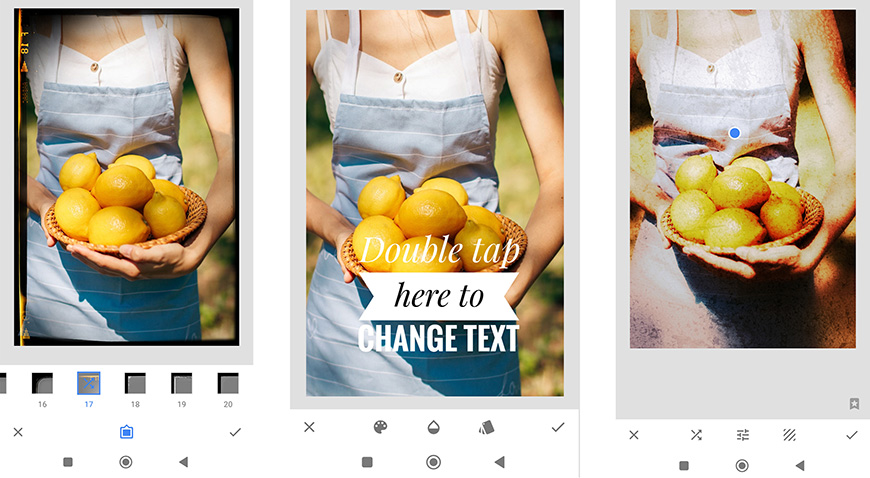
Snapseed app
Another popular edit in smartphone photography is the use of overlays. The overlay can be a texture to give your photograph a grunge or vintage look.
However, overlays can also be text or graphic elements. These are particularly useful if you're creating content for social media.
Some photographers also like to use a watermark overlay before sharing their images. There are tons of possibilities and many apps to choose from.
Advanced Editing Tips for Mobile Photography
On top of the basic editing, you may want to do some advanced editing in certain situations.
Here are some techniques you can use for smartphone photography. Consider that you might need dedicated apps for these.
Double exposures

Credit: Maria Varshavskaya
Double exposure is a technique where you capture multiple shots that layer onto the same picture.
You can use a camera app that allows this while taking the pictures, or you can composite the photos in post-processing with apps like Snapseed.
Panoramas

Credit: Pixabay
A panorama is very common in cityscape or landscape photography. The panorama mode allows you to capture stunning photos of an ultra-wide scene without any special lens.
Simply press the shutter button and start turning until you've included everything you want in the picture. Most modern phones have a panorama mode in the built-in camera app.
To avoid distortion, you can also take as many photos as you need to cover the entire scene. Then, stitch them together with a photo editing app.
HDR

Credit: Pixabay
High Dynamic Range (HDR) is a technique based on taking pictures with different exposures. Then, blending them to create a striking image with details both in the highlights and shadows.
This lets you take better pictures in high-contrast situations. Almost any camera app has this amazing feature. You can also download a dedicated app that allows you to adjust the HDR settings for better results.
See also our guide to using HDR on iPhone.
Overcoming Challenges with Smartphone Cameras & Mobile Photography
Mobile photography keeps improving, but it does have its limitations – from image quality to storage space.
Here are some of the most common challenges and the best way to overcome them.
Low Light Photography
The first thing you need to shoot in low light is a camera app that lets you control the camera settings. This way you can use a lower shutter speed to avoid raising the ISO and getting noise.
The iPhone camera automatically detects low light and turns on the night mode. This mode works well too, but you might need to try longer times than the one it suggests.
When you do this, you risk getting blurry photos due to camera shake. So, you'll need a tripod to get sharper images.
You can also use an external light to get capture great photos when the ambient light isn't enough.
Motion and Action Shots
Capturing moving subjects in smartphone photography is possible with the right settings. Again, you'll need to control the shutter speed. So, if your phone's camera doesn't allow it – download an app that does.
Then, set the shutter speed fast enough to freeze the subject and turn on the burst mode. Then, try to anticipate your subject's movement.
Instead, if you want to integrate motion blur to make some interesting images that convey movement – use slower times. You can try following the subject which is a technique called panning. This way, you'll have a blurred background and a sharp subject.
Storage and Backup
Smartphones have made it easier to take more photos than ever before. Before you realize it you've already filled your phone's memory. So, how do you store and back up your photos?
The easiest way is to use a cloud storage service. Most of them allow you to sync your phone. So as you're shooting images on the go, they're going directly to the cloud without taking any space on your phone. You can also disable this and manually upload the photos you want to back up.
Another way is to use memory cards. Then, you can use a card reader to transfer your photos to your computer or a hard drive.
What Smartphone Takes the Best Photos?
Several smartphones have exceptional camera capabilities. Here are some of the top contenders:
- Any recent model of Apple iPhone Pro and Pro Max: Known for their consistent photo quality, Dolby Vision video recording, and ProRAW format for professional post-processing.
- Any recent model of Samsung Galaxy S Ultra: Praised for its versatile camera system, with the latest model including a 108MP primary sensor and two telephoto lenses offering 3x and 10x optical zoom.
- Any recent model of Google Pixel: Renowned for its computational photography prowess, especially in low light and portrait shots, even though it has fewer lenses than competitors.
- Any recent model of OnePlus Pro: Developed in collaboration with Hasselblad, it has received positive reviews for its color accuracy and overall photo quality.
- Sony Xperia 1 III: Comes with impressive manual controls and has technology derived from Sony's Alpha series of cameras.
- Any recent model of Huawei P Pro and Pro+: Huawei's high-end phones are celebrated for their camera systems, especially zoom capabilities and low-light performance, but their global availability has been affected by trade restrictions.
FAQs About Phone Photography
Can I be a photographer with just my phone?
You can become a photographer using only your smartphone – but you'll face several limitations. Smartphone manufacturers keep improving the hardware and software. However, some things like the size of the sensor will always be an issue compared to a stand-alone digital camera.
Do any professional photographers use phones?
Yes, professional photographers take smartphone photos, but they don't use a smartphone camera for their work – at least, not exclusively. A study made by Suite48Analytics shows that 11% of the pros they interviewed use a phone camera for 50% of their work. Also, 31% said that they're doing mobile photography more than they used to.
Is it essential to have the latest smartphone for quality photos?
While newer phones often have advanced camera tech, great photos can still be taken with older models by focusing on technique and lighting.
How can I avoid grainy pictures in low light when using my phone camera?
Use lower ISO settings, stabilize your phone (perhaps with a tripod), and utilize apps with night modes.
Do I need external lenses for my smartphone camera?
External (third party) lenses are optional but can provide added versatility, such as wide-angle, macro, or telephoto capabilities.

Check out these 8 essential tools to help you succeed as a professional photographer.
Includes limited-time discounts.

Usnea Lebendig is an experienced photographer and reviewer who loves to photograph professionally and in moments where the world’s beauty and/or strangeness leaps in front of the lens.
1 Comment
Leave a Comment
👋 WELCOME TO SHOTKIT!
🔥 Popular NOW:

A really good comprehensive article. Good for beginners and those already familiar with their cameras.