


How to Take Good Pictures (Get Better Photos in Every Situation)
If you want the shortcut to taking better photos this year with your phone or a dedicated camera, this is the guide for you! (Tips for most popular situations.)
Learn | Photography Guides | By Ana Mireles
Shotkit may earn a commission on affiliate links. Learn more.
Wondering how to take good pictures with your phone or camera? This is the guide for you!
Mastering photography can take years of education and practice, but this is the shortcut to getting better photos.
We’ll reveal the top tips and tricks for getting the most out of your camera, whether it’s the latest DSLR or just the camera app on your iPhone!
So if you’re short on time but want to know how to take better photos, keep reading…
How to Take Good Pictures with a Phone
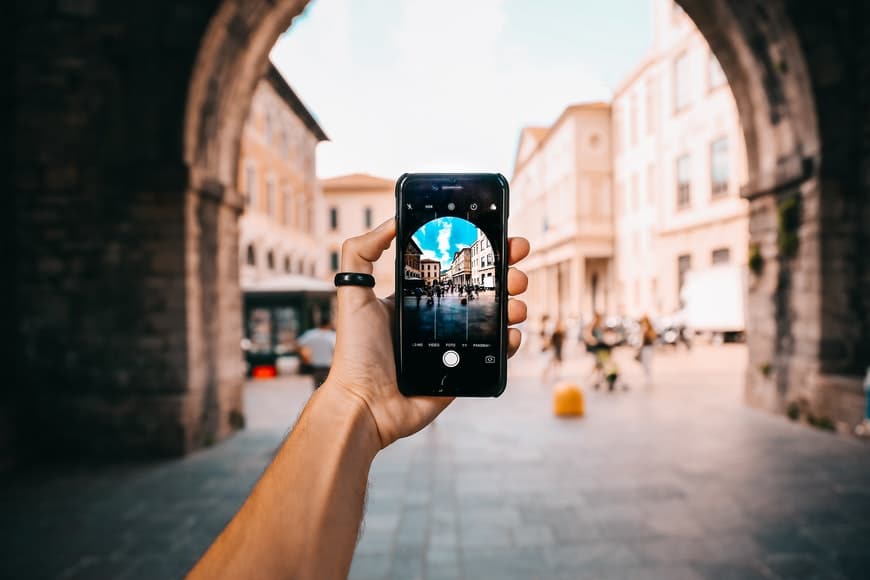
Credit: Oleg Magni
Phone photography just keeps getting better and better as the quality of the technology improves. Even if you only have a smartphone camera, you can still take a great photo.
You can check out our complete guide to taking better photos with your iPhone or these mobile photography tips, or here are some tips and tricks to get good pictures no matter what smartphone you’re using.
Use a composition overlay
Most native camera apps have the choice to activate a grid overlay. These iPhone grid lines follow the rule of thirds. The idea behind it is to position the most important elements of the pictures where lines intersect.
This type of composition helps you to highlight your subjects. Many composition rules can significantly improve your photographs – try the Fibonacci spiral, rule of thirds or the golden ratio – see: what is the golden ratio rule in photography?
Download a camera app
While native camera apps are always improving, downloading one that allows you to manually adjust the settings is key to improving your photography. Also, many of these apps allow you to shoot in raw (see below).
Some of them also offer different composition overlays so that you can move past the rule of thirds and become more of an expert. There are even apps that turn photos into paintings for a unique effect.
Shoot in raw
Raw is a type of file that stores all the information before processing. This allows you to have better quality images – even after editing them.
Not many phones have the feature of shooting raw built-in, so you’ll have to download an app to do this.
Some of the best ones are Lightroom Mobile, VSCO, ProShot, ProCam, ON1 Photo Raw, Flannl RAW Camera and Manual Camera Lite.
Accessorize
If you want to use your phone as a more professional camera, then you need to start considering it as one. That means getting the smartphone accessories needed for pro-level photography.
The most important one is a tripod – that way you can shoot even in low light situations. Also, consider buying an LED lamp or some sort of extra lighting.
Finally, to widen your focal length choice, consider buying some clip-on lenses. Some smartphones now have two or three lenses already built-in, but often they don’t have the same resolution and quality.
Invest in education
Photography with a regular camera takes years of education and practice to master, so why would you skimp with your phone photography?
Sure, it’s much easier to take a snap with an iPhone than a complex DSLR, but there’s still a lot of ways you can improve.
If you own an iPhone and really want to learn how to take good pictures with it, check out the iPhone Photography Academy.
Understand your device
Each manufacturer has installed or developed specific features to make their devices more attractive for photographers and to get an edge over the competition.
Here’s a cheat sheet of the features offered by the most popular brands so that you can make the best out of your smartphone.
Best iPhone Camera Settings
- Enable the grid lines – You can use an overlay grid to compose your image, keep the horizon straight, etc. You’ll find this feature in the settings menu.
- Mirror front camera – You can enable and disable this option to your preference – you can either leave the photos as you see them when you shot them or have the phone flip them.
- Use the levelling tool – When you’re doing an overhead shot, align the two plus signs (one is yellow and the other one is white) to make sure the camera is level.
- Turn on Live Photo – This way, you’ll capture the moments before and after the photo. This allows you to choose the best frame or get creative with all the pictures and turn them into a gif, boomerang, video, etc.
- Use night mode – If your phone supports it, the night mode allows for a longer exposure time to get great photos in low light. You can let the phone calculate the time automatically or adjust it manually. Use a tripod for better results.
- Use portrait mode – If you’re photographing people, use the portrait mode to blur the background and choose the light. This feature is also available for selfies in some iPhone models.
- Use burst mode on iPhone with moving subjects – To shoot multiple images to capture the perfect moment, use burst mode. It can be enabled in the settings area.
- Turn on ProRAW – This feature is only available for iPhone 12 Pro and iPhone 12 Pro Max if they run on iOS 14.3 or later.
Best Android Camera Settings for Samsung Galaxy
- Tracking auto photo – Go to the video mode of the camera app (even if you just want to take photos) and open the settings – you can enable this feature there. It tracks a moving subject to keep it sharp.
- Gridlines – You can enable a grid overlay to improve your composition. Find this in the settings of the photo mode inside the camera app.
- Shooting Modes – Depending on your device, you can have different choices. Normally, you can find voice activation or Show Palm – this is great for selfies.
- Aspect ratio – You can choose the format size of your photos with this feature. For example 1:1 or 3:4.
- Swipe Shutter Button – You can decide what feature will be enabled when you swipe the button. Burst mode is a very useful one for action shots.
- Picture as Previewed – This will flip the images taken with the front camera – this way, when you take a selfie, you can read the signs or any text showing in the picture correctly.
Best Android Camera Settings for Google Pixel
- Touch Tracking AF – With this feature, you tap the subject to make it the focus point, and even if it moves, the phone will keep it sharp. Use it with burst mode.
- Double Exposure Compensation – When you tap on the subject, the phone calculates the correct exposure. With double exposure compensation, you’ll have two sliders to adjust the highlights and the shadows separately.
- Astrophotography Mode – This mode allows for very long exposure in all the lenses (Pixel 5).
- Enable raw + jpeg – Inside the menu settings under Advanced, you’ll find the option to shoot two versions of your photo, one in raw and one in jpeg.
- Frequent Faces – This will prioritize the faces you photograph most often to keep them sharp. It’s great if you often do burst mode of your kids or something like that. There’s a privacy statement reassuring you it doesn’t send this information anywhere outside your phone.
- Top Shot – This works like the Live Photos of the iPhone: it takes multiple frames before and after your photo so that you can choose the best one.
- Portrait Lighting – Add extra lighting to any of your photos, even if they are not portraits. You can drag it to change the directionality.
- Framing Hints – It gives you some tips to improve your composition. You can also adjust the grid overlay from four different choices from golden ratio to the rule of thirds.
Best Camera Settings for Xiaomi
- Watermark – If you’re a photographer who likes to watermark their images, you can enable a device/custom watermark in Xiaomi Redmi phones. You can also enable a time stamp.
- Zoom with volume button – One of the functions you can associate with the volume buttons is zoom – which is pretty handy.
- Burst mode – Holding the shutter button, you can activate the burst mode – this way, the phone keeps taking photos until you release it.
- Focus – You can manually adjust the depth of field by going into the F (focus) in the Pro mode. Then swipe to left and right to make the focal point closer or further away.
- White Balance – In the pro mode, you can adjust the white balance according to the type of light.
- Metering Mode – Still in the pro mode, you can choose the metering mode to have a more accurate exposure reading.
- Peak on – When you enable this feature, it will highlight areas where the overexposure is so much that you don’t have any information anymore.
Best Android Camera Settings for Huawei
- Shoot in raw – In the pro mode of the camera app, you can open the settings and enable raw format.
- Metering Mode – In the pro mode, you can choose the metering mode between matrix, center and spot.
- Exposure compensation – In pro mode, you can use EV to increase or decrease the brightness.
- Horizontal Level – By enabling this feature, two horizontal lines appear on the screen. Once they overlap, your camera is level.
How to Take Good Pictures with a Phone of Yourself

Credit: Vera Arsic
- Use a tripod or selfie stick – Anything that’s close to the camera will look bigger – that’s why photographing yourself at arm’s length often deforms your facial features. Using a selfie stick or putting your phone on a tripod and shooting with the timer will result in better self-portraits and selfies. Also, some cameras are better for selfies than others.
- Hold your phone slightly above you – For a more flattering portrait, hold the phone up and angle it down towards you.
- Use good lighting – Soft light is the most flattering for portraits. It will make your skin smoother and won’t create harsh shadows under the eyes. To achieve this, photograph at sunrise or sunset, or on an overcast day, or stand under a shade.
- Forget the camera’s flash – Using your smartphone camera’s flash can be tempting, but it almost always gives horrible results, due to its tiny size. Take advantage of Night Mode or a slower shutter speed for your low light photography.
- Forget digital zoom – Digital zoom is fine if the alternative is missing the shot, but on the whole, zooming in by pinching your screen in phone photography isn’t recommended due to a significant reduction in image quality.
- Take multiple pictures – Most of the best things in life weren’t achieved on the first try – so why would a good selfie be any different? Take many pictures changing your expression, your angle, etc. Then choose the best one – this is a great advantage of smartphone photography.
- Mind the background – It’s easy to get caught up on the pose, the expression, the light, the position you hold your phone and the camera settings. Make sure you always do a last background check to ensure there’s nothing distracting going on behind you. That way, you’ll stand out. The alternative? Change the background with an app.
- Set your phone to portrait mode – If you’re using the front camera, this won’t always be possible. However, if possible, you should use portrait mode because this will blur the background. This feature makes you pop, and it gives the image a professional look.
- Download a photo editing app – Photo editing is part of photography. Having a good app to do it will ensure better results. The amount of editing is entirely up to you – some people like to fix every wrinkle and pimple; others prefer a natural look and only adjust the light and composition. Whatever it is that you do, try to keep it constant throughout your images.
How to Take Professional Looking Photos?
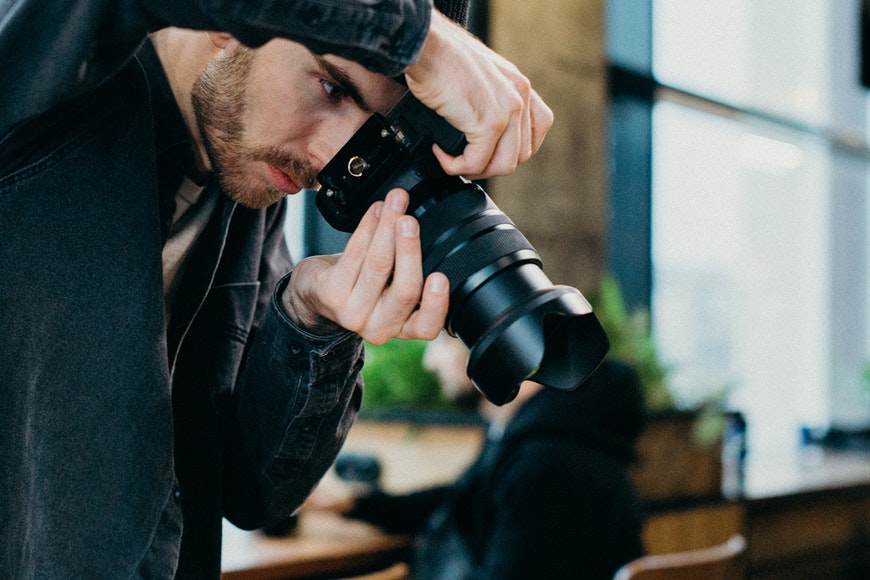
Credit: Cottonbro
- Take control over the depth of field – When you decide how much of your image is in focus, you’re guiding the viewer’s attention to a specific element or area of the picture. You influence the depth of field with the aperture, the camera lens and the distance to your subject.
- Use the right shutter speed – With the right shutter speed, not only do you avoid blurry images, but you can also decide if you want motion blur or to freeze a moving subject for a striking image.
- Master composition – Professional photographers know exactly where to put the main subject and the complementing elements to make a photo look more interesting and guide the viewer’s eye. Learn to apply the composition rules, use leading lines, color balance and texture, and you’ll see how it makes all the difference.
- Understand natural light – You don’t need expensive flashes and strobes to take professional-looking photos. Learn how to use natural lighting in the best way possible. Start by shooting during the golden hour – this is one of the best times of day to shoot landscape photography and outdoor portraits.
- Learn to use artificial light – To expand your photography skills, you can learn to use on-camera flash, strobes and different ambience lights to shoot indoors or at night.
- Get some light modifiers – With some accessories, you can turn a good photo into a great one. Using a reflector, a softbox, a snoot, etc., you can modify the directionality and intensity of any light source.
- Choose the right focal length – Professional cameras (and some semi-professional ones) allow you to change the camera lens. Understanding the implications of choosing one over the other will give you that extra edge.
- Get a tripod – A tripod allows you to use slower shutter speeds without having blurry results. It also helps you with your composition and gives you the opportunity to do advanced techniques like long exposure, focus stacking and macro photography.
- Shoot in raw – For better image quality, you should photograph in raw (as opposed to JPEG). This way, you’ll have all the information available to develop stunning photos in post-processing.
How to Take Professional Pictures of Myself at Home?
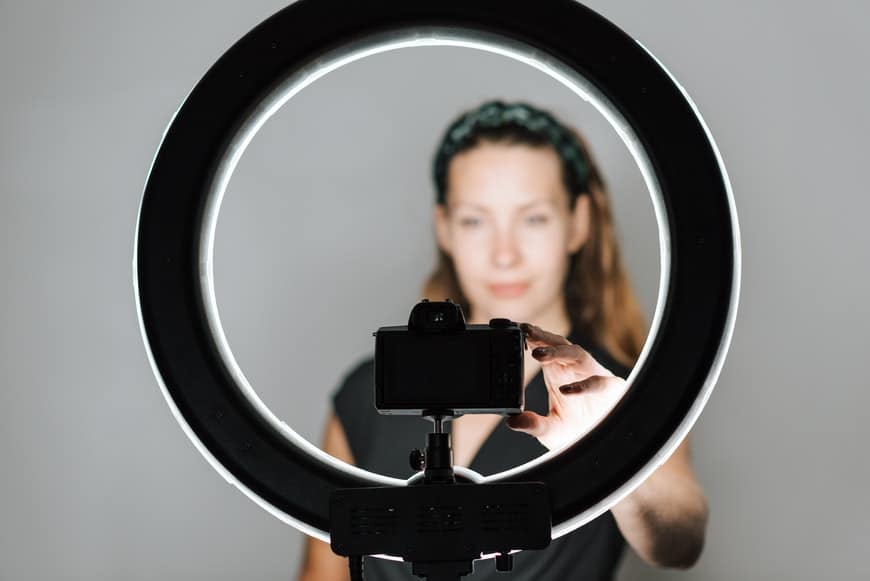
Credit: Anete Lusina
- Use a remote shutter – You can always use the self-timer to photograph yourself, but that won’t give you much chance to get in the right position, and you have to go back and forward constantly. Using a trigger gives you much more control over your self-portrait.
- Look for the best light – When you want to take a photograph with the available light, you need to choose the right time of day. Stand facing a big window but not when the sun is shining directly through it. Otherwise, consider investing in a flash or some external light.
- Avoid messy backgrounds – For a professional-looking portrait, you want to avoid any distracting elements around you. Find a plain background with good lighting and take the portrait there.
- Learn to pose – With any portrait, the pose can make or break the photo. Get to know your strong points and learn how to move in front of the camera.
- Practice makes perfect – Good photos rarely just happen – it takes time and effort to achieve great pictures, from mastering the light to nailing the pose.
- Edit your pictures – Use good photo editing software to process your images and get astonishing results. Here’s a list of the best photo editing apps.
How to Take Better Instagram Pictures

Credit: Ready Made
- Choose a strong focal point – Make sure that you have an interesting subject and it’s clear what you want to show. People are scrolling fast, and you need to catch their attention.
- Learn the composition rules – To take better pictures, you need to learn composition. Using negative space and leading lines are two guidelines that work great in Instagram photos.
- Separate the subject from the background – Keep the focus point on the subject and blur the background. You can do this with any digital camera – even a phone camera.
- Use a coherent color palette – Professional Instagram photos always have a color palette that will make the entire feed consistent and pleasing to look at. Try the triadic color scheme, for example.
- Plan your content – There’s nothing ‘insta’ about Instagram. If you want to have more followers and use Instagram for marketing yourself or your brand, you need to plan as if it were any other photoshoot. Learning how to take good pictures for Instagram isn’t an overnight thing either – most ‘influencers’ are very methodical about their photography.
- Keep a consistent style – The topic, the concept, and the aesthetic should stay consistent to help people recognize your content. Otherwise, people won’t follow you because they don’t know what to expect from your account.
- Consider a ‘real’ camera – sure, smartphones can take great pictures. However, the best camera for Instagram for you may be the latest DSLR or mirrorless camera. Combining a great camera body with a nice lens can let you achieve photos not possible with a phone’s camera.
How to Take Good Pictures of Food
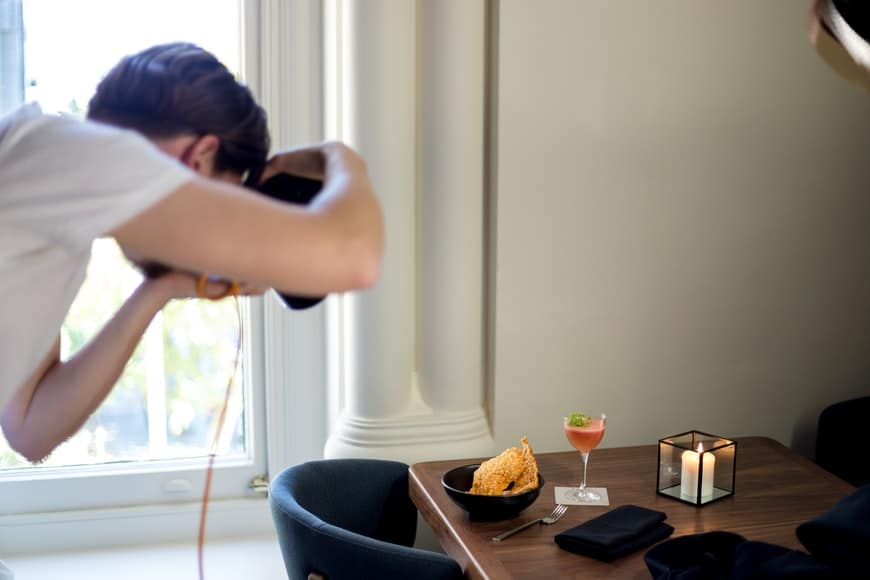
Credit: Sander Dalhuisen
- Use natural light – Sunlight works great for food photography because it gives it a more natural look. If you’re shooting indoors, make sure you do it next to a window.
- Experiment with the direction of the light – To create different textures and highlights, change the direction of the light.
- Try multiple perspectives – In food photography, there are three main camera angles: from the top down (flat lay), 45 degrees to simulate how you look at food when you’re sitting at the table, and level with the table. Keep experimenting to find the best one.
- Do some food styling – This is not a photographic technique in itself – actually, in professional sessions it’s not even the photographer who takes care of this. However, if you want to up your game in food photography and you can’t afford to hire a food stylist, you’ll need to learn some techniques to arrange the food so that it looks fresh and tasty.
- Use the right props – Is the photo intended as a homemade meal or as fine dining? Is it modern or rustic? The props can help you to set the atmosphere of your photo. The same drink can look like a summery cocktail to drink by the pool or a fancy party cocktail from a downtown club. So, choose wisely the style of glass or plate, the cutlery, other edible items in the picture, etc.
- Improve the composition – Composition is key, just like it is in any other type of photography. The story you tell to the viewer depends on the way you arrange the elements in the frame.
- Edit your photos – Develop a good post-processing workflow to keep your images looking professional with a consistent style.
Final Words
While mastering photography can take years of learning and practice, you can start improving today with whatever gear you have.
I hope this article gave you an insight into how to take good pictures. If you have any questions, don’t hesitate to ask in the comments section below.

Check out these 8 essential tools to help you succeed as a professional photographer.
Includes limited-time discounts.

Ana Mireles is a Mexican researcher that specializes in photography and communications for the arts and culture sector.
2 Comments
Leave a Comment

👋 WELCOME TO SHOTKIT!
🔥 Popular NOW:

I hardly use my mobile phone for photography (which I know I should), so thank you about these useful tips.
You’re welcome, I’m glad you found them useful!