


8 Tips for Creating a Compelling Photography Panorama
All the tips and tricks you need to know to capture a stunning photography panorama using either your phone or dedicated camera.
Learn | By Ana Mireles
Shotkit may earn a commission on affiliate links. Learn more.
If you love panoramic photos but you’re not sure about where to start – this is the article for you.
Here, I’ll give you step-by-step instructions to start taking panoramic photos with whatever equipment you have.
(If you’d like to level up, I’ll also talk about some specific gear and panorama software that’ll make the stitching work much easier. )

Easily create seamless panoramas with this affordable and feature-rich software that's perfect for beginners.
I’ll also give you some tips and tricks to make stunning panoramic photos and show you some examples to get your inspiration going.
If you’re feeling pumped, let’s get started so you can do your first panoramic photos today!
What is Panoramic Photography?

Credit: Pixabay
A panorama is a type of wide-format photography. However, it shouldn’t be confused with a photograph taken with a wide-angle lens.
Panoramic images cover a wider field of view than the one from human vision. You can create panoramic photos by stitching together several photographs taken with any focal length.
That’s why I said it shouldn’t be confused with an image taken with a wide-angle lens. All focal lengths work can be used to shoot a panorama. However, most photographers prefer a 50mm lens.
The proportion is usually two to one. Most of the time, panoramic images are horizontal. So, they are twice as wide as they are high. However, some people shoot panoramic photos vertically.
The origins of the panoramic image are not in photography. This format existed in mural paintings as early as 20AD.
The first panoramic image in photography belongs to Friederich von Marten. He designed a special camera so that he could capture panoramic photos in a single daguerreotype plate.
However, the first patent for a panoramic camera belongs to Joseph Putchberger. It was hand-cranked and reached a 150-degree field of view.
Panoramic cameras were later improved by von Martens, who used curved plates and a set of gears. The consensus is that the original daguerreotypes were composed of eleven plates. Unfortunately, they no longer exist.
The idea of taking multiple photos and stitching them together as panoramas carried on to the other photographic techniques.
For example, George Barnard used two or more wet-plate glass negatives to create his panoramas. You can find one in the Library of Congress in Washington, US.
By the late nineteenth century, the first panoramic cameras appeared. In swing lens cameras, the lens rotates to capture the panorama.
Also, there were cameras where both the lens and the film rotated so that they could capture a 360-degree panoramic picture.

Credit: Joost J. Bakker IJmuiden, CC, via Wikimedia Commons
Not long after, panoramic cameras were mass-produced and reached the amateur market. Since the dimensions of the panoramic image weren’t so big, they could be printed on photographic paper.
In digital photography, the most common technique for producing panoramas is to stitch several shots using special software.
Some digital cameras can stitch panoramas automatically. This way, you don’t need to do it in post-processing.
Why make a panorama?
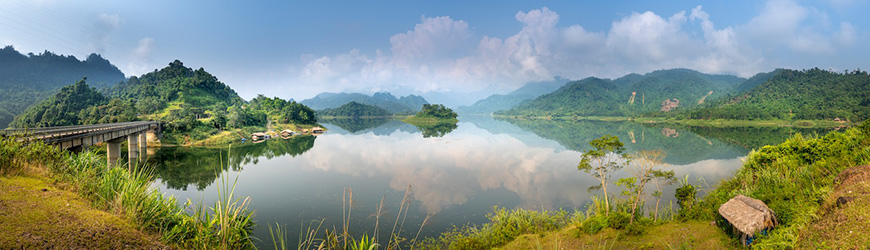
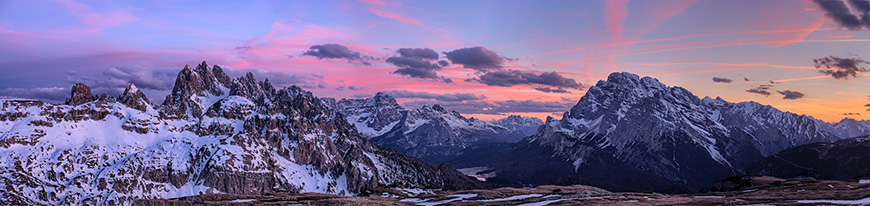
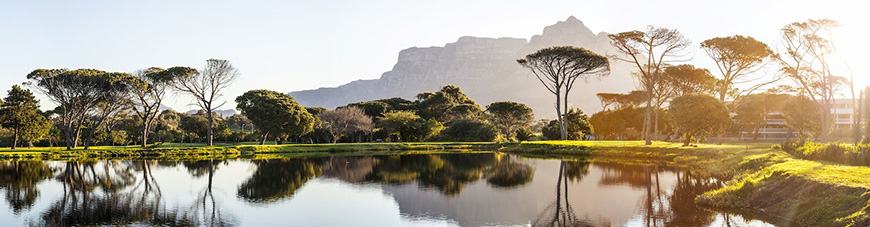
Most panoramic images are done in landscape photography. The idea of shooting panoramas is to display the whole scene in a single shot.
Panoramic photography is also used to create virtual tours for a location. This is because you can create an immersive experience.
Panoramic photography is also used by artists. David Hockney is famous for his panography montages, also known as ‘joiners.’ Also, Andreas Gursky often creates panoramic photographs in his artworks.
Types of Panoramic Images

Bälmeten Spherical Panorama. Credit: Capricorn4049, CC via Wikimedia Commons
Planar panorama.- This is a panoramic image that’s intended to display on a flat surface. It’s like a regular photograph with a wider field of view.
Cylindrical panorama.- This type of panoramic image depicts a 360-degree view of a scene. If you saw these photos on a flat surface, the horizontal lines would look curved. Instead, it’s meant to be seen as a cylinder with the viewer standing inside.
Spherical panorama.- These panoramic photos cover a 360-degree field of view in one direction and 180-degree in the other direction. This gives the viewer a fully immersive experience. This would also appear distorted when displayed in a flat surface.
What Equipment Do I Need to Do Panorama Photography?
Camera – The choice of camera depends on whether you want to capture the panorama on a single shot or join it in post-processing. Some digital cameras make the photographic process internally and deliver a complete panorama. In film photography, only swing lens cameras can do this. You can use any analog or digital camera if you don’t mind stitching the panorama afterward.
Lens – If you’re using a camera with interchangeable lenses, choosing a 50mm over a wide-angle lens is better. This is because you’ll have less visible distortion toward the edges.
Tripod – Since you want your images to match perfectly, a steady tripod will help keep the horizon at the same level.
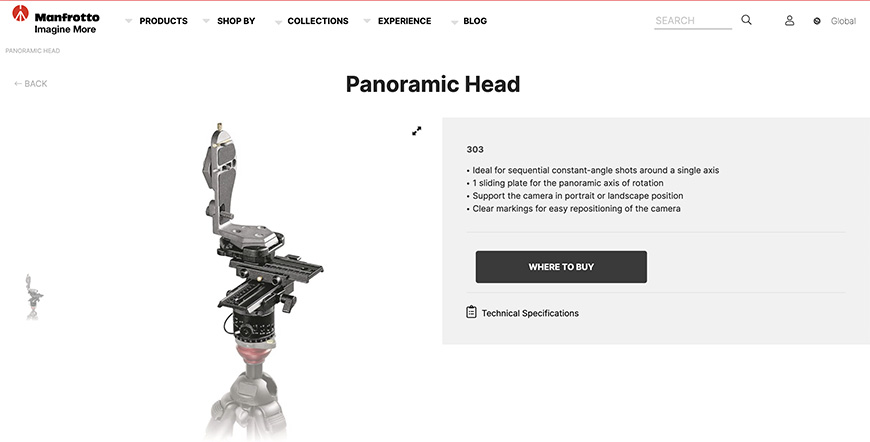
Panorama ball head – Most tripod ball heads allow you to pan in order to capture a panoramic photo. However, you’ll need a panorama ball head if you want more precision. These heads have click stops at pre-set intervals. This way, you’ll ensure professional results in your panorama photography.
Nodal point adapter – To do professional panorama photography, you’ll need an accessory called a nodal point adapter. This helps you avoid parallax errors which may cause problems with the stitching software.
A bubble level – You can use a two-axis hot-shoe bubble level to ensure your camera is perfectly leveled.
How to Take a Panorama Photo Using a DSLR or Mirrorless Camera
In the above video, you can see the difference between taking panoramic images handheld, with a regular camera and tripod, and also using a nodal point head.
For the following step-by-step guide, I chose to explain how to take panoramic shots with a basic setup. So, you’ll only need a DSLR or mirrorless and a regular tripod.
Then, I’ll explain how to stitch and edit your panoramic photography.
Step 1: Find the best point of view and compose
Just as you would do with any photograph, you need to think about the composition. So, decide which one will be your main subject.
Then, consider where your panorama will start and finish. You can use all the usual composition rules in panoramic photography.
Step 2: Mount and level the camera
Now that you’re in position, it’s time to set up your camera. Make sure the tripod is leveled, especially in landscape photography, where you might not be working in flat terrain.
Then, level the camera. You can use a double-axis hot shoe bubble level to do this.
Step 3: Find the correct exposure
To do panoramic photography, you must use the camera in manual mode. However, you can use a semi-automatic mode to find the correct settings.
Once you have them, switch to manual mode. This will ensure that nothing changes from one picture to the next. Don’t forget to set the white balance too. If you leave it in automatic, the white balance might change as you move the framing while taking the panorama.
The problem with this is that the white balance changes the picture’s tone. So, you might end up with cooler or warmer images as you move from one side of the panorama to the other.
Now, do a test shot to make sure everything is OK. You can use the histogram to check that you don’t have any clippings.
Step 4: Focus on your subject
Use manual focus to avoid changes in the focal point throughout the photos for your panorama. The best way to focus is to use Live View and zoom in.
Turn the focus to infinity and then back it up a little. Take a test shot and zoom into it to make sure you have the correct focus.
Step 5: Take a series of photos
Once you have everything ready, you can start taking the images that will compose your panorama. Start on either side of the panorama and take the first shot.
Then, pan the camera and make a second shot, and so on. Make sure there’s at least a 30% overlap between each photo.
A good way to keep track is by using the rule-of-thirds composition overlay. Most cameras have it, and this way, you have a line at roughly 33% of the image, which can be used as a reference.
Step 6: Merge your images to create a panorama
There’s special software to create panoramic photography. However, some regular editing programs also allow you to merge panoramic photos. I’ll explain how you can do this using Lightroom to keep all the workflow on a single software.
Once you’ve imported your photos, make all the edits you need. Make sure you apply the same edits to the entire set, though.
Select all the images and go to Photo > Photo Merge > Panorama. This will launch a preview dialog box where you can change some settings to achieve the result you want.
Feel free to try them all. I recommend using cylindrical projection and enabling Auto Crop, Auto Settings, and Create Stack.
Now click Merge. Click on the panorama photo and use the Develop panel to make the last edits if it needs them.
How to Take a Panoramic Image Using on Android or iPhone
It’s important to note that using a phone for your panoramic shots won’t get you as good results as the ones you get with a dedicated camera.
Step 1: Launch the camera app
Smartphones come with a default camera app. This app is usually enough to make a panoramic photo because they have a dedicated mode. If yours doesn’t have a panorama mode, you should download one with it.
Step 2: Enable panorama mode
The way you change photo modes is different on each app. So, you might need to explore your menus or do a quick research on Google.
For example, in the Xiaomi phones, you need to scroll the options bar until you find Others. Tap on it to open the menu. Here, tap on Panorama. On iPhone, you should swipe the camera screen until you find Pano mode.
Step 3: Shoot and pan for perfect panorama photography
In panorama mode, you can see the beginning of the picture and an arrow. When you tap on the shutter button, you’ll start the panorama.
Slowly pan the phone in the direction of the arrow and see how it captures the new segment of the panorama. You can stop the panorama at any point by tapping the shutter button again. Otherwise, it will stop when it reaches the end of the screen.
Now, the phone will process and save the final image on your device.
What Software Should I Use to Stitch a Photography Panorama?

-
Panorama Studio – Panorama Studio’s editing tools are robust, allowing you to change the focal length, image alignment, blending, and exposure. You can also add contrast, adjust curves/levels/color, and sharpen, with or without masks.
- PhotoDirector – Available for Windows and Mac. It has many auto options to create professional-looking panoramas. It also has filters, editing tools, and AI features. You can buy a lifetime license or get a subscription.
- PanoWeaver 10 – Available for Windows and Mac. It allows for regular panoramas, gigapixel ones, and little planets. You can do them with the auto features or use the manual ones. There is a Pro and a standard version.
- Photo Stitcher – Available for Windows and Mac. It’s easy to use with a friendly interface. It allows for vertical and horizontal panorama. Also, you can scan large images in parts and stitch them together. You can buy only Photo Stitcher or the bundle with other editing programs from Teorex.
- AutoStitch – Available for Windows and Mac. With its powerful recognition technology, it allows you to create panoramas from multiple images, even if they aren’t perfect. It requires little to no input from the user – it’s fully automatic. This makes it easy to use, but it also means you can adjust or customize the result. This is paid software.
- Hugin Panorama Software – Available for Windows, Mac, and Linux. This software is free and open-source. It has an automatic feature, and you can do some photo editing.
- PTGui – Available for Windows, Mac, and Linux. This software allows you to create panoramas from a series of images organized in multiple rows and columns. You can also create HDR panoramas. There’s a light and a pro version – they are both paid programs.
- Photoshop – Available for Windows and Mac. Adobe Photoshop is a powerful photo editing software. One of its features allows you to merge images to create a panorama automatically. It’s not a panorama-stitching software, but you can make panoramic images if you already have it.
- Lightroom – Whether you’re using Lightroom CC or Adobe Lightroom Classic, you can make a panorama out of multiple shots. You simply need to use the Photo Merge tool. Like Photoshop, this isn’t dedicated software. Instead, it’s a photo editor that allows you to make quick panoramas.
8 Photography Panorama Tips and Tricks
If you want to improve your panoramic photos, try these tips and tricks.
Tip 1: Use manual mode

Credit: Kamran Sabir
If you’re shooting a single photo, you may prefer semi-automatic modes instead of going full manual. Most landscape photographers like using aperture priority.
However, to shoot panoramas is more advisable to shoot in manual mode. This is because all the images need the same camera settings.
For example, if you use aperture priority, you give the camera the freedom to change the shutter speed between shots.
However, this could be a problem if your shot has any moving elements. Let’s say that there’s running water. Using a different shutter speed, you’ll have blurred waves and ripples in part of the panorama and sharp ones in another part.
So, using manual mode will ensure consistency throughout the entire panorama.
Tip 2: Overlap at least 30% of the image
Credit: JackerKun
Stitching programs need to recognize different elements in the photos to understand how to merge them. If you overlap your images by a minimum of 30%, you give the software all the information it needs.
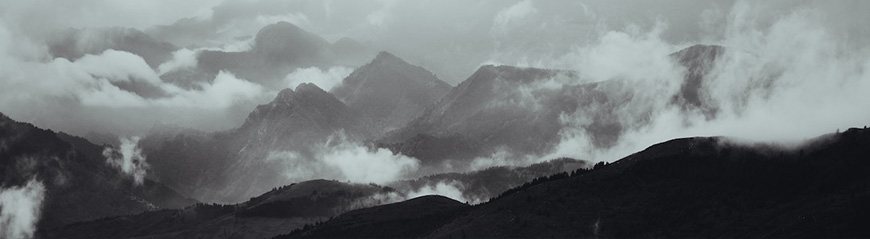
Don’t be afraid to overlap even more when there’s foggy weather. This is because of the lack of definition and contrast created by the fog.
Tip 3: Shoot in portrait mode
Credit: Quang Nguyen Vinh
The most common format of the panorama is landscape orientation. However, this doesn’t mean you should take the images you’ll merge in the same way.
It’s better to capture the images in portrait mode. Yes, you’ll need more photos to capture the entire scene, but you’ll also have more information. This will allow you to crop or recompose later if you want.
Tip 4: Apply lens correction
Credit: Josh Sorenson
Most specialized software for panoramic photography automatically applies lens correction to the images before merging them.
If the one that you’re using doesn’t do this, make sure you do it manually. This is because the lens may create distortion – it may be more or less depending on the focal length. Also, there may be a vignetting effect that darkens the corners or the edges.
Applying the lens correction fixes both issues and prevents weird effects from showing in your panoramic photos.
Tip 5: Mind the size and resolution
Credit: v2osk
When you’re shooting high-resolution images, you’re already creating large files. Once you merge them together, you’ll create a super high-resolution panoramic image.
So, you need to use a powerful computer and software that can handle such large files. Otherwise, you should consider taking fewer images to create the panorama – maybe shooting in landscape orientation.
Another thing that you can do is to shoot only in JPG or lower the resolution of the single files. However, this is not ideal as you’ll lose quality and information.
Tip 6: Avoid wide-angle lenses
Credit: Matthis Volquardsen
As you probably know, a wide-angle lens creates something called barrel distortion. Simply put, it means that straight lines – such as the horizon, look curved. It also makes the scene ‘blotted’ in the center and stretched toward the edges.
Since you don’t need to extend the field of view with the lens as you’re already doing it by taking many photos, you can use a shorter lens.
If you have one, use a 50mm lens. This is the one that’s closer to our field of view and creates the less possible amount of distortion.
Otherwise, use the focal length you have that’s closer to 50mm.
Tip 7: Expose to the highlights
Credit: Pixabay
Shooting panorama photography, you’ll often find very contrasted scenes. Since you must maintain the same camera settings in all the photos, it can be challenging to decide on the best exposure.
When this happens, it’s best to determine the exposure of the brightest part. This might make some images darker than you would like, but don’t worry. It’s easier to bring out the details from the shadows in post-processing than it is to work with blown-out highlights.
Tip 8: Experiment with different subjects for variety in your panorama photography

Credit: Pixabay
Panoramic images don’t have to be landscaped. There are many uses for this technique that you can try.
For example, you can take vertical panoramas to capture tall buildings and landmarks. This is a great way to make more exciting tourist shots on your next trips.
You can also create a virtual tour if you’re into interior or real estate photography. It’s also possible to do it for museum visits or other remote and interactive experiences.
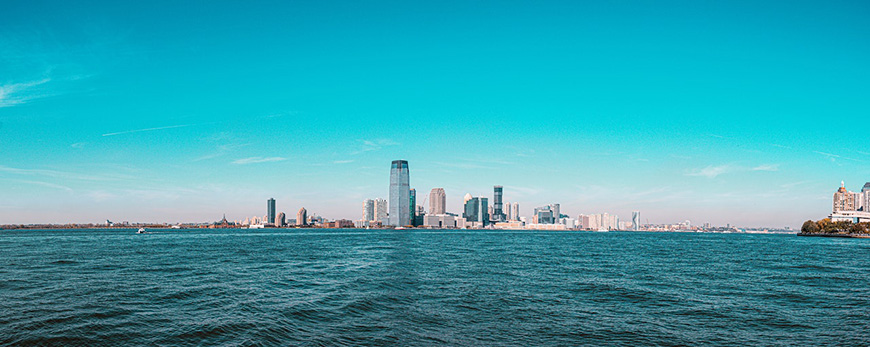
You can also try street panoramas. These can be a little tricky because usually, there are many moving subjects. So, unless you’re shooting on a quiet street, you’ll need to be quick. In this case, it’s better to shoot in a horizontal orientation to capture everything in just two or three shots.
Photography Panorama FAQs
What does panorama mean in photography?
In photography, a panorama refers to a specific aspect ratio of an image. The format has one side notably longer than the other. Traditionally it’s a horizontal photo. Therefore, it’s much wider than it is tall. However, It’s also possible to make a vertical panoramic photo.
What is panorama mode in photography?
Some cameras have a panorama mode. Using it allows you to shoot more than one image so that they can be stitched together into a single panoramic format photograph.
How is a panorama different from a regular photograph?
The difference between a regular and a panoramic photo is the aspect ratio. While regular photos are rectangular, the proportion between both measures is not so great. Instead, a panoramic photograph has a more significant difference between width and height.
What is the best tool for stitching panoramas?
PTGui Pro is one of the best programs for creating panoramic photos. However, if you’re looking for an all-around editing software that’s good for stitching panoramas, I recommend Lightroom. This is because it also allows you to create HDR panoramas merging raw bracketed-exposure photos.

Check out these 8 essential tools to help you succeed as a professional photographer.
Includes limited-time discounts.

Ana Mireles is a Mexican researcher that specializes in photography and communications for the arts and culture sector.

👋 WELCOME TO SHOTKIT!
🔥 Popular NOW:
